AMIGURUMI PATTERNS
amigurumi, amigurumi keychain, amigurumi mushroom keychain, AmyLiva Handmade, beginner crochet pattern, crochet accessories, crochet keychain idea, crochet mushroom, cute crochet project, diy crochet project, easy amigurumi tutorial, free amigurumi pattern, handmade mushroom, kawaii crochet mushroom, mini mushroom plush, mushroom lover gift
admin
0 Yorumlar
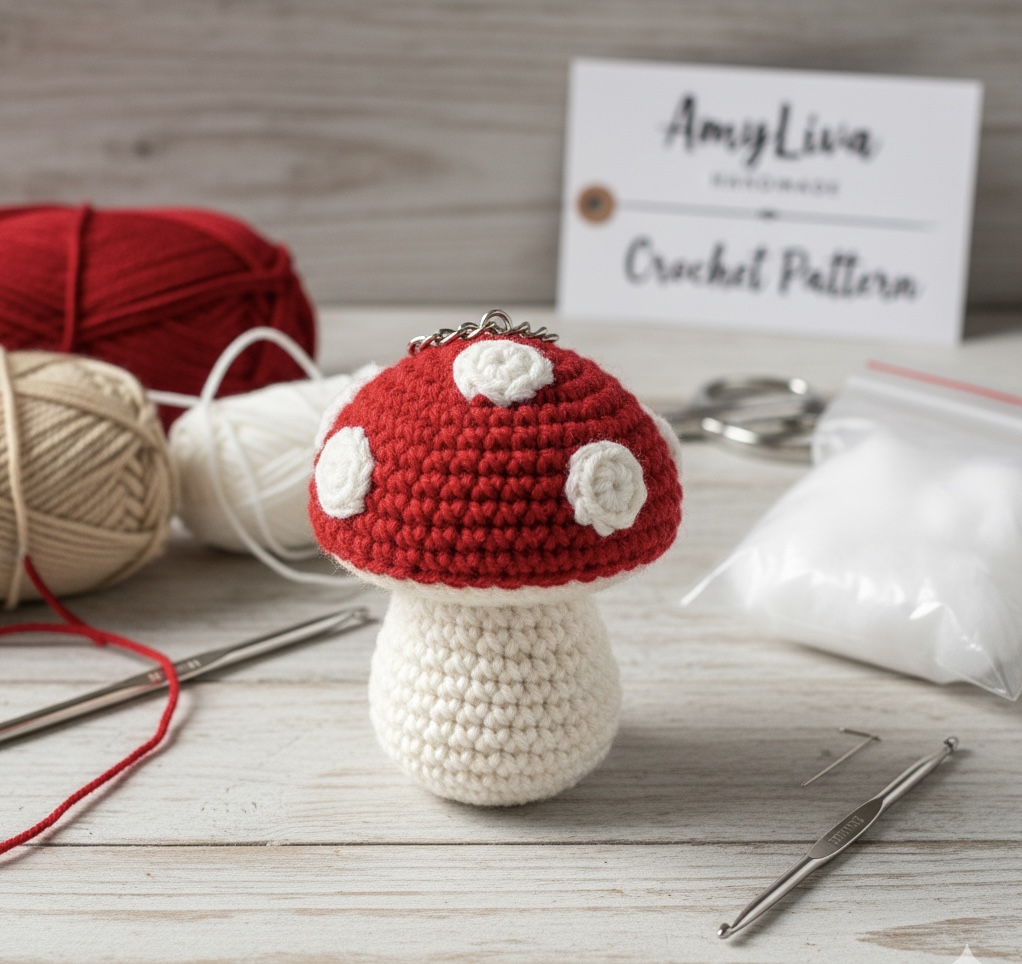
Amigurumi Mushroom Keychain – Cute & Easy Crochet Pattern for Beginners
Welcome to another charming project from AmyLiva Handmade!
https://youtube.com/shorts/DQ22dk2Jwg4?si=u0fCdbQkoib8PLJK
If you love small crochet projects that are quick, adorable, and practical, this Amigurumi Mushroom Keychain is perfect for you. It’s a beginner-friendly crochet pattern that turns yarn into a delightful mini mushroom you can attach to your bag, keys, or gift to someone special.
Whether you are new to amigurumi or looking for a cute weekend project, this step-by-step guide will help you crochet your own little mushroom with confidence and creativity.
🧶
Materials You’ll Need
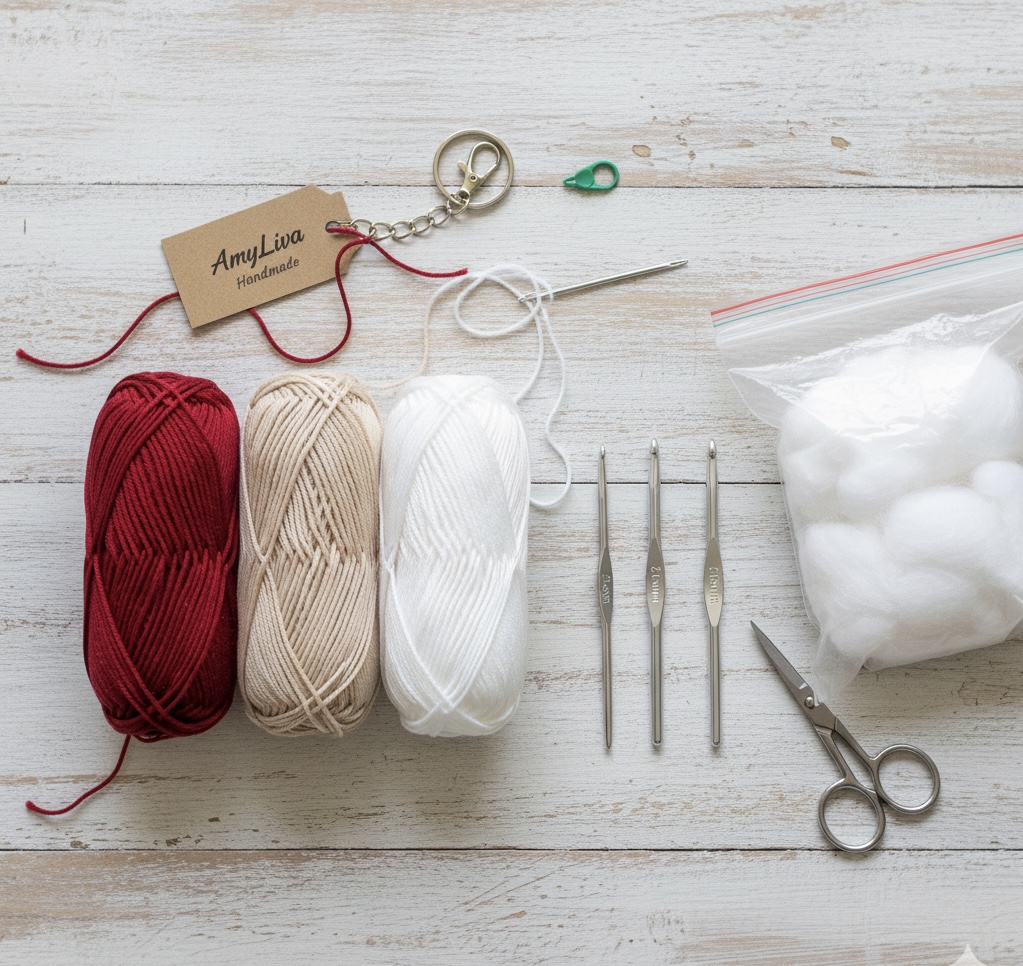
To make your amigurumi mushroom keychain, gather these materials before you start:
- Yarn:
- Red (for the mushroom cap)
- Beige or off-white (for the stem)
- White (for the cap spots)
- Crochet Hook: 2.0 mm – 2.5 mm (depending on yarn thickness)
- Fiberfill stuffing (for shaping)
- Yarn needle (for sewing parts together)
- Scissors
- Keychain ring and metal chain
- Stitch marker (optional, to keep track of rounds)
🧵 Tip: Use cotton yarn for a smooth finish and firm shape that holds well as a keychain.
🪡
Abbreviations (US Terms)
- MR – Magic Ring
- sc – single crochet
- inc – increase (2 sc in the same stitch)
- dec – decrease (sc two stitches together)
- st – stitch
- sl st – slip stitch
- R – round/row
🍄
How to Crochet the Mushroom Keychain
This amigurumi mushroom is made in two main parts: the cap and the stem. After that, you’ll add small white dots and assemble everything together.
🌰
1. Crochet the Mushroom Cap (Red Yarn)
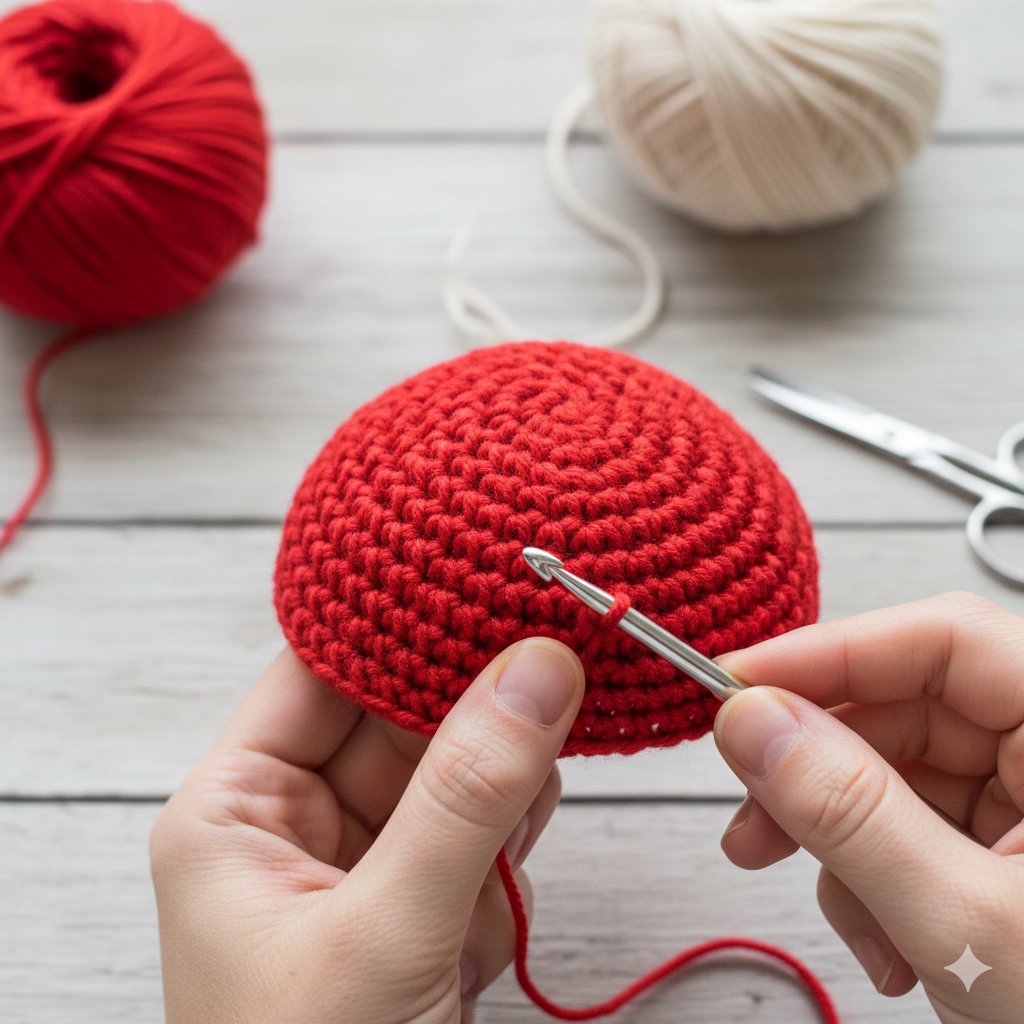
R1: MR, 6 sc (6)
R2: inc in each st (12)
R3: (1 sc, inc) × 6 (18)
R4: (2 sc, inc) × 6 (24)
R5–R6: sc around (24)
R7: (2 sc, dec) × 6 (18)
👉 Do not stuff the cap yet. We’ll attach it later after making the stem.
🧶 Pro Tip: Keep your stitches tight to maintain a neat dome shape. If your cap curls, gently press it flat with your fingers.
🌿
2. Crochet the Stem (Beige Yarn)
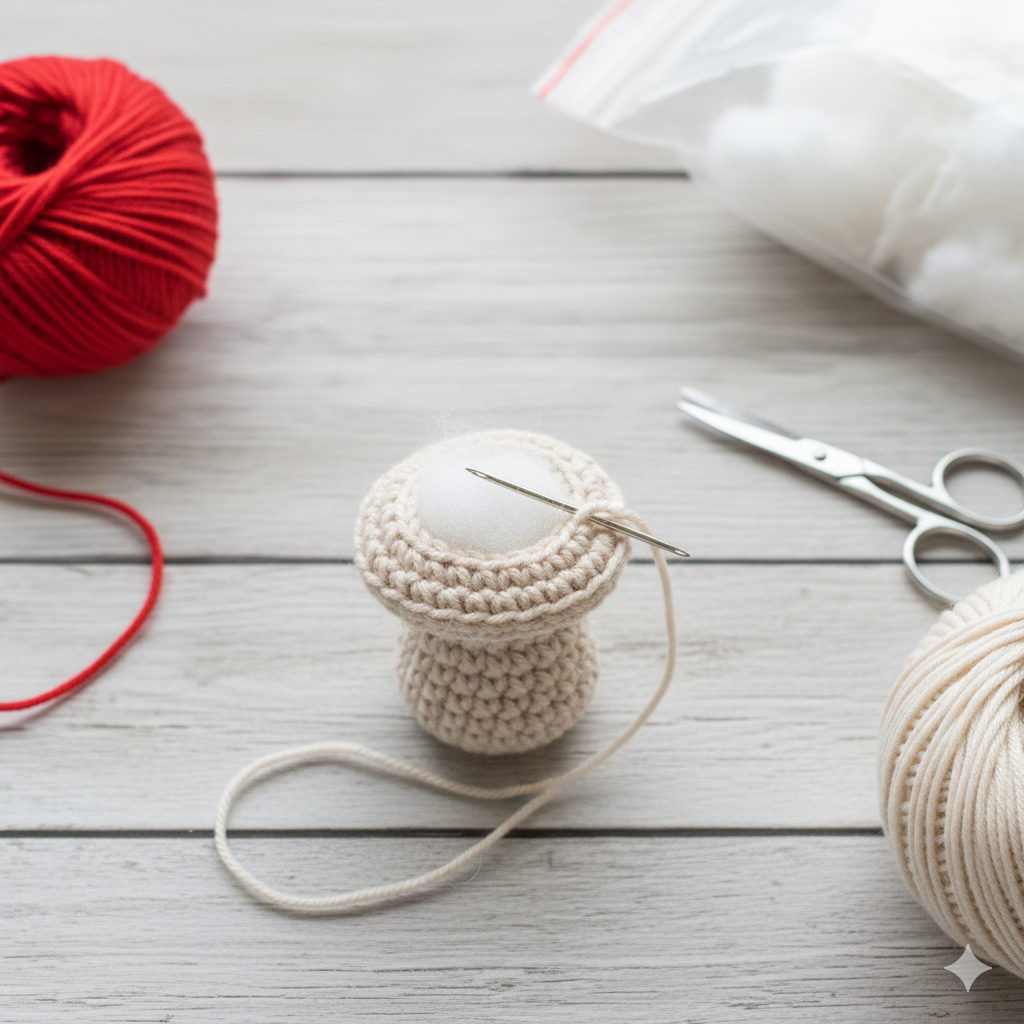
R1: MR, 6 sc (6)
R2: (1 sc, inc) × 3 (9)
R3–R7: sc around (9)
R8: (1 sc, dec) × 3 (6)
Now lightly stuff the stem with fiberfill. Leave a long tail for sewing to the cap.
⚪
3. Make the White Spots
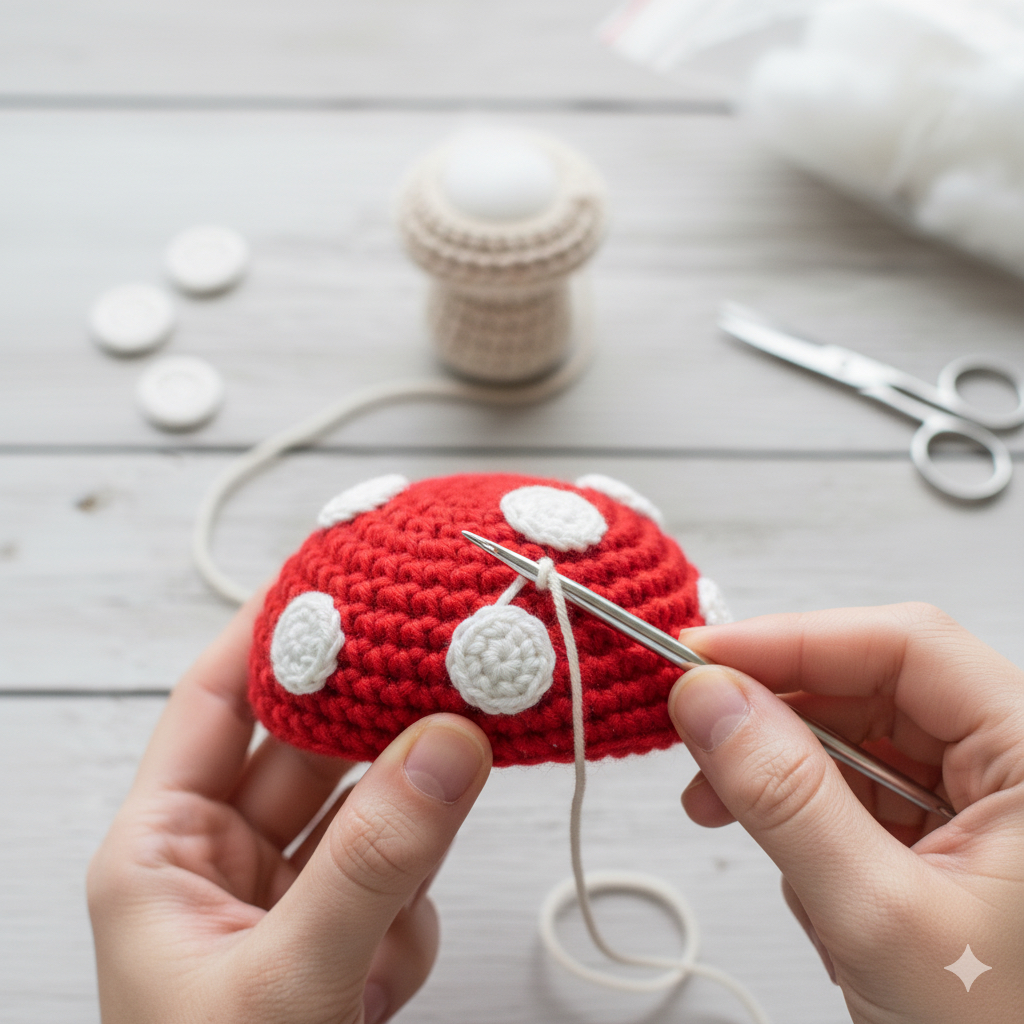
Use white yarn and create small circles:
R1: MR, 6 sc, sl st to join. Fasten off.
Make 4–6 spots of different sizes and sew them randomly on the red cap.
Try mixing slightly smaller and bigger spots for a more natural look.
❤️
4. Assemble the Mushroom
- Place the stem under the cap and sew them together neatly.
- Stuff a little more fiberfill before closing if needed.
- Use your yarn needle to hide all loose ends inside.
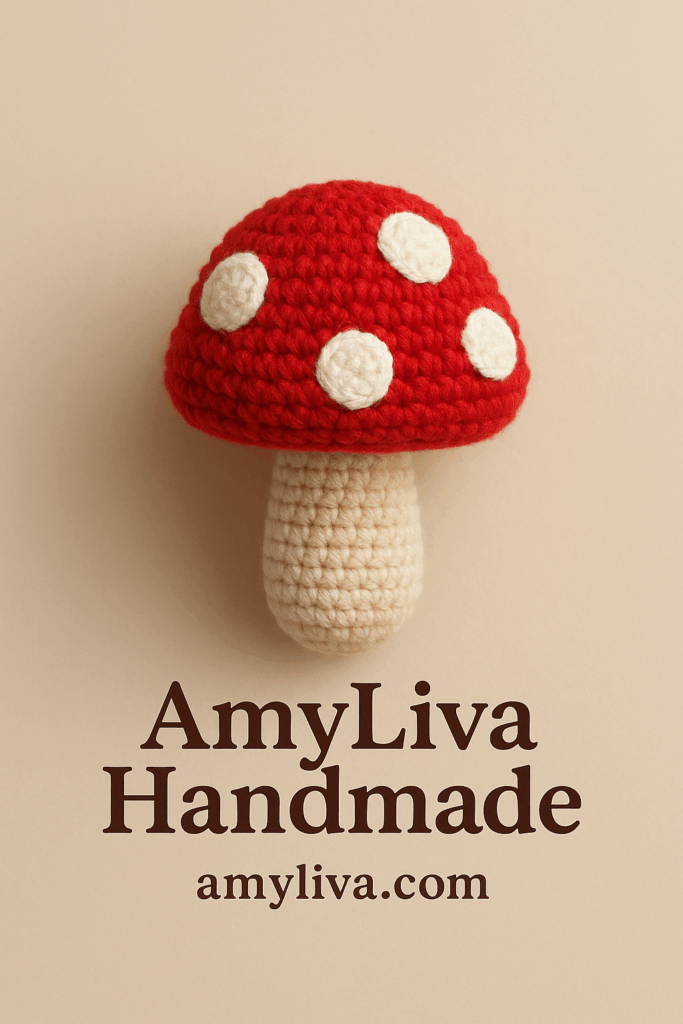
Your mini amigurumi mushroom is ready! 🍄
🔗
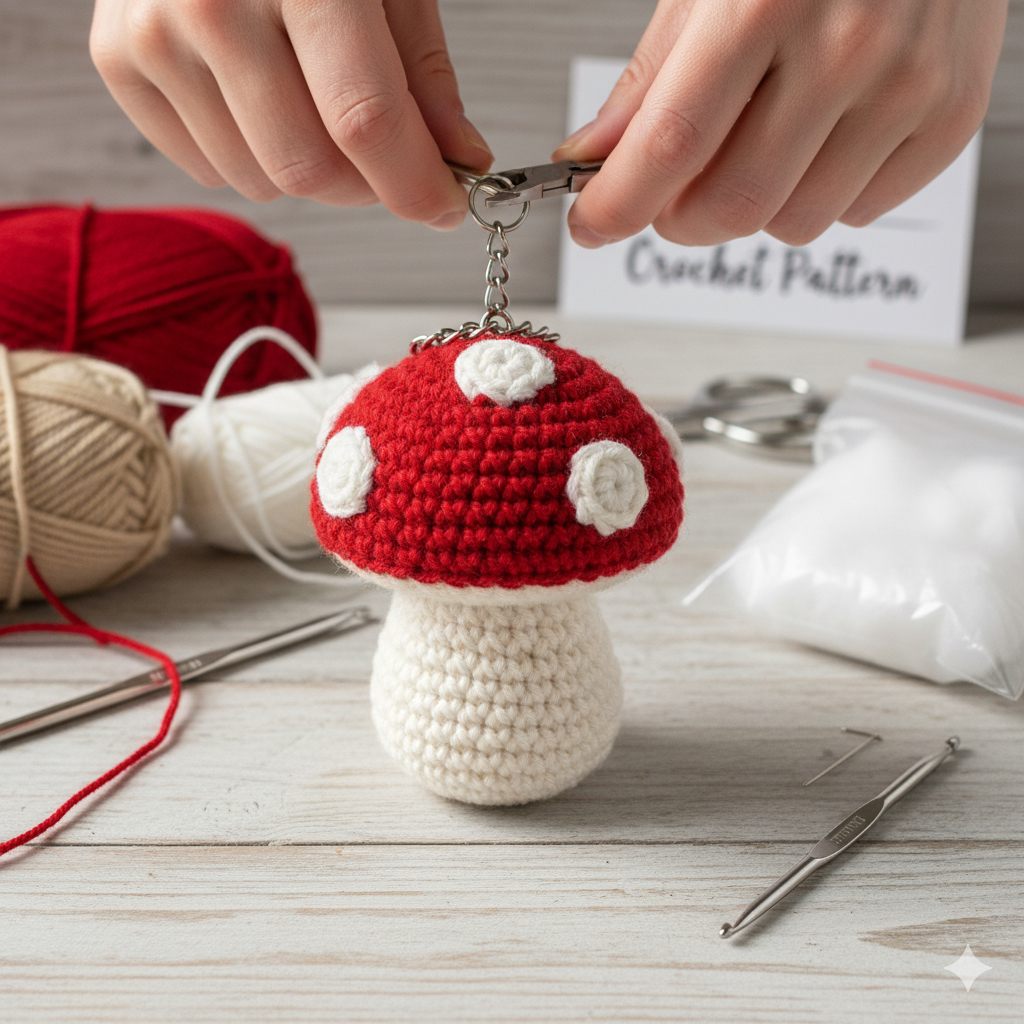
5. Add the Keychain Ring

Use a small metal ring or a short chain to attach your mushroom.
Sew or loop it securely through the top of the cap.
✨ Optional: You can also attach a safety pin or clasp to make it removable.
🌼
Finishing Touches & Styling Ideas
- Add a tiny face with black embroidery thread for a kawaii look.
- Use pastel colors for a dreamy style or the classic red and white for a woodland theme.
- Attach a few tiny beads or charms for a more decorative keychain.
- Combine with other mini amigurumi pieces — like a leaf, frog, or flower — for a cute themed set.
💡
Crochet Tips from AmyLiva Handmade
- Tension control: Keep your tension consistent so stuffing doesn’t show through.
- Stuffing: Use small pinches of fiberfill to keep the shape even.
- Joining parts: Sew parts firmly, especially if the keychain will be used daily.
- Customization: Try using glitter yarn or pastel tones for seasonal versions.
- Maintenance: If your keychain gets dusty, gently wipe it with a damp cloth — never machine wash.
🌐
Share Your Work
We love seeing your creations!
📸 Tag @AmyLivaHandmade on Pinterest, Instagram, and YouTube.
Visit amyliva.com for more free amigurumi patterns, detailed crochet tutorials, and handmade design inspiration.
❓
Frequently Asked Questions (FAQ)
Q1. What type of yarn is best for amigurumi keychains?
A: 100% cotton yarn is ideal — it keeps the shape well and doesn’t fuzz easily.
Q2. Can I make this mushroom bigger?
A: Yes! Use thicker yarn and a larger hook, keeping the same stitch pattern.
Q3. How long does it take to make?
A: Usually about 1–1.5 hours for experienced crocheters, or 2 hours for beginners.
Q4. Can I sell mushrooms made from this pattern?
A: Absolutely! You may sell finished items, but please credit AmyLiva Handmade as the designer.
Q5. How can I keep my keychain clean?
A: Gently hand-wash or surface clean with mild soap and water. Let it air dry completely.
✨
Conclusion: A Small Project with Big Charm
The Amigurumi Mushroom Keychain is a small yet satisfying crochet project that captures the magic of handmade art.
Its simple shape, soft texture, and vibrant colors make it a perfect beginner pattern — and a charming way to decorate your everyday items.
By following this guide, you’ll not only create an adorable mushroom keychain but also improve your crochet skills, one stitch at a time.
🌸 Don’t forget to visit amyliva.com for more patterns, videos, and tips to keep your creativity blooming


Yorum gönder