CROCHET ACCESSORIES AND HOME
amigurumi, amigurumi designs, amigurumi keychain, amigurumi tutorial, AmyLiva Handmade, beginner friendly crochet, crochet, crochet crafts, crochet design, Crochet Gift Ideas, crochet ideas, crochet inspiration, crochet keychain tips, Crochet Pattern, crochet project, crochet tutorial, cute crochet, DIY amigurumi, DIY crochet, easy amigurumi, free amigurumi pattern, free crochet pattern, handmade crochet, handmade gift crochet, HandmadeWithLove, kawaii crochet, mini amigurumi, soft baby doll, storytelling amigurumi
admin
0 Yorumlar
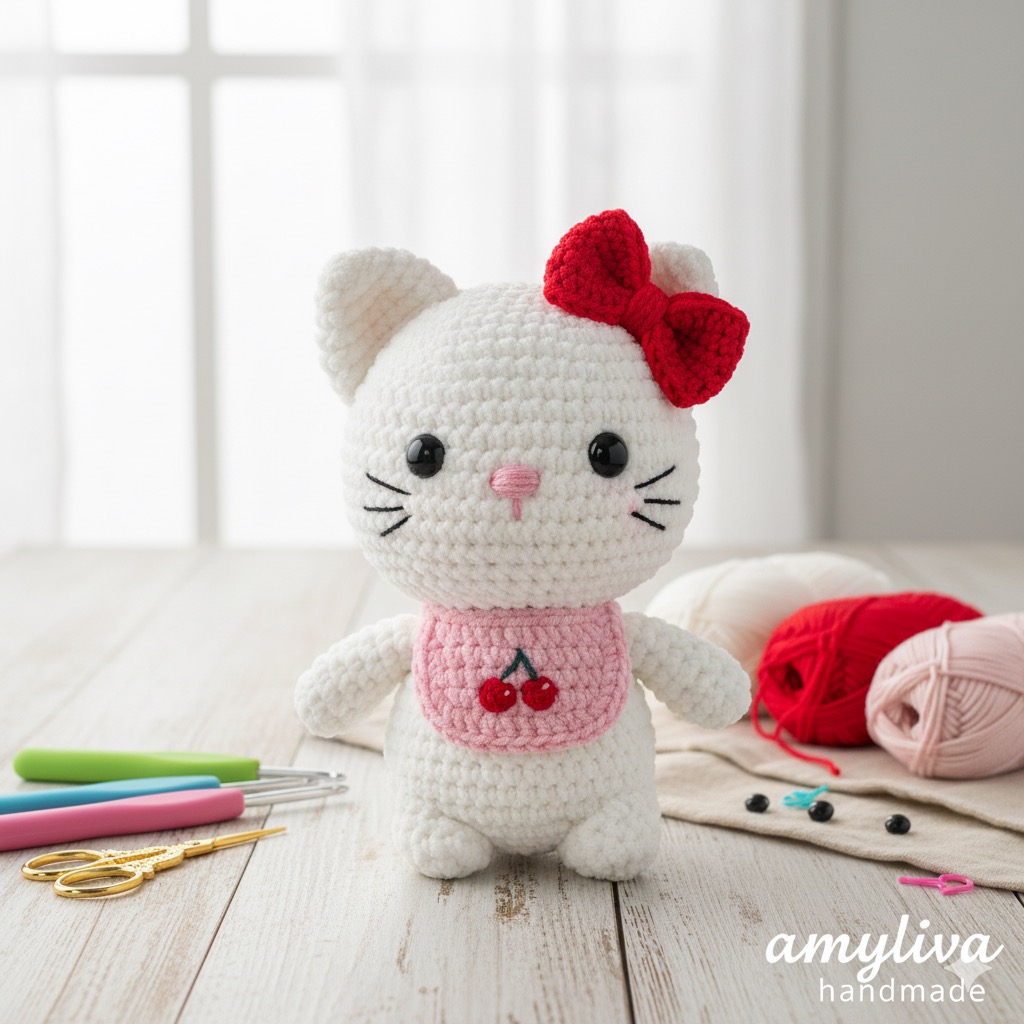
Create Your Own Cuddly Companion: The Ultimate Kitty Amigurumi Pattern
Are you ready to bring a touch of handmade magic into your life? Amigurumi—the Japanese art of crocheting small, stuffed yarn creatures—is a wonderfully rewarding craft. Whether you are an experienced crocheter or just picking up a hook for the first time, this delightful kitty amigurumi pattern is the perfect project to create something truly special.
This isn’t just any crochet pattern. Instead, we have meticulously designed this free tutorial to be clear, easy to follow, and incredibly satisfying from start to finish. Imagine the joy of holding a soft, charming crochet kitty that you made with your own two hands! More importantly, this little feline friend is not only an adorable handmade toy but also a heartfelt gift for birthdays, baby showers, or simply “just because.”
In this comprehensive step-by-step guide, we’ll walk you through every stage of the kitty amigurumi pattern—from the very first stitch to the final assembly. Moreover, you’ll learn essential techniques, useful tips, and clever tricks to make sure your project is both fun and successful. So, grab your yarn, find a cozy spot, and let’s get started on your next favorite project: a charming kitty amigurumi!
Why You’ll Love This Easy Crochet Kitty Pattern
This kitty amigurumi pattern is far more than a simple set of instructions. It’s a complete guide to a fulfilling creative journey. Here’s why this free amigurumi pattern stands out among others:
- Beginner-Friendly Amigurumi: Although the finished product looks detailed, the crochet kitty pattern uses only fundamental stitches. Each row and technique is explained with clear, concise language. Therefore, even if you’re a beginner, you can create this adorable amigurumi without stress.
- Detailed & Comprehensive Guide: Unlike rushed tutorials, this guide provides row-by-row counts, yarn-handling tips, and clear instructions for assembly. As a result, you’ll feel confident at every stage of the process.
- Perfect for Thoughtful Gifts: A handmade gift always carries extra love. This crochet kitty is a thoughtful, personalized present that will be cherished for years. Consequently, it’s the ideal crochet project for birthdays, holidays, or other special occasions.
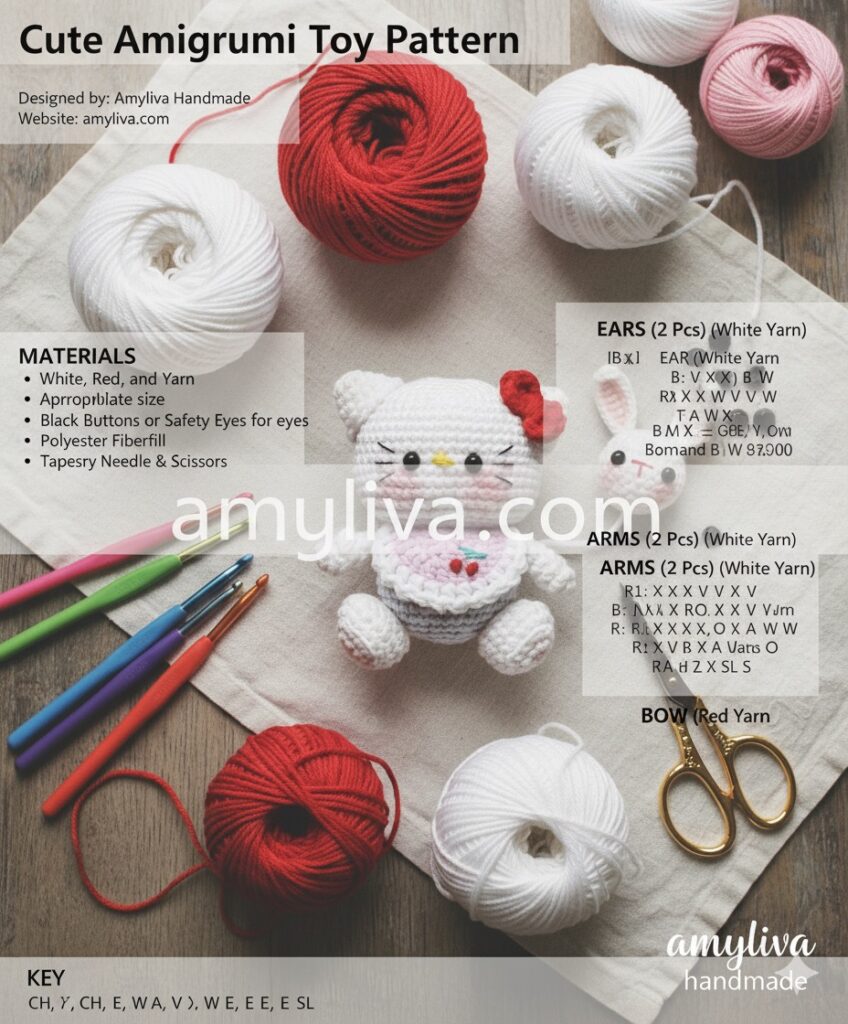
Essential Supplies for Your Kitty Amigurumi Project
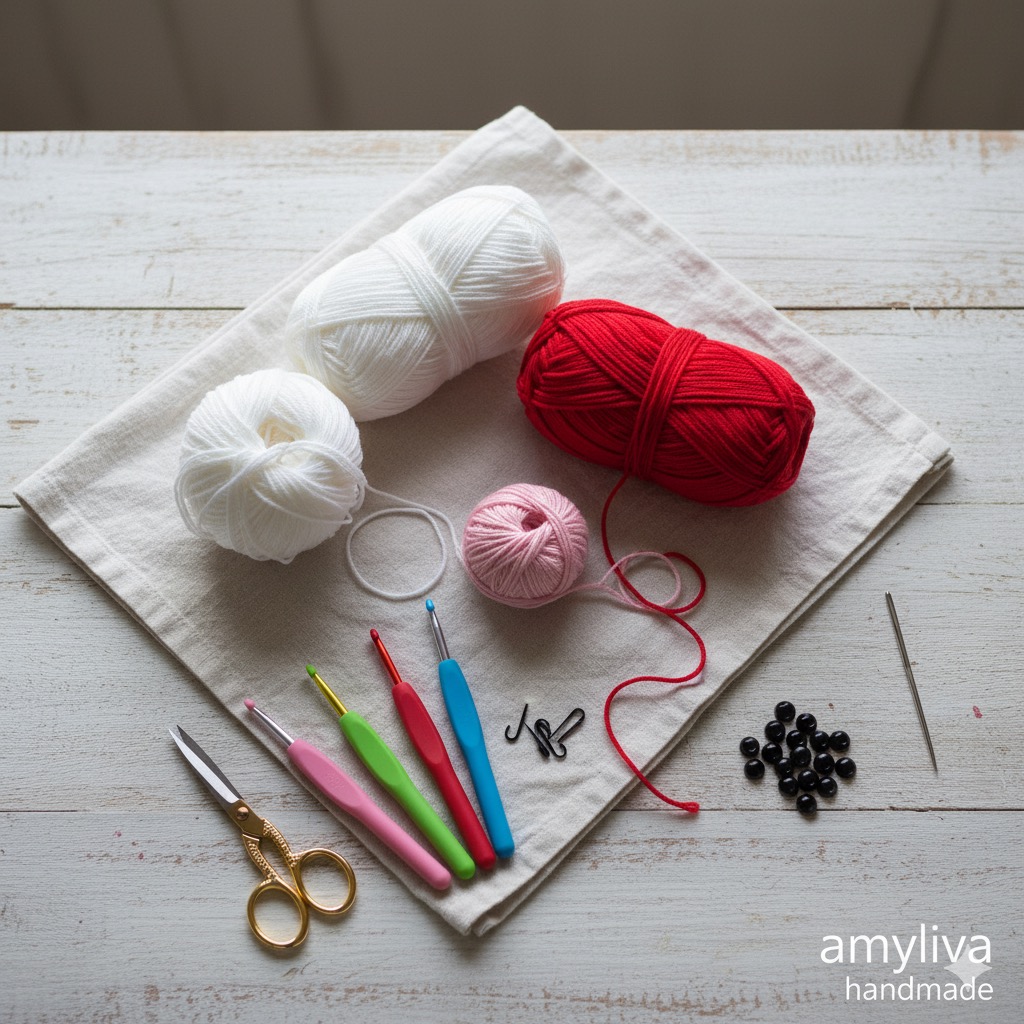
Before diving into the pattern, let’s make sure you have all the essential supplies ready. Having the right tools will not only make the process smoother but also more enjoyable.
- Yarn: White yarn for the head, ears, and arms, plus red yarn for the bow. We recommend a soft, worsted-weight cotton or acrylic yarn. Tip: Using yarn that doesn’t split easily will make your crochet kitty much easier to complete.
- Crochet Hook: A 2.5mm or 3.0mm hook is ideal, as it creates the tight stitches needed for amigurumi. This prevents the stuffing from showing through.
- Stuffing: Polyester fiberfill is the best option due to its lightweight and durable nature.
- Eyes: Use black safety eyes (6mm–8mm) or small black buttons. Important: Always secure safety eyes firmly, especially if the toy is meant for children.
- Tools: Tapestry needle for sewing, sharp scissors, and stitch markers. In fact, stitch markers are invaluable for amigurumi, ensuring you never lose track of your rounds.
Understanding Amigurumi Abbreviations
If you’re new to crochet, abbreviations might feel confusing. However, they’re simply shorthand for common stitches. Here’s a quick cheat sheet to help you read this kitty amigurumi pattern:
- CH: Chain
- MR: Magic Ring (also known as Magic Circle)
- X (SC): Single Crochet
- V (INC): Increase (2 Single Crochets in one stitch)
- A (DEC): Decrease (Single Crochet two stitches together)
- W: 3 Single Crochets in one stitch
- E (DC): Double Crochet
- SL: Slip Stitch
Note: We will be working in continuous rounds for most parts. This means you won’t join your rounds with a slip stitch unless specified. Always place a stitch marker at the start of each round.
Step-by-Step Kitty Amigurumi Pattern
Now comes the most exciting part—bringing your crochet kitty to life! Follow these detailed instructions carefully.
Head (white yarn)
- R1: Chain 6. In the 2nd stitch from the hook: 4X. In the last chain, W (3X). Turn to the other side of the chain, 3X, then V (2X). (12)
- Tip: This oval base helps shape the kitty’s head beautifully.
- R2: (X, V) ×6 → 18
- R3: (X, V, X) ×6 → 24
- R4: (3X, V) ×6 → 30
- R5: (2X, V, 2X) ×6 → 36
- R6: (5X, V) ×6 → 42
- R7: (3X, V, 3X) ×6 → 48
- R8–16: 48X (Insert safety eyes between R13–R14, 8–10 stitches apart.)
- R17: (3X, A, 3X) ×6 → 42
- R18: (5X, A) ×6 → 36
- R19: (2X, A, 2X) ×6 → 30
- R20: (3X, A) ×6 → 24
Cut yarn, leaving a long tail for sewing. Stuff firmly before closing.
Ears (×2, white yarn)
- R1: MR6X
- R2: (X, V) ×3 → 9
- R3: (X, V, X) ×3 → 12
- R4: (3X, V) ×3 → 15
- R5: (2X, V, 2X) ×3 → 18
Do not stuff. Flatten into triangles.
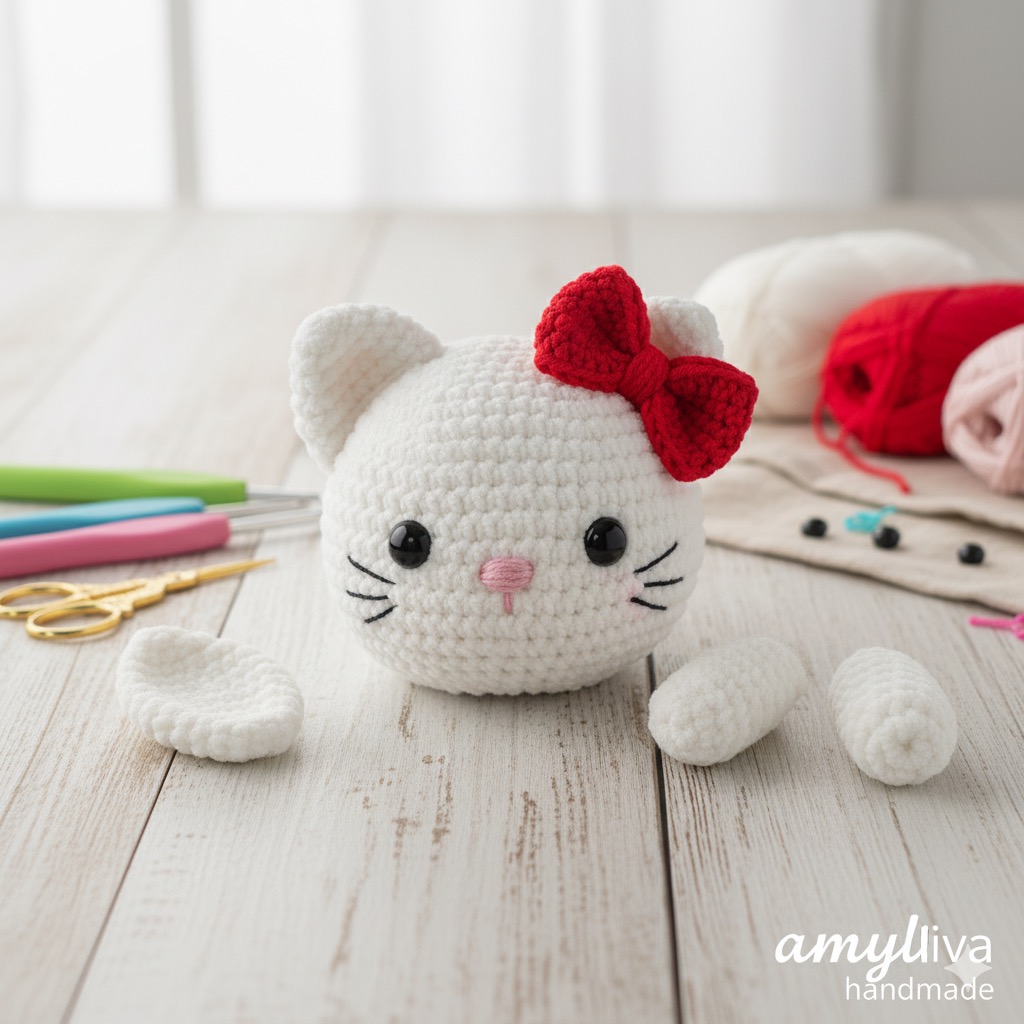
Arms (×2, white yarn)
- R1: MR6X
- R2: (X, V) ×3 → 9
- R3–4: 9X
- R5: (X, A) ×3 → 6
- R6–7: 6X
Lightly stuff, leaving top unstuffed.
Bow (red yarn)
- MR (5CH, 5E, 5CH, SL, 5CH, 5E, 5CH, SL).
- Tip: Both loops are formed at once, with the central SL acting as the knot.
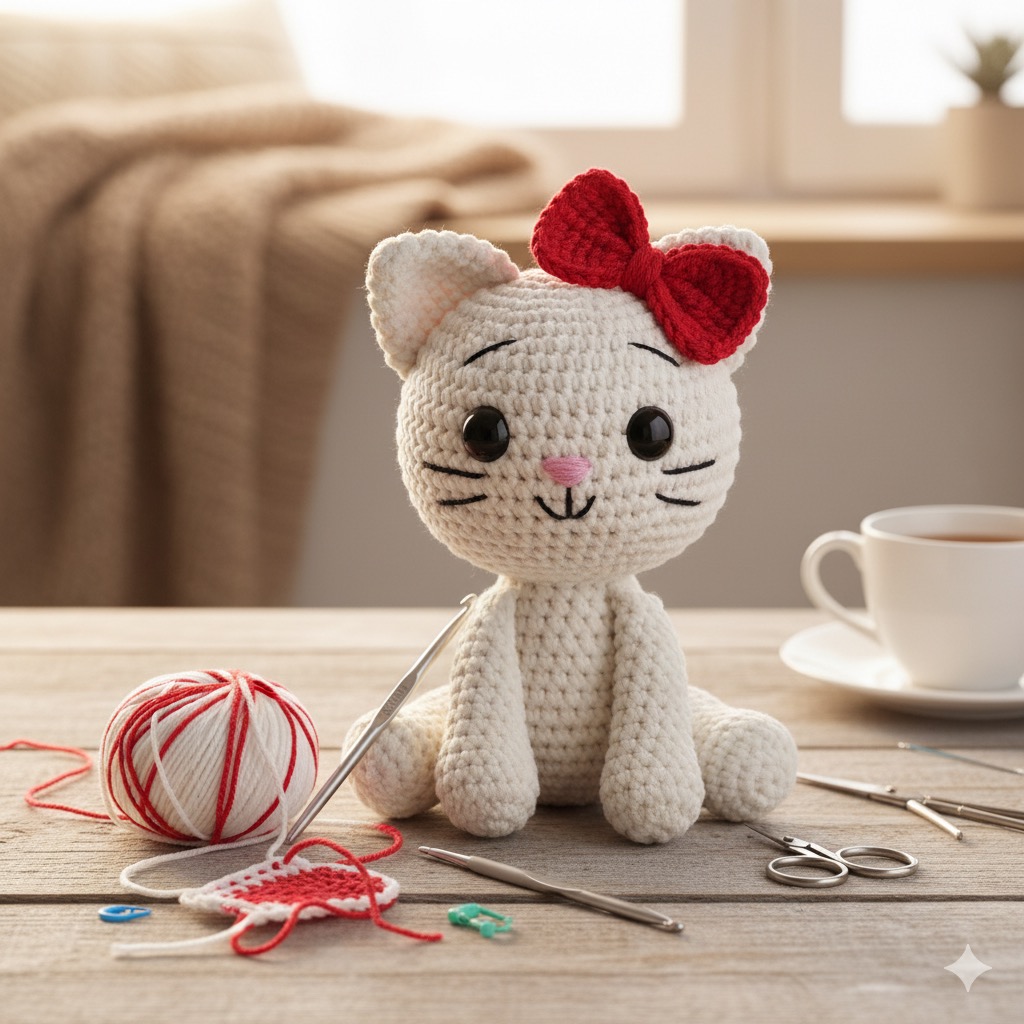
Assembly: Bringing Your Kitty to Life
This is where everything comes together!
- Attach the Ears: Position around R4–R6 of the head. Sew firmly.
- Attach the Arms: Place on the body sides. Either sew directly or use thread jointing for movable arms.
- Attach the Bow: Place just above one ear for extra cuteness.
- Embroider Details: Nose, whiskers, and mouth with embroidery floss. For a fun extra project, check out our Hilarious Amigurumi Poop Emoji Keychain.
- Final Touches: Reshape gently, ensuring stuffing is even.
Frequently Asked Questions (FAQ)
1. Can I use a different yarn weight?
Yes! Thicker yarn makes a larger kitty, thinner yarn makes a smaller one. Adjust your hook size accordingly—usually one or two sizes smaller than the yarn label recommends.
2. Why is my amigurumi lumpy?
Uneven stuffing is the culprit. Add stuffing little by little, pressing into all corners. Use a wooden dowel or the back of a crochet hook to smooth it out.
3. I keep losing stitch count. What now?
Use a stitch marker at the start of each round. It prevents miscounts and keeps your project neat.
4. Can I sell my kitty amigurumi?
Absolutely! Items made from this pattern can be sold, but please credit Amyliva Handmade as the designer.
Permissions & Content Use
- Sharing Content: You are welcome to share our blog links, photos, and videos on Pinterest, Instagram, TikTok, or blogs.
- Crediting: Always tag [@amylivahandmade] and link back to amyliva.com.
- Unauthorized Use: Please do not copy pattern text or images without permission.
For further crochet learning, you may find The Spruce Crafts Crochet Guide helpful.
Final Thoughts: Your New Handmade Kitty
Congratulations—you’ve just completed your very own kitty amigurumi! Every stitch reflects your creativity and patience. This crochet kitty is not just a toy; it’s a handmade keepsake that shows love and dedication.
Once you’ve mastered this pattern, you can experiment with other animals, characters, or even food-inspired amigurumi. The possibilities are endless!
We would love to see your finished work. Share your kitty on Instagram with [@amylivahandmade] or hashtag #amylivahandmade so others can admire your creation too.
Happy crocheting from Amyliva Handmade!
Find more free and premium amigurumi patterns at amyliva.com.
Yorum gönder