Quick & Easy Crochet Cherry Earrings – Beautiful Handmade Jewelry!
Make your own realistic crochet cherry earrings with this detailed step-by-step guide. These handmade accessories add a playful and elegant touch to any outfit. Let’s create them together!
Materials You’ll Need
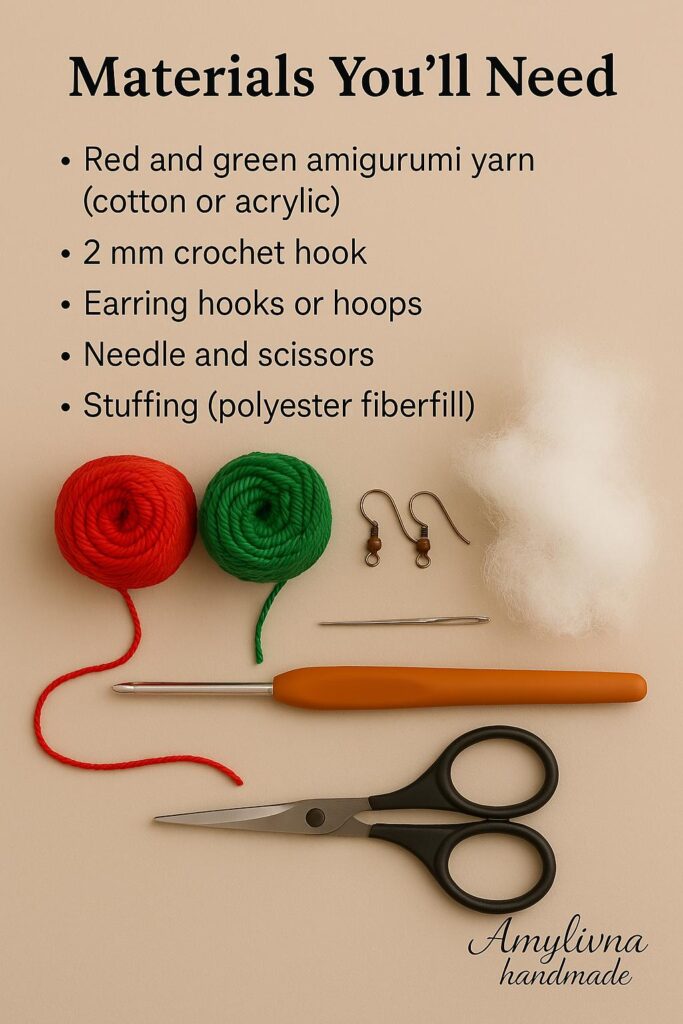
- Red and green amigurumi yarn (cotton or acrylic)
- 2 mm crochet hook
- Earring hooks or hoops
- Needle and scissors
- Stuffing (polyester fiberfill)
Step-by-Step Instructions
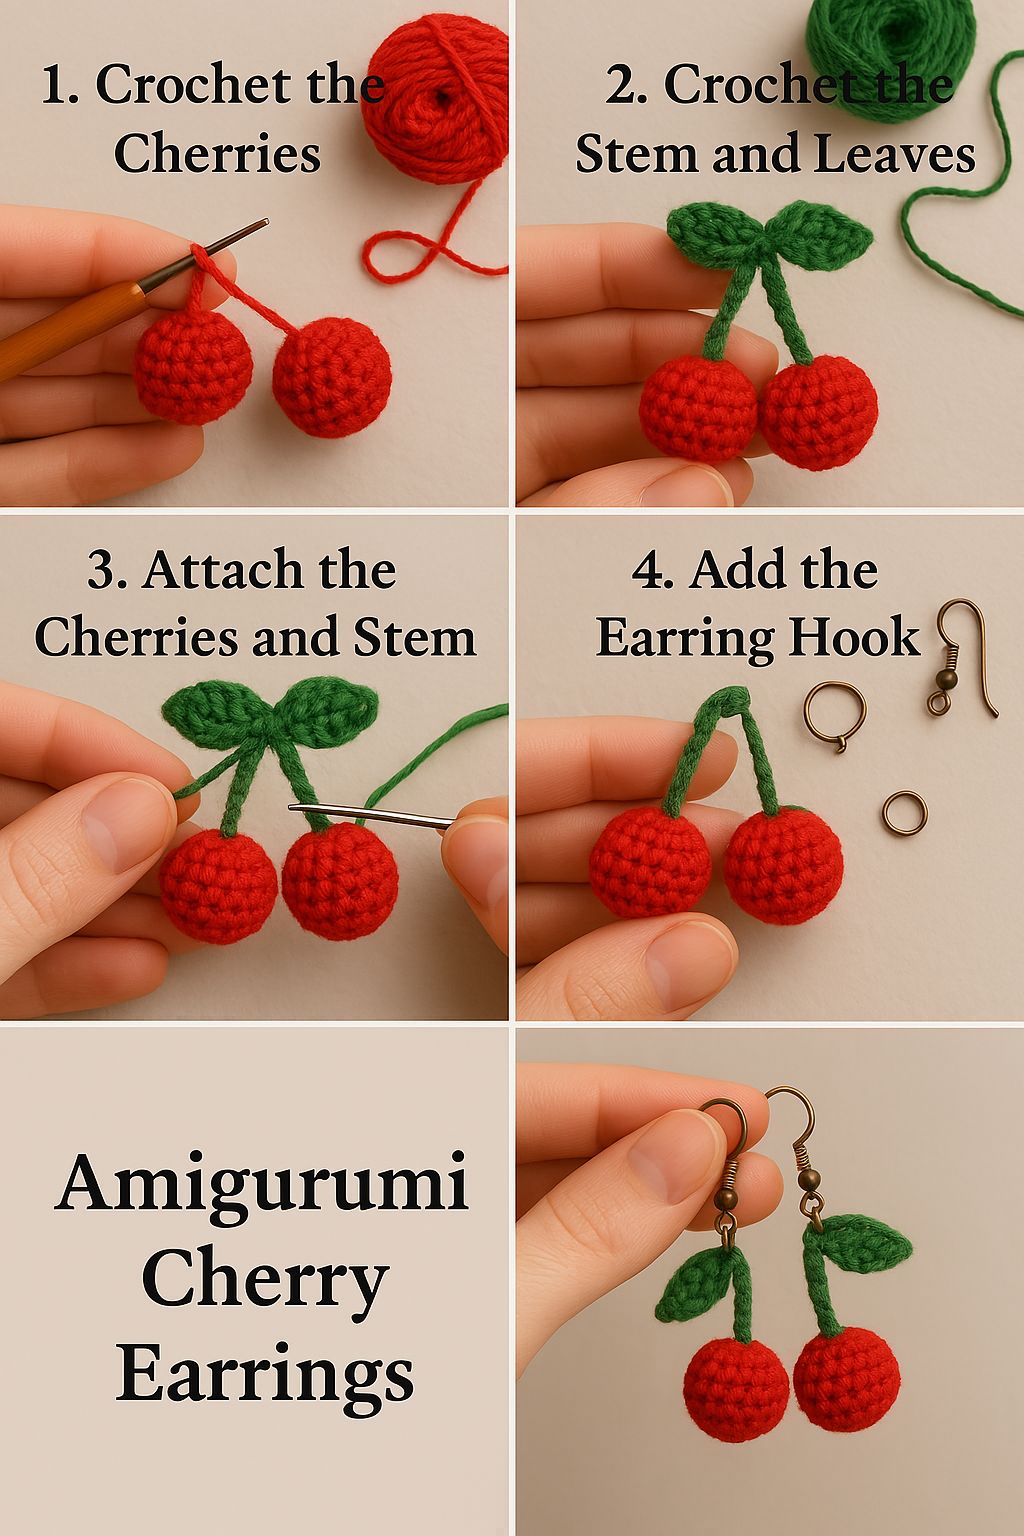
🧶 Step 1: Making the Cherry
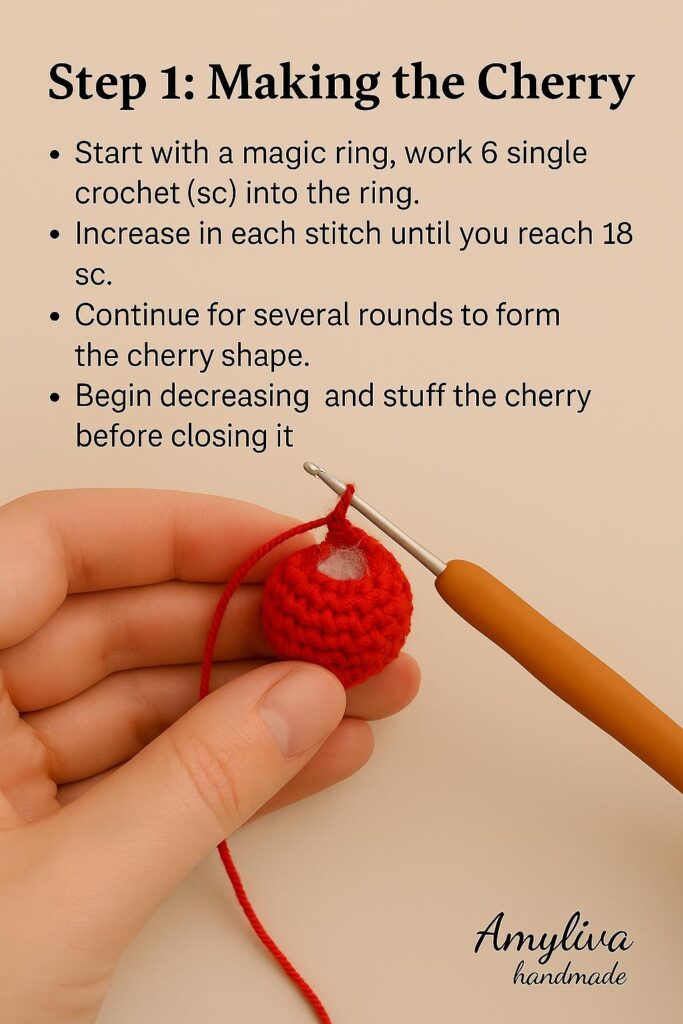
- Start with a *magic ring, work *6 single crochet (sc) into the ring.
- Increase in each stitch until you reach 18 sc.
- Continue for several rounds to form the cherry shape.
- Begin decreasing and stuff the cherry before closing it.
🍃 Step 2: Creating the Stem & Leaves
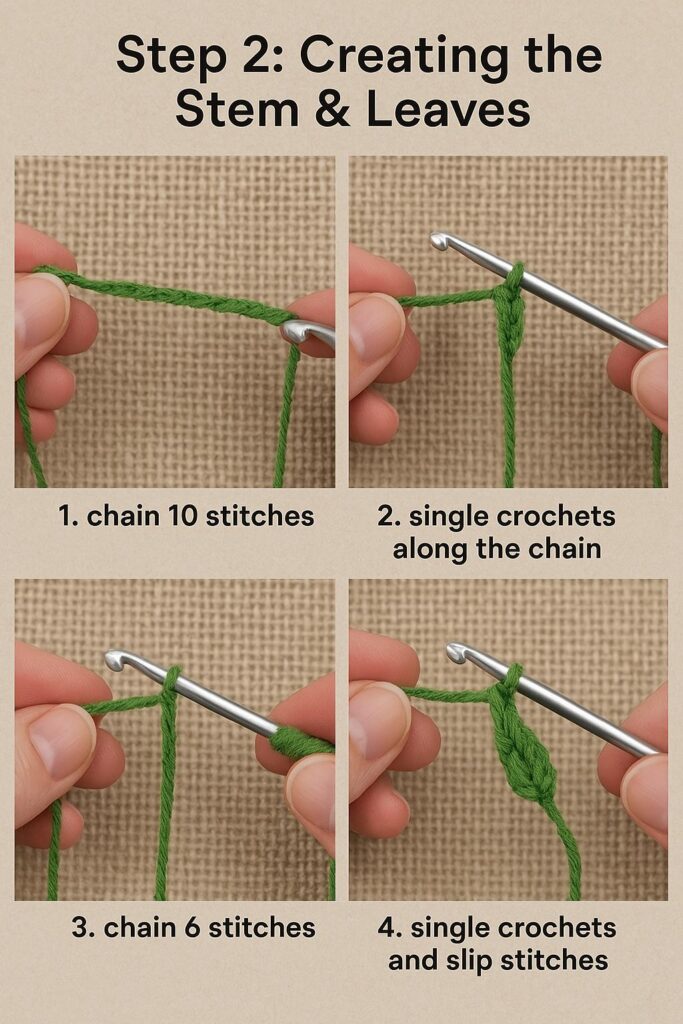
- Using green yarn, chain 10 stitches for the stem.
- Work single crochets along the chain to form a sturdy stem.
- For the *leaf, chain **6 stitches, then work back with *single crochets and slip stitches to shape the leaf.
✨ Step 3: Assembling the Earrings
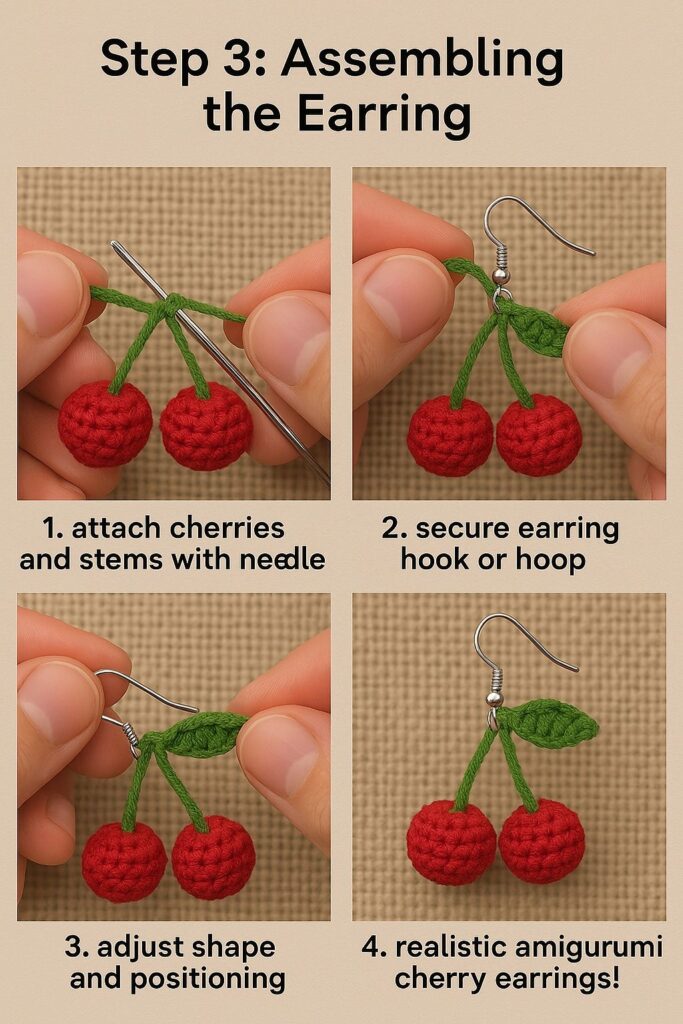
- Attach the cherries and stems together with your needle.
- Secure the earring hook or hoop to the top.
- Adjust the shape and positioning for a natural look.
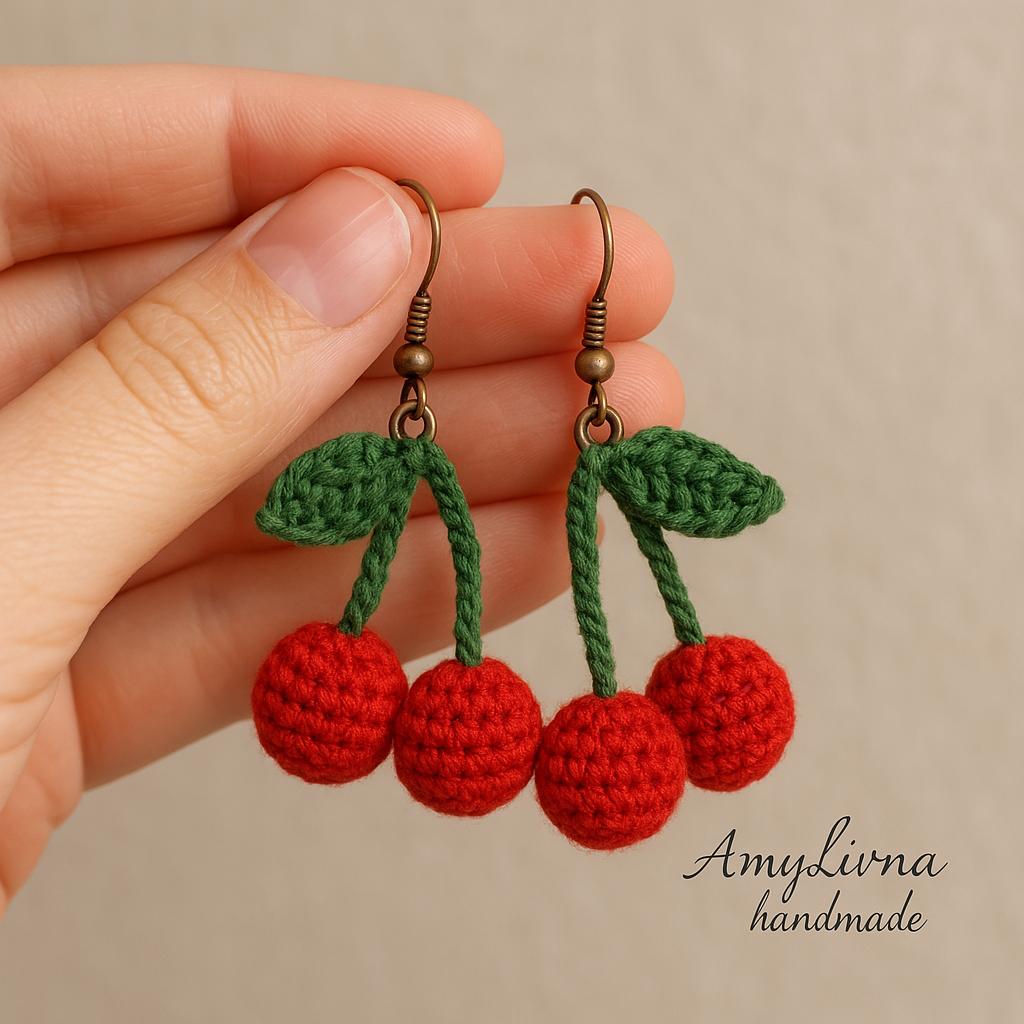
- Your realistic amigurumi cherry earrings are ready to wear! 🍒
Where to Wear Amigurumi Cherry Earrings?
✔ Handmade jewelry for daily wear or special occasions
✔ Perfect gift idea for crochet lovers
✔ Customize with different colors for unique designs
🔍 SEO Keywords for Maximum Visibility:
✅ Amigurumi cherry earrings
✅ Handmade crochet jewelry
✅ DIY crochet earrings tutorial
✅ Free crochet earring pattern
✅ Step-by-step amigurumi tutorial

Yorum gönder