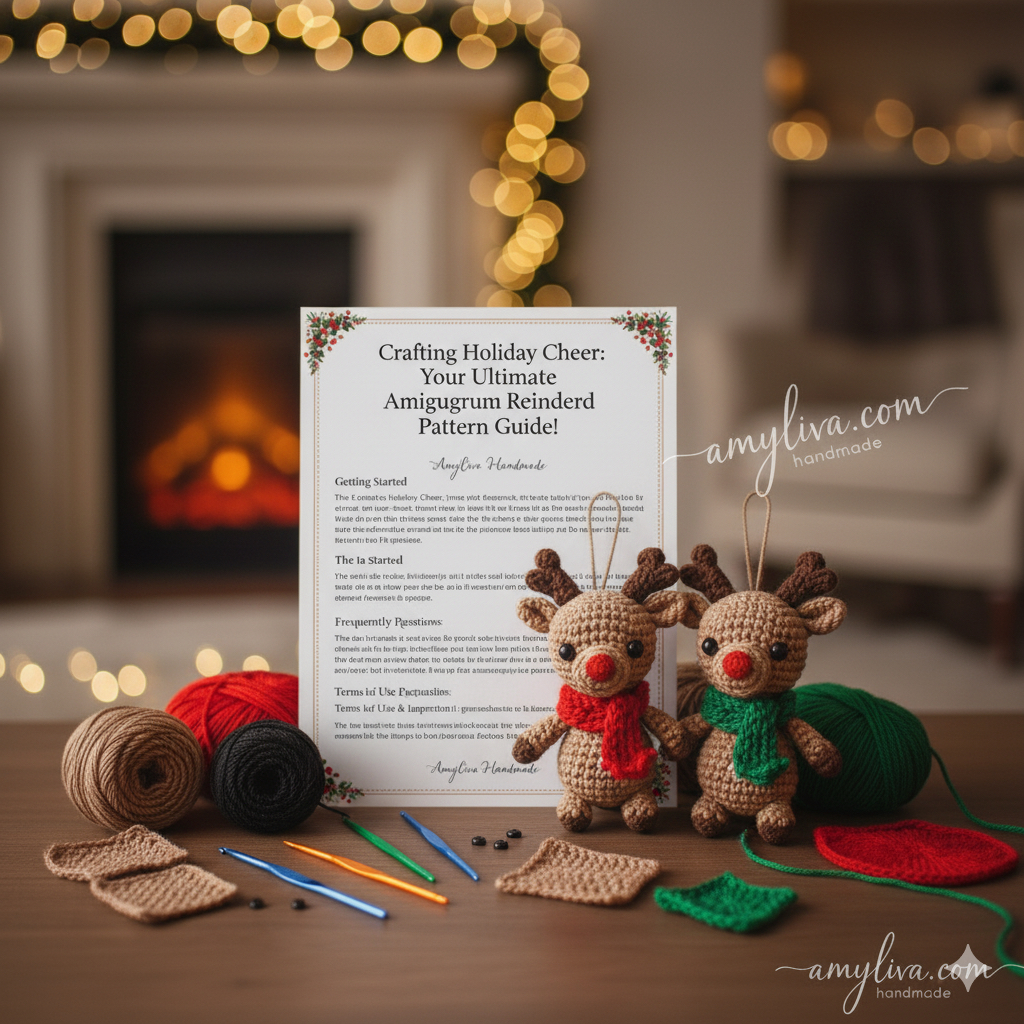
Crafting Holiday Cheer: Your Ultimate Amigurumi Reindeer Pattern Guide!
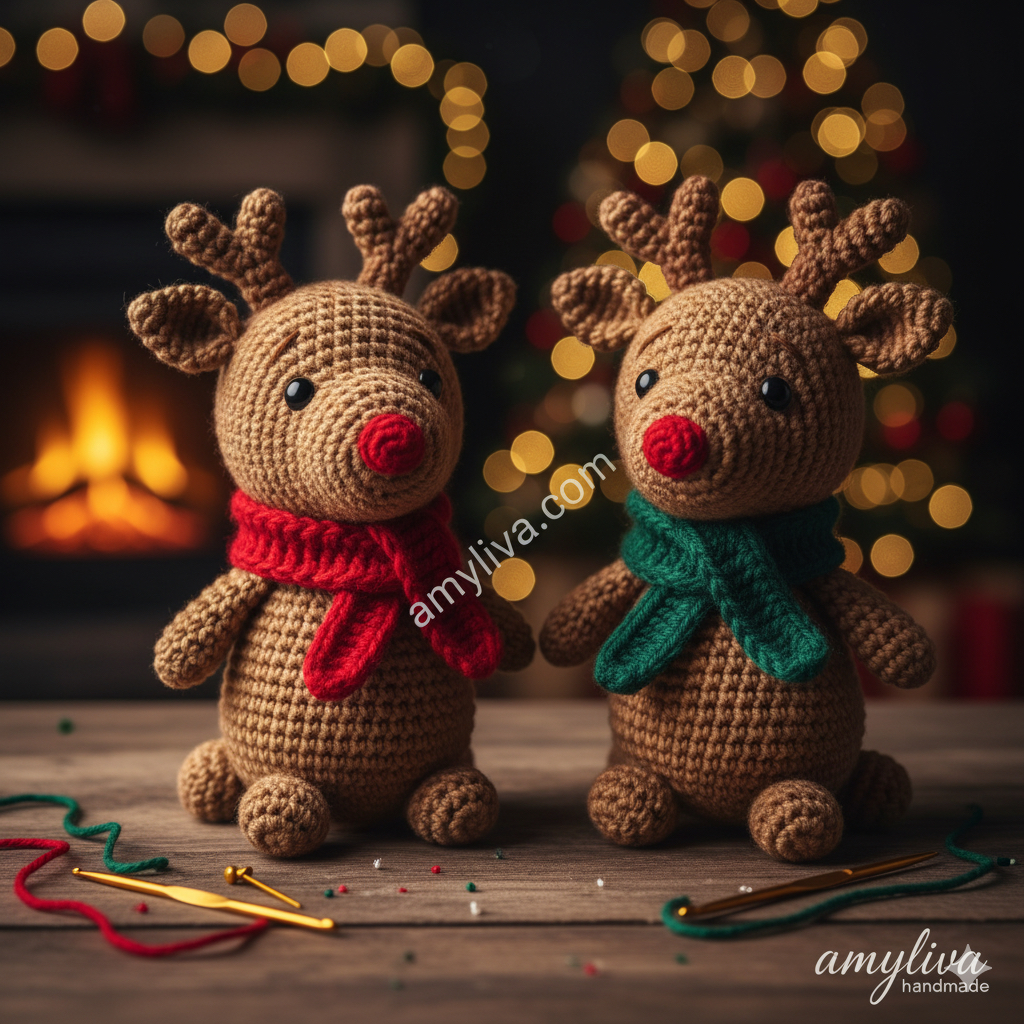
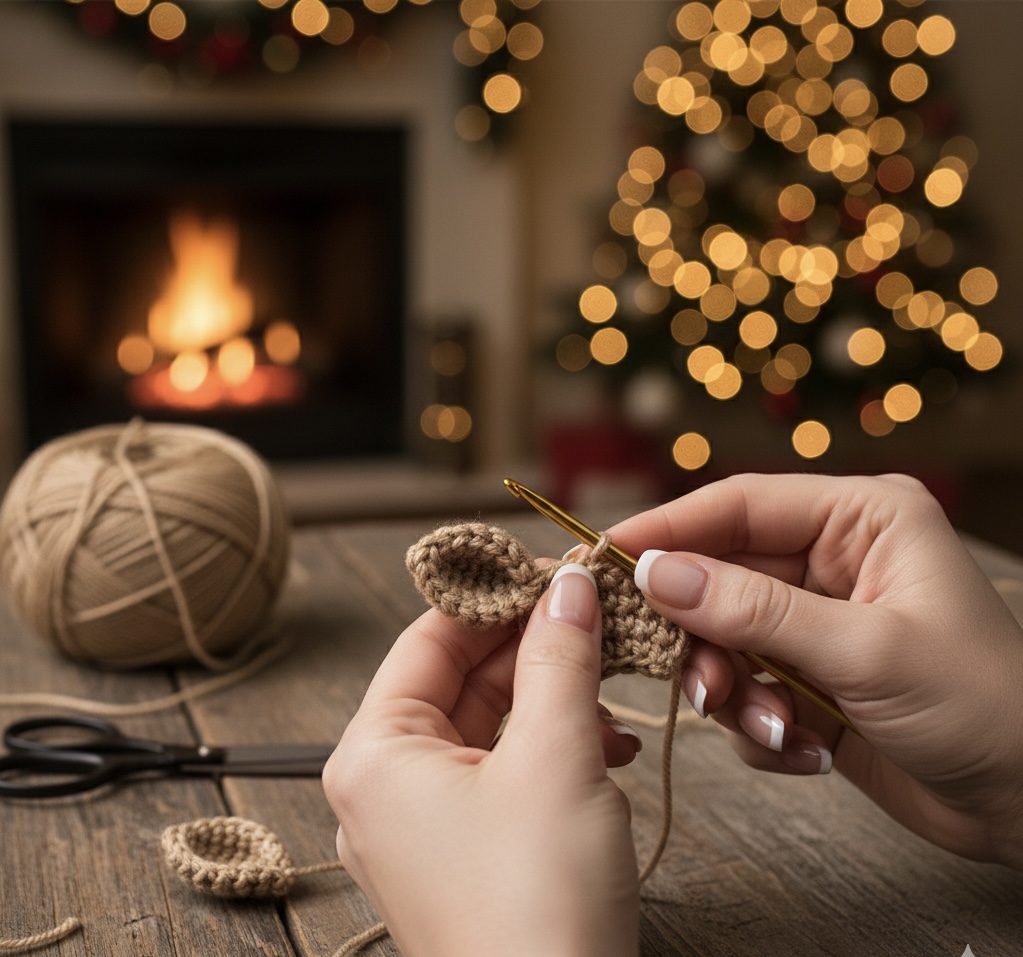
The holiday season is a magical time, filled with warmth, joy, and the delightful tradition of handmade gifts. What better way to spread some festive cheer than by crafting your very own adorable amigurumi reindeer? These charming little creatures are not just decorations; they are tiny bundles of love, perfect for adorning your Christmas tree, gifting to loved ones, or simply adding a touch of whimsical wonder to your home.
Welcome to AmyLiva Handmade, your go-to source for unique and delightful amigurumi patterns. In this comprehensive guide, we’ll walk you through everything you need to know to create your own herd of charming reindeer. Whether you’re a seasoned crocheter or a beginner eager to dive into the world of amigurumi, our detailed pattern and tips will make the process enjoyable and rewarding.
Why Amigurumi Reindeer? The Magic of Handmade Holidays
In a world increasingly dominated by mass-produced items, handmade crafts offer a personal touch that truly stands out. Amigurumi, the Japanese art of crocheting small stuffed animals, allows for endless creativity and the creation of unique, heartfelt items. Our amigurumi reindeer are designed to capture the essence of holiday magic, with their sweet expressions, tiny antlers, and cozy scarves.
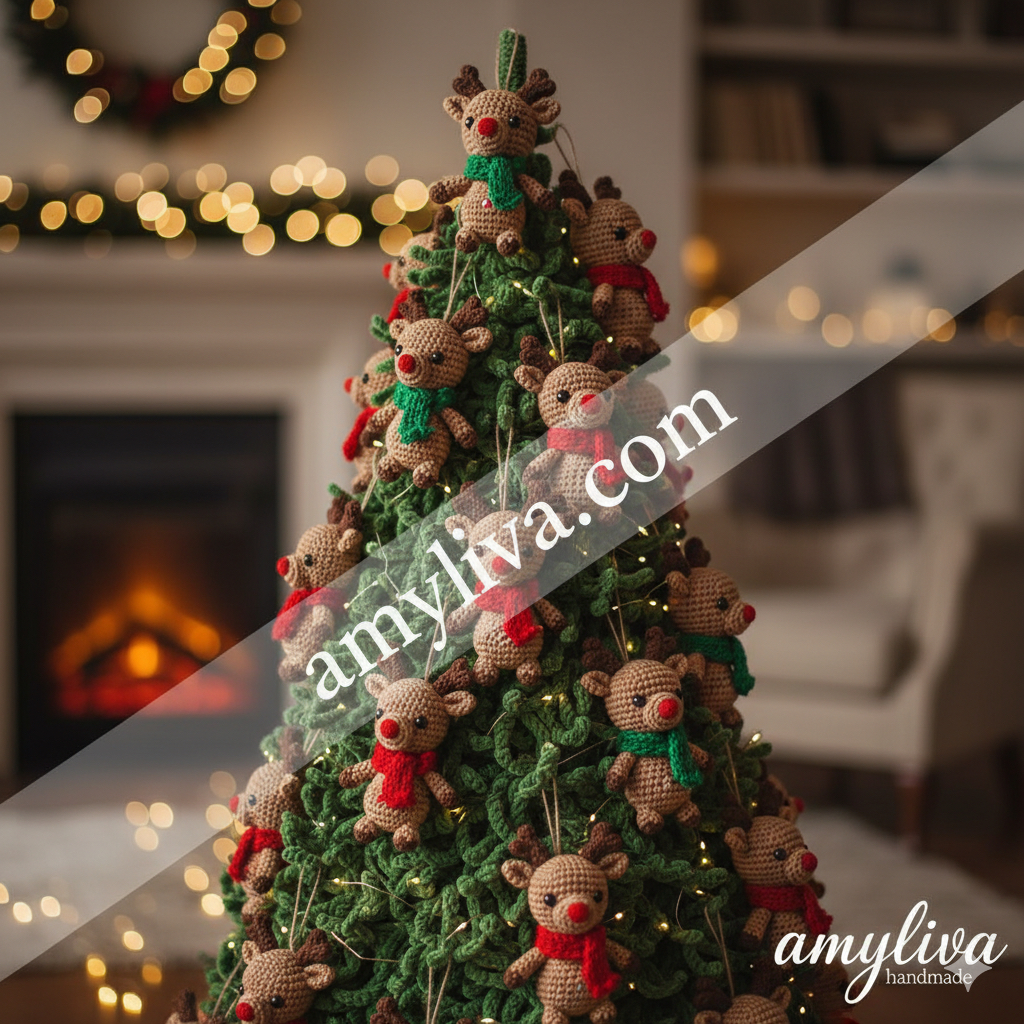
Imagine your Christmas tree twinkling with lights, each branch adorned with a handmade reindeer. Picture the delight on a child’s face as they receive a soft, cuddly reindeer made especially for them. These aren’t just toys; they’re heirlooms, memories in the making, and tangible expressions of love. They are also fantastic additions to holiday markets, craft fairs, and online shops, making them perfect for those looking to turn their passion into a small business.
Getting Started: What You’ll Need
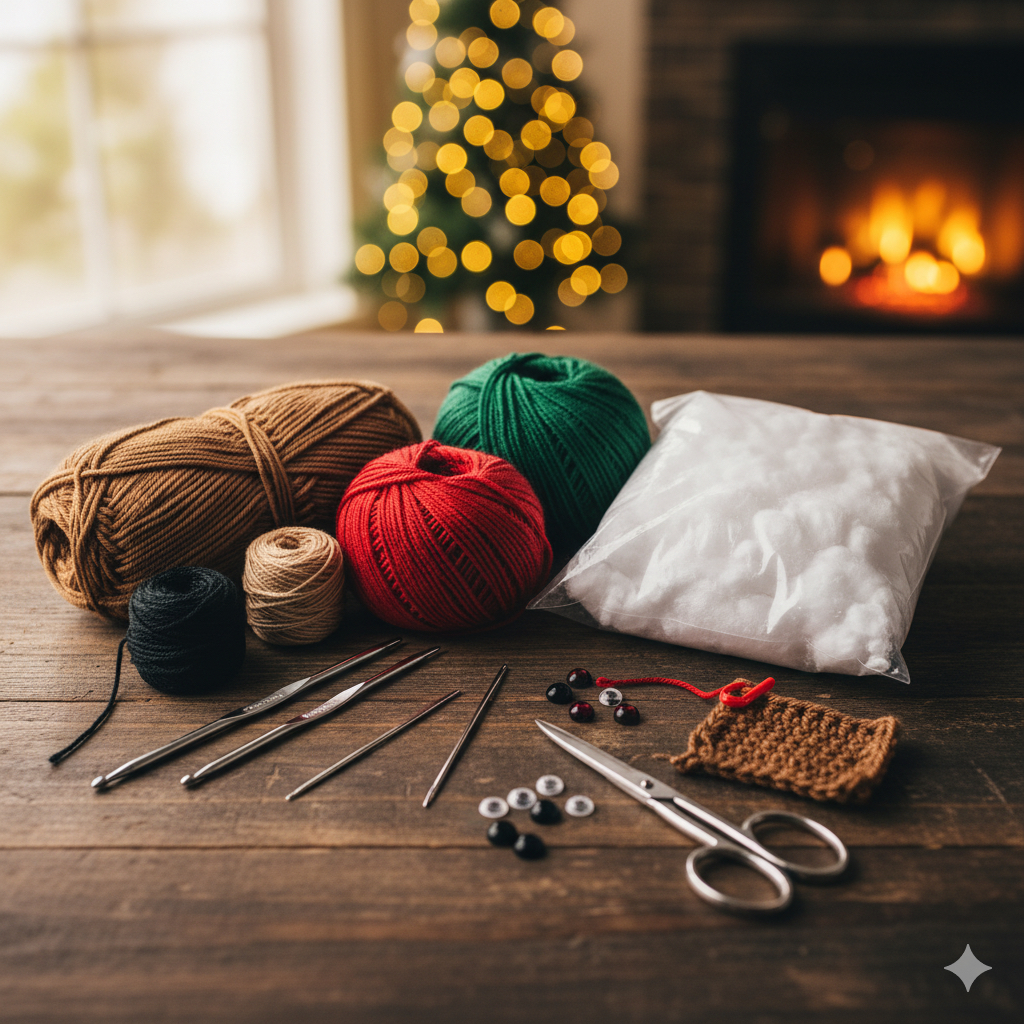
Before we dive into the pattern, let’s gather our materials. Having everything ready will make your crafting experience smooth and enjoyable.
• Yarn: Worsted weight yarn in the following colors:
• Brown (for the body)
• Red or Green (for the scarf)
• Small amount of Black (for embroidering eyes/eyebrows)
• Small amount of Red (for the nose, if not using safety eyes)
• Crochet Hook: Size 2.5mm or 3.0mm (or a size appropriate for your yarn to achieve tight stitches)
• Safety Eyes: 6mm or 8mm (or embroider eyes for a softer look)
• Stuffing: Polyester fiberfill
• Tapestry Needle: For weaving in ends and embroidering details
• Scissors: For cutting yarn
• Stitch Marker: To keep track of your rounds (highly recommended!)
• Optional: Small amount of wire for antlers (if you want them posable, though we’ll provide a yarn-only option)
Pro Tip for Yarn Selection: Choose a yarn that doesn’t split easily and has a nice, even texture. This will make your stitches more defined and your finished reindeer look more polished.
The AmyLiva Handmade Amigurumi Reindeer Pattern
This pattern uses US crochet terminology. We recommend working in continuous rounds unless otherwise specified.
Abbreviations:
• MR: Magic Ring
• ch: chain
• sc: single crochet
• inc: increase (2 sc in one stitch)
• dec: decrease (sc2tog – single crochet two stitches together)
• sl st: slip stitch
• FO: fasten off
• ( ): repeat instructions in parentheses the specified number of times
• [ ]: total number of stitches in the round
Head & Body (Start with Brown Yarn)
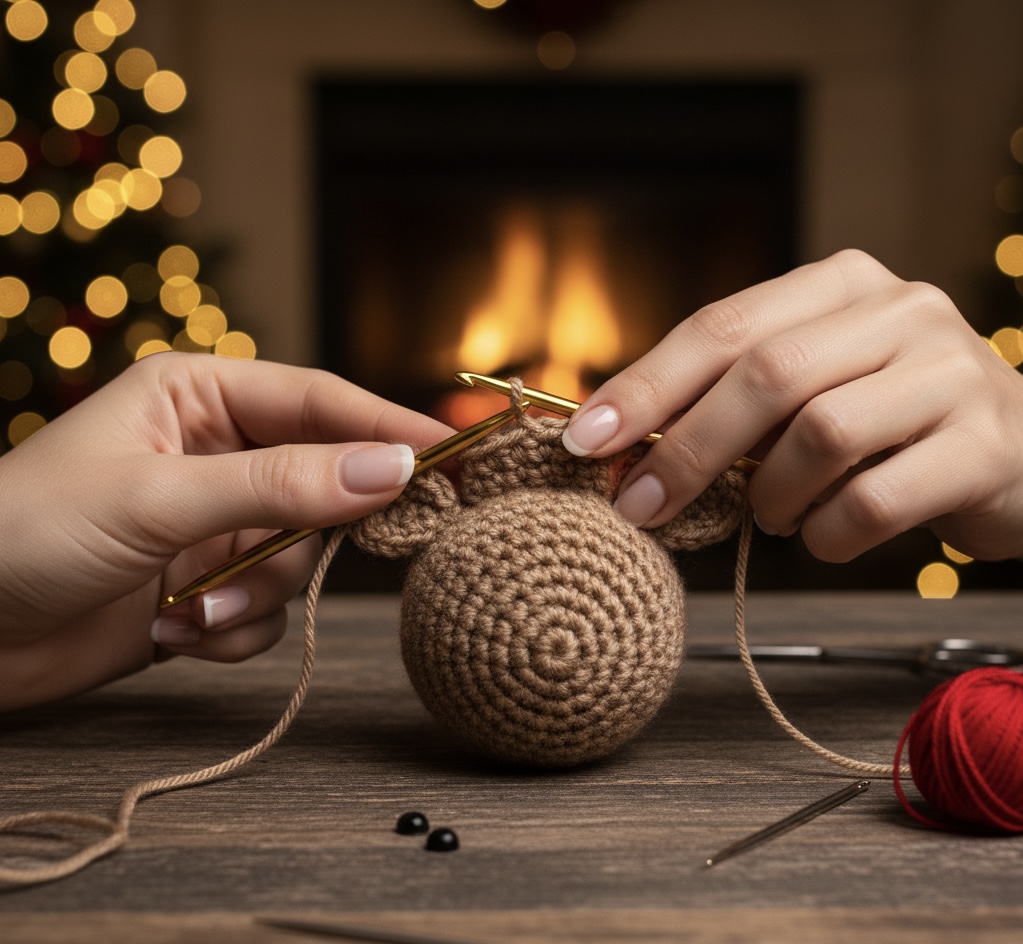
1. MR 6 sc [6]
2. inc x 6 [12]
3. (sc, inc) x 6 [18]
4. (2 sc, inc) x 6 [24]
5. (3 sc, inc) x 6 [30]
6. (4 sc, inc) x 6 [36]
7. sc in each st around [36]
8. sc in each st around [36]
9. sc in each st around [36]
10. sc in each st around [36]
11. sc in each st around [36]
12. sc in each st around [36]
13. (4 sc, dec) x 6 [30]
14. (3 sc, dec) x 6 [24]
• Insert safety eyes between rows 9 and 10, about 6-8 stitches apart. If embroidering, do this later.
• Begin stuffing the head firmly.
15. (2 sc, dec) x 6 [18]
16. (sc, dec) x 6 [12]
• Continue stuffing as you go.
17. dec x 6 [6]
• Do not FO. Continue directly to the body.
18. inc x 6 [12]
19. (sc, inc) x 6 [18]
20. (2 sc, inc) x 6 [24]
21. (3 sc, inc) x 6 [30]
22. sc in each st around [30]
23. sc in each st around [30]
24. sc in each st around [30]
25. (3 sc, dec) x 6 [24]
26. (2 sc, dec) x 6 [18]
• Stuff the body firmly.
27. (sc, dec) x 6 [12]
28. dec x 6 [6]
• FO, leaving a long tail. Weave the tail through the remaining stitches and pull tight to close. Weave in the end.
Snout (Start with Brown Yarn – or Lighter Brown if desired)
1. MR 6 sc [6]
2. inc x 6 [12]
3. (sc, inc) x 6 [18]
4. sc in each st around [18]
• FO, leaving a long tail for sewing. Lightly stuff and sew onto the face, centering it below the eyes.
• Embroider the nose with red yarn onto the snout, or attach a small red felt circle. Embroider a small line from the nose downwards for the mouth.
Ears (Make 2 – Brown Yarn)
1. MR 4 sc [4]
2. (sc, inc) x 2 [6]
3. (2 sc, inc) x 2 [8]
4. sc in each st around [8]
• FO, leaving a long tail for sewing. Pinch the bottom edges together and sew onto the top of the head, between rows 4-6, about 8-10 stitches apart.
Antlers (Make 2 – Brown Yarn)
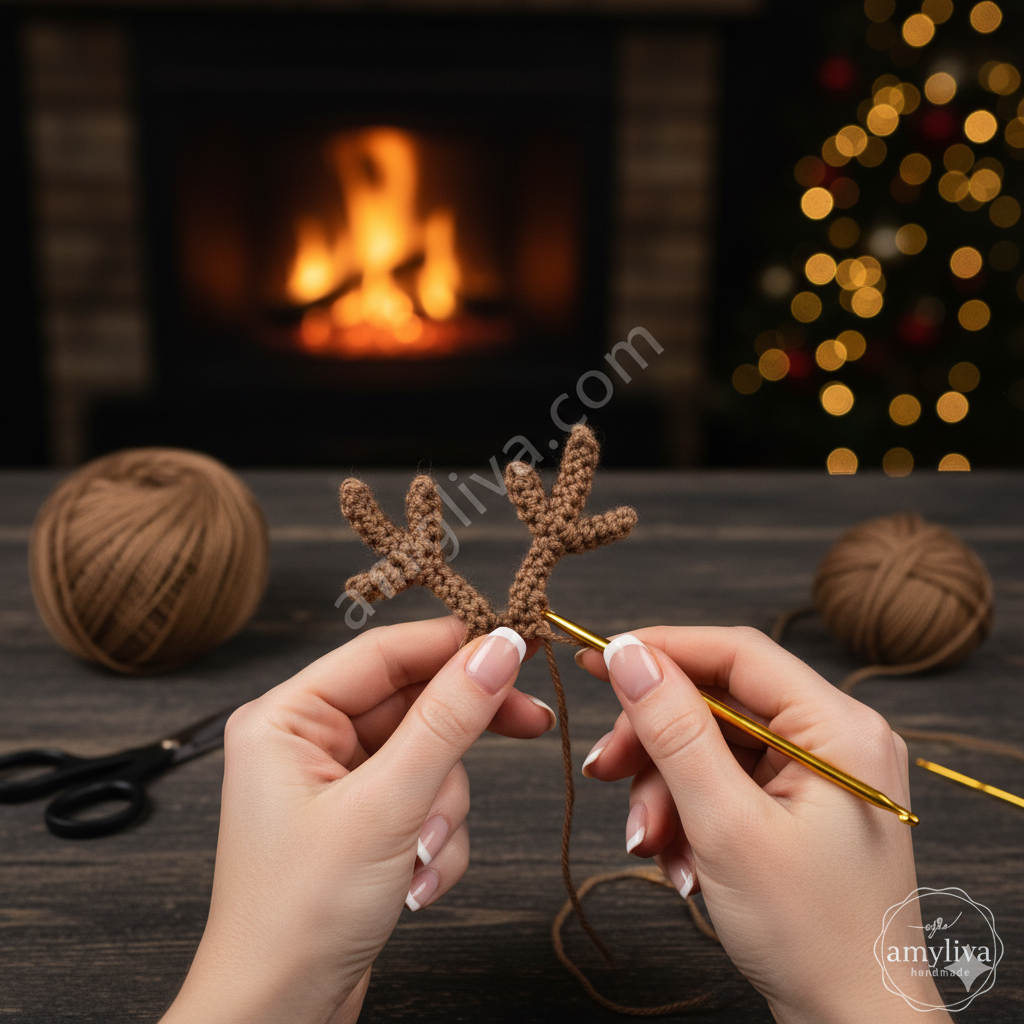
• Option 1: Crocheted Antlers (easier, softer look)
1. Ch 5. Sl st into the 2nd ch from hook. Sc in next ch.
2. (Ch 3, sl st into 2nd ch from hook, sc into next ch) x 2 (these form the tines).
3. Continue sc down the remaining chains of the original ch 5.
• FO, leaving a long tail. Sew firmly onto the top of the head, slightly behind the ears.
• Option 2: Wire-supported Antlers (more defined, posable)
• This requires experience with wire in amigurumi. For beginners, we recommend Option 1.
• Cut two pieces of floral wire (about 4-5 inches each).
• Wrap brown yarn tightly around each wire.
• Shape them into desired antler forms with small tines.
• Carefully insert the ends into the head, securing with a small amount of fabric glue if needed. Be cautious to ensure no sharp wire ends are exposed.
Arms (Make 2 – Brown Yarn)
1. MR 6 sc [6]
2. (sc, inc) x 3 [9]
3. sc in each st around [9]
4. sc in each st around [9]
5. dec, 7 sc [8]
6. sc in each st around [8]
7. sc in each st around [8]
• Lightly stuff the bottom half of the arm.
8. dec, 6 sc [7]
9. sc in each st around [7]
• FO, leaving a long tail. Flatten the opening and sew to the sides of the body, just below the neck.
Legs (Make 2 – Brown Yarn)
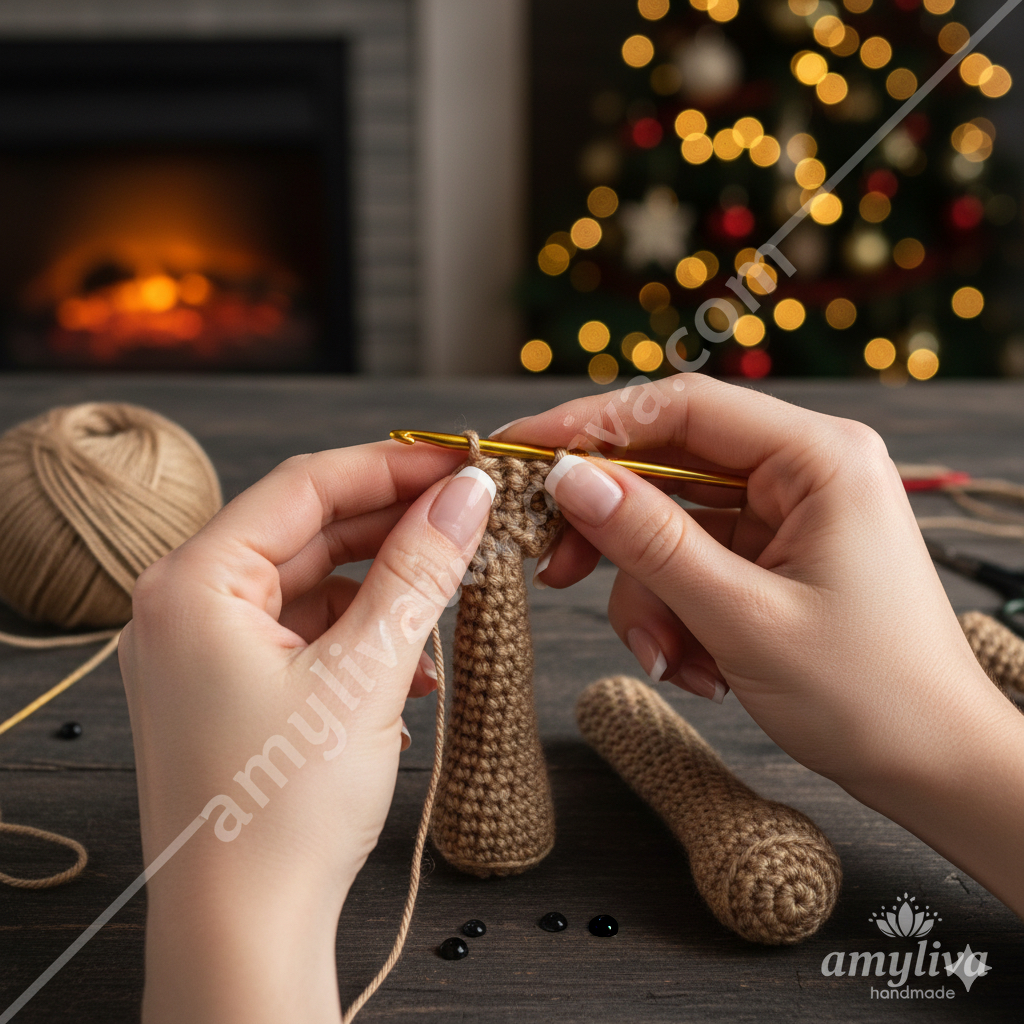
1. MR 6 sc [6]
2. inc x 6 [12]
3. (sc, inc) x 6 [18]
4. sc in each st around [18]
5. sc in each st around [18]
6. (sc, dec) x 6 [12]
• Stuff the foot part firmly.
7. sc in each st around [12]
8. sc in each st around [12]
9. dec x 6 [6]
• Continue stuffing the leg as you go.
10. sc in each st around [6]
• FO, leaving a long tail. Flatten the opening and sew to the bottom of the body.
Scarf (Red or Green Yarn)
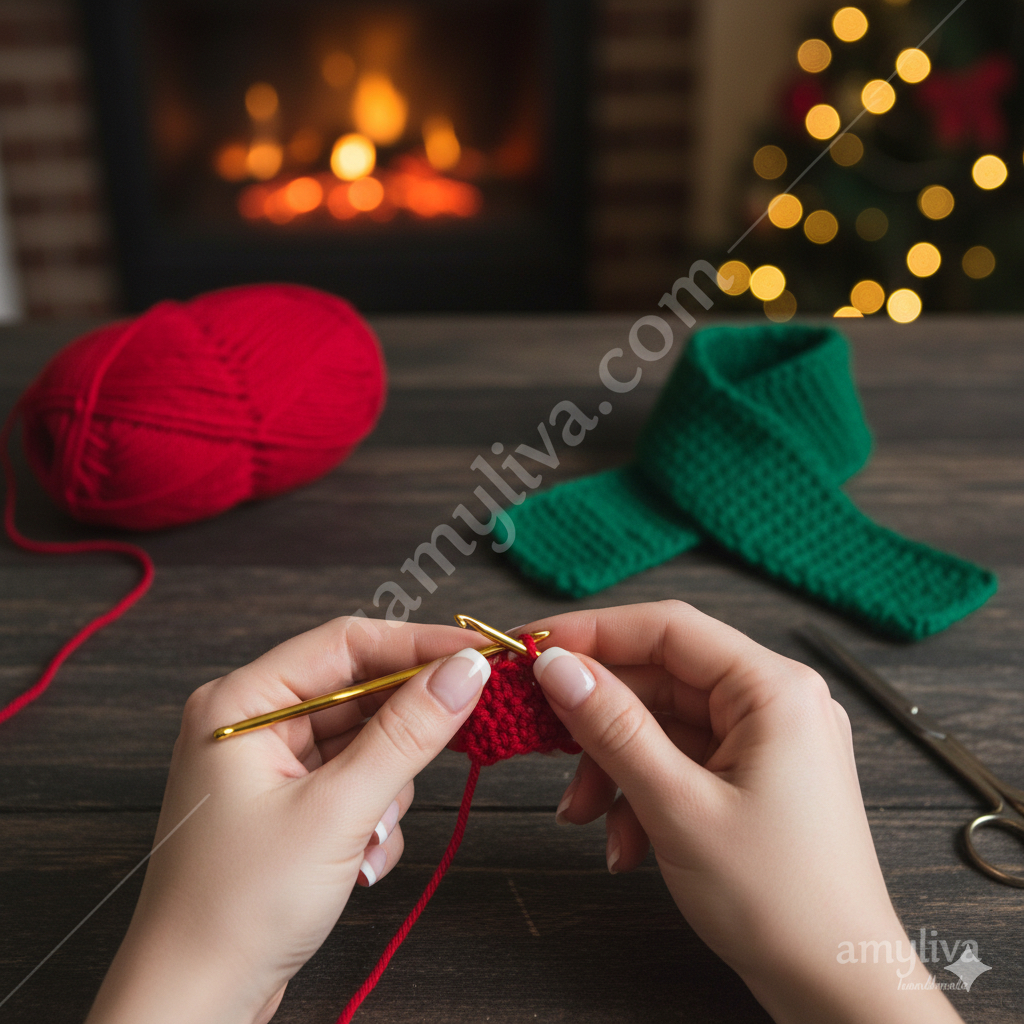
1. Ch 40-50 (or to desired length to wrap around the neck).
2. Starting in the 2nd ch from hook, sc in each ch across.
• FO, weave in ends. Tie around the reindeer’s neck. You can add small fringes to the ends of the scarf if desired!
Finishing Touches and Embellishments

Congratulations! You’ve crocheted your very own amigurumi reindeer. Now, let’s add some final touches to bring your creation to life:
• Facial Expressions: If you opted for embroidered eyes, use black yarn to create small French knots or straight lines. You can also add eyebrows for more character.
• Blush: A tiny bit of pink blush or chalk applied with a Q-tip can give your reindeer rosy cheeks.
• Hanging Loop: If you want to use your reindeer as an ornament, attach a loop of yarn or string to the top of its head.
Tips for Amigurumi Success
• Tight Stitches: For amigurumi, it’s crucial to have tight stitches to prevent stuffing from showing through. If your stitches are too loose, try going down a hook size.
• Stitch Marker is Your Best Friend: Always use a stitch marker in continuous rounds to avoid losing your place.
• Stuffing is Key: Stuff your amigurumi firmly and evenly. This gives it a good shape and helps it stand up. Use small pieces of fiberfill to avoid lumps.
• Read the Pattern First: Always read through the entire pattern before you start crocheting. This helps you understand the construction and identify any potentially tricky steps.
• Don’t Be Afraid to Undo: If you make a mistake, don’t hesitate to “frog” (undo) your work and try again. Practice makes perfect!
Frequently Asked Questions (FAQ)
Q1: What kind of yarn should I use?
A1: Worsted weight acrylic or cotton yarn is generally recommended for amigurumi due to its durability, wide color range, and ease of use. However, you can experiment with different yarn weights for larger or smaller reindeer, adjusting your hook size accordingly.
Q2: Can I use different colors for my reindeer?
A2: Absolutely! Feel free to get creative with your color choices. You could make a white reindeer, a sparkly one, or even one with multi-colored antlers!
Q3: How long does it take to make one reindeer?
A3: The time taken can vary greatly depending on your skill level and speed. For a beginner, it might take 4-6 hours, while experienced crocheters could complete one in 2-3 hours.
Q4: Are these suitable for small children?
A4: If making for infants or toddlers, it’s highly recommended to embroider the eyes and nose instead of using safety eyes or small buttons, as these can be choking hazards. Always supervise children with handmade toys.
Q5: Where can I find more amigurumi patterns?
A5: You can find a wide variety of amigurumi patterns on our website, AmyLiva.com, as well as on platforms like Etsy, Ravelry, and other craft blogs.
Q6: I’m a complete beginner. Is this pattern too hard for me?
A6: While this pattern involves a few different components, it uses basic crochet stitches. If you know how to do a magic ring, single crochet, increase, and decrease, you should be able to follow along. We recommend watching some beginner amigurumi tutorials on YouTube if you need visual guidance.
🌐 Related Patterns on AmyLiva.com
. Mini Amigurumi Bear – Free Pattern
. Crochet Peas and Love Bug – Free Pattern
Terms of Use & Important Disclaimers
This pattern is an original design by AmyLiva Handmade.
Personal Use Only: This pattern is for personal use only. You may make as many reindeer as you wish for yourself, as gifts, or for charity.
Selling Finished Items: If you wish to sell finished items made from this pattern, please give credit to AmyLiva Handmade as the designer. A simple “Pattern by AmyLiva Handmade” on your product tag or listing is sufficient and much appreciated.
No Redistribution: Please do not copy, translate, redistribute, or resell this pattern, in whole or in part, electronically or physically. Do not claim this pattern as your own.
Copyright: All content, including text and images, on this blog post is copyrighted by AmyLiva Handmade. Unauthorized use and/or duplication of this material without express and written permission from this site’s author and owner is strictly prohibited. Excerpts and links may be used, provided that full and clear credit is given to AmyLiva Handmade with appropriate and specific direction to the original content.
Safety Notice: Always exercise caution when making items for children. Ensure all components are securely attached. If using safety eyes, ensure they are properly installed. For very young children, consider embroidering facial features instead of using small parts that could pose a choking hazard.
AdSense Disclaimer: This blog post may contain advertisements served by third-party ad networks (e.g., Google AdSense). We strive to ensure that ads displayed are relevant and appropriate for our audience. However, we do not control the content of these ads and are not responsible for any external websites or services linked to them.
Affiliate Disclosure: Some links within this blog post may be affiliate links. This means that if you click on the link and make a purchase, we may receive a small commission at no extra cost to you. This helps support our work in creating free and paid patterns and content. We only recommend products we genuinely believe in.
Disclaimer of Liability: While every effort has been made to ensure the accuracy and clarity of this pattern, AmyLiva Handmade cannot be held responsible for any errors or omissions, or for any outcomes resulting from the use of this pattern. Crocheting involves sharp tools; please craft safely.
Join the AmyLiva Handmade Community!
We love seeing your finished creations! Share your amigurumi reindeer on social media and tag us @AmyLivaHandmade. Join our crafting community and connect with fellow amigurumi enthusiasts. Don’t forget to visit AmyLiva.com for more exciting patterns and crochet inspiration!
Happy Crocheting, and Happy Holidays!
Amy Liva

Yorum gönder