Hedgehog Amigurumi Crochet Pattern – Cute Handmade Toy with Leaf Detail
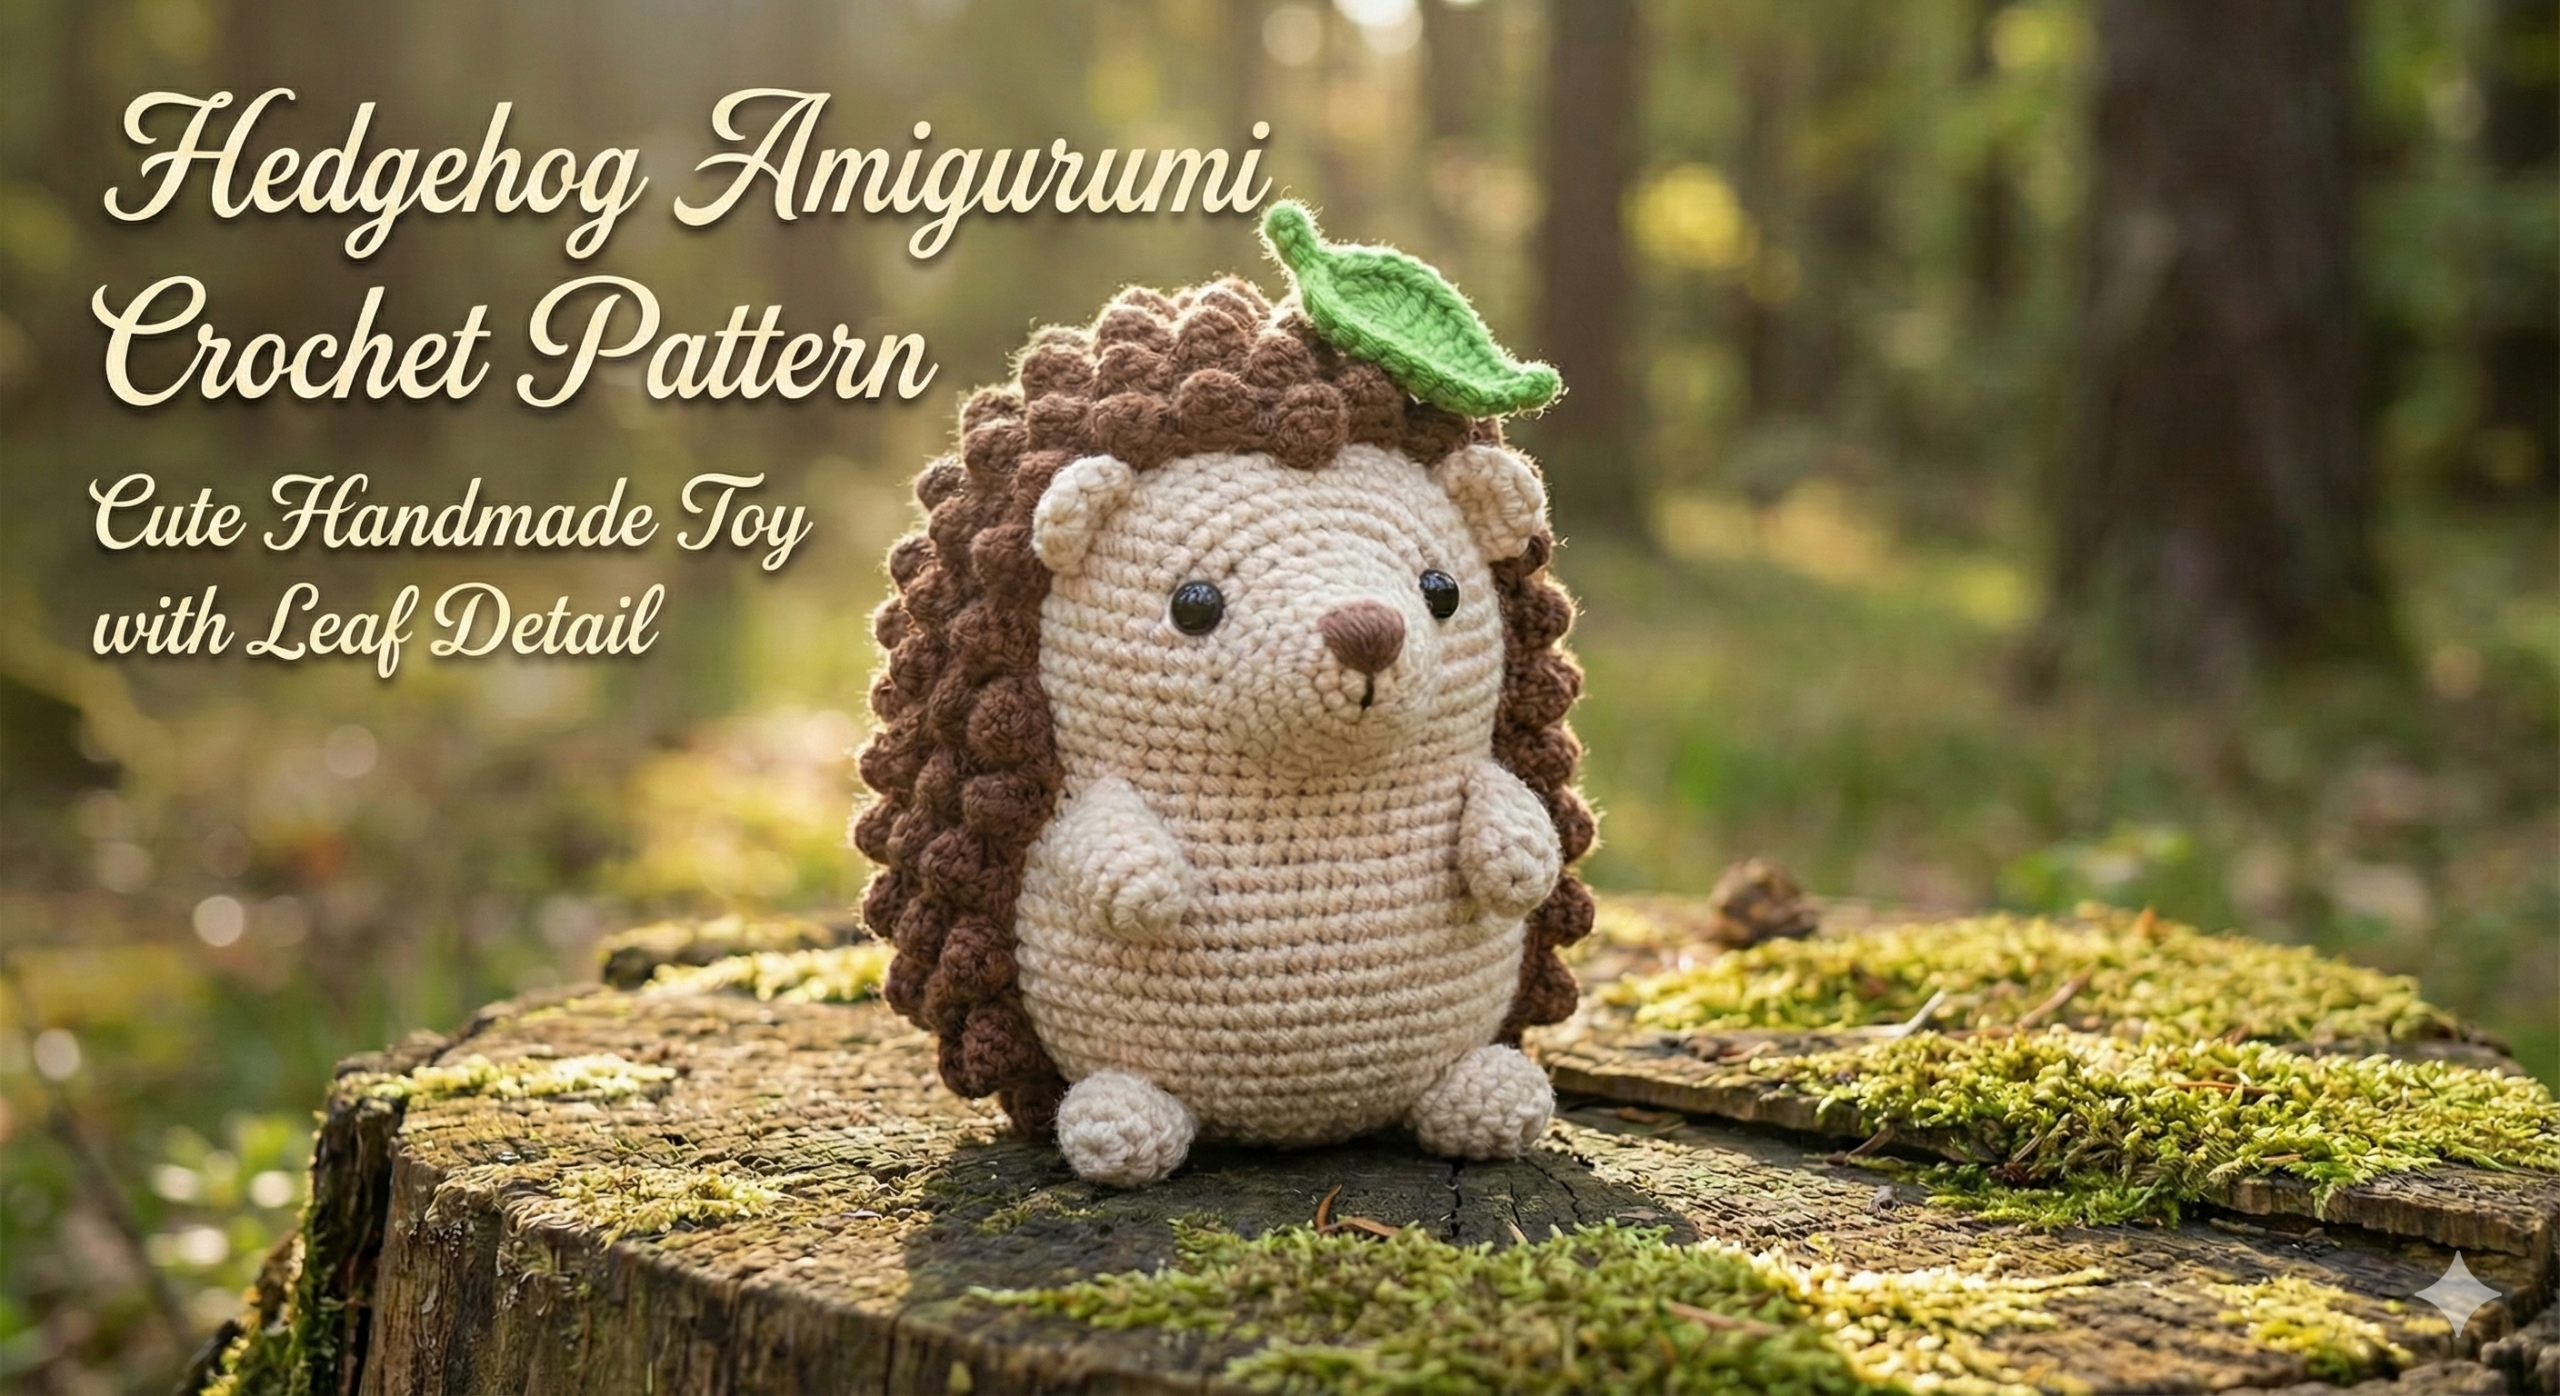
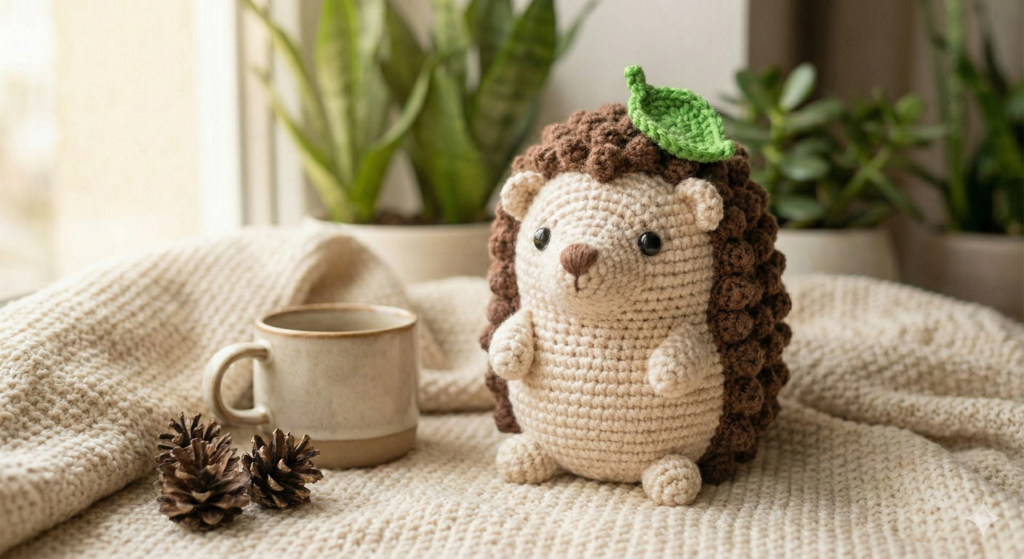
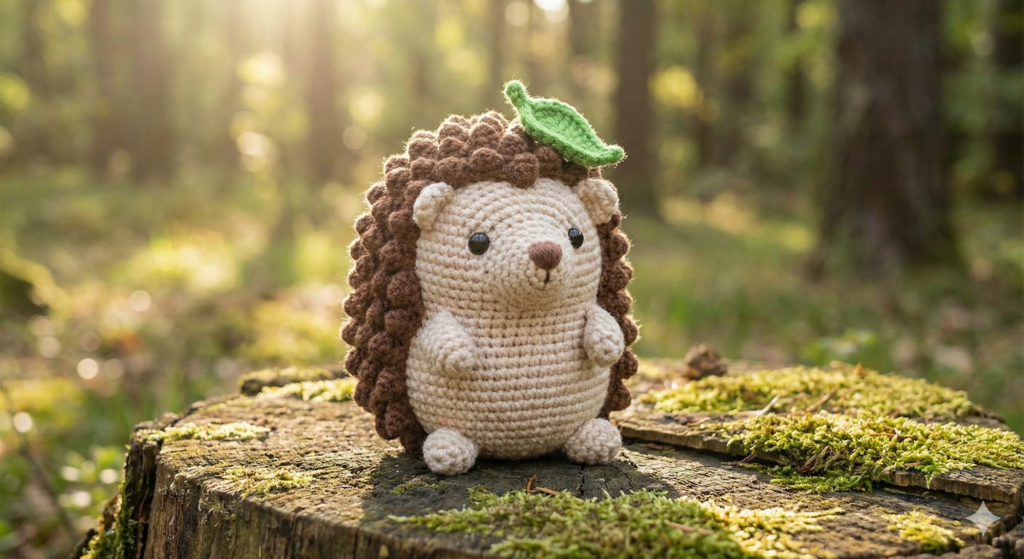
If you love woodland animals and cute handmade projects, this little Hedgehog Amigurumi is a fun pattern to try. With its rounded body, pointed snout, tiny ears, textured back, and a sweet leaf detail, this crochet hedgehog has plenty of personality.

This project is designed for crocheters who are comfortable with basic amigurumi techniques such as working in continuous rounds, making increases and decreases, stuffing small pieces, and sewing crocheted parts together.

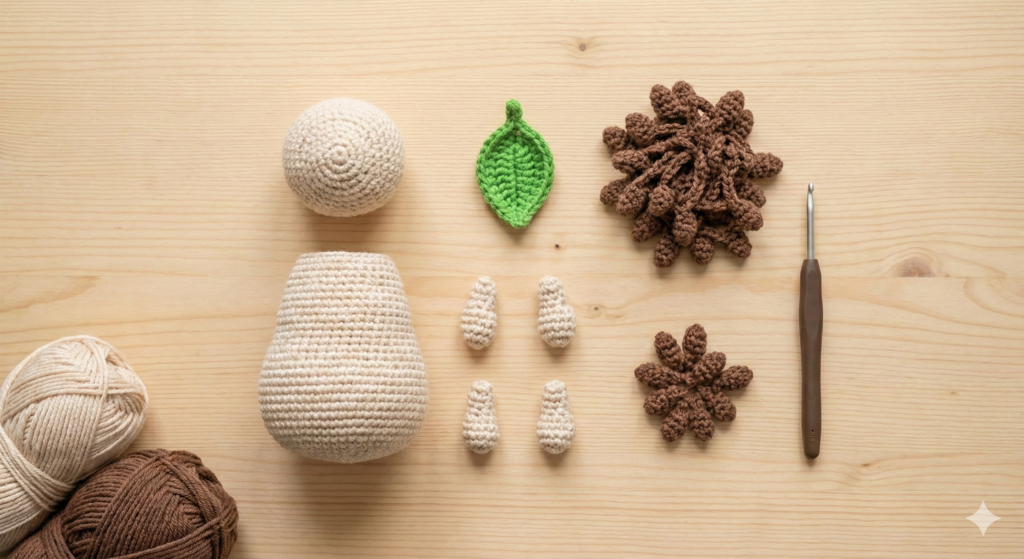
In this tutorial, you’ll make the body and head, legs, arms, ears, facial details, a small leaf, and the textured spiky back before assembling everything into the finished hedgehog.

You can also customize your hedgehog with different yarn colors, embroidered details, or a different size by changing the yarn and hook.

Let’s get started! 🧶🦔

Why Hedgehog Amigurumi Toys Are So Loved

Hedgehogs symbolize protection, curiosity, and warmth. In amigurumi form, their rounded shapes and textured backs translate perfectly into crochet stitches. This makes them ideal subjects for handmade toys and decorative items.

Crochet hedgehog toys are especially popular because:

  • They look cute from every angle
  • They work well in small sizes
  • They are perfect for seasonal and woodland-themed collections
  • They photograph beautifully for Pinterest and blog content

This pattern focuses on simplicity while still offering enough texture and detail to create a visually rich finished piece.

Skill Level and Finished Size

This hedgehog amigurumi pattern is suitable for advanced beginners and intermediate crocheters.

  • Skill level: Beginner–Intermediate
  • Finished size: Approximately 10–12 cm (size may vary depending on yarn and hook)
  • Construction: Separate parts sewn together
  • Style: Soft, textured, and cute

Basic crochet knowledge such as working in the round, increasing, decreasing, and sewing pieces together is recommended.

Materials and Tools

To create this crochet hedgehog, you will need the following materials:

  • Yarn (DK or sport weight recommended)
    • Light beige or cream for the body and head
    • Brown for the hedgehog spikes
    • Green for the leaf
  • Crochet hook: 2.0 mm – 2.5 mm
  • Fiberfill stuffing
  • Yarn needle
  • Scissors
  • Black yarn or embroidery thread for the nose
  • Optional: safety eyes or embroidered eyes

Using cotton yarn will give a clean stitch definition, while acrylic yarn will result in a softer finish.

Crochet Techniques Used

The pattern uses basic crochet stitches, with a simple chain technique to create the textured back.

Techniques included:

  • Magic ring
  • Single crochet
  • Increasing and decreasing
  • Working in continuous rounds
  • Chain stitch for texture
  • Sewing crochet pieces together

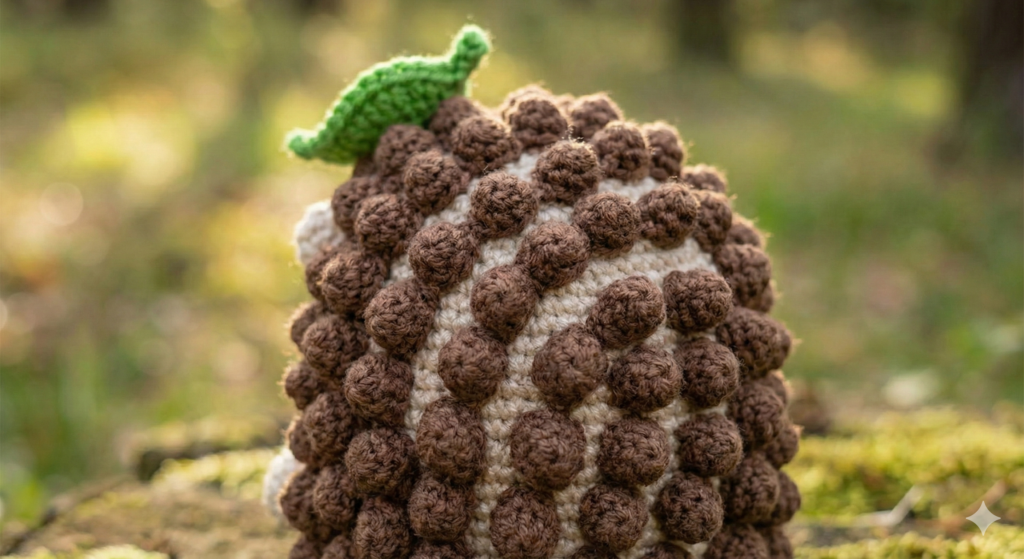
The hedgehog spikes are created separately using chain stitches and sewn onto the body, which gives the toy its distinctive look without complicated stitch work.

Pattern Structure Overview

The crochet hedgehog is made up of the following parts:

  • Body
  • Head
  • Legs
  • Arms
  • Ears
  • Eyes
  • Mouth
  • Leaf detail
  • Spiky back

Each piece is crocheted individually and assembled at the final stage. This construction method allows better control over shaping and makes the pattern easier to follow.
Part 1: Body and Head

Body

Using light beige or cream yarn, work in continuous rounds.

R1: MR, 6 sc. (6 sts)

R2: Inc in each stitch around. (12 sts)

R3: (1 sc, inc) × 6. (18 sts)

R4: (2 sc, inc) × 6. (24 sts)

R5: (3 sc, inc) × 6. (30 sts)

R6: (4 sc, inc) × 6. (36 sts)

R7: (5 sc, inc) × 6. (42 sts)

R8: (6 sc, inc) × 6. (48 sts)

R9–R15: Sc in each stitch around. (48 sts per round)

Begin stuffing the body gradually. Add enough fiberfill to create a firm but softly rounded shape.

R16: (6 sc, dec) × 6. (42 sts)

R17: (5 sc, dec) × 6. (36 sts)

R18: (4 sc, dec) × 6. (30 sts)

R19: (3 sc, dec) × 6. (24 sts)

Add a little more stuffing if needed.

R20: (2 sc, dec) × 6. (18 sts)

R21: (1 sc, dec) × 6. (12 sts)

Fasten off, leaving a long tail for sewing.

Head

Using light beige or cream yarn, work in continuous rounds.

R1: MR, 6 sc. (6 sts)

R2: Inc around. (12 sts)

R3: (1 sc, inc) × 6. (18 sts)

R4: (2 sc, inc) × 6. (24 sts)

R5–R7: Sc in each stitch around. (24 sts per round)

R8: (2 sc, dec) × 6. (18 sts)

R9: (1 sc, dec) × 6. (12 sts)

R10: Sc in each stitch around. (12 sts)

R11: (2 sc, dec) × 3. (9 sts)

R12: Sc in each stitch around. (9 sts)

Lightly stuff the head, keeping the front slightly narrower to create the hedgehog’s pointed snout.

R13: (1 sc, dec) × 3. (6 sts)

Fasten off, leaving a long yarn tail.

Close the remaining opening with a yarn needle and weave in the end securely.

Joining the Head and Body

Position the head slightly forward on the front of the body.

Pin the head in place before sewing so you can check the angle and overall shape.

Using the yarn tail and a tapestry needle, sew the head securely to the body with small, even stitches.

The head should sit slightly forward rather than directly on top of the body to emphasize the hedgehog’s pointed snout.

Part 2: Legs

Legs

Make 4 using light beige or cream yarn.

Work in continuous rounds.

R1: MR, 6 sc. (6 sts)

R2: (1 sc, inc) × 3. (9 sts)

R3–R5: Sc in each stitch around. (9 sts per round)

Lightly stuff each leg.

R6: (1 sc, dec) × 3. (6 sts)

Fasten off, leaving a long yarn tail for sewing.

Do not close the opening completely if you prefer to flatten the bottom slightly before attaching the legs to the body.

Make 4 identical legs.

Attaching the Legs

Position two legs toward the front underside of the body and two toward the back underside.

Pin the legs in place first and check that the hedgehog sits evenly.

Sew each leg securely to the body using the yarn tails. Weave in the ends inside the body.

Part 3: Arms

Make 2 using light beige or cream yarn.

Work in continuous rounds.

R1: MR, 6 sc. (6 sts)

R2–R5: Sc in each stitch around. (6 sts per round)

Lightly stuff the lower part of each arm.

R6: Dec around. (3 sts)

Fasten off, leaving a long yarn tail for sewing.

Make 2 identical arms.

Attaching the Arms

Position the arms on the sides of the body, slightly below the head.

Pin them in place first to check that they are positioned evenly.

Sew each arm securely to the body using the yarn tails.

Weave in and hide the remaining ends inside the body.

Part 4: Ears

Make 2 using light beige or cream yarn.

R1: MR, 6 sc. (6 sts)

R2: (1 sc, inc) × 3. (9 sts)

R3: Sc in each stitch around. (9 sts)

Fasten off, leaving a long yarn tail for sewing.

Fold each ear gently in half to create a slightly curved shape.

Attaching the Ears

Position the ears on both sides of the head, slightly above the widest part of the head.

Pin them in place first and check that they are symmetrical.

Sew each ear securely to the head using the yarn tails.

Weave in and hide the remaining ends inside the head.

Part 5: Eyes

The eyes can be made with small safety eyes or embroidered with black yarn.

Safety Eyes

If using safety eyes, position them on the front of the head, slightly above the widest part of the snout.

Check the placement from the front and side before securing the backs.

Make sure the eyes are positioned evenly on both sides of the face.

Embroidered Eyes

For an embroidered version, use black embroidery thread or a small amount of black yarn.

Make a few small stitches to create each eye.

Keep the eyes small and evenly spaced for a simple, friendly expression.

Secure the yarn at the back of the head and weave in the ends.

Safety Note: Safety eyes are not recommended for babies or young children because they can become a choking hazard if detached. Use embroidered eyes instead for baby-safe versions.

Part 6: Mouth & Nose

Use black yarn or embroidery thread.

Nose

Thread a tapestry needle with black yarn.

Position the nose at the pointed end of the hedgehog’s snout.

Make several small stitches in the same area to create a small, rounded triangular nose.

Secure the yarn at the back of the head and weave in the remaining end.

Mouth

Using the same black yarn, embroider a small curved line directly below the nose.

Keep the stitches small and even to create a simple, friendly expression.

Secure and hide the yarn ends inside the head.

💡 Tip: Before embroidering the nose and mouth permanently, mark their positions with pins or a small removable stitch. This makes it easier to adjust the expression.

Part 7: Leaf Detail

Using green yarn, crochet a small leaf to place on top of the hedgehog’s head.

R1: Ch 6.

Starting in the second chain from the hook:

1 sl st, 1 sc, 1 hdc, 1 dc, 1 hdc.

Continue along the opposite side of the foundation chain:

1 sc, 1 sl st.

Fasten off, leaving a long yarn tail for sewing.

Attaching the Leaf

Place the leaf on top of the hedgehog’s head, slightly to one side.

Use the yarn tail and a tapestry needle to sew the center of the leaf securely to the head.

You can gently shape the leaf with your fingers to give it a natural curved appearance.

Weave in and hide the remaining yarn end inside the head.

💡 Tip: You can make the leaf slightly larger or smaller by changing the length of the starting chain.

 Part 8: Spiky Back

Using brown yarn, create the hedgehog’s textured back with a simple chain-based technique.

Making the Spiky Strip

Work one long foundation chain with brown yarn. The length will depend on the size of your hedgehog and the area you want to cover.

For each spike:

  1. Chain 4.
  2. Slip stitch back into the same base point to form a small pointed loop.
  3. Move to the next point along the foundation chain.
  4. Repeat the process to create a row of small spikes.

Continue until you have enough spikes to cover the back of the body.

Attaching the Spiky Strip

Place the finished spiky strip along the back of the hedgehog, starting near the lower back and continuing upward toward the top of the body.

Use a tapestry needle and brown yarn to sew the strip securely to the body.

Keep the spikes concentrated on the back half of the hedgehog and leave the cream-colored head and underside free of spikes.

After sewing, gently separate the spikes with your fingers so they spread naturally across the back.

💡 Tip: Make the chain slightly longer if you want a fuller spiky back, or shorter for a simpler look. Before sewing, place the strip against the body to check the length and position.

Assembly

Once all the crocheted pieces are finished, it is time to bring your hedgehog together.

1. Attach the Head

Position the head slightly forward on the body, as described in the Body and Head section.

Pin it in place first and check the shape from the front and side.

Sew the head securely to the body with small, even stitches.

2. Attach the Legs

Position the four legs evenly underneath the body.

Place two legs toward the front and two toward the back so the hedgehog can sit securely.

Sew each leg firmly to the body and weave in the yarn ends.

3. Attach the Arms

Position the two arms on the sides of the body, slightly below the head.

Sew them securely and hide the yarn ends inside the body.

4. Attach the Ears

Sew the two ears to the sides of the head.

Check their position from the front before securing them permanently.

5. Add the Eyes, Nose, and Mouth

Attach the safety eyes or embroider the eyes first.

Then embroider the nose at the tip of the snout and add the small curved mouth underneath.

6. Attach the Leaf

Place the green leaf slightly to one side on top of the head.

Sew it securely and gently shape it with your fingers.

7. Attach the Spiky Back

Place the brown spiky strip over the back of the body.

Adjust the position so the spikes cover the back without extending onto the face or underside.

Sew the strip securely and arrange the spikes with your fingers.

Final Check

Check all sewn pieces carefully and make sure there are no loose yarn ends.

Give the finished hedgehog a gentle squeeze to make sure the stuffing is evenly distributed and all attached pieces are secure.

Your cute hedgehog amigurumi is now complete! 🦔💚

Assembly Tips for Best Results

Take your time when positioning and sewing each piece. Checking the placement before sewing permanently will help you achieve a balanced and polished finished hedgehog.

Make sure all pieces are securely attached and all yarn ends are woven in and hidden.

Customization Ideas

I love how easy it is to give this little hedgehog your own personal touch.

You can customize this hedgehog by:

  • Changing yarn colors for autumn or forest themes
  • Making a mini version using thinner yarn
  • Turning it into a keychain by adding a loop
  • Embroidering rosy cheeks for extra cuteness
  • Using embroidered eyes for baby-safe versions

Small changes can give each hedgehog a unique personality.

Usage and Safety Guidelines

  • If safety eyes are used, the toy is not suitable for children under 3 years old
  • For baby gifts, always use embroidered facial features
  • Secure all yarn ends tightly
  • Handmade toys should be used for decorative or gentle play purposes

Following these guidelines will ensure a safe and durable finished item.

Frequently Asked Questions

Is this hedgehog amigurumi suitable for beginners?

Yes. The stitches are basic, and the construction is straightforward. The spike section requires patience but no advanced skills.

Can I sell finished hedgehogs made from this pattern?

You may sell finished handmade items. Please credit AmyLiva Handmade or link back to amyliva.com as the pattern source.

Can I use different yarn types?

Yes. Cotton, acrylic, or blended yarns all work well. The texture and size may vary slightly.

Does this pattern include photos or diagrams?

The written pattern provides step-by-step instructions for each part. Additional photos may be included in the blog post to help you understand the construction and assembly.

✨ About AmyLiva Handmade Welcome to AmyLiva Handmade — a cozy corner where cuteness meets creativity! We specialize in easy, beginner-friendly amigurumi patterns that bring joy to makers of all ages. Whether you’re just starting your crochet journey or looking for your next adorable project, you’ll find plenty of free patterns, step-by-step tutorials, and inspiration right here. 💖 Why AmyLiva? • Simple & clear instructions • Whimsical designs that spark smiles • 100% free patterns for everyone Join our creative community and start stitching tiny treasures today! 🔗 Explore more at: amyliva.com

Yorum gönder