Easy Amigurumi Chick Crochet Pattern – Perfect Spring DIY Gift
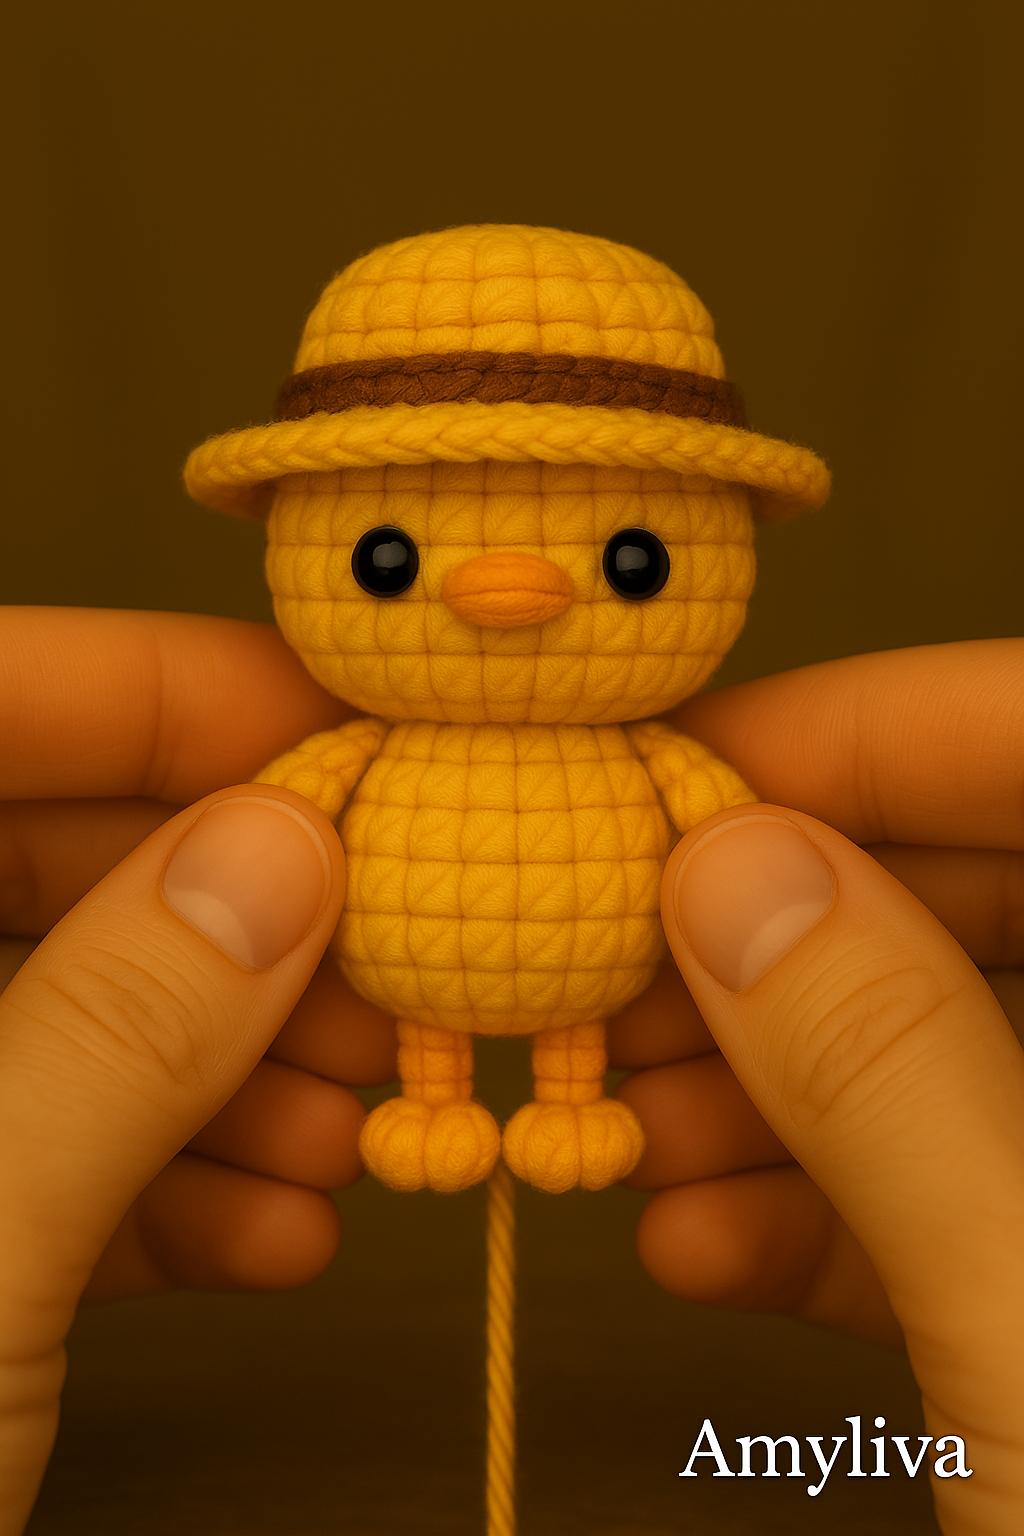
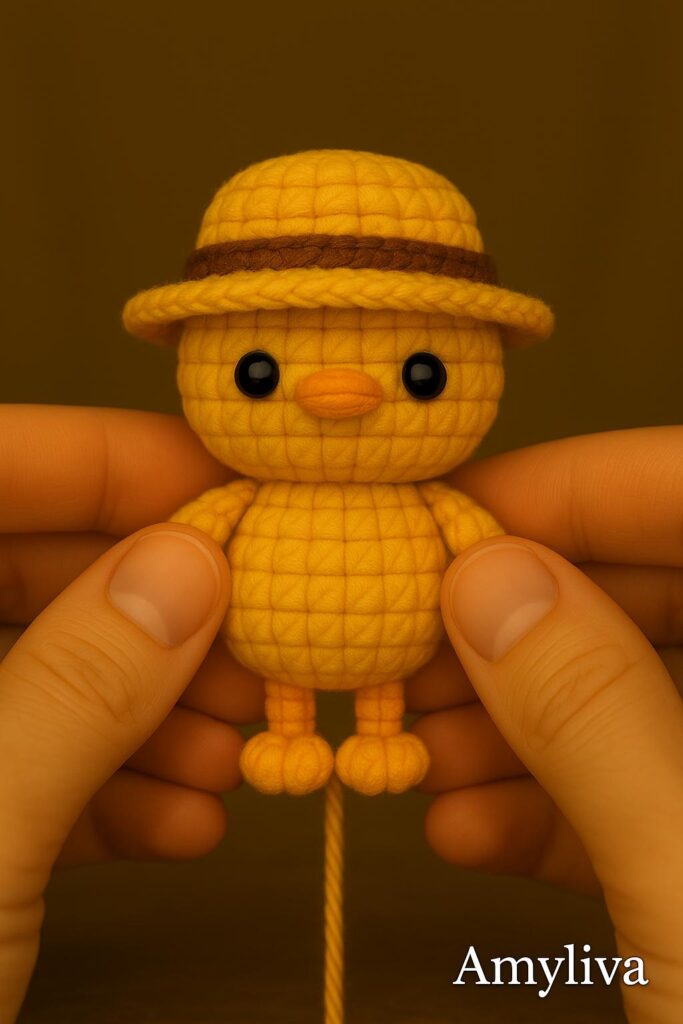
Spring is the season of new beginnings, fresh colors, and adorable handmade crafts. Nothing captures the spirit of spring better than a tiny crochet chick—cute, cheerful, and beginner-friendly! Whether you want to surprise someone with a thoughtful Easter gift, decorate your home with handmade charm, or simply practice your amigurumi skills, this easy amigurumi chick crochet pattern is the perfect choice.
In this guide, we’ll go through the materials you need, step-by-step instructions, tips for beginners, and creative ways to use your finished chick.
Why Crochet a Chick for Spring?
Amigurumi, the Japanese art of crocheting small stuffed toys, has taken the crafting world by storm. Crocheted animals and figures are not only cute but also hold sentimental value.
Here’s why this chick pattern makes such a great project:
- Beginner-friendly: Uses only basic stitches (single crochet, increase, decrease).
- Quick to finish: You can make one in just a couple of hours.
- Versatile gift: Perfect for Easter baskets, spring parties, or as nursery decor.
- Scrap-buster project: Great way to use leftover yellow and orange yarn.
Materials You’ll Need:
Before you begin, gather these supplies:
- Yarn:
- Yellow (main body)
- Orange (beak and feet)
- Small amount of white or pink (optional for cheeks)
- Crochet Hook: Size 2.5 mm – 3.5 mm (depending on your yarn thickness).
- Stuffing: Polyester fiberfill or cotton stuffing.
- Safety Eyes or Embroidery Thread:
- 6 mm safety eyes for a polished look.
- Black embroidery thread for a baby-safe option.
- Tapestry Needle: For sewing parts together.
- Stitch Marker: To keep track of rounds.
- Scissors
👉 Tip: Always choose cotton or baby-friendly yarn if making toys for children.
Abbreviations (US Terms)
- MR = Magic Ring
- SC = Single Crochet
- INC = Increase (2 SC in one stitch)
- DEC = Decrease (SC two stitches together)
- CH = Chain
- SL ST = Slip Stitch
Step-by-Step Crochet Instructions:
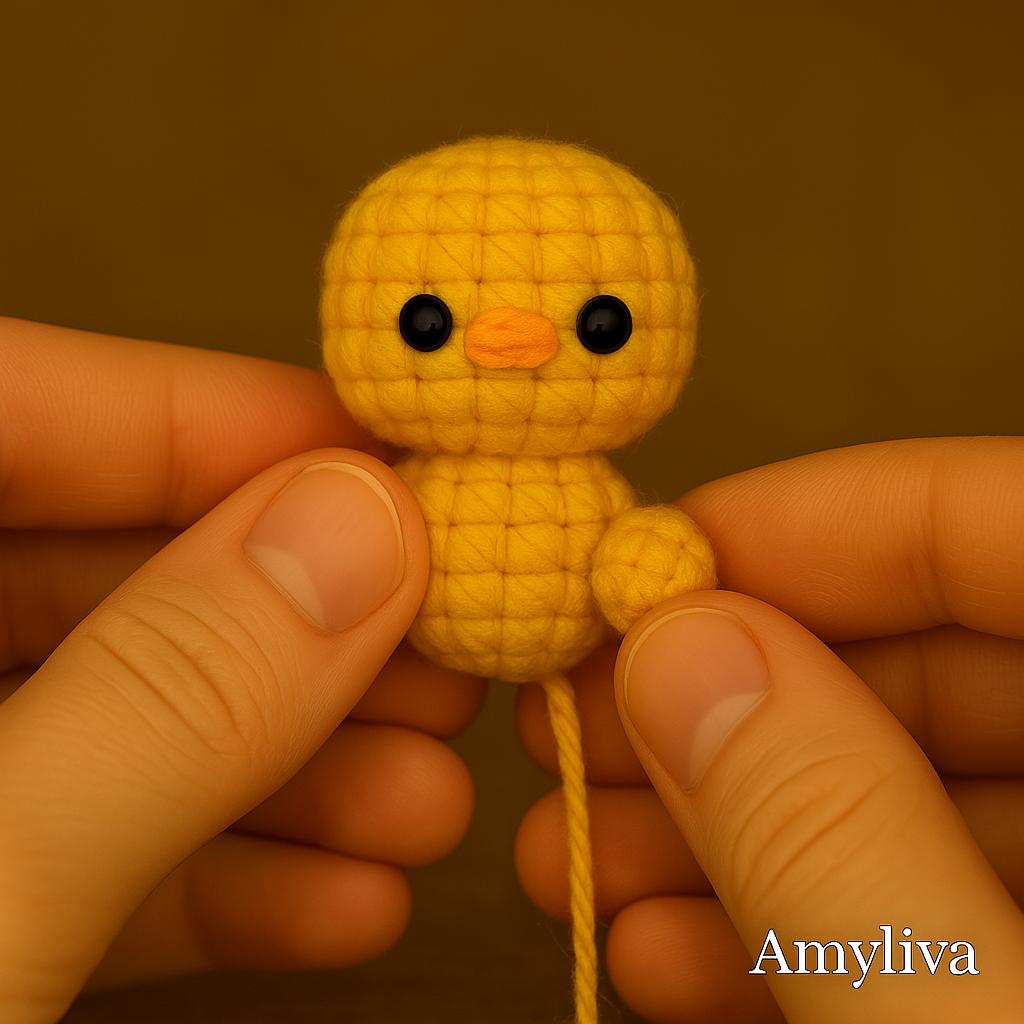
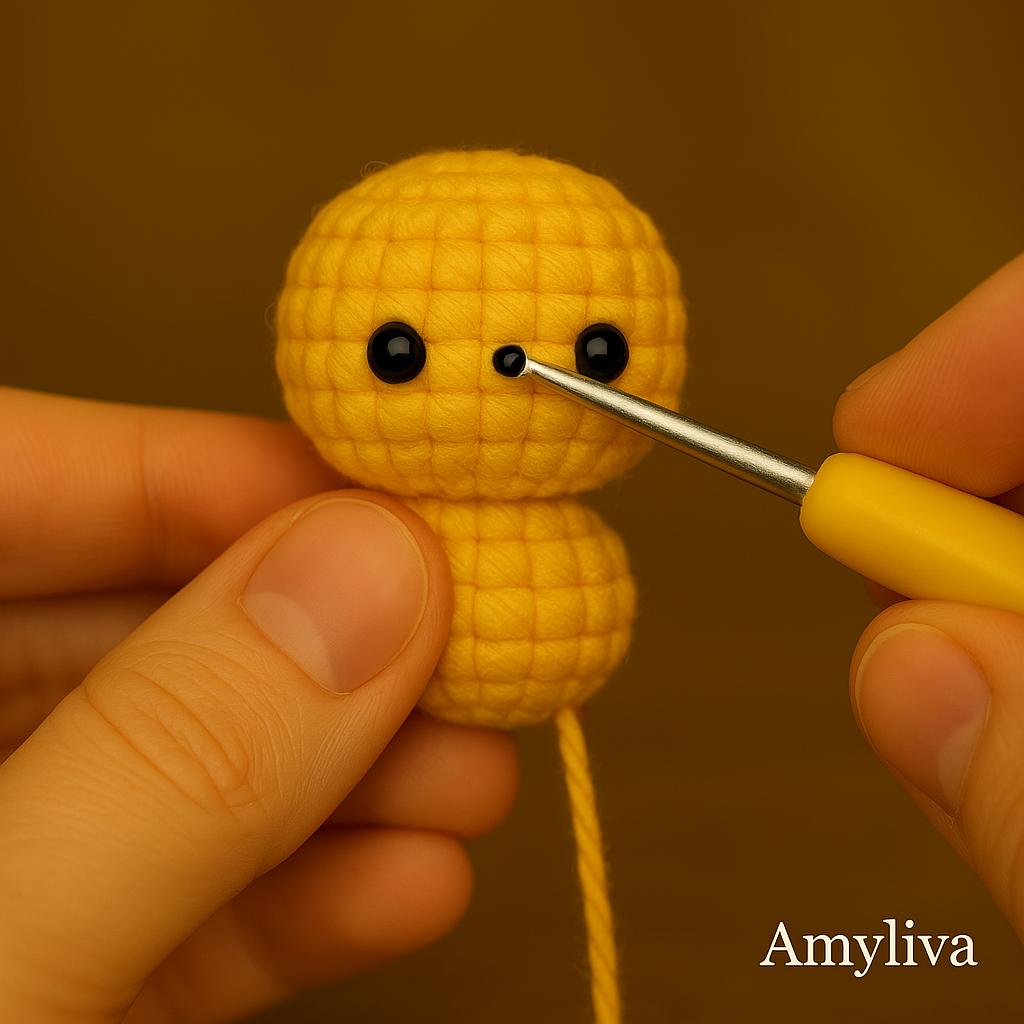
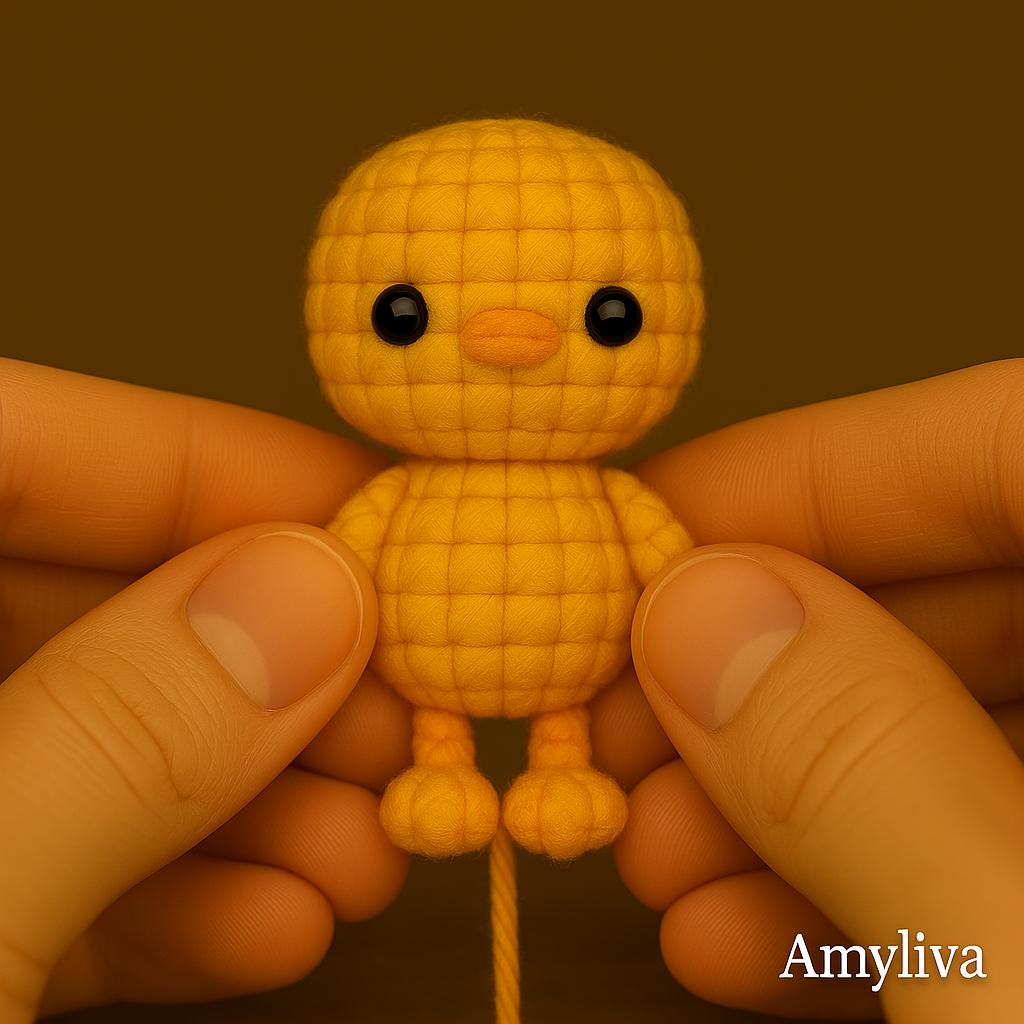
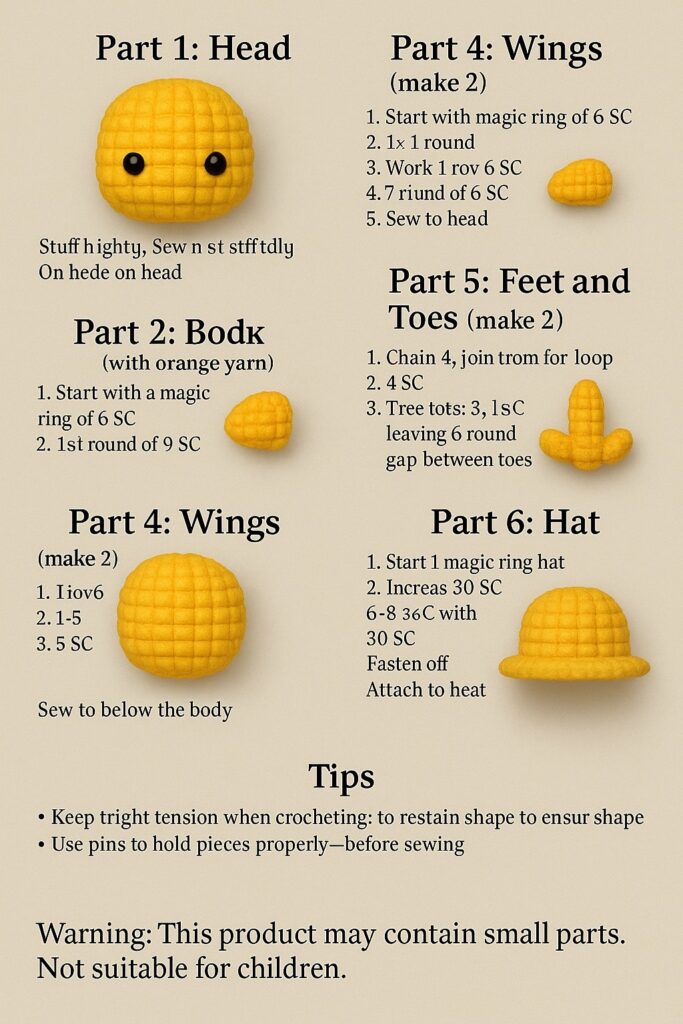
1. Chick’s Head & Body (worked in one piece)

- MR, 6 SC into the ring. (6)
- INC around. (12)
- [1 SC, INC] repeat 6 times. (18)
- [2 SC, INC] repeat 6 times. (24)
- [3 SC, INC] repeat 6 times. (30)
6–12. SC around. (30) - [3 SC, DEC] repeat 6 times. (24)
- [2 SC, DEC] repeat 6 times. (18)
👉 Insert safety eyes between rounds 7 and 8, about 6 stitches apart. - [1 SC, DEC] repeat 6 times. (12)
- DEC around. (6)
Stuff firmly before closing. Fasten off and weave in ends.
2. Beak (Orange Yarn)
- MR, 4 SC into the ring. (4)
- SC around. (4)
Fasten off, leaving a tail for sewing. - 3. Wings (Make 2)
- MR, 6 SC into the ring. (6)
- [INC, SC] repeat 3 times. (9)
- SC around. (9)
Fasten off, leave a tail for sewing.
4. Feet (Make 2, Orange Yarn)
- CH 4, SL ST in second CH from hook, SC in next CH, SL ST in last CH.
- CH 4 again, repeat the same process to form tiny toes.
Fasten off.
5. Assembly
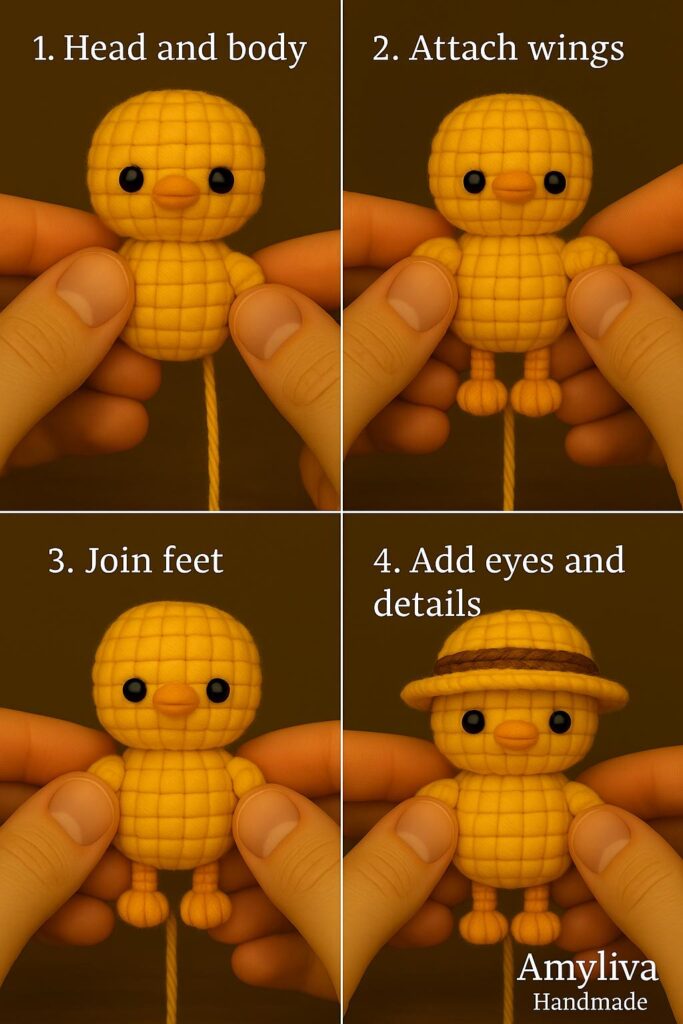
- Sew the beak between the eyes.
- Attach wings to the sides of the body.
- Sew the feet at the bottom.
- Optional: Embroider small blush spots or use pink felt circles.
Congratulations! Your chick is ready to brighten up your spring.
Creative Ideas for Using Your Crochet Chick
- Easter Basket Fillers – Add a few crochet chicks to candy baskets for a handmade touch.
- Spring Home Decor – Place chicks in glass jars, wreaths, or on shelves.
- Keychains & Bag Charms – Add a keyring to turn it into a cute accessory.
- Nursery Toys – Make a set of chicks in pastel colors for a soft and playful look.
- Party Favors – Perfect giveaway for spring-themed baby showers or kids’ parties.
Tips for Beginners
- Always use a stitch marker when working in rounds—it prevents mistakes.
- Stuff the chick gradually while crocheting to avoid gaps.
- If your stitches are too loose, switch to a smaller hook.
- Don’t be afraid to experiment with yarn colors (white chicks, pastel blue, or even rainbow!).
How to Care for Your Amigurumi Chick
- Washing: Hand wash in cold water with mild soap.
- Drying: Air dry flat, never use a dryer.
- Repairs: If stuffing comes out, open the seam slightly, add more filling, and re-sew.
Frequently Asked Questions (FAQ)
Q: How long does it take to make this chick?
A: About 2–3 hours for beginners, faster for experienced crocheters.
Q: Can I make this without safety eyes?
A: Yes! Embroider the eyes with black yarn for a baby-safe version.
Q: What size will the chick be?
A: With DK yarn and a 3 mm hook, about 7–8 cm tall.
Q: Can I sell the finished chicks?
A: Absolutely! Handmade chicks are very popular in online shops and spring markets.
Conclusion – A Little Chick with a Lot of Charm
This easy amigurumi chick crochet pattern is the perfect project for beginners and experienced crocheters alike. With simple stitches and quick assembly, you can create a collection of cute chicks in no time. They make thoughtful handmade gifts, cheerful decorations, and delightful toys.
So grab your hook, some yellow yarn, and let spring bloom in your hands—one stitch at a time!
💛 Share your creations on social media with #AmyLivaHandmade and inspire other crafters around the world.
✨ Follow AmyLiva Handmade:
📌 Pinterest: pinterest.com/amyliva
📺 YouTube: youtube.com/@AmyLivaHandmade
📸 Instagram: instagram.com/amylivahandmade
💗 Share your creations with the hashtag #AmyLivaHandmade and inspire others!
Amy Liva

Yorum gönder