Free Sleepy Owl Amigurumi Crochet Pattern (Step-by-Step Tutorial)
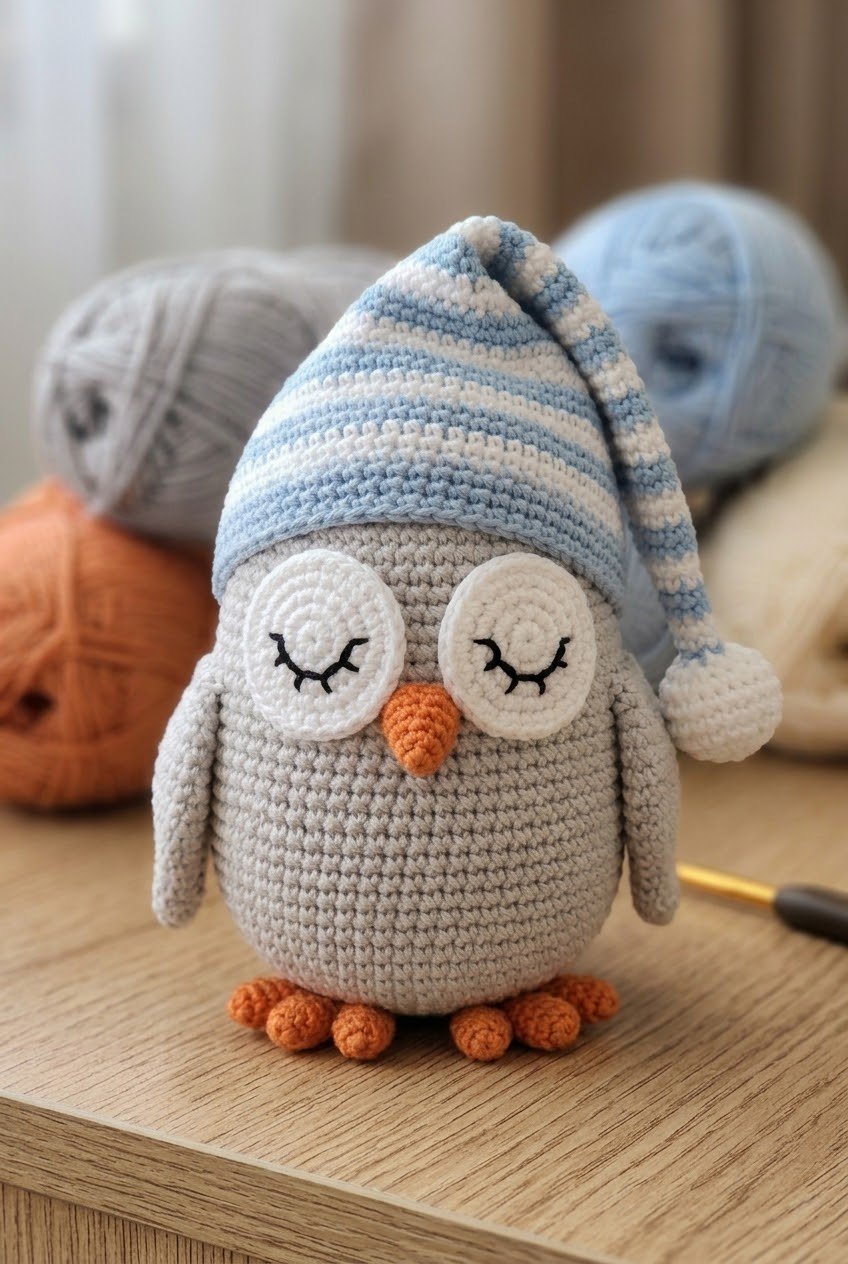
There is something charming about sleepy owl designs. With their round shape, tiny feet and peaceful expression, they are a favorite choice for cozy amigurumi projects.
This sleepy owl was designed as a relaxing crochet project that does not require complicated shaping or advanced stitches. The embroidered closed eyes and oversized nightcap give it a gentle bedtime personality while keeping the design beginner friendly.
The finished owl can be used as nursery decor, a handmade gift, or simply a cute addition to your amigurumi collection. You can also experiment with different color combinations to create your own unique sleepy owl.
Because the pattern is worked with basic amigurumi stitches, it is also a good project for crocheters who want to practice shaping, stuffing and simple assembly techniques without working on a large or complicated design.
Make bedtime a little sweeter with this adorable Sleepy Owl Amigurumi. With its soft rounded body, sleepy embroidered eyes, tiny beak and feet, and a slightly oversized nightcap, this little owl is full of cozy bedtime charm.
The pattern uses basic amigurumi techniques and simple stitches, so it is a relaxing project for crocheters who already know the basics of working in single crochet. The finished owl also makes a lovely handmade gift for children, nursery decor, or a cute addition to your crochet collection.
You can keep the nightcap striped as shown in the color suggestions below, or make it in one solid color to match your own style.
Skill Level
Easy to Intermediate
This pattern uses basic amigurumi techniques such as single crochet, increases, decreases, working in continuous rounds and simple sewing. It is suitable for crocheters who are already comfortable with the basics and would like a relaxing project with minimal shaping.
Materials & Tools
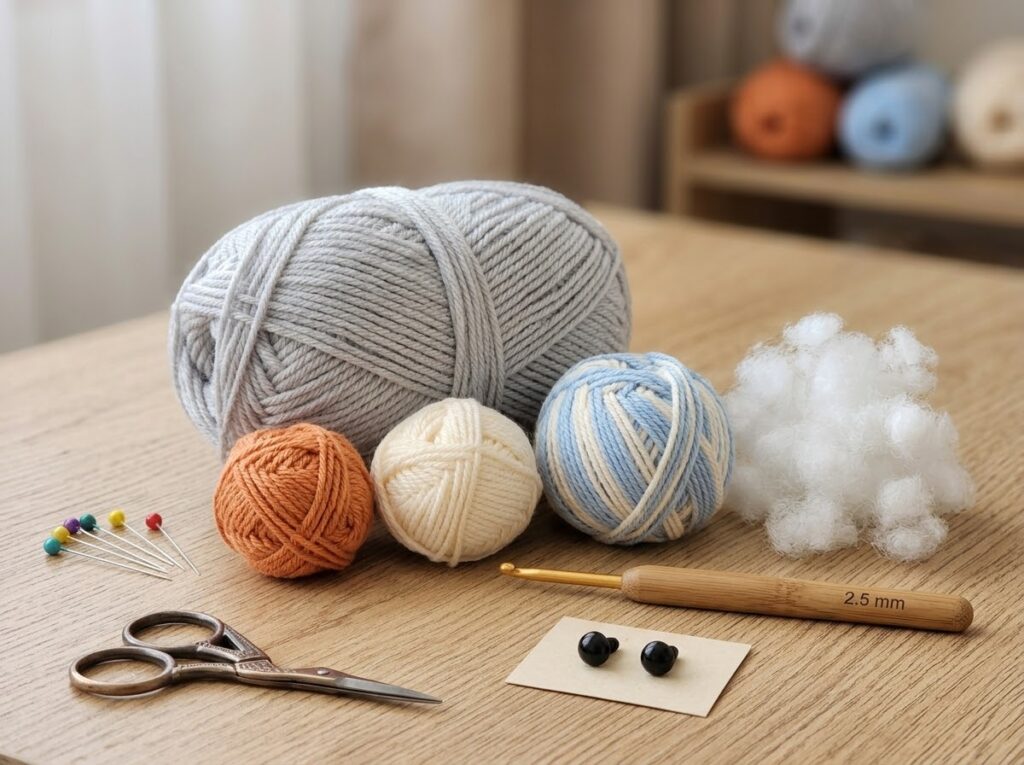
- Sport or DK weight yarn
- Light gray – body and wings
- White or cream – eye patches
- Orange or mustard – beak and feet
- Baby blue – nightcap
- Cream – nightcap stripes and pom-pom
- Small amount of black embroidery thread – sleepy eyelashes
- 2.5 mm crochet hook, or a hook size that gives you a firm fabric
- Polyester fiberfill
- Tapestry needle
- Stitch marker
- Scissors
Optional
- 8–10 mm safety eyes, if you prefer open eyes instead of embroidered sleepy eyes
- Pins for positioning the pieces before sewing
Tip: For amigurumi, your stitches should be tight enough that the stuffing cannot easily be seen through the fabric. If your stitches are loose, try going down by 0.5 mm.
Abbreviations
US crochet terms are used throughout the pattern.
- MR – Magic Ring
- sc – Single Crochet
- inc – Increase (2 sc in the same stitch)
- dec – Decrease (invisible single crochet decrease)
- ch – Chain
- sl st – Slip Stitch
- st(s) – Stitch(es)
The number in parentheses at the end of each round shows the total stitch count.
- Body
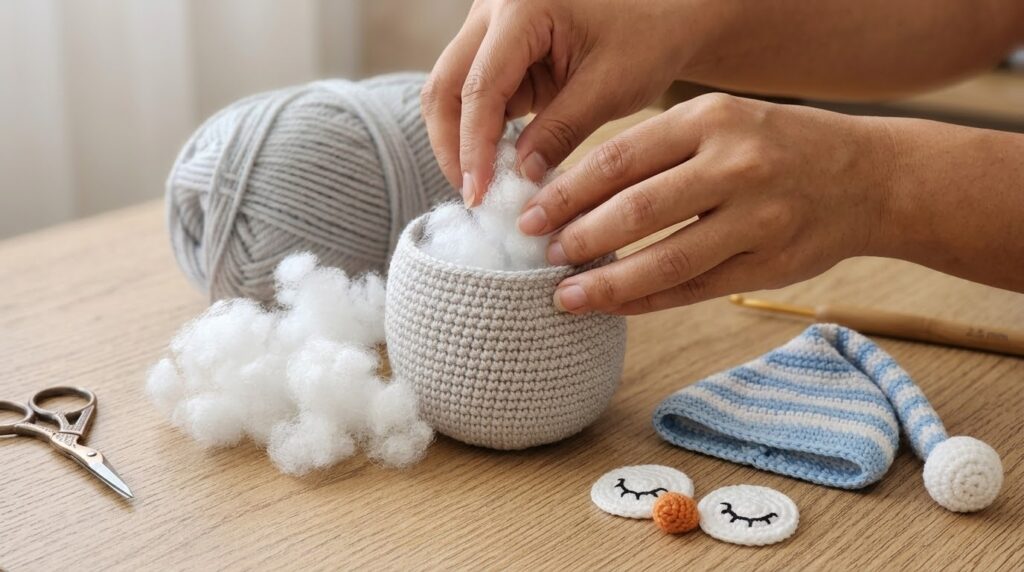
Main color: Light Gray
Work in continuous rounds unless otherwise stated. Use a stitch marker to keep track of the beginning of each round.
R1: 8 sc in MR (8)
R2: 8 inc (16)
R3: [1 sc, 1 inc] × 8 (24)
R4: [3 sc, 1 inc] × 6 (30)
R5–R14: 30 sc (30)
Begin adding fiberfill gradually from around Round 8 onward. Continue stuffing as you work, making sure the body stays firm but not overly hard.
R15: [3 sc, 1 dec] × 6 (24)
R16: [1 sc, 1 dec] × 8 (16)
R17: 8 dec (8)
Fasten off, leaving a short tail. Using a tapestry needle, weave the yarn through the front loops of the remaining 8 stitches. Pull gently to close the opening and secure the yarn inside the body.
Body Tip
Do not wait until the last few rounds to add all the stuffing. Adding small amounts as you go helps prevent empty spaces and gives the owl a smooth, rounded shape.
- Sleepy Nightcap
Baby Blue and Cream
The nightcap is worked from the tip toward the wider opening. You can alternate baby blue and cream every round for a striped look, or simply work the entire cap in one color.
If changing colors, make the color change neatly at the end of the round and carry the unused yarn carefully inside the cap. Avoid pulling the carried yarn too tightly, as this can make the hat narrow.
R1: 4 sc in MR (4)
R2: [1 sc, 1 inc] × 2 (6)
R3: 6 sc (6)
R4: [2 sc, 1 inc] × 2 (8)
R5: 8 sc (8)
R6: [3 sc, 1 inc] × 2 (10)
R7: 10 sc (10)
R8: [4 sc, 1 inc] × 2 (12)
R9–R10: 12 sc (12)
R11: [5 sc, 1 inc] × 2 (14)
R12: 14 sc (14)
R13: [6 sc, 1 inc] × 2 (16)
R14: 16 sc (16)
R15: [3 sc, 1 inc] × 4 (20)
R16: 20 sc (20)
R17: [4 sc, 1 inc] × 4 (24)
R18: 24 sc (24)
R19: [5 sc, 1 inc] × 4 (28)
R20: 28 sc (28)
R21: [6 sc, 1 inc] × 4 (32)
R22: 32 sc (32)
R23: [7 sc, 1 inc] × 4 (36)
R24–R28: 36 sc (36)
Fasten off and leave a long tail for sewing.
Shaping the Nightcap
The hat is intentionally longer and slightly floppy so it can be tilted to one side. Before sewing it to the owl, place it over the body and adjust the position until you like the shape.
You can leave the tip naturally floppy or gently bend it to one side for a more sleepy, playful appearance.
- Eye Patches
White Yarn – Make 2
Work in continuous rounds.
R1: 8 sc in MR (8)
R2: 8 inc (16)
R3: [1 sc, 1 inc] × 8 (24)
Fasten off, leaving a long enough tail for sewing.
Repeat for the second eye patch.
Sleepy Eyes
Using black embroidery thread, embroider a curved closed eyelid across each white eye patch.
For a soft sleepy expression, keep the eyelid slightly curved rather than making it completely straight. Add two or three tiny stitches at the outer edge if you want the appearance of eyelashes.
Take your time with the eye placement because even a small difference in height can change the owl’s expression.
- Beak
Orange Yarn
R1: 4 sc in MR (4)
R2: [1 sc, 1 inc] × 2 (6)
R3: 6 sc (6)
Fasten off, leaving a sewing tail.
Lightly shape the piece with your fingers before attaching it. Sew the beak securely in the center, between the two eye patches.
- Wings
Light Gray – Make 2
R1: 8 sc in MR (8)
R2: 8 inc (16)
R3: 16 sc (16)
Fasten off and leave a long tail for sewing.
Do not overstuff the wings. They should remain relatively flat so they sit naturally against the sides of the body.
- Hat Pom-Pom
Cream Yarn
R1: 6 sc in MR (6)
R2: [1 sc, 1 inc] × 3 (9)
R3: 9 sc (9)
Add only a small pinch of stuffing.
R4: [1 sc, 1 dec] × 3 (6)
Fasten off, leaving a long tail.
Use the remaining yarn to close the opening and attach the pom-pom securely to the tip of the nightcap.
- Feet
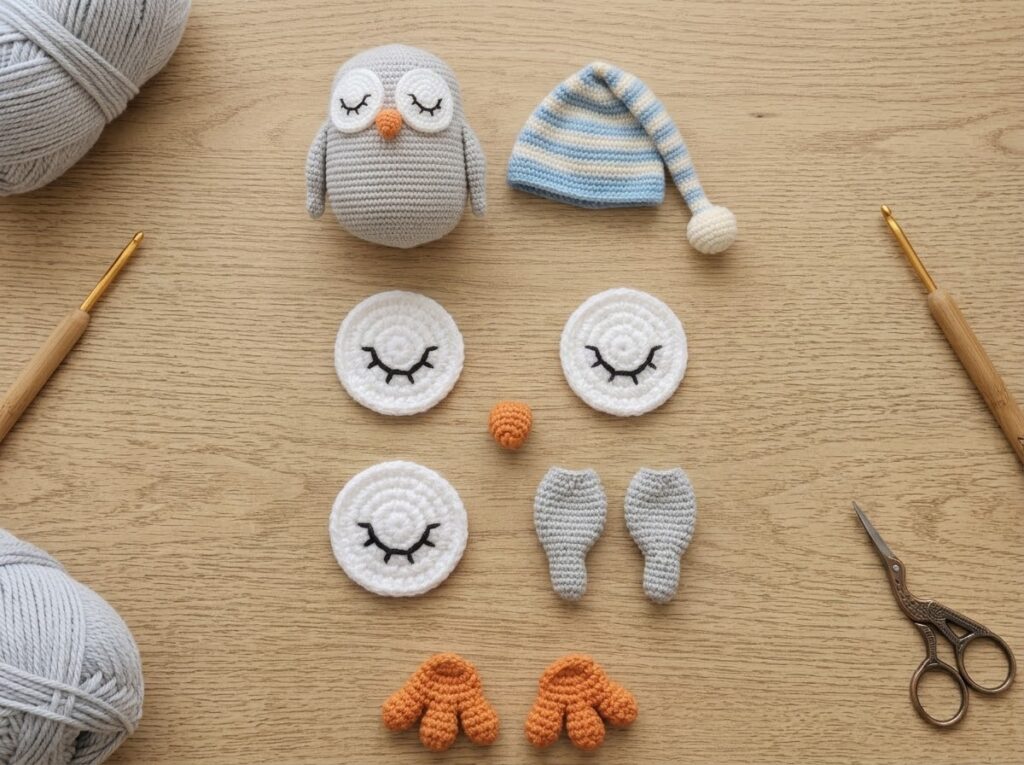
Orange Yarn – Make 2
Begin with a magic ring.
Work 8 sc into the MR.
Now create three small toes:
Toe 1: Ch 3, sl st into the first stitch.
Toe 2: Sl st into the next stitch, ch 3, sl st into the same stitch.
Toe 3: Sl st into the next stitch, ch 3, sl st into the same stitch.
Fasten off, leaving a long tail for sewing.
Gently arrange the three toes so they point forward before attaching the foot to the body.
Assembly
This is the part where your sleepy owl really starts to come to life. Before sewing anything permanently, use pins to position all the pieces and check the proportions from the front.
Eye Patches
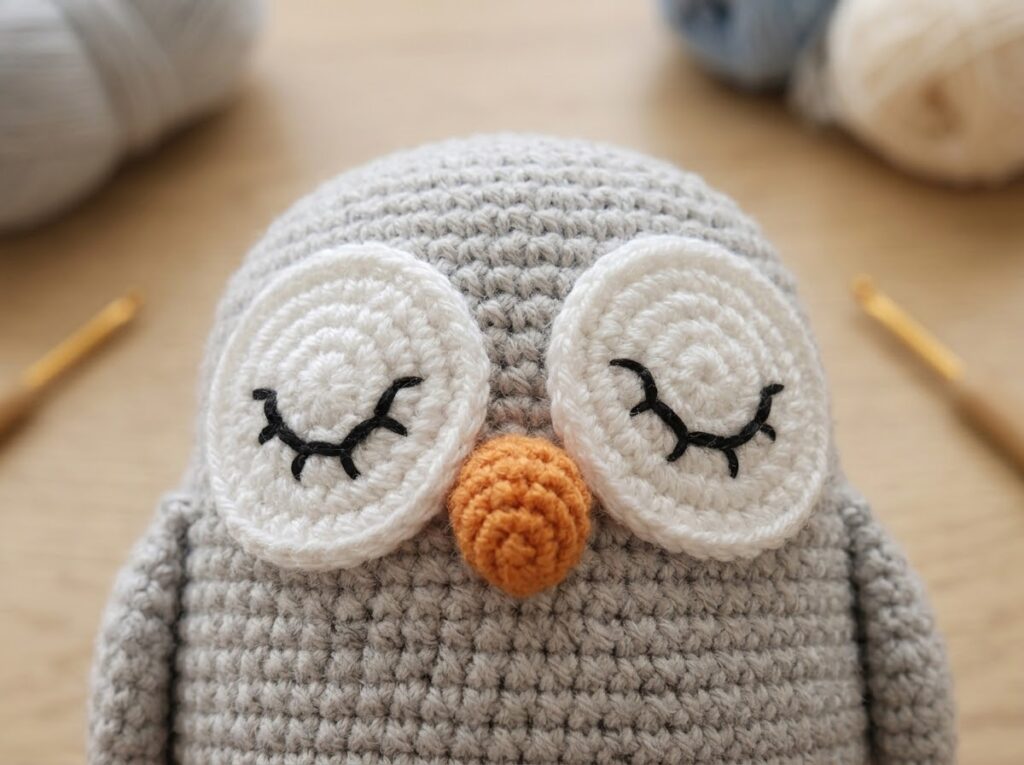
Place the two white eye patches on the front of the body, approximately between Rounds 10 and 13.
Keep about 2 stitches of space between the patches, adjusting slightly if needed so they look symmetrical.
Sew each patch securely around the edge.
Beak
Position the beak in the center, between and slightly below the eye patches.
A placement around Rounds 9–10 works well. Sew it firmly in place.
Wings
Place one wing on each side of the body, approximately between Rounds 10 and 11.
Keep the wings relatively flat against the body. Sew around the outer edge, leaving the upper portion secure enough that the wings do not droop excessively.
Feet
Attach the feet to the lower front of the body around Rounds 3–4.
Make sure the three toes on each foot point forward and that both feet are positioned at a similar height.
Nightcap
Place the nightcap over the top of the owl.
Tilt it slightly to one side for a relaxed bedtime look. The lower edge of the cap should sit comfortably around the upper part of the body.
Once you are happy with the position, sew the lower edge of the cap to the body with small, neat stitches.
Finally, sew the cream pom-pom securely to the tip.
Finishing Touches
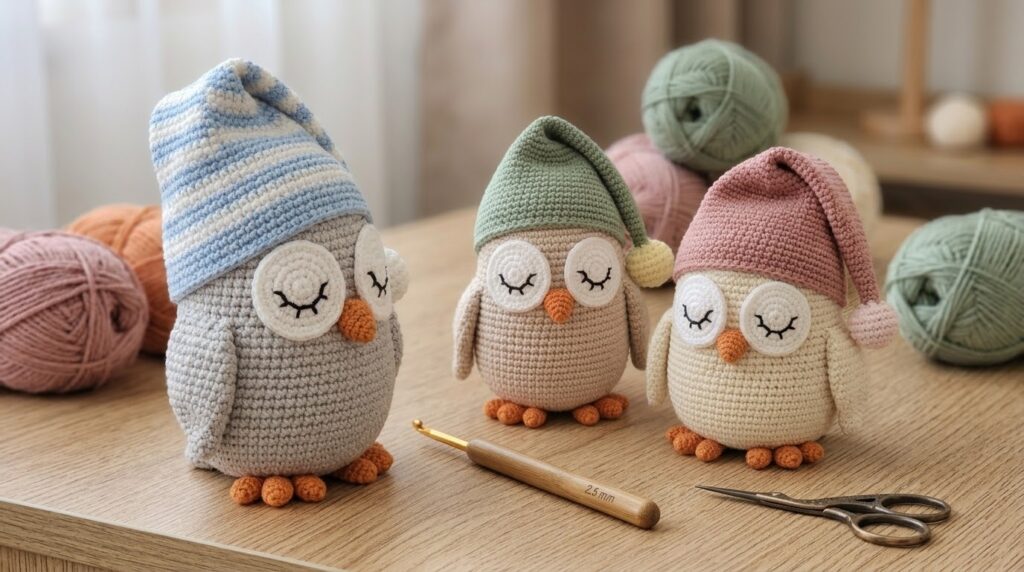
Before cutting any remaining yarn ends, take a moment to check your owl from the front.
- Are the eyes at the same height?
- Is the beak centered?
- Are the wings positioned evenly?
- Are the feet facing forward?
- Is the nightcap sitting at the angle you want?
If something looks slightly uneven, it is much easier to fix it before weaving in all the ends.
Once everything looks right, securely weave in the remaining yarn tails.
Tips for a Neat Amigurumi Finish
Keep your tension consistent
A firm and even tension will give the body a smooth appearance and help prevent stuffing from showing through.
Use invisible decreases
Invisible decreases create a much cleaner surface than regular decreases, especially on the lower part of the body.
Stuff gradually
Adding small amounts of stuffing every few rounds gives you better control over the shape. Pay particular attention to the bottom and sides of the body.
Don’t overstuff the hat
The nightcap is meant to have a soft, floppy appearance. Heavy stuffing can make it stand upright instead of falling naturally to the side.
Pin before sewing
Pins are especially helpful when attaching the eyes, wings and feet. It allows you to check the owl’s proportions before making anything permanent.
Color Ideas
Although the original color combination gives the owl a soft bedtime look, you can easily customize it.
Try:
- Light gray + dusty pink + cream
- White + baby blue + cream
- Beige + sage green + cream
- Brown + mustard + cream
- Lavender + white + pale yellow
You can also make the nightcap in a single color for a simpler design.
Frequently Asked Questions
What yarn is best for this sleepy owl?
Cotton or cotton-blend yarn works especially well because it gives the stitches a clean, defined appearance. Sport or DK weight yarn is a good choice for the proportions of this pattern.
Yarn such as YarnArt Jeans or Alize Cotton Gold can work nicely, provided you adjust your hook size and tension to achieve a firm fabric.
Can I use plush or chenille yarn?
Yes. If you use a thicker plush or chenille yarn, the finished owl will be considerably larger and softer. You will also need to use a larger hook suitable for the yarn and adjust your stuffing accordingly.
Because plush yarn can make individual stitches harder to see, it is helpful to use a stitch marker and count your stitches carefully.
Can I use safety eyes?
Yes, if you prefer an owl with open eyes.
Place 8–10 mm safety eyes in the center area of the white eye patches before sewing the patches onto the body.
For a sleepy owl, however, the embroidered closed eyes give the design its characteristic bedtime expression.
How do I stop the stuffing from showing?
Use a smaller hook and maintain firm tension. A hook that is approximately 0.5–1 mm smaller than the yarn label’s suggested size may work well for amigurumi.
Also make sure you do not overstuff the body, as excessive pressure can force the fiberfill through the stitches.
How long does it take to make?
Most crocheters can complete this project in approximately 2–3 hours, depending on their crochet speed, sewing experience and how much time they spend on the embroidered details.
Can I make the owl larger or smaller?
Yes. Changing the yarn weight and hook size is the easiest way to alter the finished size.
Using thicker yarn and a larger hook will create a larger owl, while thinner yarn and a smaller hook will produce a smaller version. Remember that changing the yarn also changes the amount of stuffing and the proportions of the finished piece.
Can I sell the finished owls?
If you are using this free pattern, check the designer’s stated usage terms before selling finished items. In general, it is a good practice to credit the pattern designer when selling handmade pieces made from a published pattern.
A Little Handmade Magic
There is something especially sweet about making sleepy little creatures by hand. The curved embroidered eyes, floppy nightcap and tiny three-toed feet give this owl plenty of personality without requiring complicated crochet techniques.
Choose your favorite bedtime colors, make the nightcap a little crooked, and give your owl its own sleepy personality. 🦉🌙
Looking for more free amigurumi patterns?Try my Sleepy Pink Bunny Amigurumi, Frog Keychain Pattern, and Cute Seal Crochet Tutorial for more beginner-friendly crochet projects.



Yorum gönder