Free Crochet Ghost Pattern (Easy Halloween Amigurumi Ghost)
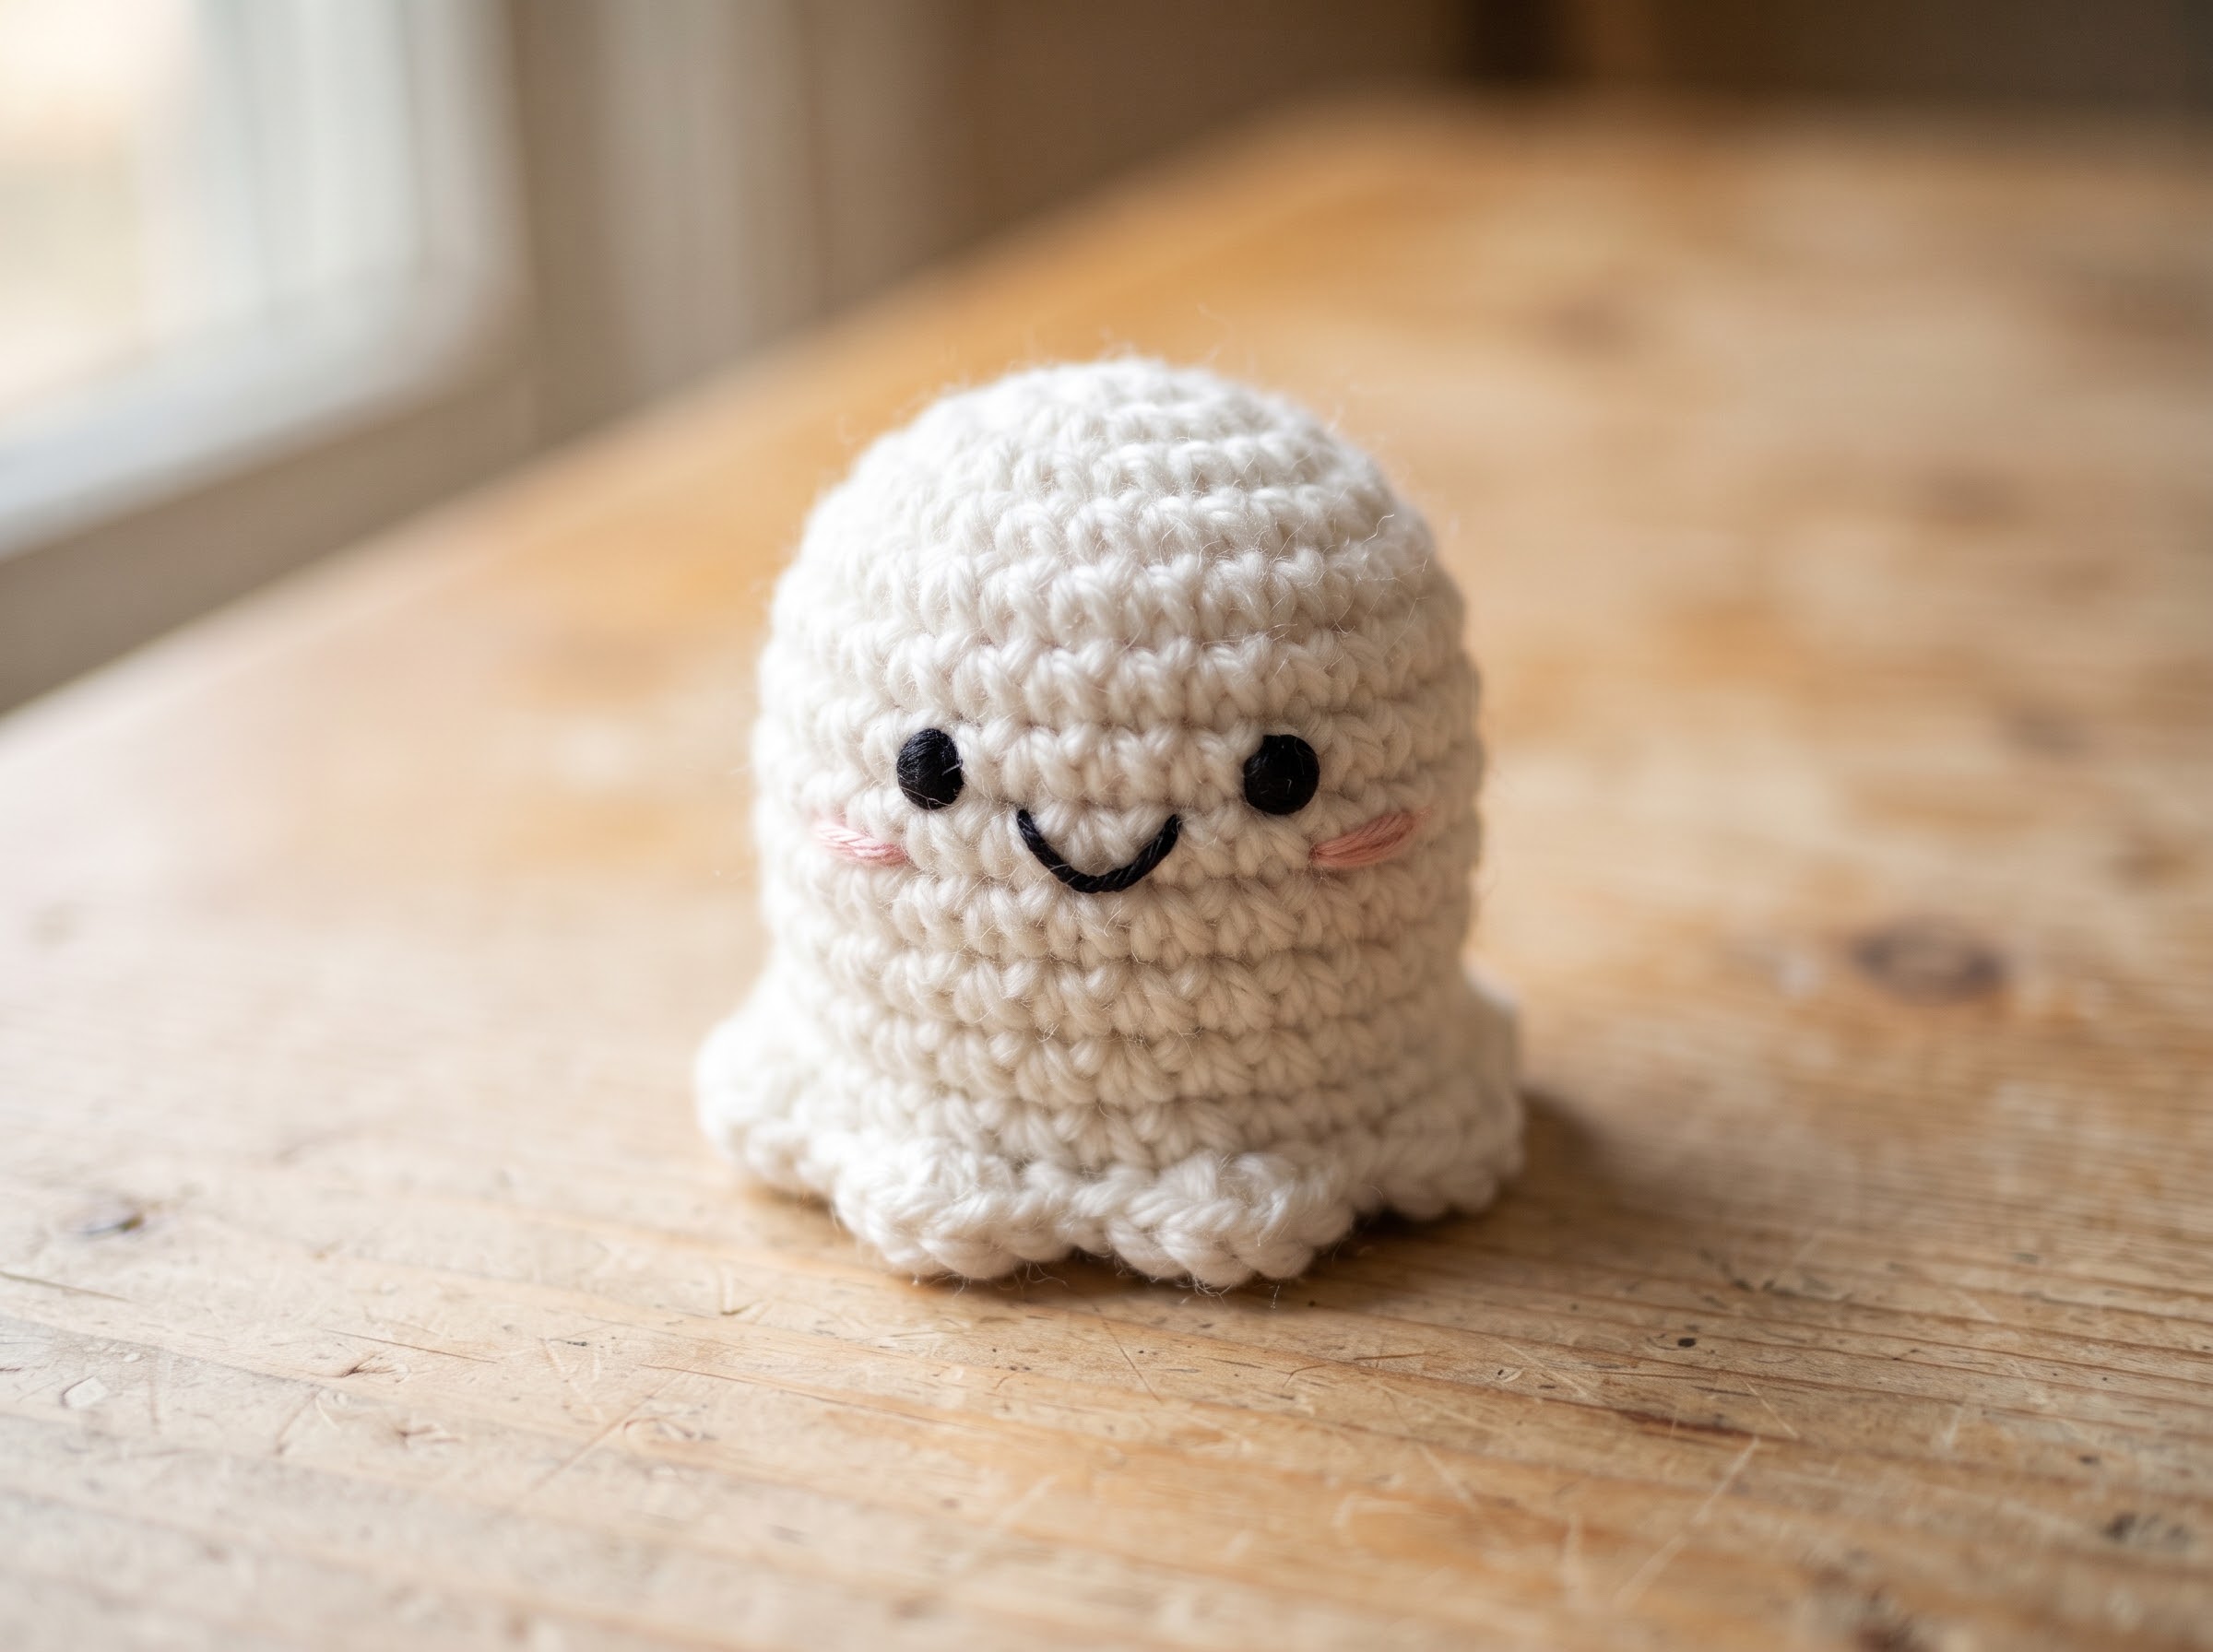
This little crochet ghost is a fun project for Halloween. It has a rounded white body, a wavy scalloped hem, and a simple face that you can customize to suit your style. Make it cheerful with a small smile, give it sleepy eyes, or add a spooky expression for a classic Halloween look.
This free crochet ghost pattern uses basic amigurumi stitches and works from the bottom upward in continuous rounds. The scalloped edge is added at the end, giving the ghost its soft, wavy shape without needing to crochet a separate skirt.
You can use your finished ghost as a Halloween decoration, a small handmade gift, or a seasonal ornament. If you enjoy making small projects, this easy ghost amigurumi is a lovely addition to your collection of crochet Halloween decorations. This beginner-friendly Halloween crochet pattern works up quickly and makes a cute addition to your seasonal décor.
Materials
- White worsted-weight yarn
- Small amount of black yarn or embroidery thread for the eyes and mouth
- A little pink yarn for optional rosy cheeks
- 4 mm crochet hook, or a smaller hook if needed to create firm stitches
- Fiberfill stuffing
- Yarn needle
- Scissors
- Stitch marker
- Two small safety eyes, if preferred
Safety note: Embroidered eyes and facial features are a safer choice for toys intended for babies and young children. Safety eyes can be a choking hazard if they come loose.
Finished Size
The finished size will vary depending on the yarn, hook size, and crochet tension used. Using a different yarn weight or hook may make your ghost larger or smaller.
If you want several ghosts to look similar, use the same yarn, hook, and tension for each one.
Crochet Abbreviations
This pattern uses US crochet terminology.
- MR: Magic ring
- sc: Single crochet
- inc: Increase — work 2 single crochet stitches in the same stitch
- dec: Decrease — combine 2 stitches into 1
- BLO: Back loop only
- FLO: Front loop only
- ch: Chain
- sl st: Slip stitch
- dc: Double crochet
- st/sts: Stitch/stitches
- Rnd: Round
Before You Begin
Work the body in continuous rounds rather than joining each round with a slip stitch. Place a stitch marker in the first stitch of every round so you can keep track of your progress.
Keep your stitches firm and even, but avoid pulling the yarn so tightly that the hook becomes difficult to move. If you are new to amigurumi, count the stitches at the end of each round. This makes it easier to spot a missed increase or decrease before the shape becomes uneven.
The stitch counts in parentheses show how many stitches you should have at the end of each round.
Free Crochet Ghost Pattern
Part 1: Crochet the Body
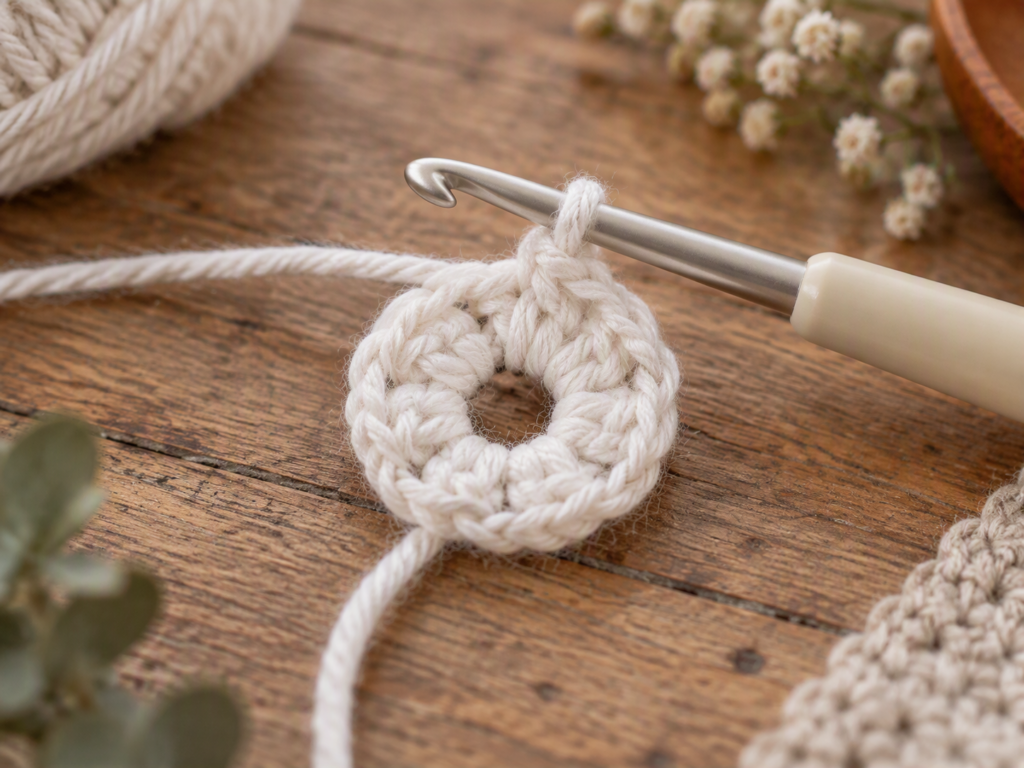
Rnd 1: Make a magic ring and work 6 sc into the ring. (6)
Rnd 2: Inc in each stitch around. (12)
Rnd 3: Repeat (1 sc, inc) 6 times. (18)
Rnd 4: Repeat (2 sc, inc) 6 times. (24)
Rnd 5: Repeat (3 sc, inc) 6 times. (30)
Rnd 6: Repeat (4 sc, inc) 6 times. (36)
These increase rounds create the broad base of the ghost. The body will begin to rise after the next round.
Rnd 7: Work 1 sc in the BLO of each stitch around. (36)
Working in the back loops leaves the front loops of Round 6 free for the scalloped edge later.
Rnd 8–10: Sc in each stitch around. (36 in each round)
Rnd 11: Repeat (4 sc, dec) 6 times. (30)
Rnd 12–13: Sc in each stitch around. (30 in each round)
Rnd 14: Repeat (3 sc, dec) 6 times. (24)
Rnd 15–16: Sc in each stitch around. (24 in each round)
Rnd 17: Repeat (2 sc, dec) 6 times. (18)
Rnd 18: Sc in each stitch around. (18)
The upper part of the body is now narrower than the base. Before closing the top, add the facial features and begin stuffing the ghost.
Part 2: Add the Face
Position the eyes around Rounds 15–16, adjusting their placement to suit the expression you want. As a starting point, leave approximately 6–7 stitches between the eye centers.
If you are using safety eyes, attach them securely before stuffing and closing the body. Alternatively, embroider the eyes with black yarn or embroidery thread.
Add a small embroidered mouth beneath the eyes. A short curved line creates a smile, while a small oval gives the ghost a surprised expression. A few pink stitches on either side of the face can be used for rosy cheeks.
Check the placement from the front before continuing. Even a small change in the distance between the eyes can give your ghost a different personality.
Part 3: Stuff and Close the Body
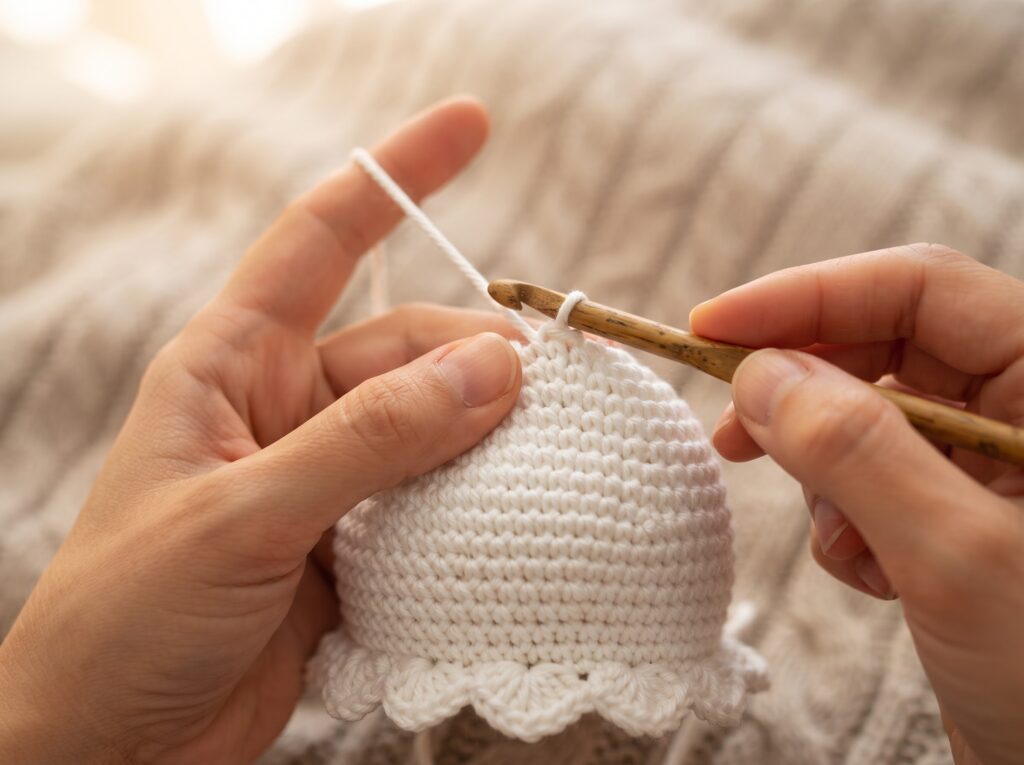
Add small amounts of fiberfill through the opening. Spread the stuffing evenly inside the body, including around the sides, so the shape looks smooth. Avoid packing it too tightly, as this can make the stitches stretch and allow the stuffing to show.
Rnd 19: Repeat (1 sc, dec) 6 times. (12)
Add a little more stuffing if needed while the opening is still large enough to reach inside.
Rnd 20: Dec 6 times. (6)
Fasten off, leaving a yarn tail. Using a yarn needle, weave the tail through the front loops of the remaining stitches and pull gently to close the opening. Secure the yarn and weave in the end.
Part 4: Crochet the Scalloped Hem
The scalloped hem is worked into the unused front loops from Round 6. This creates a wavy edge around the bottom of the ghost.
- Attach the white yarn to any unused front loop from Round 6.
- Work a slip stitch into the next front loop.
- Skip the following front loop.
- Work 5 dc into the next front loop to create a shell.
- Skip the next front loop.
- Repeat this sequence around the base.
With 36 front loops available, this sequence creates nine scallops when worked evenly around the round.
Adjust the tension as you go. If the edge pulls inward, your stitches may be too tight. If the scallops overlap or look crowded, check that you are skipping the correct loops between shells.
When you reach the beginning, secure the yarn and weave in the end. Gently arrange the shells with your fingers so the wavy edge sits evenly.
Optional: Add a Hanging Loop
To turn your ghost into a ghost ornament, attach white yarn at the top of the head and chain 12–16 stitches, or make a loop that suits your preferred hanging point. Join the chain securely to the top, fasten off, and weave in the ends.
Check that the loop is firmly attached before hanging the decoration.
Fun Face Variations
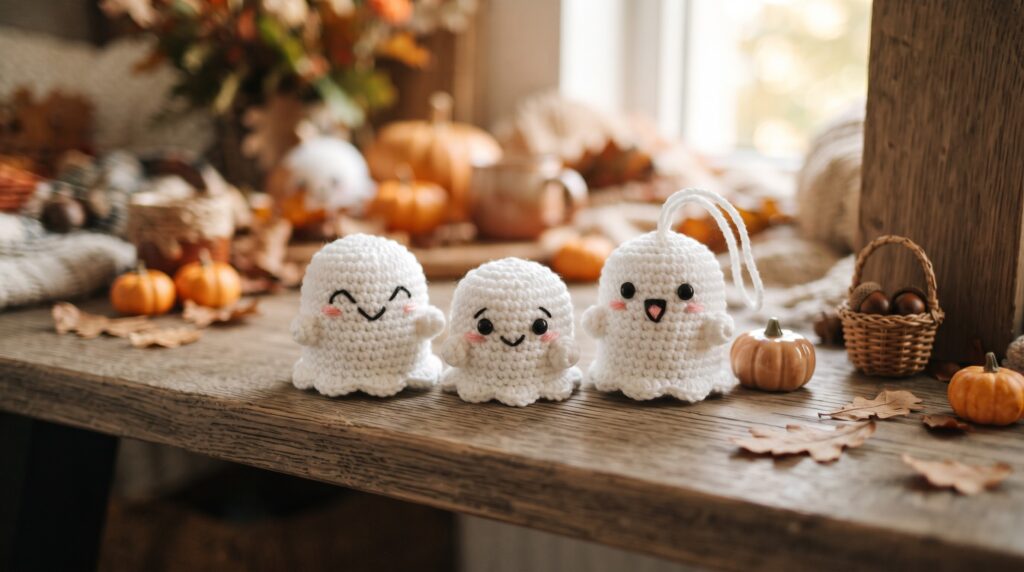
One of the nicest things about a simple ghost is how easily you can change its expression without altering the body pattern.
- Happy Ghost: Embroider two round eyes and a small curved smile. Ki
- Sleepy Ghost: Use closed eyes made from short curved lines.
- Surprised Ghost: Make a small oval mouth beneath the eyes.
- Spooky Ghost: Use narrower eyes and a slightly angled mouth.
- Blushing Ghost: Add two small pink cheek marks beside the mouth.
You can make a small group of ghosts using the same pattern and give each one a different face. They look especially cute displayed together on a shelf or arranged as part of a Halloween decoration.
Tips for a Neat Finish
Keep track of your rounds. Use a stitch marker and count each round before moving on. Missing an increase or decrease can change the shape of the body.
Choose a suitable hook. If gaps appear between the stitches, try a smaller hook. The fabric should be firm enough that the stuffing does not show through.
Stuff gradually. Add small amounts of fiberfill and distribute them evenly. This helps prevent lumps and keeps the body looking rounded.
Check the face before closing. Look at your ghost from the front before finishing the top. It is easier to adjust the expression while you can still reach inside.
Take your time with the scallops. Work into the unused front loops from Round 6 and follow the same sequence around the entire base. Consistent placement helps the hem look balanced.
Troubleshooting
My ghost looks uneven. Check that you have the correct stitch count at the end of each round. A missed increase or decrease can affect the shape.
The stuffing is visible. Try a smaller hook or work with slightly firmer tension. Avoid stretching the stitches while stuffing the body.
The base curls inward. Check your tension around the BLO round and the scalloped edge. Make sure the shell stitches are not being pulled too tightly.
My scallops do not line up evenly. Count the front loops as you work and repeat the same sequence for each shell. If you lose track, pause and check the last completed scallop before continuing.
Frequently Asked Questions
Is this crochet ghost pattern suitable for beginners?
The body uses basic stitches, including single crochet, increases, and decreases. Beginners who are comfortable working in rounds may find it manageable. The scalloped hem is an additional step, so take your time when working around the base.
Should I join the rounds?
No. The body is worked in continuous rounds. Use a stitch marker to identify the first stitch of each round.
Can I use a different yarn?
Yes. You can use another yarn weight, but the finished size and appearance will change. Choose a hook that produces firm stitches for amigurumi.
Can I make the ghost into a keychain?
You can add a securely attached hanging loop or keychain fitting. Keep in mind that small crocheted items and attached hardware may not be suitable for young children.
Can I make the ghost without safety eyes?
Yes. Embroidered eyes and a mouth are good alternatives and let you customize the expression.
More Free Crochet Patterns from Amyliva
If you enjoy making seasonal amigurumi, you may also like these free crochet projects:
- Easy Amigurumi Snowman Ornament: Complete Crochet Guide for Beginners — another small seasonal project to make for your handmade decorations.
- Tiny but Terrific: The Mini Crochet Pumpkin That Stole Fall — a mini pumpkin for your autumn crochet collection.
These projects can be made alongside your ghost to create a small collection of handmade seasonal decorations.
A Few Final Notes
This little ghost is a fun quick project to add to your Halloween crochet collection. Whether you choose a happy face, sleepy eyes, or a spooky expression, each ghost can have its own personality. I hope you enjoy making your own handmade Halloween decoration and finding a place for it in your seasonal display.
This pattern is provided for personal crafting. Please do not republish the written instructions or use Amyliva Handmade photos as your own. If you share your finished ghost, you are welcome to mention Amyliva Handmade as the pattern source.



Yorum gönder