Sleepy Pink Bunny Amigurumi: Free Crochet Pattern & Tutorial

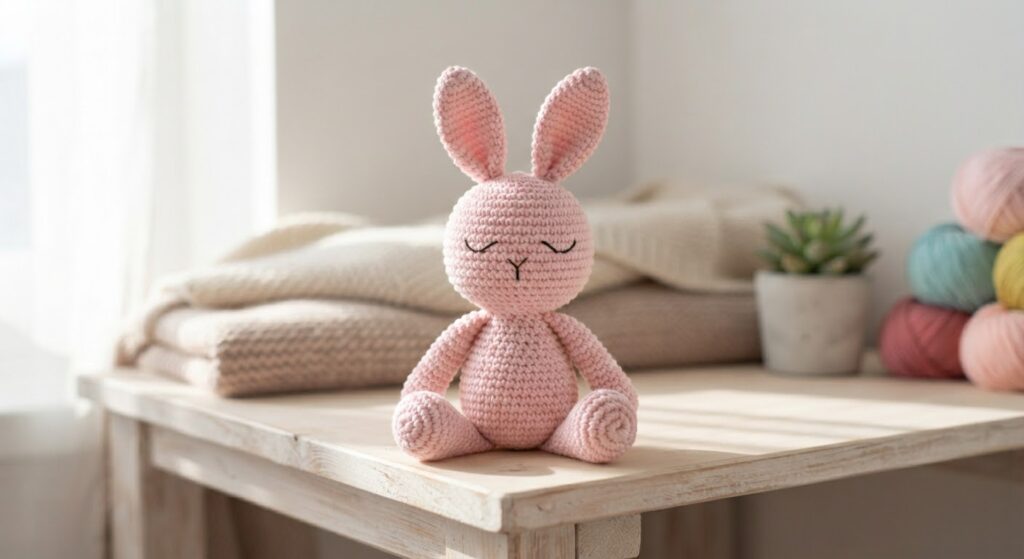
This sleepy pink bunny is a small amigurumi project with a soft, peaceful expression and a simple sitting shape. I designed the body so the finished bunny can sit nicely on a shelf, bedside table, or in a small cozy corner without taking up much space.
The pattern uses a small amount of yarn and simple amigurumi techniques. Pink cotton yarn gives the bunny a neat, defined shape, while the embroidered sleepy eyes create its calm expression.
One detail I especially like about this design is the shaping of the cheeks and muzzle. The increases in Round 4 of the head are intentional, so make sure to follow that round exactly.
Finished Size
The finished bunny is approximately 10–12 cm (4–4.7 in) tall, depending on your yarn, hook size, crochet tension, and stuffing.
Materials
- Cotton yarn in pink
- Small amount of matching yarn for sewing
- 1.75 mm crochet hook
- Polyester fiberfill
- Tapestry needle
- Embroidery needle
- Stitch marker
- Small amount of black embroidery thread or fine black yarn for the sleepy eyes
Abbreviations – US Crochet Terms
- MR – Magic Ring
- sc – Single Crochet
- inc – Increase
- dec – Decrease
- sl st – Slip Stitch
- ch – Chain
A Note About Yarn and Hook Size
I recommend cotton yarn because it keeps the stitches defined and gives the small body pieces a clean shape.
A 1.75 mm hook works well with the yarn used for this sample. Crochet tension varies from person to person, so use the hook size that gives you firm, even stitches without large gaps.
If your stitches are too loose, try a smaller hook. If they feel difficult to work, try a slightly larger one.
Head
Work in continuous rounds unless otherwise stated.
Round 1: 6 sc in MR [6]
Round 2: 6 inc [12]
Round 3: (1 sc, 1 inc) × 6 [18]
Round 4: 3 sc, 6 inc, 9 sc [24]
Round 5: sc around [24]
Round 6: (3 sc, 1 inc) × 6 [30]
Round 7: (4 sc, 1 inc) × 6 [36]
Round 8: sc around [36]
Round 9: sc around [36]
Round 10: sc around [36]
Round 11: sc around [36]
Round 12: sc around [36]
Round 13: sc around [36]
Round 14: (4 sc, 1 dec) × 6 [30]
Round 15: (3 sc, 1 dec) × 6 [24]
Round 16: (2 sc, 1 dec) × 6 [18]
Round 17: (1 sc, 1 dec) × 6 [12]
Round 18: 6 dec [6]
Fasten off and close the opening.
Head-Shaping Tip
Round 4 is important for the shape of the bunny’s face.
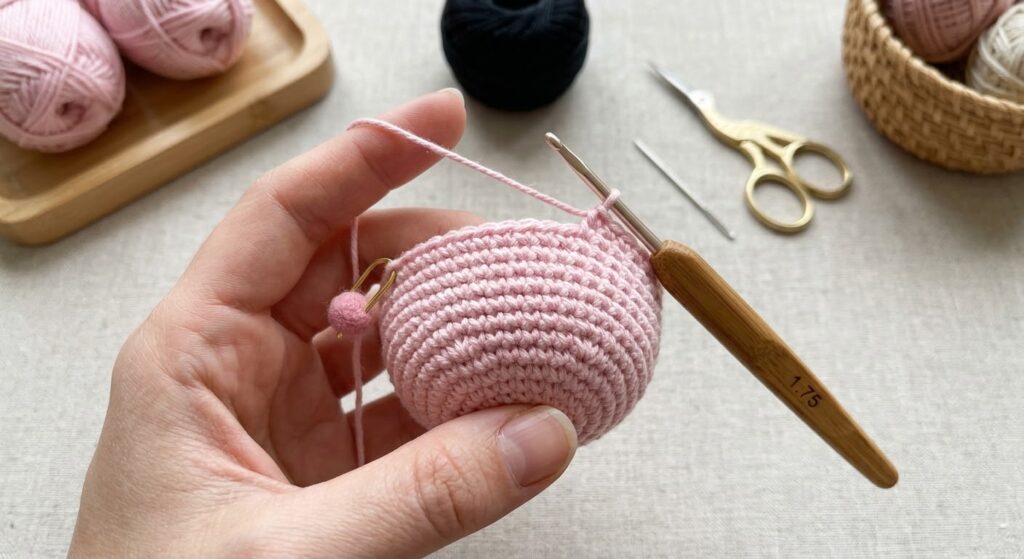
The six increases are worked consecutively after the first 3 sc:
3 sc, 6 inc, 9 sc [24]
Starting with 18 stitches, the six increases add 6 new stitches, bringing the total to 24 stitches.
These consecutive increases create extra fullness in the central face area and help form the rounded cheek and muzzle shape of the bunny.
Stuffing the Head
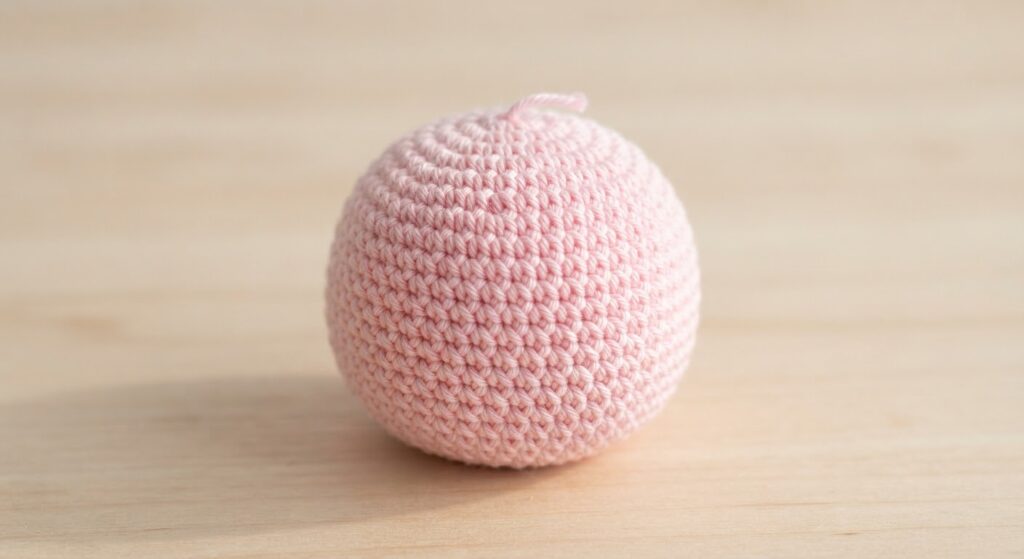
Begin adding fiberfill as the head takes shape.
Add the stuffing a little at a time and use your fingers to spread it evenly inside the head. This helps prevent hard lumps and makes it easier to control the final shape.
The head should be firm enough to hold its shape without being so tightly stuffed that the crochet stitches stretch.
Body
Round 1: 8 sc in MR [8]
Round 2: (1 inc) × 8 [16]
Round 3: (1 sc, 1 inc) × 8 [24]
Round 4: (2 sc, 1 inc) × 8 [32]
Round 5: (3 sc, 1 inc) × 8 [40]
Round 6: sc around [40]
Round 7: sc around [40]
Round 8: sc around [40]
Round 9: sc around [40]
Round 10: sc around [40]
Round 11: sc around [40]
Round 12: sc around [40]
Round 13: sc around [40]
Round 14: (3 sc, 1 dec) × 4, then sc in remaining 20 sts [36]
Round 15: sc around [36]
Round 16: (3 sc, 1 dec) × 3, then sc in remaining 21 sts [33]
Round 17: (9 sc, 1 dec) × 3 [30]
Round 18: sc around [30]
Round 19: (8 sc, 1 dec) × 3 [27]
Round 20: sc around [27]
Round 21: (7 sc, 1 dec) × 3 [24]
Round 22: sc around [24]
Round 23: (6 sc, 1 dec) × 3 [21]
Round 24: sc around [21]
Round 25: (5 sc, 1 dec) × 3 [18]
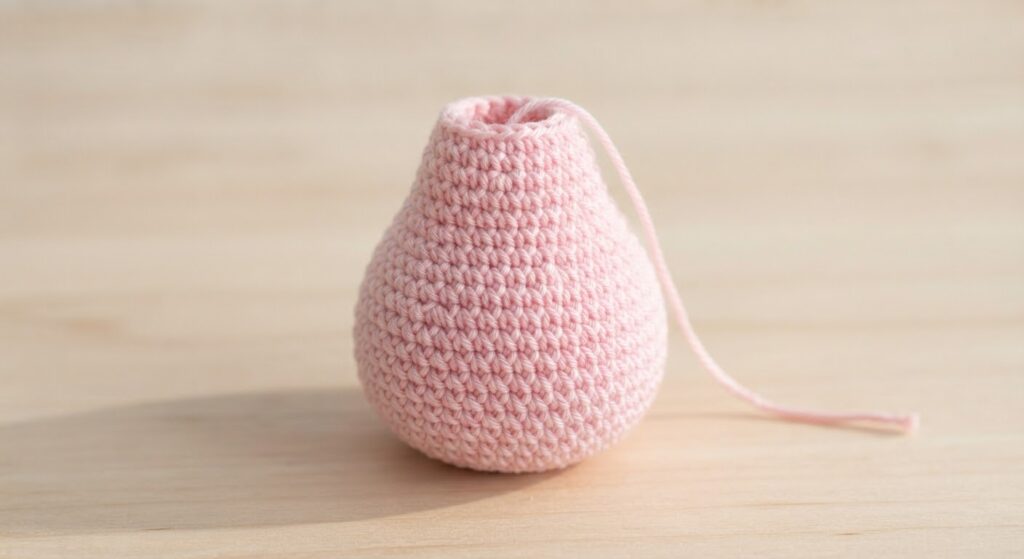
Fasten off, leaving a long tail for sewing.
Stuff the body gradually as you work. Keep the lower part firm enough to support the sitting position, but avoid overstuffing it.
Ears – Make 2
Round 1: 6 sc in MR [6]
Round 2: (1 sc, 1 inc) × 3 [9]
Round 3: sc around [9]
Round 4: sc around [9]
Round 5: sc around [9]
Round 6: sc around [9]
Round 7: sc around [9]
Round 8: sc around [9]
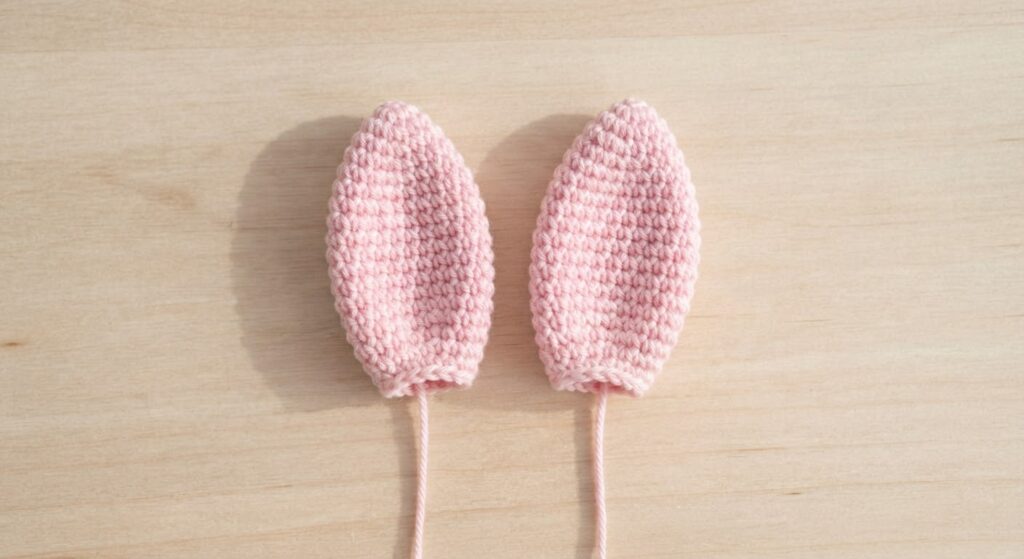
Fasten off, leaving a long tail for sewing.
Do not stuff the ears heavily. A small amount of stuffing, or leaving them mostly unstuffed, helps them stay soft.
Legs
The legs are made from separate thigh and foot pieces.
Thigh – Make 2
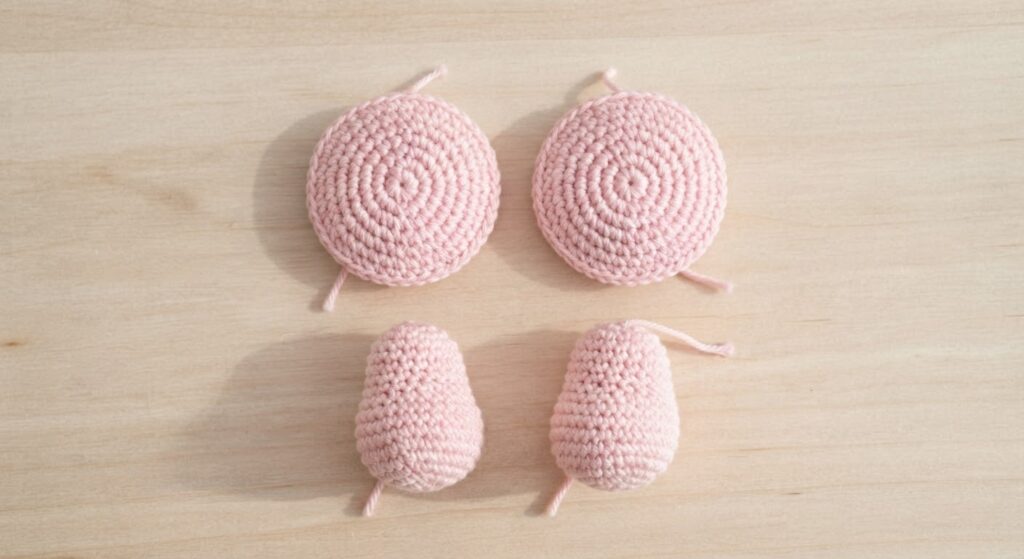
Work the thigh piece as a small, flat, rounded disc. Keep the piece flat throughout; it should look like a small crochet pancake rather than a folded or curved piece.
Round 1: 6 sc in MR [6]
Round 2: 6 inc [12]
Round 3: (1 sc, 1 inc) × 6 [18]
Round 4: (2 sc, 1 inc) × 6 [24]
Round 5: sc around [24]
Fasten off, leaving a long tail for sewing.
Do not fold or bend the finished piece. Keep it flat and rounded. If you want to give it a little more body, use only a very small amount of stuffing without changing its flat shape.
To attach the thigh, place the flat piece directly against the lower body and sew around its outer edge. Before finishing, check the bunny from the front and side to make sure both thighs are positioned at a similar height and the bunny can sit steadily.
Important: The thigh should remain a flat, rounded pad. This flat shape is important for creating the bunny’s sitting position.
Foot – Make 2
Round 1: 6 sc in MR [6]
Round 2: 6 inc [12]
Round 3: (1 sc, 1 inc) × 6 [18]
Round 4: sc around [18]
Round 5: sc around [18]
Round 6: sc around [18]
Fasten off, leaving a long tail for sewing.
Add a small amount of stuffing and shape the foot gently with your fingers.
The feet should be firm enough to hold their shape but do not need to be packed tightly.
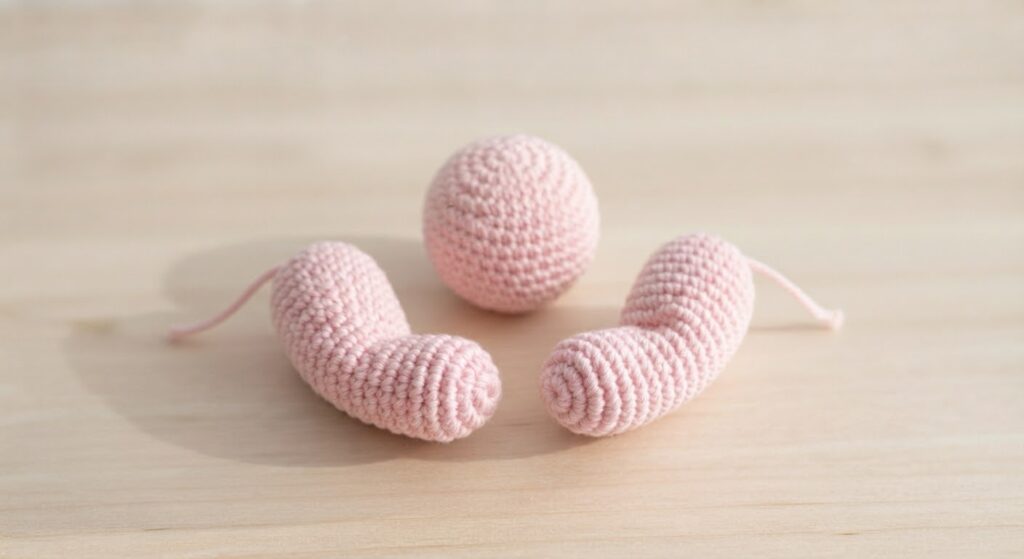
Arms – Make 2
Round 1: 6 sc in MR [6]
Round 2: (1 sc, 1 inc) × 3 [9]
Round 3: sc around [9]
Round 4: sc around [9]
Round 5: sc around [9]
Round 6: sc around [9]
Round 7: sc around [9]
Round 8: sc around [9]
Fasten off, leaving a long tail for sewing.
Stuff very lightly, keeping the arms soft.
Tail
Round 1: 6 sc in MR [6]
Round 2: 6 inc [12]
Round 3: sc around [12]
Round 4: sc around [12]
Fasten off, leaving a long tail for sewing.
Add a small amount of stuffing and close the opening neatly.
Assembly
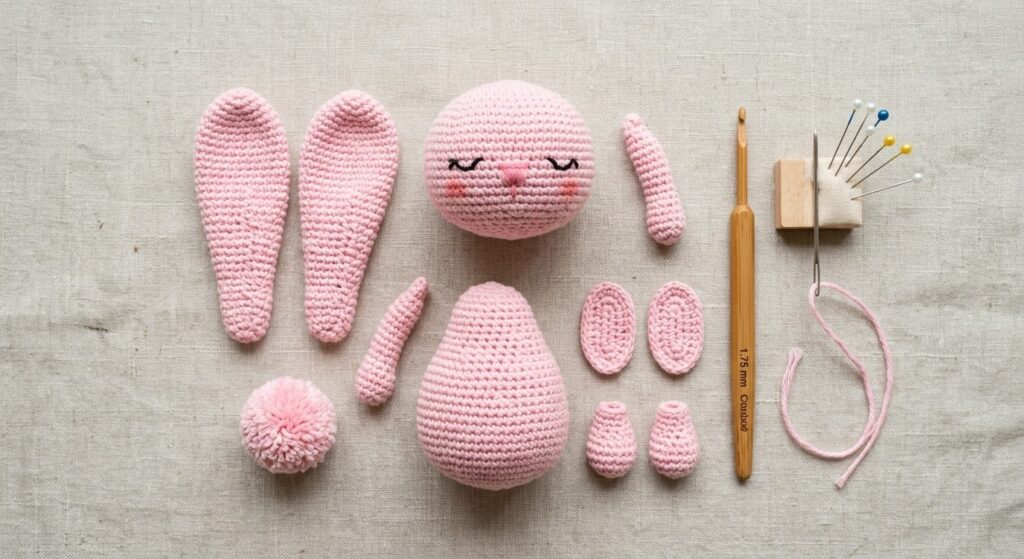
Before sewing the pieces permanently, lay all the finished pieces out together. This makes it easier to check the proportions and decide where everything should go.
Attach the Head
Place the head on top of the body.
Use pins if helpful, then sew around the neck opening with the long yarn tail.
Work slowly and check the bunny from the front and side. The head should sit securely without leaning too far forward or backward.
Attach the Ears
Position the ears on the top of the head.
The exact placement can be adjusted slightly depending on the look you want. Sew them securely through the base of each ear.
Keep both ears at a similar height, while remembering that small differences are natural in handmade amigurumi.
Attach the Legs
Place the flat thigh pieces against the lower part of the body.
Do not fold or bend the thigh pieces. Keep them flat against the body while sewing.
Attach the feet so they extend naturally from the lower body and help create a stable sitting position.
Before finishing the sewing, place the bunny on a flat surface and check whether it sits comfortably. If necessary, make small adjustments to the position of the thighs or feet before securing them completely.
Attach the Arms
Place the arms on both sides of the body.
Check their height from the front before sewing. Attach them securely with small, neat stitches.
Attach the Tail
Position the tail toward the lower back of the body.
Sew it firmly in place and weave in the remaining yarn ends.
Embroider the Sleepy Face
The sleepy expression is created with simple embroidery instead of safety eyes.
Using black embroidery thread or fine black yarn, embroider two gently curved closed eyes.
Embroidery Tip
Try not to pull the embroidery thread too tightly. A relaxed, slightly curved line gives the bunny a softer sleepy expression.
You can lightly mark the position of both eyes before stitching so they remain at a similar height.
Helpful Tips
Keep the Stuffing Even
Small amounts of stuffing are easier to control than adding a large amount at once.
After adding each small amount, use your fingers to move the fiberfill into the corners and smooth the outside of the piece.
Check the Sitting Position
The sitting position depends mainly on the placement of the thighs, feet, body stuffing, and tail.
Before finishing the leg attachments, place the bunny on a flat surface and look at it from both the front and side.
If it leans, slightly adjust the position of the feet or thighs before finishing the sewing.
Don’t Overstuff Small Pieces
Overstuffing can make small crochet pieces look stiff and can stretch the stitches.
For the ears and arms especially, use only enough stuffing to give them shape.
Frequently Asked Questions
Which yarn can I use instead of cotton?
You can use another yarn with a similar thickness, but the finished size and texture may change. A soft acrylic yarn can work, although cotton usually gives a more defined amigurumi shape.
If you change the yarn weight, you may also need to adjust the hook size.
How can I get neat sleepy eye embroidery?
Mark the eye positions before stitching and compare both sides before pulling the thread through completely.
Use small, even stitches and avoid pulling too tightly. The curved shape does not need to be perfectly identical on both sides.
Why isn’t my bunny sitting straight?
The sitting position is mainly affected by the placement of the thighs, feet, body stuffing, and tail.
Before finishing the leg attachments, place the bunny on a flat surface and adjust the pieces until the body feels balanced.
Why does my bunny look different from the pattern?
Small differences are completely normal with amigurumi. Crochet tension, yarn thickness, hook size, stuffing, and embroidery placement can all change the final appearance.
The most important thing is to keep your stitches consistent and follow the stitch counts carefully.

Yorum gönder