Crochet Your Own Cute One-Eyed Green Monster
Welcome back to Amyliva Handmade!
There is something undeniably charming about amigurumi monsters. They don’t have to be scary; in fact, they are often the cutest projects on our hooks! Today, we are diving deep into a project that is perfect for beginners looking to refine their skills, or experienced crocheters wanting a quick, satisfying make.
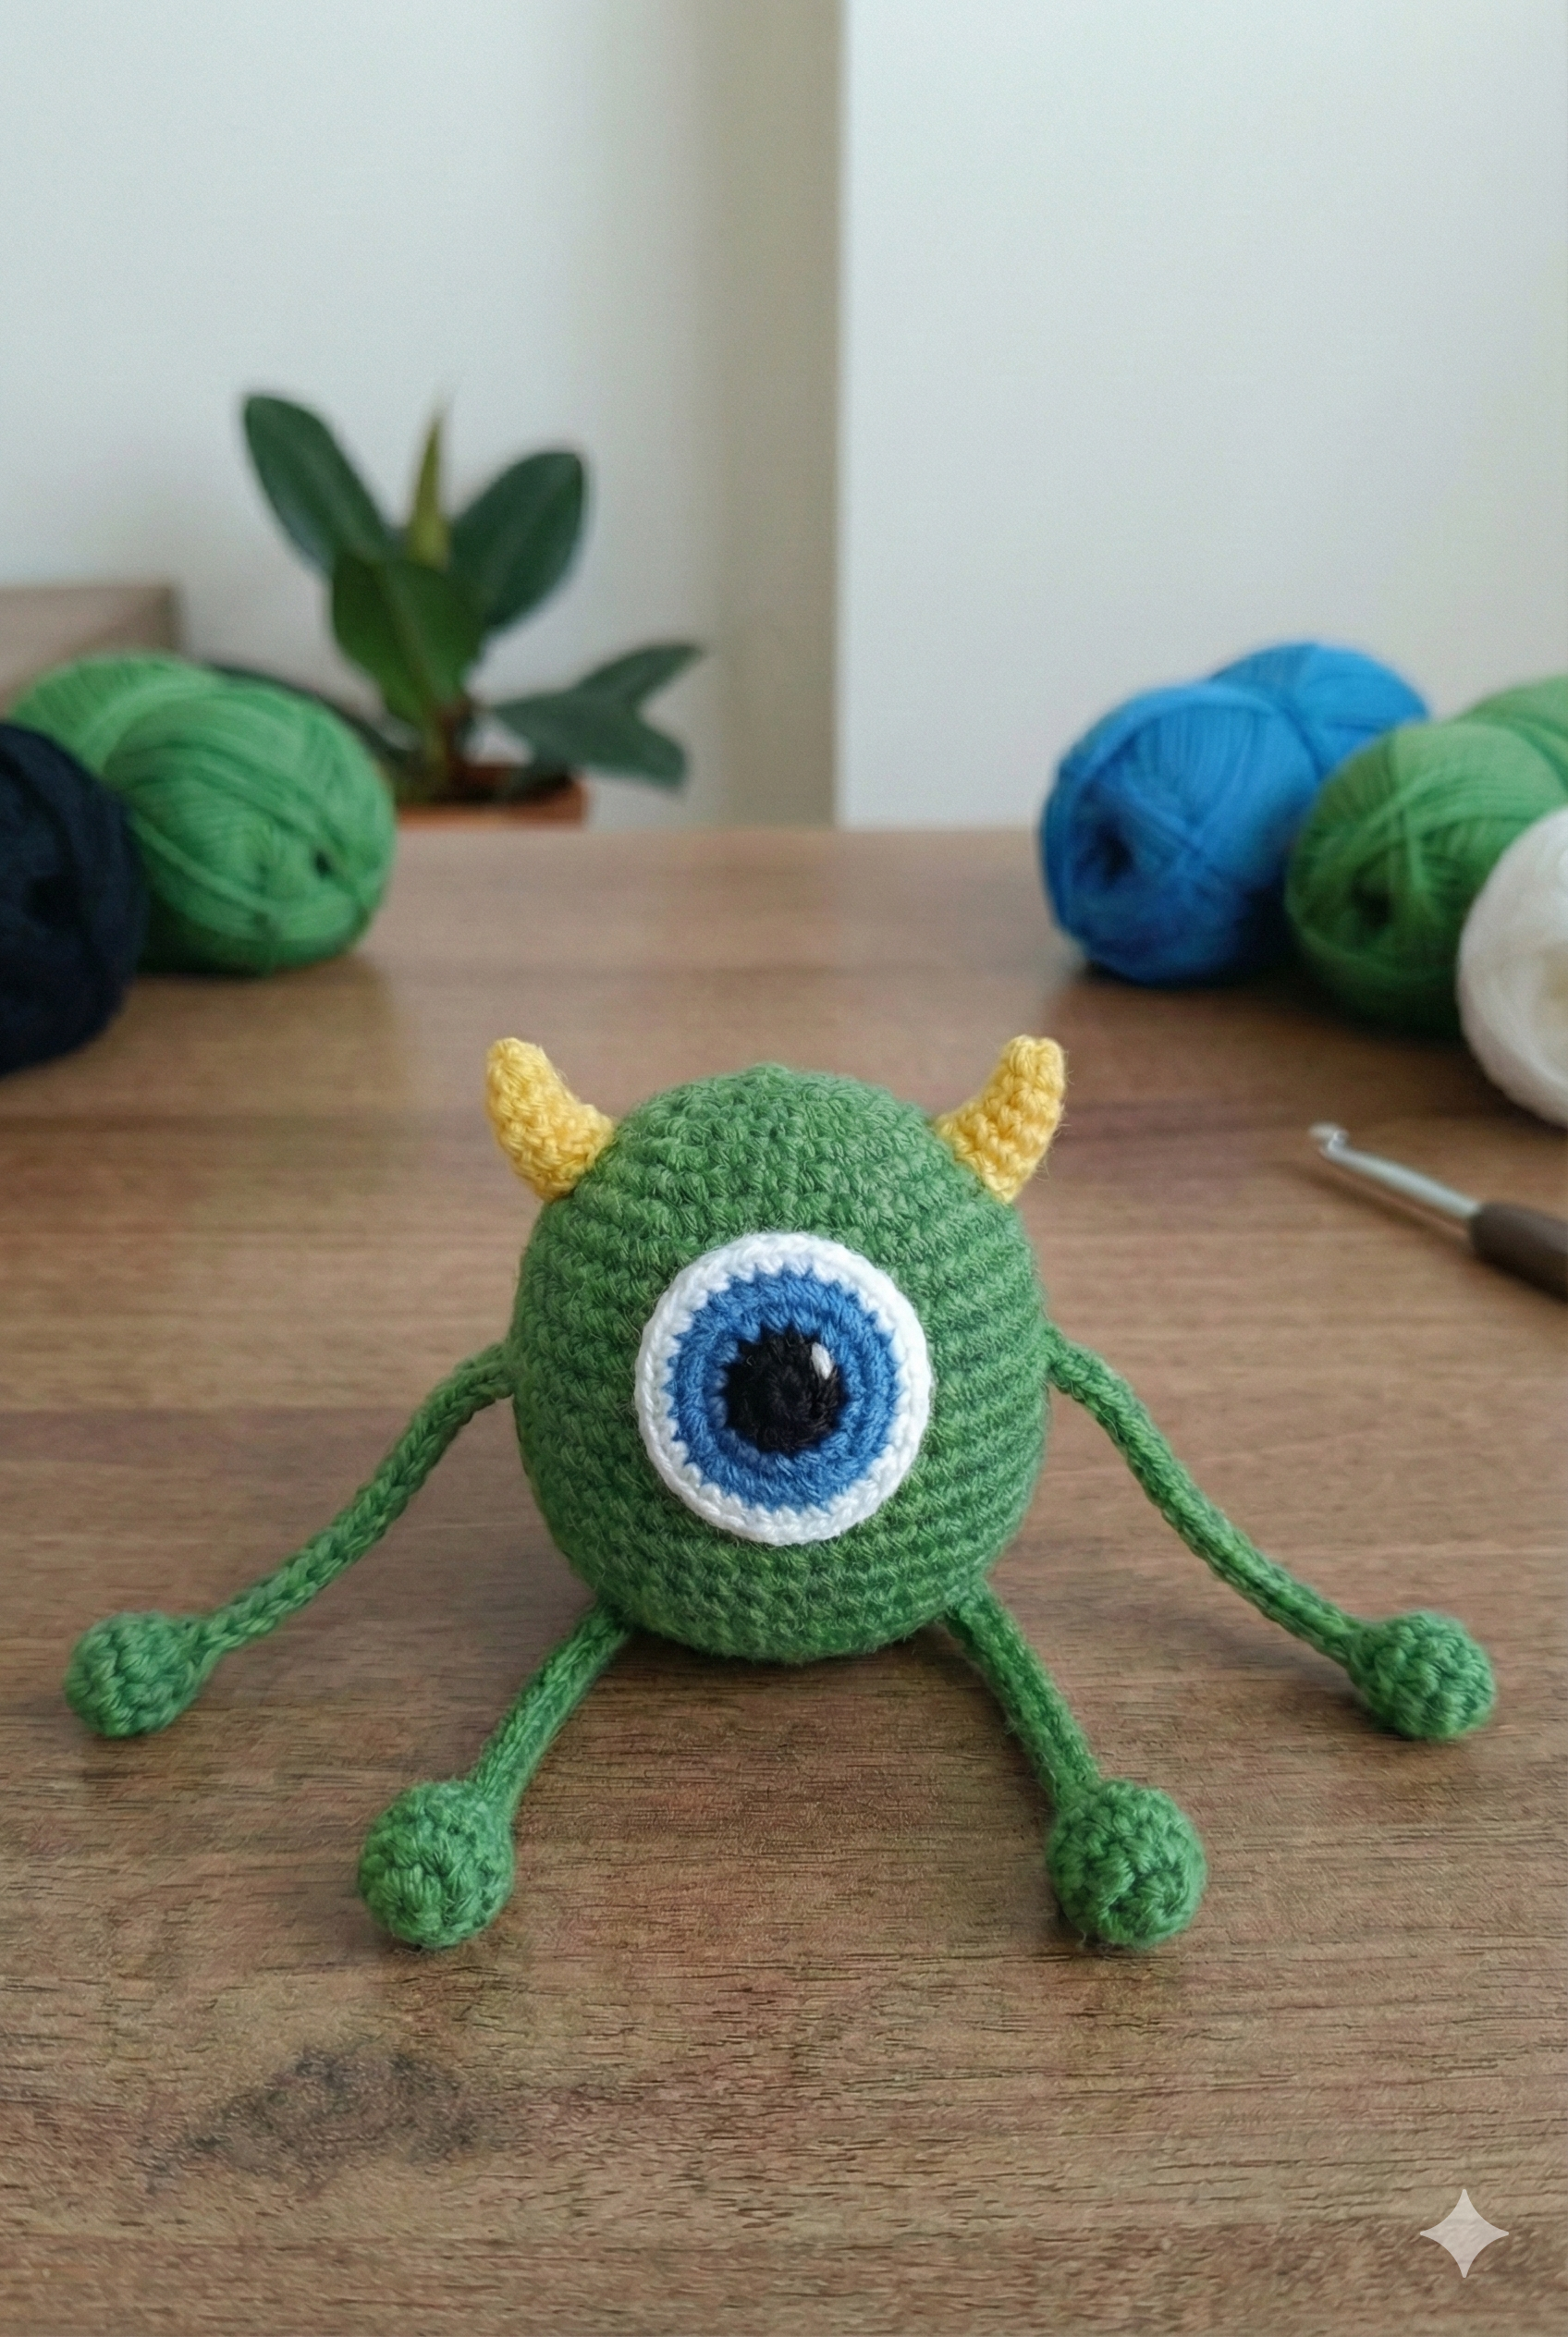
We are creating a lovable, spherical, one-eyed green monster. (You might recognize the inspiration, but for copyright reasons, we’ll call him our “Little Green Friend”).
This tutorial isn’t just a pattern; it’s a study in essential amigurumi techniques. We will explore how to create a perfect sphere, how to execute neat color changes for flat appliques (the eye), and how sometimes the simplest techniques (like knotted chains) make the best details.
Let’s grab our hooks and get started!

The Amigurumi Toolkit: What You Need
Before we begin stitch work, ensure you have the right tools. Amigurumi requires a tighter gauge than regular crochet to prevent stuffing from showing through.
• Yarn: DK or Worsted weight yarn in Bright Green, White, Blue, Black, and a scrap of Yellow for the horns. Cotton or acrylic blends work best for defined stitches.
• Crochet Hook: A size smaller than usually recommended for your yarn. For DK weight, a 2.5mm or 3.0mm hook is ideal.
• Stuffing: High-quality polyester fiberfill.
• Tapestry Needle: For weaving in ends and assembly.
• Stitch Marker: Absolute essential for working in continuous rounds.
• Scissors.
Key Techniques and Abbreviations (US Terms)
Understanding the mechanics of the stitches is crucial for a neat final product.
• MR (Magic Ring/Circle): The foundation technique to avoid a hole at the start of round projects.
• sc (Single Crochet): The bread and butter of amigurumi.
• Pro Tip: For tighter, neater stitches that look like little ‘x’s rather than ‘v’s, try the “Yarn Under” technique instead of “Yarn Over” when pulling up your first loop.
• inc (Increase): Working two single crochets into the same stitch. This expands your work.
• dec (Decrease): Combining two stitches into one.
• Essential Technique: Use the “Invisible Decrease”. Insert hook into the FRONT loop only of the first stitch, then immediately into the FRONT loop only of the second stitch. Yarn over and pull through the first two loops, yarn over and complete the sc. This is invisible on the outside of the work.
• sl st (Slip Stitch): Used for joining or moving across stitches without adding height.
• Ch (Chain): The foundation of most crochet.
• FO (Fasten Off): Securing your yarn.
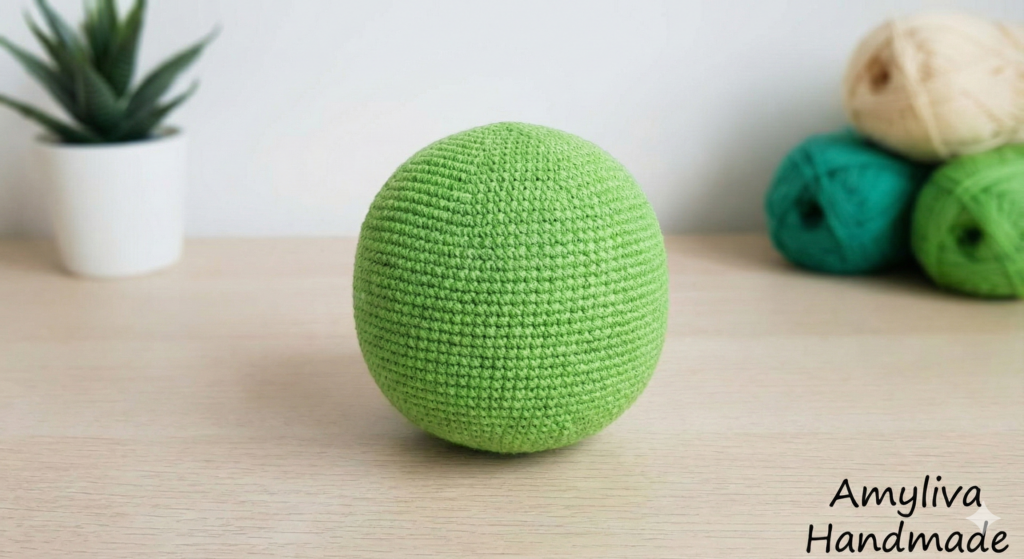
Phase 1: Mastering the Sphere (The Body)
(Reference Image 1 in the guide)
The body of our monster is a classic mathematical sphere. Learning this sequence is fundamental to amigurumi design. The core concept is putting 6 increases in every round until the desired width is reached, working even rows for height, and then decreasing by 6 in every round to close.
The Technique:
Rounds must be worked continuously in a spiral. Do not join with a slip stitch at the end of rounds unless specified. Always move your stitch marker to the first stitch of the new round.
The Pattern:
Using Green Yarn.
• R1: Start with a Magic Ring, work 6 sc into the ring. (6 sts)
• R2: inc in every stitch around. (12 sts)
• R3: (1 sc, inc) repeat 6 times. (18 sts)
• R4: (1 sc, inc) repeat 6 times. Note: The image text says (1 sc, inc) for R4, resulting in 24. The standard mathematical progression is usually (2 sc, inc)x6 = 24. Following the image text suggests a rapid increase, but standard practice is usually adding one plain stitch between increases per round. Let’s follow the standard sphere math for a smoother shape: Correction: R4 should ideally be (2 sc, inc) x 6 = 24.
• R5: (3 sc, inc) repeat 6 times. (30 sts)
• R6–R10: Work 30 sc evenly around for 5 rounds. This builds the height of the sphere.
• R11: (3 sc, dec) repeat 6 times. (24 sts) Remember to use invisible decreases!
• R12: (2 sc, dec) repeat 6 times. (18 sts)
• Critical Step: Stuffing. Pausing here to stuff is vital. Don’t just shove the stuffing in the center. Use your fingers to push it against the walls of the sphere, shaping it as you go. It should be firm but squishy, like a stress ball, not rock hard.
• R13: (1 sc, dec) repeat 6 times. (12 sts)
• R14: dec around 6 times. (6 sts)
• FO: Cut the yarn, leaving a tail. Weave the tail through the front loops of the remaining 6 stitches and pull tight to close the hole completely.
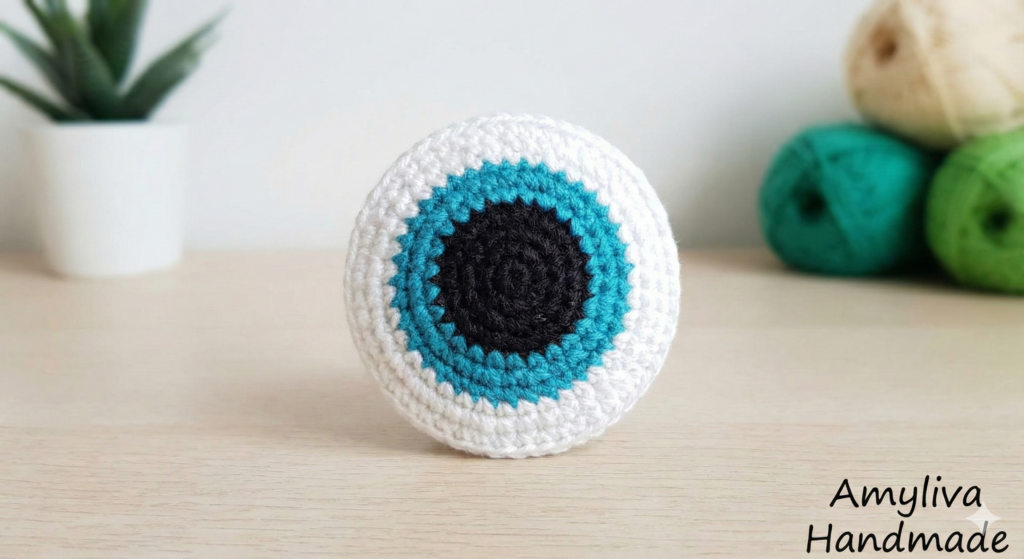
Phase 2: The Iconic Eye (Flat Circle Color Changes)
(Reference Image 2 in the guide)
The eye is a flat applique. The challenge here is keeping the circle perfectly flat and making neat color transitions between black, blue, and white.
The Technique:
To keep a circle flat, we use the same increase math as the sphere (adding 6, 8, or sometimes 10 stitches per round depending on yarn tension). To make neat color changes, always introduce the new color in the final “yarn over, pull through” step of the last stitch of the old color.
The Pattern (Adjusted for better visual accuracy than the image text):
Start with Black yarn.
• R1: Magic Ring, 6 sc into ring. Sl st to first st to join. Change to Blue yarn in this sl st.
• R2 (Blue): Ch 1 (does not count as stitch), inc in each st around. Join with sl st. Change to White yarn. (12 sts)
• R3 (White): Ch 1, (1 sc, inc) repeat around. Join with sl st. (18 sts).
• FO: Leave a long white tail for sewing onto the body later.
Tip: When changing colors, you can crochet over the tail ends of the previous color to save time on weaving in ends later.
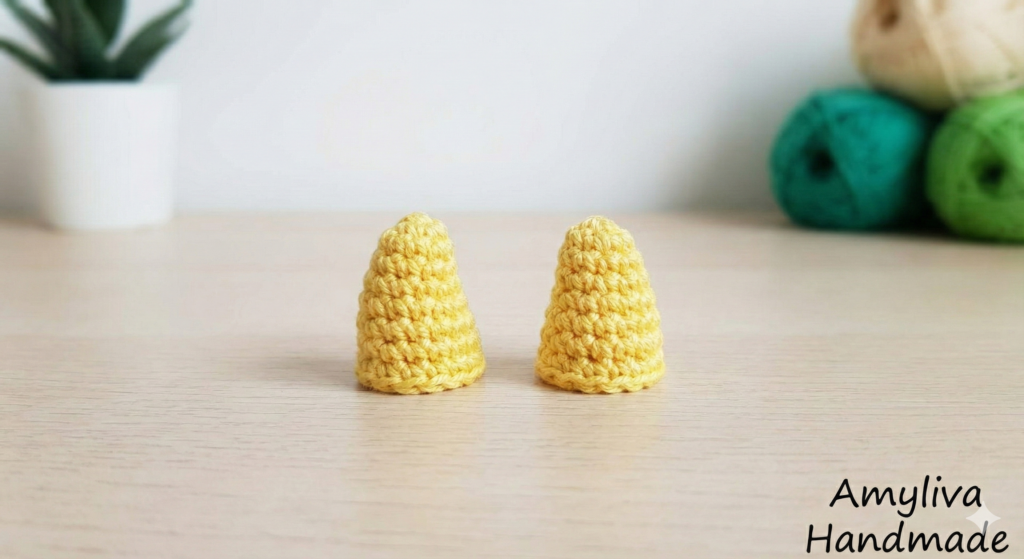
Phase 3: The Horns (Working Small Details)
(Reference Image 3 in the guide)
These tiny horns add so much character. The pattern provided in the image uses a clever, unconventional technique to create a small cone shape without needing a magic ring, which can be fiddly with very few stitches.
The Technique:
Instead of working in the round, these are worked in a tiny row and then likely folded or stitched to create the nugget shape.
The Pattern:
Make 2 using Yellow yarn.
• Ch 4.
• Start working in the second chain from your hook.
• Turn your work, 1 sl st in the first space, followed by 2 sc.
• FO, leaving a tail to sew them onto the head. When sewing, you can pinch the piece slightly to give it more of a conical shape as you attach it.
Phase 4: Arms & Legs (Simplicity is Key)
(Reference Image 4 in the guide)
Sometimes, the best solution is the simplest one. To get the gangly, funny look of this monster’s limbs, we don’t need complex tubes of single crochet. A simple chain with a bulky knot at the end works perfectly!
The Technique:
This relies on creating a tight, uniform chain and a secure knot that won’t slip.
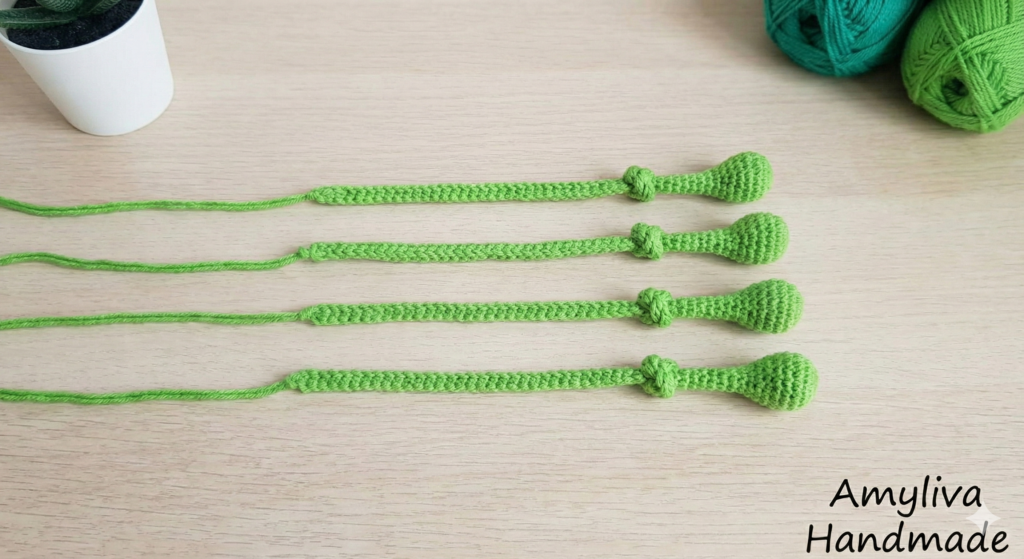
The Pattern:
Make 4 using Green yarn.
• Chain 20 loosely.
• At the end of the chain, tie a knot.
• Tie a second knot directly over the first one to create a larger, palpable “lump” for the hand/foot. Pull tightly to secure.
• Cut the yarn close to the knot on the “hand/foot” side. Leave a tail on the other side for attaching to the body.
Assembly: Bringing It All Together
(Reference Image 5 in the guide)
Assembly is where amigurumi truly comes to life. Patience here pays off.

1. Placement is Everything: Before sewing anything, use pins to hold the pieces in place.
2. The Eye: Pin the large eye to the front center of the body. Use the long white tail and a tapestry needle to whipstitch around the outer edge of the white circle, securing it firmly to the green body.
3. The Horns: Position them on top of the head, slightly spaced apart. Sew them securely using the yellow tails.
4. The Limbs:
• Legs: Attach two of the chained pieces to the bottom front of the body so it can sit.
• Arms: Attach the remaining two chained pieces to the sides of the body, slightly lower than the midline of the eye.
5. The Smile (Optional): Using a strand of black embroidery floss or thinner yarn, embroider a simple smile below the eye using a backstitch.
You have finished your One-Eyed Green Monster!
Warnings and Safety Information
When making handmade items, especially those that look like toys, safety is paramount.
• Not for Small Children/Babies: While this pattern does not use plastic safety eyes (which are a choking hazard), the knotted ends of the arms and legs, or the horns, could potentially be chewed off by an infant. This item is recommended as a decorative collectible or for children over the age of 3 who do not put objects in their mouths.
• Secure Stitching: Ensure all parts, especially the limbs and eye applique, are sewn on very securely with tight stitches.
• Materials: If making for younger individuals, ensure you use washable, hypoallergenic fiberfill and yarn.
Frequently Asked Questions
Q: Why is my sphere shaped like a hexagon instead of a round ball?
A: This happens because the increases are stacked directly on top of each other in every round. To avoid this, you can “offset” your increases. For example, in a round of (4 sc, inc), you could do 2 sc, inc, then (4 sc, inc) around, ending with 2 sc.
Q: There are holes in my amigurumi and the stuffing is showing. Why?
A: Either your hook size is too large for the yarn you chose, or your tension is too loose. Try going down half a hook size or consciously crocheting tighter. Using the “Yarn Under” technique mentioned earlier also helps close gaps.
Q: Can I resize this pattern?
A: Absolutely! To make a bigger monster, continue the increase pattern on the body (e.g., up to 6 sc, inc) before working the even rows. You would then need to adjust the eye size accordingly by adding more rounds to the flat circle.
Terms of Use
We love sharing our passion for crochet with you! To keep providing free content, we ask that you respect the following terms regarding this pattern designed by Amyliva Handmade based on the visual guide:
• Personal Use: This pattern is intended for free personal use. You may make as many monsters as you like for yourself or as gifts.
• Selling Finished Items: You MAY sell finished items made from this pattern, provided that they are handmade by you in limited quantities. We ask that you credit Amyliva Handmade as the designer and provide a link back to Amyliva.com in your listing description.
• Pattern Distribution: You MAY NOT redistribute, sell, copy, or translate this written pattern or the associated images as your own, either digitally or in print. Please link people directly to this blog post if they wish to use the pattern.
We hope you enjoyed this tutorial! Mastering the sphere and these detailing techniques opens up a world of amigurumi possibilities.
Share your finished little green monsters with us on social media by tagging @AmylivaHandmade—we would love to see your creations! Happy crocheting!
Amy Liva
1 yorum