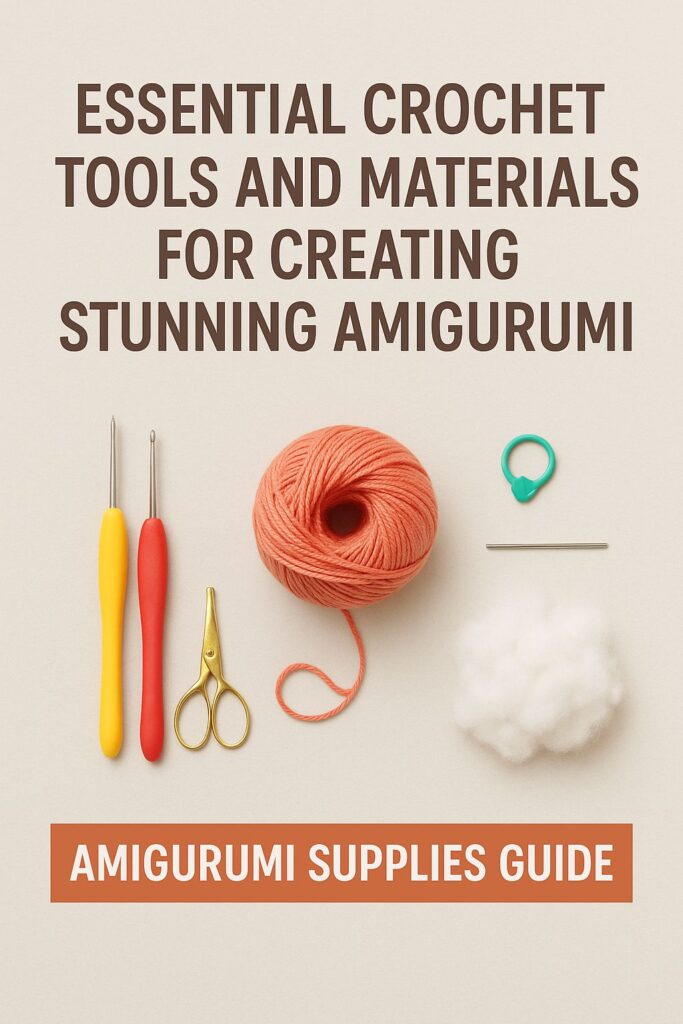
Essential Crochet Tools and Materials for Creating Stunning Amigurumi
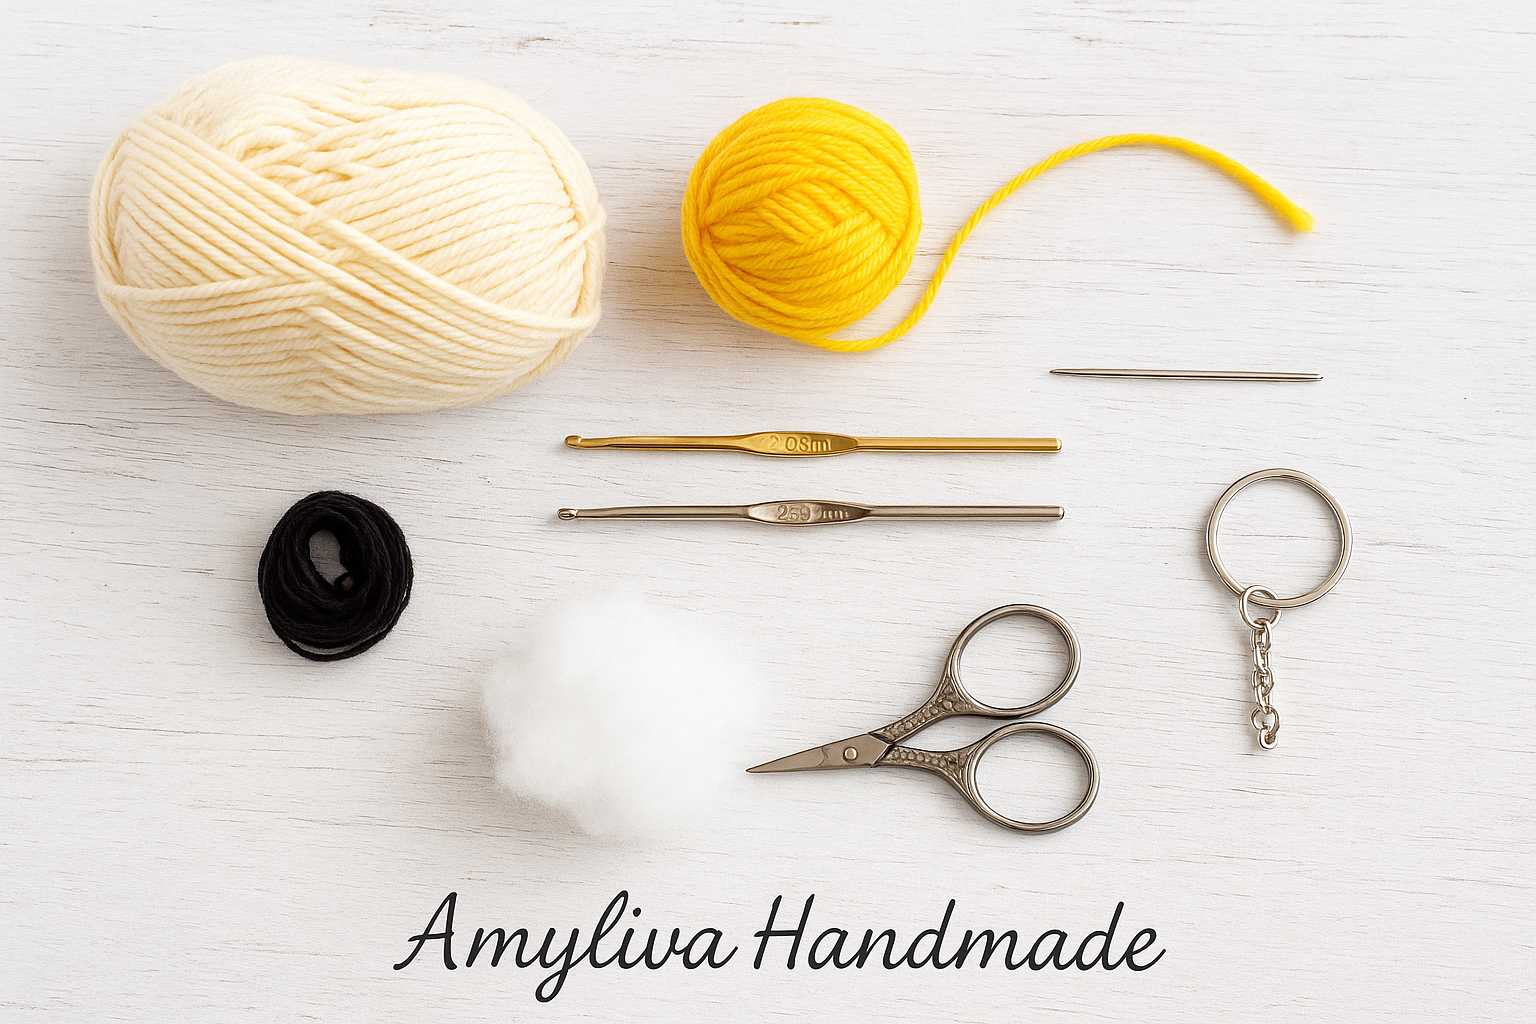
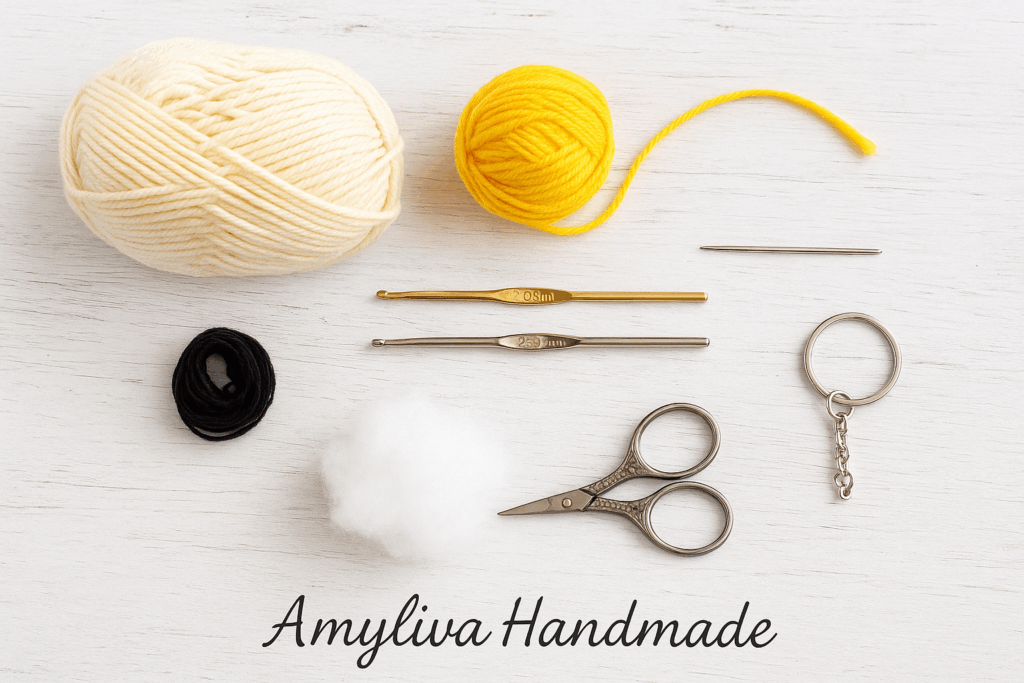
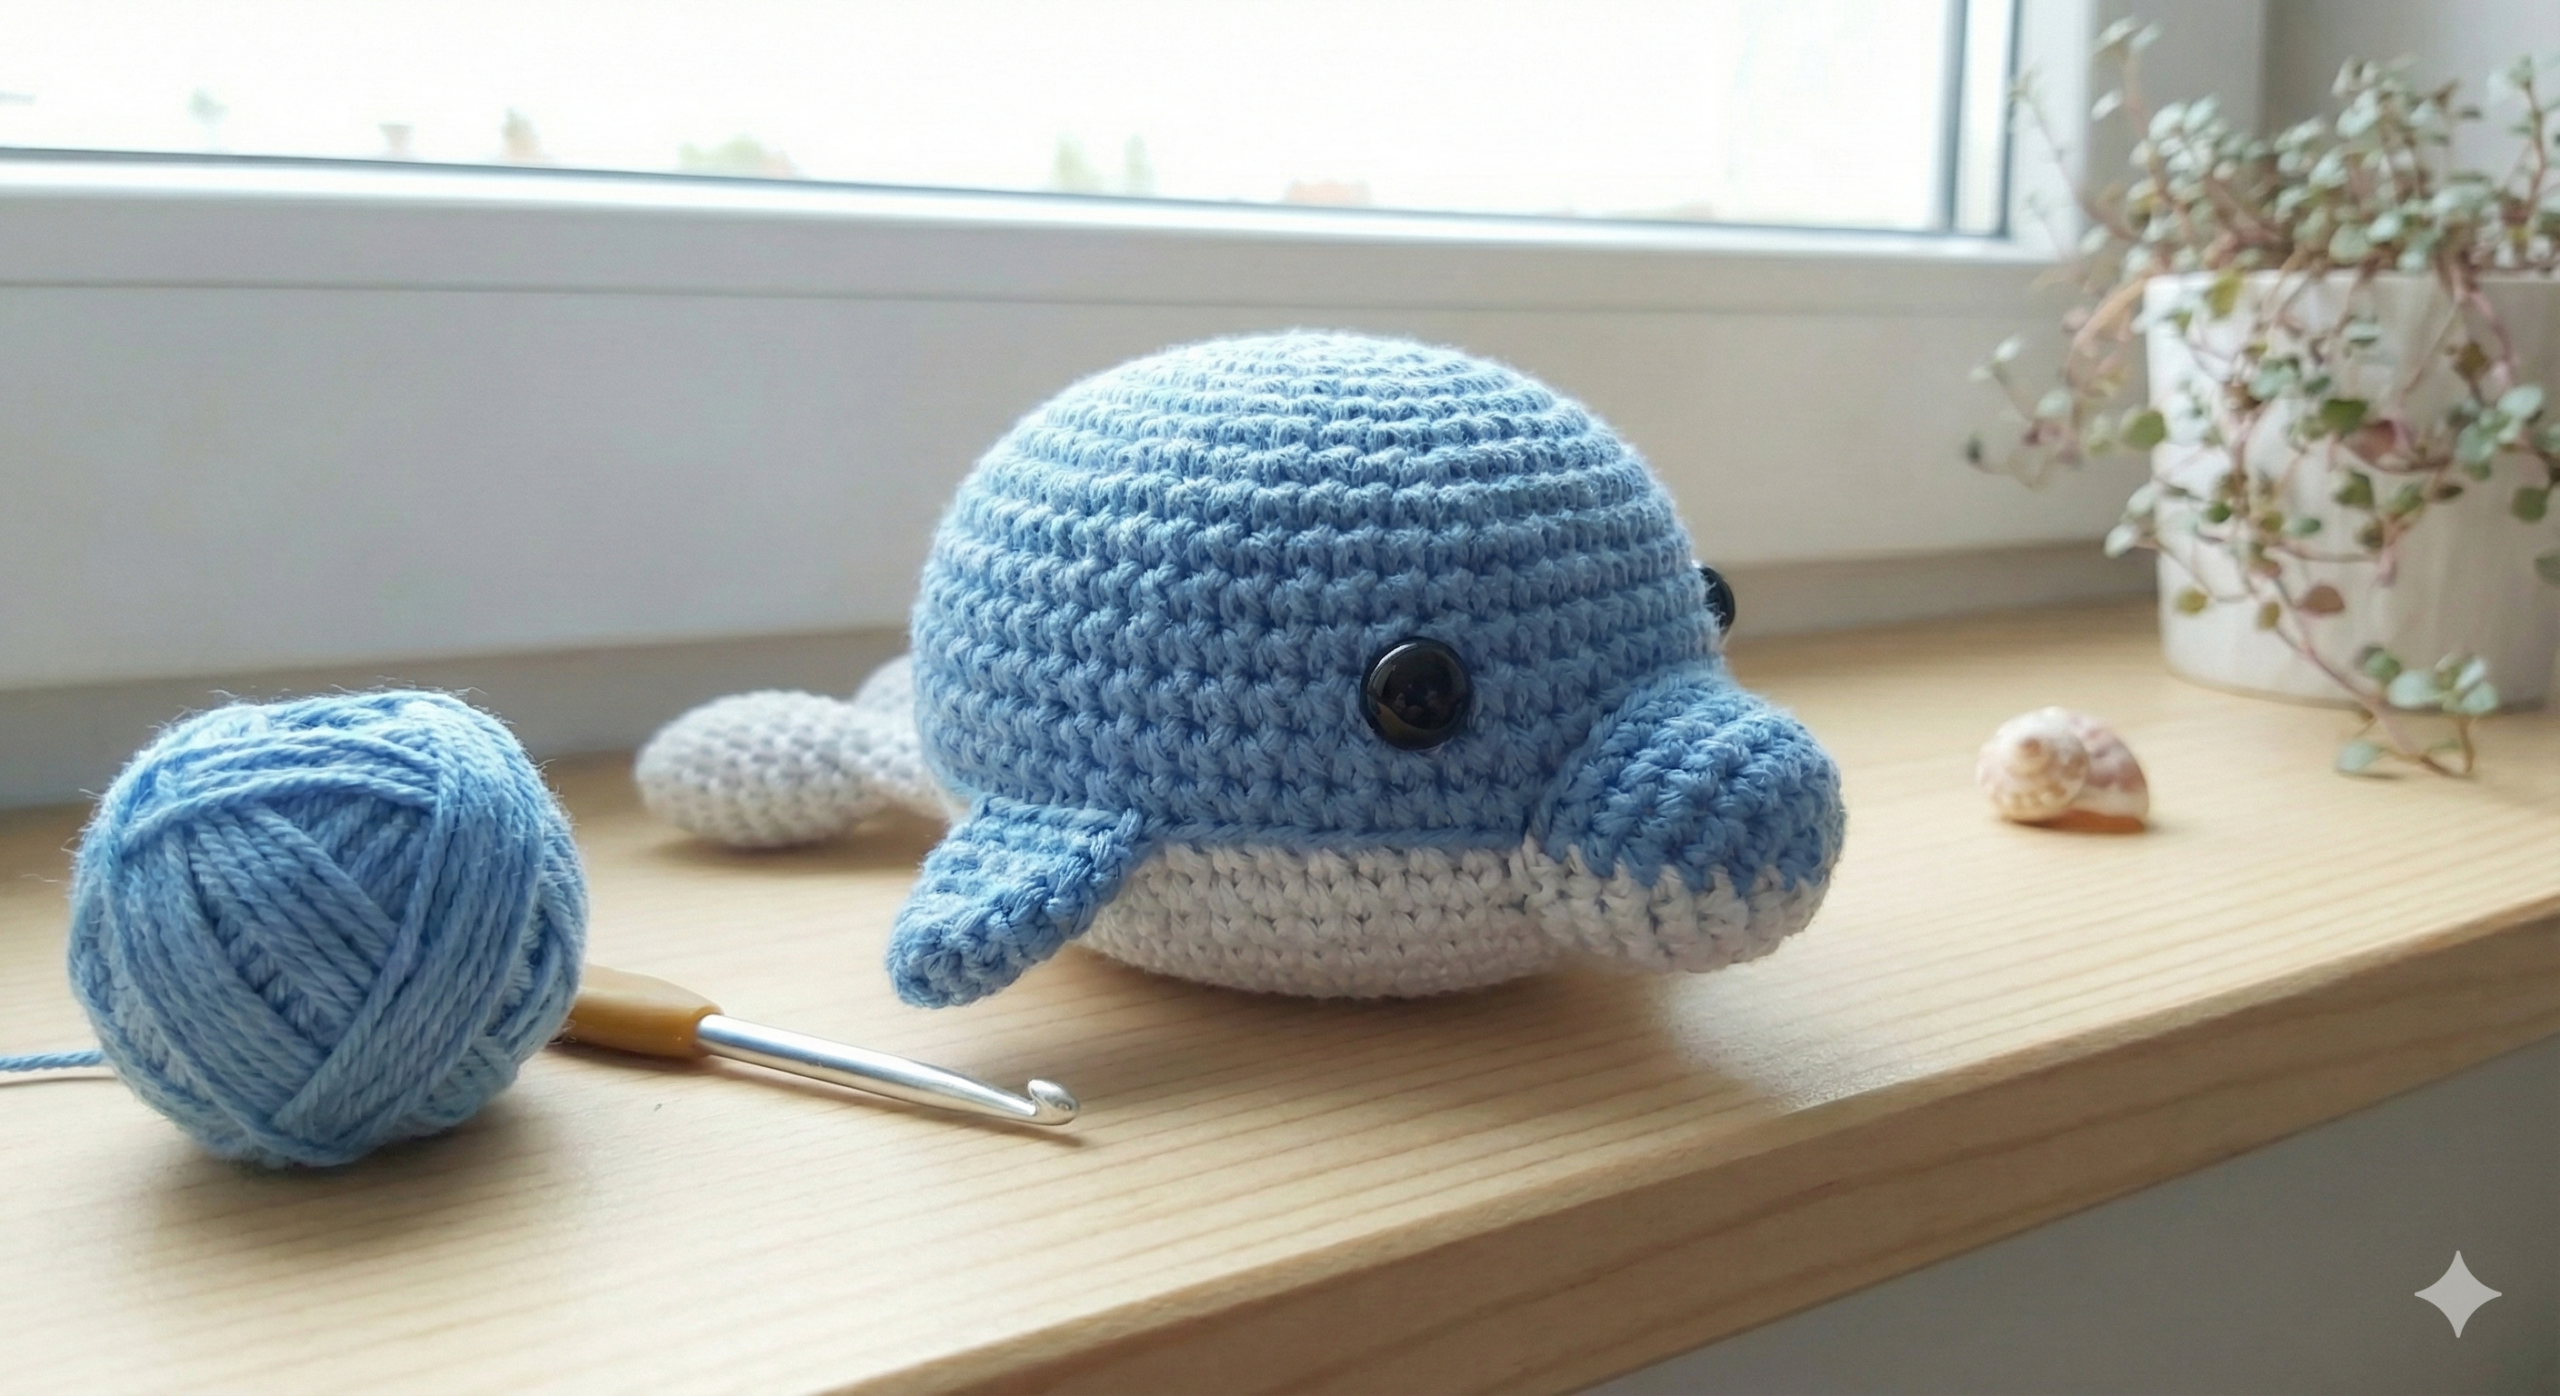
Amigurumi is a fascinating crochet art that allows you to bring adorable characters, keychains, and decorative toys to life with just a hook and some yarn. Whether you are a complete beginner or an experienced crafter, the secret to creating high-quality and long-lasting amigurumi lies in using the right crochet tools and materials. Without the proper yarn, hooks, and accessories, even the simplest project can quickly become frustrating.
This guide will walk you through all the essential crochet supplies every amigurumi enthusiast should have in their toolkit. From choosing the best yarn types to selecting the right hook sizes, stuffing, and safety accessories, you’ll discover how each tool makes your work easier and your projects more professional. By the end of this article, you’ll feel confident about what to buy, how to use it, and why these tools are the foundation of successful amigurumi projects.
🧵 1. Yarn – The Foundation of Every Amigurumi
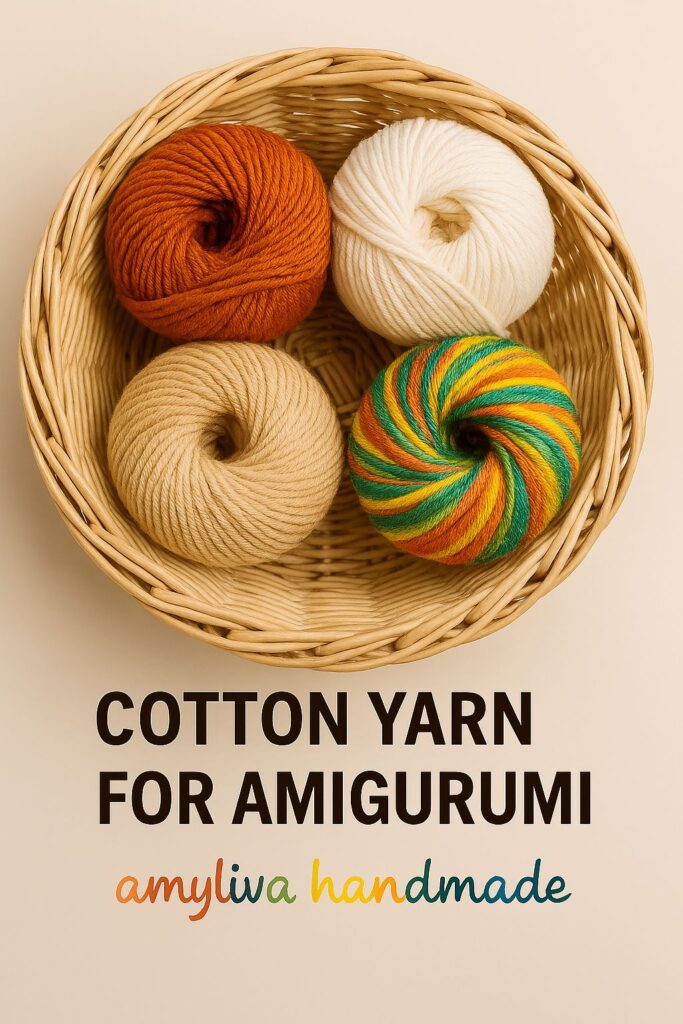
Yarn is the heart of every amigurumi project. The type, thickness, and texture of the yarn you choose directly affect how your finished toy will look and feel. Beginners often wonder which yarn is best for amigurumi, and the answer depends on the project and the effect you want to achieve.
- Cotton Yarn – This is the most popular choice for amigurumi. Cotton yarn creates a smooth, firm texture that highlights every stitch and gives your toys a professional finish. It’s also durable, easy to wash, and holds its shape well. Perfect for keychains, dolls, and detailed projects.
- Acrylic Yarn – A softer, more affordable alternative. Acrylic is lightweight and comes in a wide variety of colors. However, it may pill over time and is less sturdy compared to cotton. Still, it’s a great choice for beginners or for practice pieces.
- Blended Yarns – A mix of cotton and acrylic can give you the best of both worlds: softness, durability, and affordability.
Pro Tip: For beginners, a DK (double knit) cotton yarn paired with a 2.5 mm or 3.0 mm crochet hook is the easiest way to achieve neat stitches and firm shapes.
🪝 2. Crochet Hooks – Choose the Right Size
Choosing the right crochet hook is just as important as picking the right yarn. The size, shape, and material of your hook determine how comfortable you’ll feel while crocheting and how neat your stitches will look. For amigurumi, the goal is to create tight stitches so the stuffing doesn’t show through.
- Hook Sizes – Most amigurumi patterns recommend using smaller hooks than you would normally use for the same yarn. For example, with DK cotton yarn, a 2.5 mm–3.0 mm hook works best. This ensures firm stitches and prevents gaps.
- Materials – Hooks come in different materials such as aluminum, steel, plastic, or ergonomic rubber handles.
- Aluminum hooks are lightweight and slide smoothly through stitches.
- Ergonomic hooks with cushioned handles reduce hand strain, especially during long crochet sessions.
- Shape – Some crocheters prefer tapered hooks, while others love inline hooks. The choice is personal, and experimenting will help you discover which type feels more comfortable.
Pro Tip: Invest in a set of ergonomic crochet hooks. They may cost a little more, but they will save your hands from fatigue and make crocheting more enjoyable.
✂ 3. Scissors – Small but Mighty
1. Definition and Purpose:
Scissors are essential tools in amigurumi and other crafts, used for cutting yarn, trimming excess, and achieving a clean finish. High-quality scissors prevent fraying and ensure precise cuts.
2. Types of Scissors:
- Embroidery / Needlework Scissors: Small, sharp-tipped scissors ideal for precise cuts and delicate details.
- Sewing Scissors: Larger and stronger, suitable for cutting thicker yarns and fabrics.
- Multi-purpose Scissors: Can be used for both yarn and fabric, though not ideal for fine, detailed work.
- Mini / Travel Scissors: Compact and portable, perfect for on-the-go projects.
3. Features to Look For:
- Sharp Tips: Ensures clean, accurate cuts without fraying.
- Ergonomic Handles: Reduces hand fatigue during extended use.
- Stainless Steel Blades: Provides durability and long-lasting sharpness.
- Safety Covers: Protects the user, especially important if children are around.
4. Usage Tips:
- Use scissors only for cutting yarn; cutting other materials may damage the blades.
- Keep the yarn taut while cutting for a neat finish.
- Store scissors safely with a cover or in a dedicated case when not in use.
5. Cleaning and Maintenance:
- Wipe the blades with a dry cloth after use.
- Avoid storing in damp areas to prevent rust.
- If the blades become dull, consider professional sharpening to restore their precision.
6. Additional Tips for Amigurumi:
- Keep a dedicated pair of scissors exclusively for yarn to maintain sharpness.
- Small embroidery scissors are perfect for trimming close to stitches without damaging your project.
- For larger cuts or bulk yarn, sewing scissors work efficiently and save time.
⸻
🧷 4. Stitch Markers – Keep Track of Rounds
1. Definition and Purpose:
Stitch markers are small tools used in crochet and amigurumi to mark specific stitches or rounds. They help keep track of where a round begins or ends, making it easier to follow patterns accurately and maintain consistent shapes.
2. Types of Stitch Markers:
- Ring or Closed Markers: Circular markers that can be slipped onto a stitch; they stay in place and are ideal for marking the beginning of a round.
- Clip-On / Locking Markers: Small clips that attach directly to the stitch; easy to move and remove as you work.
- Reusable Plastic or Metal Markers: Durable and can be used for multiple projects.
- Safety Pin Markers: Affordable alternative, especially for beginners.
3. Features to Look For:
- Visibility: Bright colors make markers easy to spot among yarn stitches.
- Durability: Strong enough to handle frequent repositioning without breaking.
- Size: Small enough to fit between stitches without stretching or distorting the work.
- Ease of Use: Should be simple to attach, move, and remove during stitching.
4. Usage Tips:
- Place a marker at the beginning of each round to prevent confusion and avoid counting errors.
- Use different colors or types of markers to indicate special stitches, increases, or decreases.
- Remove markers when no longer needed to avoid snagging yarn or causing uneven stitches.
- Keep a few extra markers on hand for larger or more complex projects.
5. Benefits in Amigurumi and Crochet:
- Maintains Accuracy: Ensures rounds are counted correctly, keeping shapes uniform.
- Saves Time: Reduces the need to recount stitches repeatedly.
- Improves Workflow: Makes it easier to follow complex patterns, especially for detailed designs.
- Reduces Mistakes: Helps prevent accidental stitch loss or skipped rounds.
6. Maintenance and Care:
- Keep markers in a small box or pouch to avoid losing them.
- Clean plastic or metal markers with a damp cloth if they get dusty or sticky.
- Inspect markers regularly for signs of wear or damage, replacing them as needed.
⸻
🧵 5. Yarn Needles – For Sewing and Finishing
1. Definition and Purpose:
Yarn needles, also known as tapestry or darning needles, are large, blunt needles used for sewing pieces of crochet or knitting together, weaving in loose ends, and finishing amigurumi projects. They ensure neat, secure, and professional-looking results.
2. Types of Yarn Needles:
- Blunt-Tip / Tapestry Needles: Wide-eyed needles with a blunt tip, perfect for working with yarn without splitting fibers.
- Curved Needles: Ideal for sewing curved seams or stuffing-heavy projects.
- Metal or Plastic Needles: Metal needles are durable and slide easily through yarn, while plastic needles are lightweight and safer for children.
- Needle Sizes: Sizes range depending on the thickness of the yarn; larger yarns require bigger needles with wider eyes.
3. Features to Look For:
- Blunt Tip: Prevents splitting yarn strands.
- Wide Eye: Accommodates thick yarns for easy threading.
- Smooth Surface: Allows the needle to glide through stitches effortlessly.
- Durability: Strong enough to handle repeated use without bending or breaking.
4. Usage Tips:
- Thread the needle with a length of yarn long enough to sew the entire seam or weave in ends.
- Use a blunt-tip needle to gently pass through stitches, avoiding yarn splitting.
- Hide seams or ends inside the project for a clean, professional finish.
- Weave in loose ends back and forth several times to prevent unraveling.
5. Benefits in Amigurumi and Crochet:
- Professional Finish: Secures parts neatly and hides loose ends.
- Stability: Holds sewn pieces together firmly, preventing gaps.
- Versatility: Can be used for assembly, finishing, and even adding details like embroidered features.
- Ease of Use: Blunt needles are beginner-friendly and safe for all ages.
6. Maintenance and Care:
- Store needles in a small case or pin cushion to prevent loss.
- Keep metal needles dry to avoid rusting.
- Replace bent or damaged needles promptly for smooth stitching.
7. Extra Tips:
- Use different colored yarn for sewing if you want visible decorative stitching.
- Always match needle size to yarn thickness for the best results.
- For tight amigurumi stitches, slightly dampening the yarn end can make threading through easier.
⸻
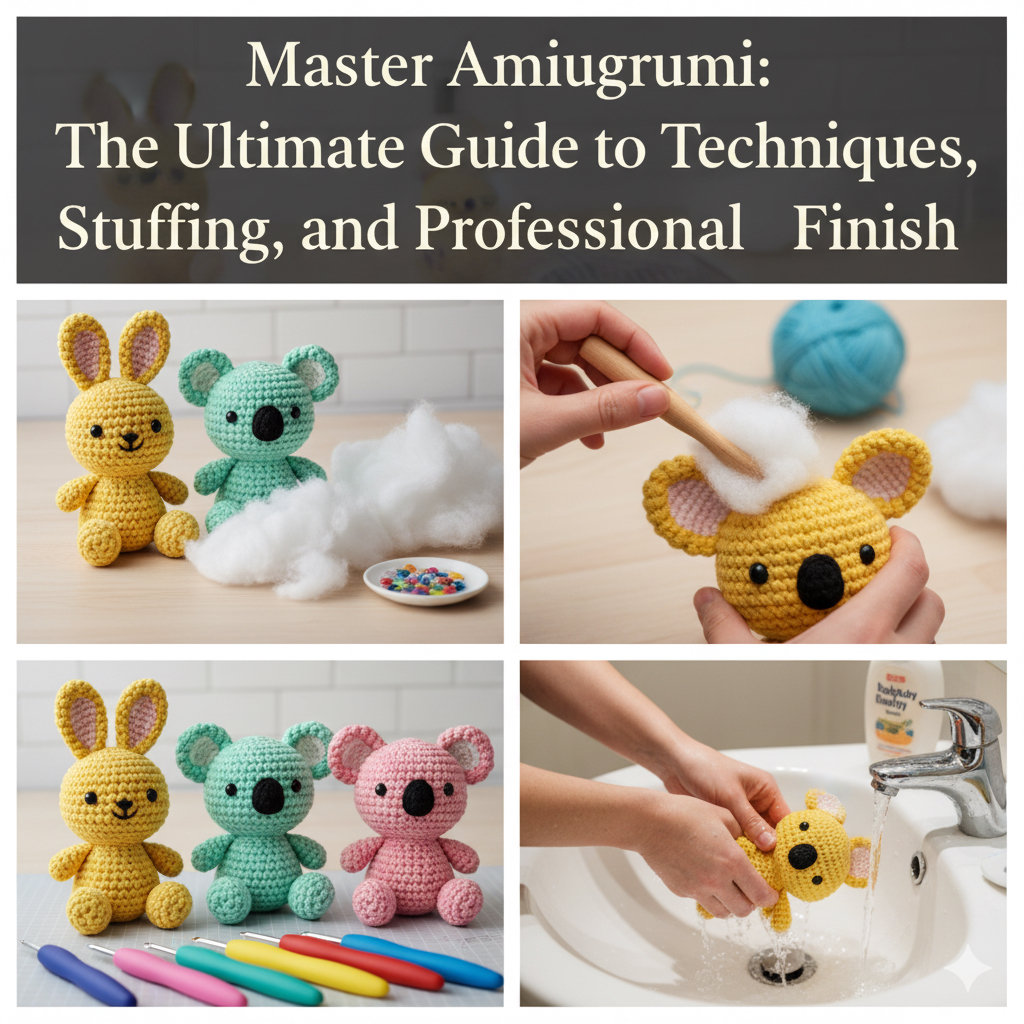
☁ 6. Stuffing – Give Shape to Your Amigurumi
1. Definition and Purpose:
Stuffing, also called filling or fiberfill, is the material used to give shape, volume, and structure to amigurumi projects. Proper stuffing ensures your amigurumi holds its form, feels soft and squeezable, and looks professionally finished.
2. Types of Stuffing:
- Polyester Fiberfill: The most common stuffing, lightweight, washable, and hypoallergenic.
- Cotton or Wool Batting: Natural fibers that give a firmer feel; ideal for eco-friendly projects.
- Recycled or Eco-Friendly Stuffing: Made from recycled fibers or biodegradable materials; sustainable choice.
- Beads or Pellets: Used for weighted amigurumi (like plush toys that sit upright) or sensory toys.
- Combination Stuffing: Mixing fiberfill with beads for stability and softness.
3. Features to Consider:
- Softness: Should be soft enough to shape easily, but firm enough to hold the amigurumi’s form.
- Washability: Machine-washable stuffing is ideal for toys meant for children.
- Non-Allergenic: Safe for babies and people with sensitivities.
- Consistency: Avoid lumps or uneven texture for smooth results.
4. Usage Tips:
- Stuff your amigurumi gradually while crocheting, adding small amounts at a time.
- Use a stuffing tool, chopstick, or the blunt end of a crochet hook to reach small corners and tight areas.
- Avoid overstuffing, which can stretch stitches and distort shapes.
- Ensure even distribution of stuffing for a balanced, well-shaped toy.
5. Benefits in Amigurumi Projects:
- Maintains Shape: Keeps limbs, heads, and bodies firm and properly proportioned.
- Adds Softness: Gives a cuddly, squeezable texture to the toy.
- Customizable Firmness: Allows you to adjust softness or firmness depending on the project.
- Supports Longevity: Proper stuffing helps the toy maintain its shape over time, even with regular use.
6. Maintenance and Care:
- Wash hands before handling stuffing to keep it clean.
- Store unused stuffing in a dry, airtight bag to prevent dust and moisture.
- Spot clean amigurumi or use a gentle hand wash to preserve stuffing integrity.
7. Extra Tips:
- For small or detailed parts like ears and tails, stuff lightly to prevent bulging.
- Use denser stuffing in bases or heavy parts for stability.
- If creating a weighted amigurumi, place beads first, then surround with fiberfill.
👀 7. Safety Eyes and Noses – Bring Characters to Life
1. Definition and Purpose:
Safety eyes and noses are specialized plastic components used in amigurumi and stuffed toys to create realistic or expressive facial features. They are designed to be securely attached, making them safe for children while giving personality and life to handmade characters.
2. Types of Safety Eyes and Noses:
- Plastic Safety Eyes: Most common type, available in various sizes, colors, and finishes (glossy, matte, or glitter).
- Plastic Safety Noses: Often used for animals, can be round, oval, or triangular, and come in different colors.
- Embroidery Alternatives: For very young children, embroidered eyes and noses eliminate any small part risks.
- Self-Locking vs. Screw-On: Some eyes have locking washers that snap behind the fabric, while others screw on for extra security.
3. Features to Look For:
- Size and Scale: Choose eyes and noses proportionate to your amigurumi size.
- Durability: High-quality plastic resists breaking or scratching.
- Safety: Non-toxic and child-safe components.
- Ease of Attachment: Simple to insert and lock in place without damaging stitches.
4. Usage Tips:
- Decide placement before attaching permanently to ensure symmetry and expression.
- Insert through stitches and secure with the washer or lock provided.
- For stuffed toys for small children, consider embroidered features or securely attach safety components.
- Test the attachment by gently tugging to make sure it won’t come loose.
5. Benefits in Amigurumi Projects:
- Brings Characters to Life: Adds expression, making toys more engaging and cute.
- Professional Finish: Creates polished, consistent, and safe facial features.
- Versatile: Works for animals, dolls, and imaginative creatures.
- Child-Safe: When properly attached, reduces the risk of choking hazards.
6. Maintenance and Care:
- Clean gently with a damp cloth; avoid harsh chemicals that may damage plastic.
- Store spare eyes and noses in a small box to prevent loss.
- Inspect periodically for loose or damaged components, especially in toys used by children.
7. Extra Tips:
- Combine different sizes and colors for more expressive characters.
- For tiny projects, use the smallest available safety eyes to maintain proportion.
- Consider pairing safety eyes with embroidery details to enhance facial expressions.
⸻
📏 8. Measuring Tape – Check Your Gauge
1. Definition and Purpose:
A measuring tape is a flexible tool used in crochet, knitting, and amigurumi to measure dimensions accurately. It helps ensure your project matches the intended size and maintains consistent proportions, which is especially important when following patterns or creating wearable items.
2. Types of Measuring Tapes:
- Flexible Cloth or Plastic Tape: Lightweight and bendable, ideal for curved surfaces and soft materials.
- Retractable Tape: Comes in a compact casing with a retractable mechanism for easy storage.
- Metal Tape: Sturdier, less flexible, better for straight measurements but less ideal for curves.
- Metric vs. Imperial: Some tapes have both centimeters and inches for versatile use.
3. Features to Look For:
- Flexibility: Easily wraps around curves and small amigurumi parts.
- Durability: Resistant to stretching, fraying, or breaking.
- Clear Markings: Numbers and lines should be easy to read, ideally in contrasting colors.
- Compact Storage: Retractable or foldable for convenience.
4. Usage Tips:
- Check your gauge by measuring a swatch before starting the main project.
- Measure limbs, bodies, or other parts to maintain consistent sizing across pieces.
- Use the tape to compare your work against pattern instructions regularly.
- Avoid stretching the tape too tightly, as it may give inaccurate measurements.
5. Benefits in Amigurumi Projects:
- Accurate Sizing: Ensures parts match the intended dimensions and proportions.
- Consistency: Maintains uniformity when making multiple pieces or sets.
- Professional Finish: Prevents uneven shapes or disproportionate features.
- Pattern Compliance: Helps achieve the exact gauge required in crochet patterns.
6. Maintenance and Care:
- Store in a dry, clean place to avoid stretching or damage.
- Wipe down plastic or cloth tapes occasionally to remove dust or fibers.
- Avoid folding tapes sharply, which can cause creases or weaken the material.
7. Extra Tips:
- For wearable amigurumi accessories (like hats or scarves), check measurements frequently.
- Keep a small notebook to note measurements for recurring designs or future reference.
- Combine tape measurements with stitch counting for maximum accuracy.
⸻
🎨 9. Optional Extras
1. Definition and Purpose:
Optional extras are additional tools or accessories that are not strictly necessary for amigurumi projects but can enhance the process, improve aesthetics, or make crafting easier. They allow crafters to customize their work and add creative details.
2. Common Optional Extras:
- Blush or Fabric Paint: For adding subtle facial details, cheeks, or decorative touches.
- Embroidery Floss or Thread: For stitching details like mouths, eyelashes, or patterns on clothing.
- Pins and Clips: Useful for holding pieces in place before sewing or assembling.
- Wire or Pipe Cleaners: Can give structure to limbs or tails, making the toy poseable.
- Decorative Items: Buttons, beads, ribbons, tiny hats, or scarves to personalize characters.
- Stuffing Tools: Chopsticks, small brushes, or specialized stuffing sticks to reach tight corners.
3. Features to Consider:
- Safety: Ensure any decorative extras are safe for children if the toy is intended for kids.
- Compatibility: Materials should work well with yarn and stuffing, avoiding damage.
- Durability: Extras should hold up over time, especially if handled frequently.
- Ease of Use: Tools like pins or clips should be simple to attach, remove, or adjust.
4. Usage Tips:
- Plan optional additions in advance to avoid disrupting the amigurumi’s structure.
- Use blush or paint lightly to achieve a natural, subtle effect.
- Secure decorative items firmly to prevent loss or hazards.
- Experiment with different textures, colors, or embellishments to make unique designs.
5. Benefits in Amigurumi Projects:
- Personalization: Adds unique details that reflect your style or the character’s personality.
- Enhanced Appearance: Decorative touches make toys more visually appealing and professional.
- Improved Functionality: Wire or pipe cleaners can make toys poseable and interactive.
- Creative Freedom: Gives crafters flexibility to experiment and innovate.
6. Maintenance and Care:
- Store optional extras in a dedicated box or pouch to keep them organized.
- Avoid items that may tarnish, rust, or degrade over time.
- Inspect embellishments periodically for safety, especially on toys for children.
7. Extra Tips:
Keep a small toolkit with optional extras handy for finishing touches on any project.
Combine optional extras with safety eyes and embroidery to create expressive features.
Use themed extras (like seasonal accessories) to make gifts more special.
⸻
✅ Pro Tips for Beginners
1. Start Small:
Begin with simple amigurumi patterns to build confidence and practice basic stitches. Small projects like keychains or mini animals help you master techniques without feeling overwhelmed.
2. Choose the Right Yarn and Hook:
Use medium-weight yarn (like worsted) and an appropriately sized hook for your project. Smooth, non-slippery yarn makes it easier to see stitches and maintain consistent tension.
3. Maintain Consistent Tension:
Tension affects the size and shape of your amigurumi. Practice holding your yarn and hook comfortably to keep stitches even throughout the project.
4. Use Stitch Markers:
Mark the beginning of rounds and special stitches with stitch markers to avoid losing track. This simple tool prevents mistakes and saves time.
5. Stuff Gradually:
Stuff amigurumi pieces lightly at first, adding more as needed. Overstuffing can stretch stitches and distort shapes, while understuffing can make toys floppy.
6. Keep Tools Organized:
Store your crochet hooks, needles, stitch markers, scissors, and other tools in a dedicated case or pouch. Staying organized reduces frustration and speeds up your work.
7. Learn to Weave in Ends Properly:
Securely weave in loose yarn ends to prevent unraveling. Using a yarn needle, thread ends back and forth through stitches for a clean finish.
8. Watch Tutorials and Join Communities:
Follow video tutorials or online patterns to see techniques in action. Join crochet forums or social media groups to get tips, inspiration, and support.
9. Be Patient and Practice:
Mistakes are part of learning. Take your time, redo parts if needed, and enjoy the process. Each project improves your skills and builds confidence.
10. Experiment and Customize:
Once comfortable with basic techniques, try experimenting with colors, accessories, and shapes. Optional extras like blush, embroidery, or small props can make your amigurumi unique.
11. Keep Notes:
Document hook sizes, yarn types, and modifications for each project. Notes help replicate successful projects and avoid repeating mistakes.
12. Safety First:
If your amigurumi is intended for children, ensure safety eyes, noses, and small embellishments are securely attached. Avoid loose parts that may pose choking hazards.
13. Enjoy the Process:
Crocheting amigurumi is as much about creativity and relaxation as it is about making toys. Take breaks, enjoy your progress, and celebrate each finished project.
⸻
❓ Frequently Asked Questions (FAQ)
1. What is amigurumi?
Amigurumi is the Japanese art of crocheting small, stuffed yarn creatures, such as animals, dolls, or food items. It combines creativity with crafting skills to produce adorable, handmade toys.
2. Which yarn is best for beginners?
Medium-weight (worsted) cotton or acrylic yarn is ideal for beginners. Smooth yarn is easier to work with and helps stitches remain uniform, making it simpler to follow patterns.
3. What crochet hook size should I use?
Hook size depends on your yarn and the tightness of your stitches. Beginners often start with the size recommended on the yarn label. Using a slightly smaller hook than the yarn suggests helps create firm stitches that prevent stuffing from showing.
4. How do I keep track of rounds in amigurumi?
Use stitch markers to mark the beginning of each round. This prevents losing your place and ensures that your toy’s shape remains consistent.
5. How should I stuff my amigurumi?
Stuff gradually while crocheting. Add small amounts at a time, using a stuffing tool for tight areas. Avoid overstuffing, as it can stretch stitches and distort shapes.
6. Are safety eyes and noses secure for children?
Yes, when properly attached with locking washers or secure backs. For toys intended for very young children, consider embroidered eyes and noses to eliminate small part hazards.
7. How do I finish my amigurumi neatly?
Weave in loose yarn ends using a yarn needle, making sure to hide them inside the toy. Sew parts together securely, and use optional extras like blush or embroidery to add finishing touches.
8. Can I wash my amigurumi?
Yes, but check yarn and stuffing materials. Most acrylic and cotton yarns are machine washable on gentle cycles, but delicate or heavily decorated toys may require hand washing.
9. How do I fix mistakes?
If you make an error, gently unravel the affected stitches and redo them. Take your time, use stitch markers, and refer to tutorials for guidance. Mistakes are part of the learning process.
10. What tools are absolutely essential for amigurumi?
Essential tools include yarn, crochet hooks, stuffing, yarn needles, stitch markers, scissors, and optionally safety eyes and noses. Optional extras can enhance your work but are not required.
⸻
🎀 Final Thoughts
Creating amigurumi is more than just crocheting toys—it’s about crafting something with love, patience, and creativity. Whether you’re a beginner or looking to refine your skills, having the right tools and materials makes a huge difference in your projects.
Key Takeaways:
- Essential Tools Matter: Yarn, hooks, stuffing, stitch markers, scissors, and yarn needles form the foundation of every successful amigurumi project.
- Attention to Detail: Proper stuffing, consistent tension, and secure attachments create professional-looking results.
- Optional Extras Enhance Creativity: Safety eyes, noses, embroidery, blush, and small decorative elements bring your characters to life.
- Practice Makes Perfect: Mistakes are normal. Each project improves your technique, builds confidence, and develops your unique style.
- Enjoy the Process: Amigurumi is as much about the journey as the finished product. Take time to savor each stitch and celebrate your progress.
By combining quality materials, proper tools, and creativity, anyone can craft charming amigurumi characters that delight both the maker and the recipient.
Remember, every stitch tells a story—so pick up your hook, grab your favorite yarn, and start creating your very own amigurumi world today!
For more handmade crochet creations, visit amyliva.com.
Yorum gönder