How to Crochet a Mini Cat Amigurumi – Free Pattern & Instructions!
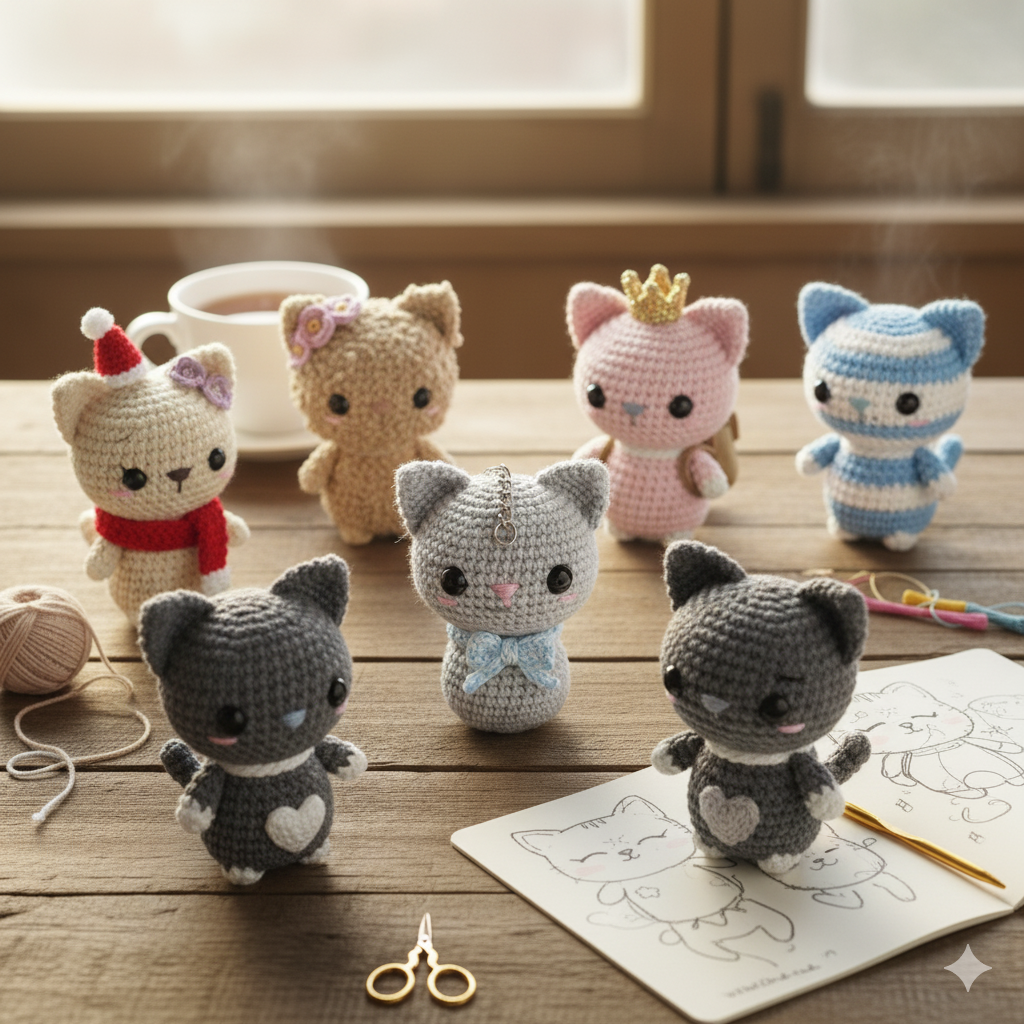
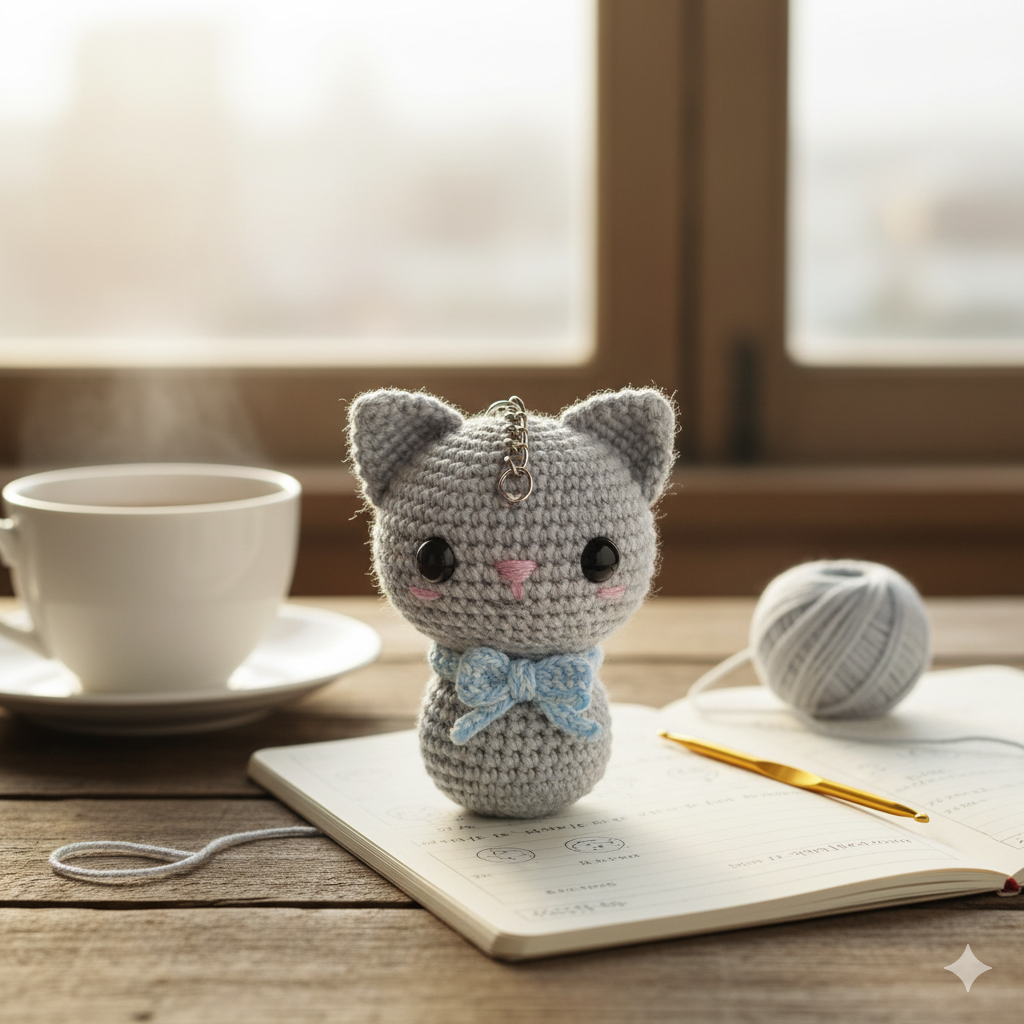
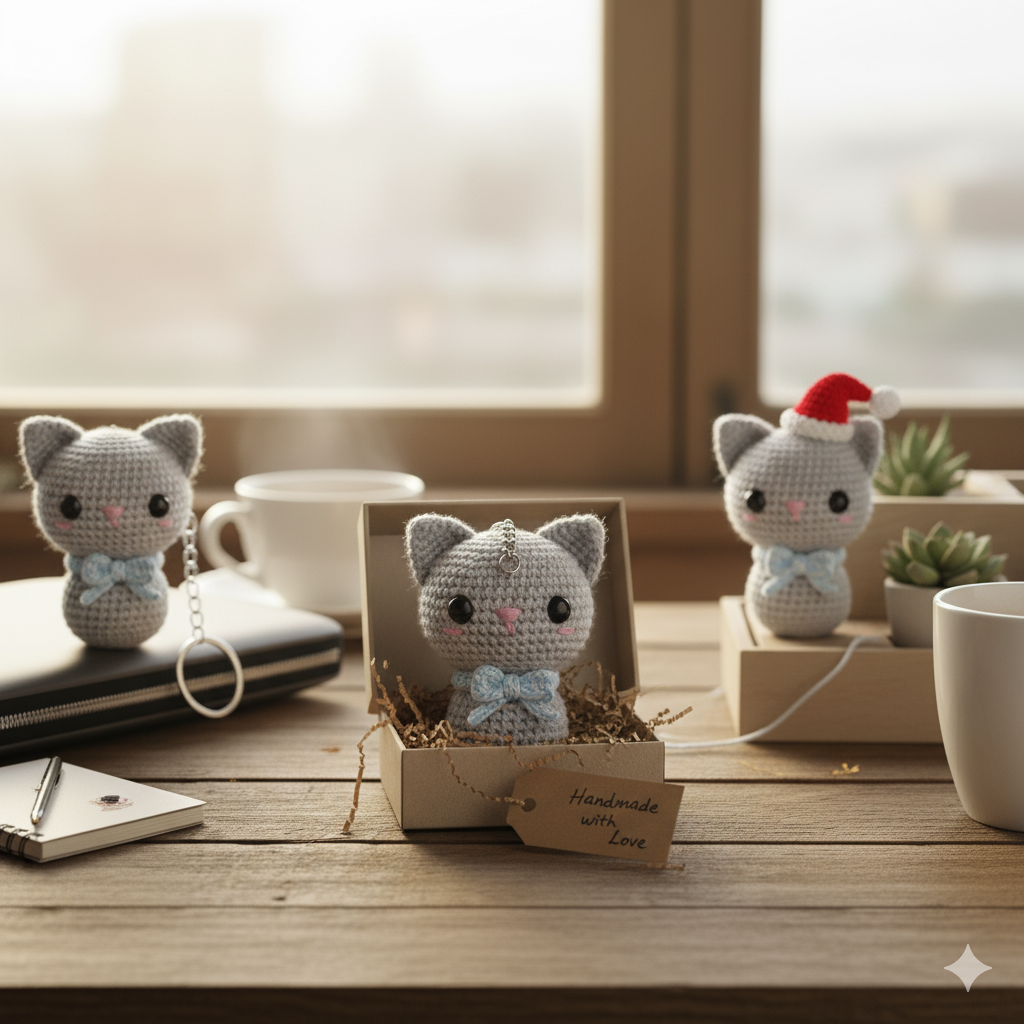
Crochet is more than just a hobby; it’s a way to create something warm, adorable, and uniquely personal. One of the most charming projects for beginners and experienced crafters alike is the Mini Cat Amigurumi. This free pattern from AmyLiva Handmade teaches you how to create a tiny, approximately 8 cm, cat amigurumi that can be used as a keychain, desk decoration, or thoughtful gift.
Every stitch in this pattern tells a story — a story of patience, creativity, and love for handmade crafts. With clear instructions, step-by-step guidance, and tips for personalization, this mini cat amigurumi is a perfect addition to your crochet projects.
🧶 Materials You’ll Need
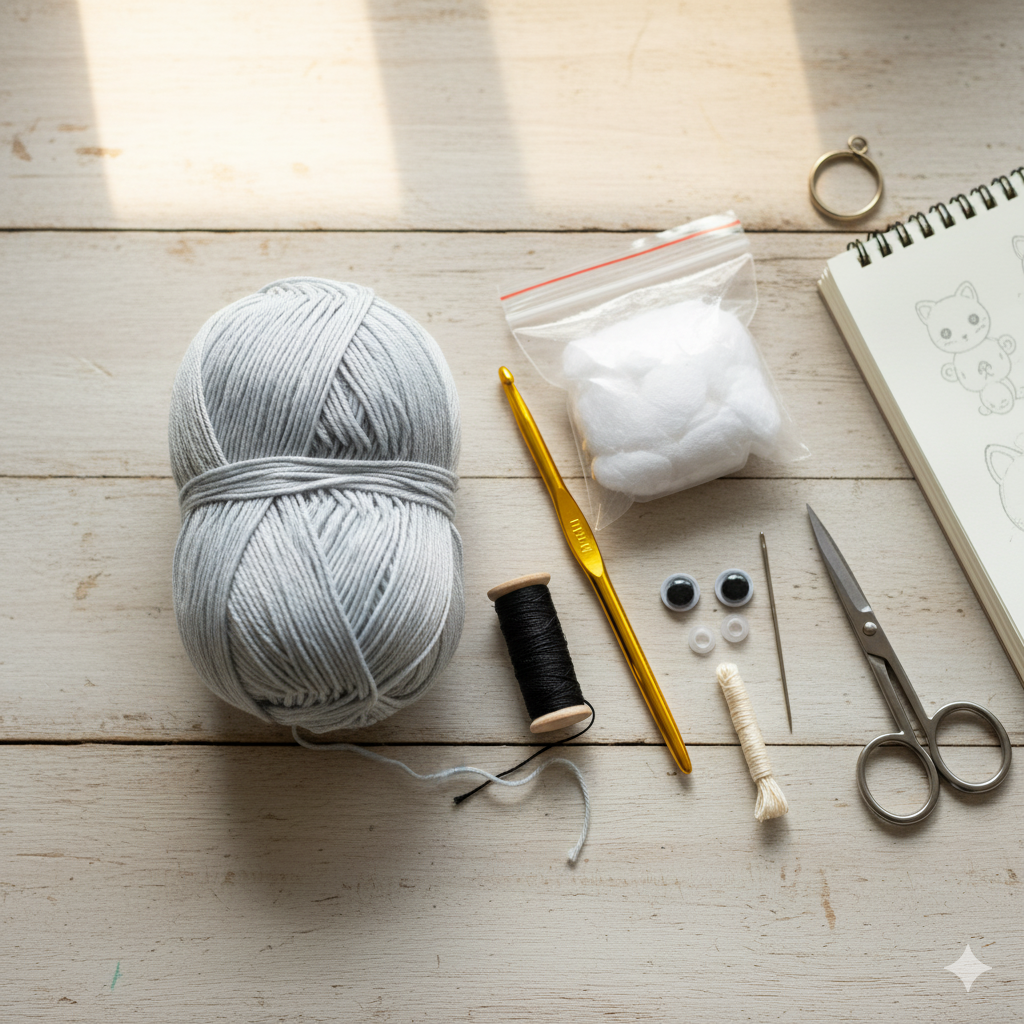
Before starting, gather the following materials:
- Yarn: Soft cotton or bamboo blend in your preferred color. Pastel shades like light gray, cream, or beige work beautifully.
- Crochet Hook: 2.0–2.5 mm for a firm, neat texture.
- Stuffing: Polyester fiberfill for soft, plump shape.
- Safety Eyes or Embroidery Thread: 6 mm black eyes, or you can embroider eyes for a softer look.
- Darning Needle: For sewing pieces together and weaving in ends.
- Scissors: To cut yarn cleanly.
💡 Tip: Choosing a smooth, high-quality yarn ensures your mini cat looks polished and professional.
🪡 Step-by-Step Instructions
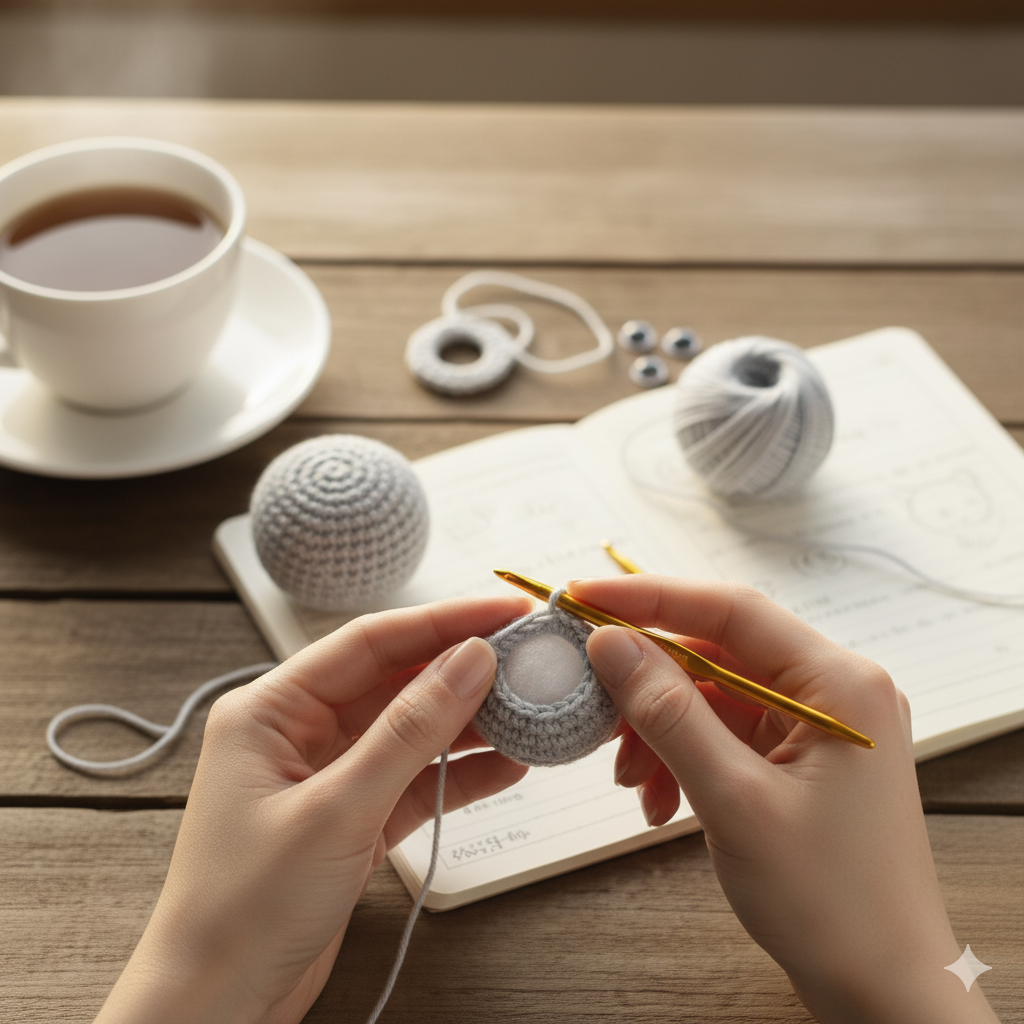
1. Head and Body
- Begin with a magic ring, making 6 single crochets (sc) into the ring.
- Increase evenly in each round to form a rounded shape for the head.
- After reaching the desired head size, continue crocheting for the body, gradually shaping a gentle taper toward the bottom.
- Stuff the head and body lightly with fiberfill to give the cat its plump, cuddly appearance.
2. Facial Features
- Eyes: Insert safety eyes or embroider with black thread. Position them slightly lower than usual for a cute, baby-like appearance.
- Nose and Mouth: Use embroidery thread to create a small, delicate nose and a simple smiling mouth.
3. Ears, Tail, and Legs
- Crochet ears separately using single crochets, then attach them symmetrically on top of the head.
- The tail can be made longer and slightly curved for a realistic effect.
- Legs are small and cylindrical. Attach them evenly to maintain balance.
💡 Tip: Stuff ears lightly to give them a soft, natural shape.
🎨 Personalization and Creativity
One of the most enjoyable aspects of amigurumi is adding your personal touch:
- Accessories: Tiny bows, scarves, or hats can transform your mini cat into a unique character.
- Colors: While this is a single-color pattern, using multiple shades for ears, belly, or paws adds depth.
- Texture: Try different yarns such as cotton, bamboo, or acrylic to achieve varied textures.
Personalization allows you to create a mini cat that reflects your style or the personality of the person you’re gifting it to.
🏆 Finishing Touches
- Ensure all parts are securely sewn. Loose pieces may cause the amigurumi to lose shape.
- Hide all yarn ends for a neat, professional look.
- Give your cat a gentle brush to soften any rough edges and enhance its fluffy appearance.
💡 Tip: For keychain use, attach a small ring at the top of the head, sewn tightly for durability.
💖 Why Handmade Amigurumi Matters
Creating a mini cat amigurumi is more than just following a pattern. It’s about enjoying the process, expressing creativity, and sharing joy. Handmade toys carry emotion, individuality, and a sense of accomplishment. Whether it becomes a gift, a desk companion, or a collectible, your creation will hold sentimental value that mass-produced items can’t match.
Amigurumi also has therapeutic benefits. Crocheting can reduce stress, improve focus, and foster mindfulness. With each stitch, you craft not only a cute figure but also a moment of calm and personal satisfaction.
📸 Display Ideas
- Desk Ornament: Place your mini cat on your workspace to add a playful, cozy vibe.
- Gift Item: Perfect for birthdays, baby showers, or as a thoughtful handmade gift.
- Keychain or Bag Charm: With a small ring, your mini cat can become a portable charm.
By customizing colors and accessories, you can make multiple variations for different purposes, each unique.
❓ Frequently Asked Questions (FAQ)
1. What skill level is this pattern suitable for?
This pattern is ideal for beginner to intermediate crocheters. You should be familiar with magic ring, single crochet, increase, and decrease stitches.
2. How many pieces does this mini cat include?
The project typically involves the head, body, ears, legs, and tail, all sewn together for a cohesive figure.
3. What type of yarn works best?
Soft cotton or bamboo yarn is recommended. Acrylic yarn can also be used, but cotton yields a smoother, more compact finish.
4. Can I use safety eyes or embroidery for the face?
Yes! Safety eyes (6 mm recommended) are secure, while embroidery gives a softer, handmade appearance.
5. How do I assemble the pieces?
Use a darning needle and yarn tails. Attach each part securely, stuffing lightly as needed. Hide ends for a polished look.
6. Can I personalize this mini cat?
Absolutely! You can add bows, scarves, hats, or change the yarn color for a unique look.
7. How long does it take to complete?
For experienced crocheters: 4–6 hours. Beginners may take longer depending on pace.
8. Is this pattern free to use commercially?
You may sell finished items, but credit AmyLiva Handmade as the original designer.
9. How can I prevent yarn from unraveling?
Ensure tight stitches and knot securely when finishing. Extra care with joins prevents unraveling.
10. What if a part becomes loose or damaged?
Carefully reopen the area, re-stuff if needed, and stitch securely with matching yarn.
🌟 Final Thoughts
The Mini Cat Amigurumi is more than just a crochet project — it’s a symbol of creativity, patience, and love for handmade crafts. Each stitch captures emotion, attention, and the joy of making something with your own hands.
Whether you’re gifting it to a loved one, displaying it on your shelf, or using it as a keychain, this mini cat will bring warmth and charm wherever it goes. By following this detailed pattern and adding your personal touches, you create not just a toy but a cherished keepsake.
Explore more patterns and tutorials at AmyLiva Handmade, and continue your journey into the world of adorable, handcrafted amigurumi.


Yorum gönder