Crochet Mini Plants: Easy Cactus & Succulent Patterns
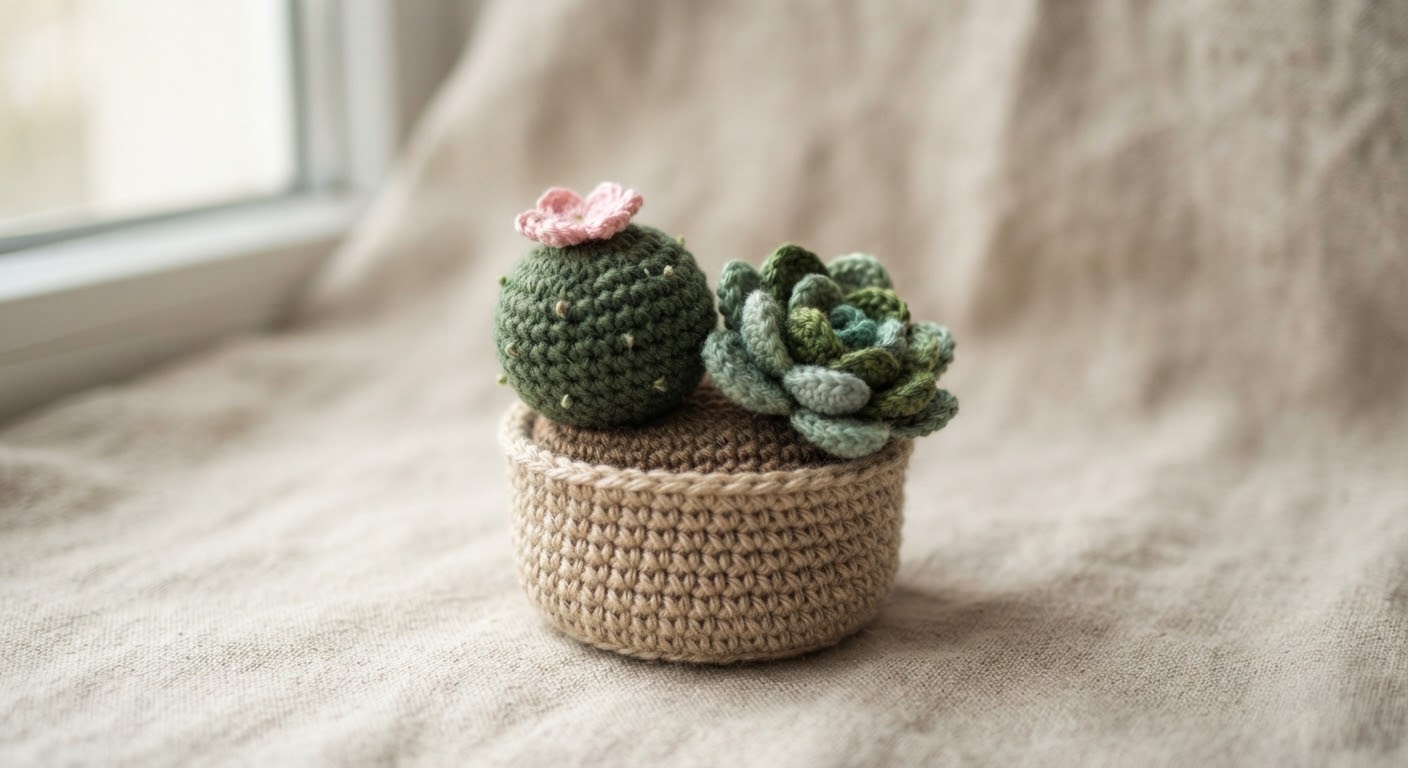
Crochet mini plants are a simple way to make small handmade decorations using basic crochet stitches. They are also useful for using leftover yarn, especially when you only need a small amount of green yarn for each project.
In this tutorial, you will learn how to make two small crochet plants: a rounded mini cactus and a simple succulent made from individual leaves. Both projects use basic stitches and can be displayed in a small crochet pot or another decorative container.
The cactus is worked in continuous rounds as one piece. The succulent is made from separate leaves that are arranged around a center.
What You’ll Make
This tutorial includes:
- A small rounded crochet cactus
- A simple crochet succulent with individual leaves
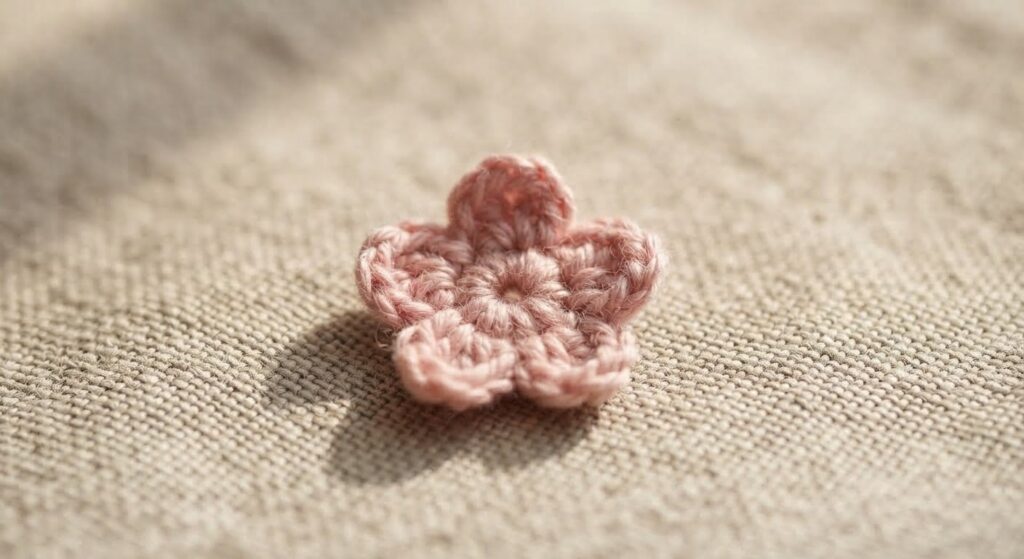
- An optional small cactus flower
- Basic instructions for placing the plants in a small pot
You can make the plants in different shades of green or combine several colors to create your own small collection.
Materials
For the crochet mini plants, you will need:
- Green cotton yarn
- A small amount of brown yarn for the soil, if making a crochet soil layer
- A small amount of pink, yellow, or white yarn for an optional cactus flower
- 2.5 mm crochet hook
- Polyester fiberfill
- Tapestry needle
- Scissors
- Stitch marker
- Small crochet pots or decorative plant pots
- Small piece of cardboard or felt for the base, if needed
Cotton yarn works well for these projects because it gives the small pieces a defined shape. You can also use acrylic yarn, but the texture and finished size may be different.
Crochet Abbreviations
US crochet terms:
- MR – Magic Ring
- sc – Single Crochet
- inc – Increase
- dec – Decrease
- sl st – Slip Stitch
- ch – Chain
- R – Round
- dc – Double Crochet
The cactus is worked in continuous rounds. Use a stitch marker to mark the beginning of each round.
Crochet Mini Cactus Pattern
This small cactus has a simple rounded shape and is worked from the bottom upward. It uses single crochet, increases, and decreases.
Cactus
Using green yarn:
R1
6 sc in MR. (6)
R2
inc around. (12)
R3
(sc, inc) ×6. (18)
R4
(2 sc, inc) ×6. (24)
R5–R10
sc around. (24)
R11
(2 sc, dec) ×6. (18)
R12
(sc, dec) ×6. (12)
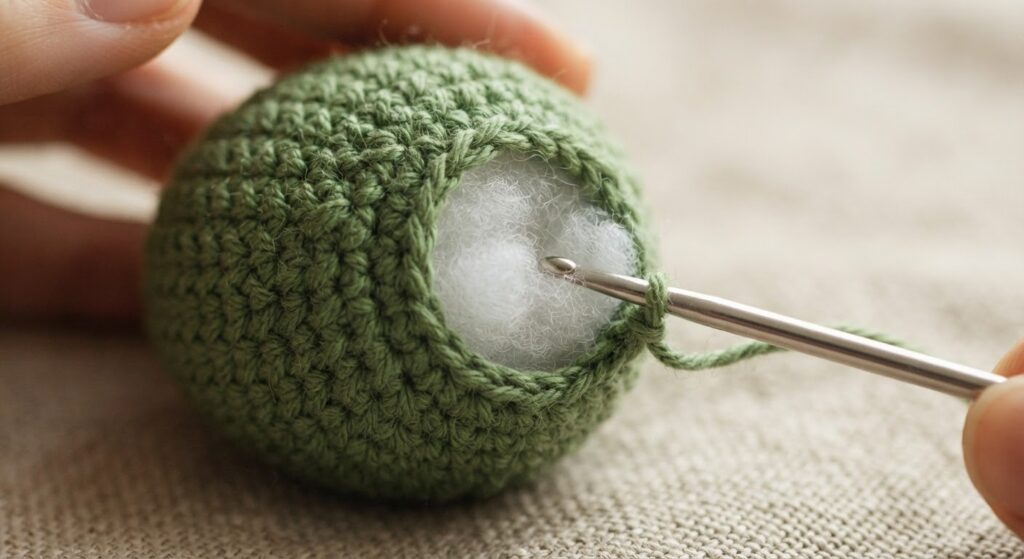
Start stuffing the cactus gradually if you have not already done so.
R13
dec around. (6)
Fasten off, leaving a long tail.
Weave the yarn through the front loops of the remaining 6 stitches. Pull gently to close the opening, secure the yarn, and weave in the end.
Shaping the Cactus
The cactus should have a small rounded shape.
Add the stuffing gradually rather than packing it tightly. Too much stuffing can stretch the stitches and make the cactus look uneven.
If the cactus feels too soft, add a little more fiberfill before closing it. If the stitches begin to spread, remove some stuffing.
Optional Crochet Cactus Flower
A small flower can be added to the top of the cactus as a decorative detail.
Using pink, yellow, or white yarn:
R1
Make a magic ring.
Work 5 small petals into the ring:
- *ch 2
- 2 dc into the ring
- ch 2
- sl st into the ring*
Repeat from * to * until you have 5 petals.
Pull the magic ring closed and fasten off, leaving a long tail.
Use the yarn tail to secure the center and sew the flower to the top of the cactus.
The flower can be made smaller or larger by changing the number of petals or the size of the stitches.
Crochet Mini Succulent Pattern
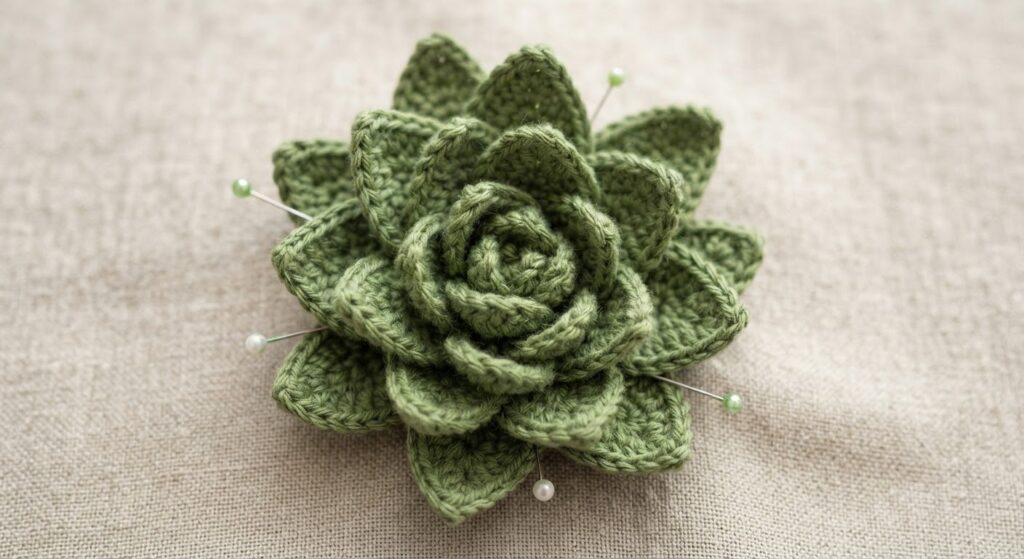
The succulent is made from individual leaves rather than one continuous crocheted piece. This makes it easy to adjust the fullness and shape of the finished plant.
You will need approximately 8–10 leaves for one small succulent.
Succulent Leaves
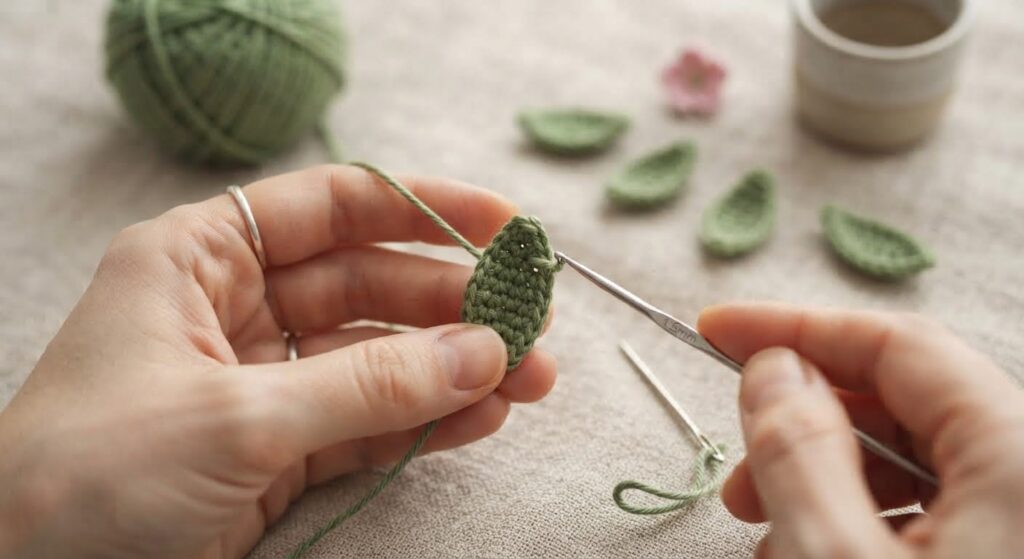
For each leaf, using green yarn:
Row 1
ch 5.
Starting in the second chain from the hook, sc in each chain across. (4)
Fasten off, leaving a long yarn tail for assembly.
Repeat until you have 8–10 leaves.
These simple leaves will create a small, narrow succulent. For a fuller plant, make additional leaves.
Optional Wider Leaves
If you want the succulent to look fuller, you can work around the starting chain instead of using only one row.
Make:
ch 5.
Starting in the second chain from the hook, sc across the chain. Continue working along the opposite side of the chain with sc until you return to the beginning.
Fasten off and leave a long tail.
This creates a slightly wider leaf with a more defined shape.
Assembling the Succulent
The arrangement of the leaves is what gives the succulent its shape.
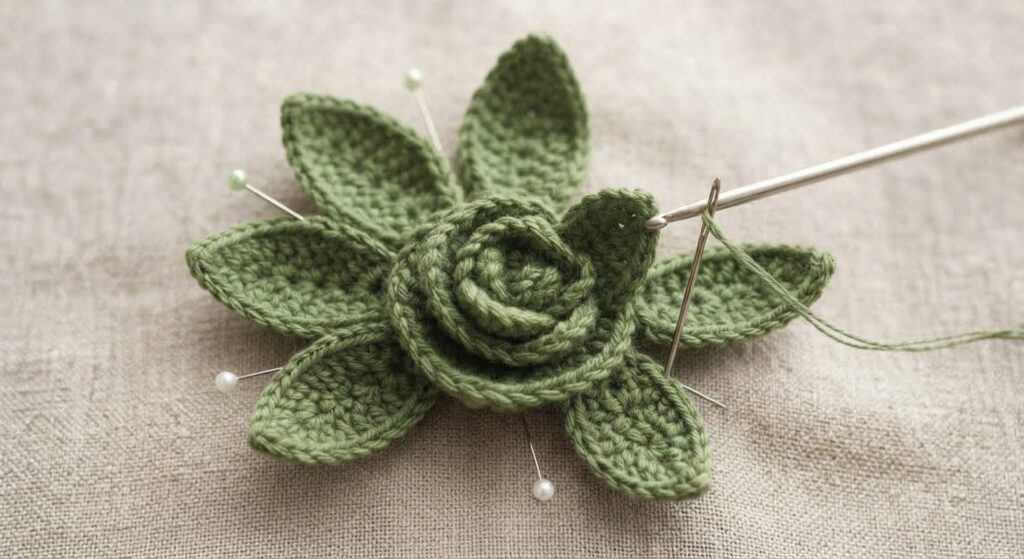
Step 1: Make the outer layer
Place 4–5 leaves in a circle with their pointed ends facing outward.
Overlap the lower ends slightly.
Step 2: Add the inner leaves
Place another 3–5 leaves between the first leaves, with their pointed ends angled slightly upward.
The inner leaves should sit closer together than the outer leaves.
Step 3: Secure the center
Gather the lower ends of the leaves underneath the plant.
Use one of the long yarn tails to wrap around the gathered ends several times. Pull firmly enough to hold the leaves together, but do not pull so tightly that they lose their shape.
Secure the yarn with a knot and weave in the end.
Step 4: Shape the leaves
Gently bend the leaves with your fingers.
You can keep the outer leaves flatter and angle the inner leaves upward to create a more natural succulent shape.
Placing the Crochet Plant in a Pot
A small crochet pot works well for both the cactus and succulent.
If the pot is deep enough, place a small amount of fiberfill underneath the plant to hold it in position.
For a firmer base, cut a small circle of cardboard or felt that fits inside the bottom of the pot. Place it underneath the filling or inside the bottom of the pot so the finished plant sits more securely.
Choose a pot that is slightly wider than the plant. If the pot is much larger, the plant may move around and lose its shape.
Optional Crochet Soil
If you want the plant to look more like a potted plant, you can add a small brown crochet circle as the soil.
Using brown yarn:
R1
6 sc in MR. (6)
R2
inc around. (12)
R3
(sc, inc) ×6. (18)
R4
(2 sc, inc) ×6. (24)
Fasten off and leave a long tail.
The number of rounds can be adjusted according to the size of your pot. The soil piece should fit inside the pot without being stretched.
For the cactus, the soil can be placed underneath the cactus and secured with a few stitches if necessary.
For the succulent, the gathered bottom of the leaves can be sewn to the center of the soil piece.
How to Make the Plants Look Fuller
The succulent can look very different depending on how many leaves you use.
For a smaller plant, 8 leaves may be enough.
For a fuller succulent, make 10–14 leaves and arrange them in two or three layers.
Using two or three shades of green can also give the leaves more variation without changing the pattern.
Keep the darker leaves toward the outside and lighter leaves closer to the center if you want more contrast.
Color Ideas
You do not have to use the same shade of green for every plant.
Try combinations such as:
- Light green cactus with a pink flower
- Dark green succulent with lighter inner leaves
- Sage green leaves with a cream crochet pot
- Two shades of green for a layered succulent
- Soft green cactus with a yellow flower
Small amounts of leftover yarn are often enough for the leaves and flower.
Crochet Mini Plants for Home Decor
Because these plants are small, they can be used in places where a real plant may not be practical.
A mini cactus can sit on a desk, shelf, craft table, or small side table. Several succulents can also be grouped together in different pots.
They do not require sunlight or watering, so they can be used as decorative pieces in rooms where a real plant would not grow well.
They can also be given as small handmade gifts.
Tips for Better Results
Keep the stitches tight
For the stuffed cactus, use a hook size that gives you firm stitches. You should not see large gaps between the stitches.
Do not overstuff the cactus
Too much stuffing can make the cactus wider than intended and stretch the crochet fabric.
Count your stitches
The cactus increases and decreases are simple, but keeping the correct stitch count helps maintain its rounded shape.
Shape the succulent by hand
The leaves may look very flat immediately after crocheting. Gently curve them with your fingers when assembling the plant.
Secure the leaves well
The leaves are small and may shift while you are arranging them. Secure the lower ends firmly before placing the succulent in its pot.
Frequently Asked Questions
Are these crochet mini plants suitable for beginners?
Yes. The cactus uses basic single crochet, increases, and decreases. The succulent leaves are also simple and require only a short chain and single crochet.
What yarn is best for crochet mini plants?
Cotton yarn is a good choice because it holds its shape well and makes small stitches easy to see. Acrylic yarn can also be used if you prefer it.
Can I use a different hook size?
Yes. Choose a hook that works well with your yarn and gives you firm stitches for the stuffed cactus.
Can I make the plants in different colors?
Yes. You can use different shades of green and add flowers in colors such as pink, yellow, or white.
Can I make the succulent larger?
Yes. The easiest way is to make more leaves and arrange them in additional layers. You can also use thicker yarn and a larger hook.
How should I clean a crochet plant?
If the plant becomes dusty, gently wipe it with a slightly damp cloth. Let it dry completely before placing it back in the pot.
Pattern Use
This crochet tutorial is provided for personal crafting and learning. You may make finished crochet plants for yourself or as gifts.
Please do not copy, reproduce, translate, or redistribute this written pattern as your own. If you share your finished project online, please credit Amyliva Handmade and link back to this tutorial.

Yorum gönder