Crochet Giraffe Amigurumi – Free Crochet Pattern
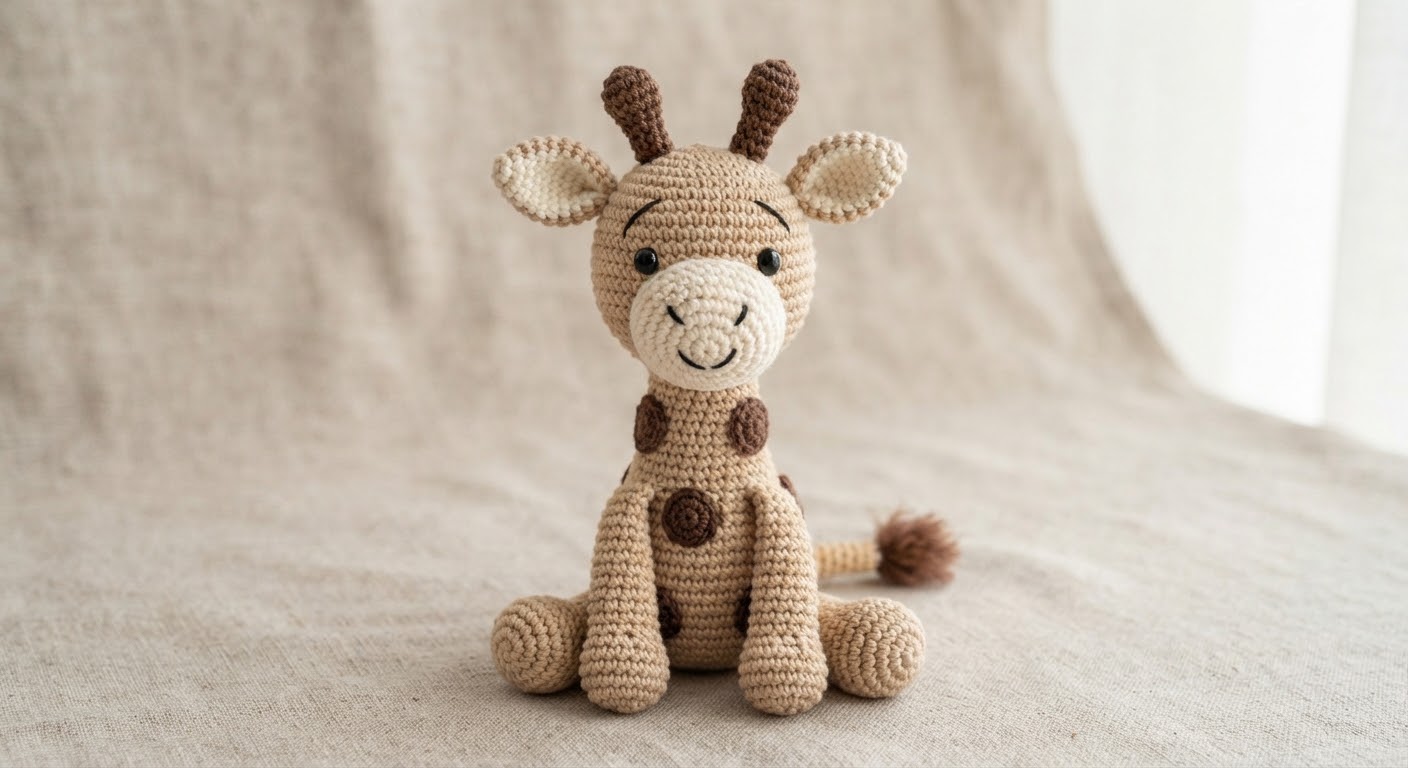
I made this little crochet giraffe with simple shapes and basic amigurumi stitches. The finished giraffe has a rounded head, small horns, little ears, four legs, and brown spots that give it its classic giraffe look.
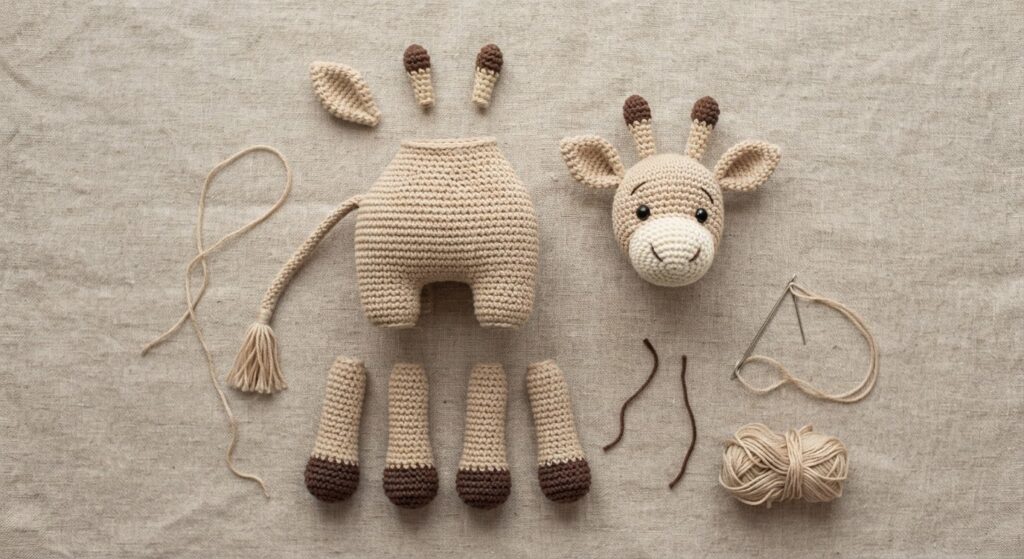
The pieces are crocheted separately and sewn together during assembly. In this pattern, you’ll find the instructions for the head, muzzle, ears, horns, body, legs, and tail, followed by the finishing and assembly steps.
I used beige, cream, and brown yarn for the giraffe shown in the photos, but you can choose different colors if you want to make your own version.
Pattern Details
Skill level: Beginner to intermediate
Finished size: The size will vary depending on the yarn and hook used.
Yarn: DK-weight cotton yarn
Hook size: 2.5–3.0 mm
Construction: The giraffe is made in separate pieces that are sewn together.
Pattern style: Worked mainly in continuous rounds
Materials
- DK-weight cotton yarn in beige or light brown
- Brown yarn for the giraffe spots, horns, and tail tip
- Cream or white yarn for the muzzle and optional inner ears
- 2.5–3.0 mm crochet hook
- Polyester fiberfill
- 8–10 mm safety eyes
- Tapestry needle
- Scissors
- Stitch marker
- Small amount of black yarn for embroidering the nose and mouth
Use a crochet hook that gives you firm, tight stitches. The stuffing should not be visible through the stitches. If you use a different yarn weight or hook size, the finished giraffe will be a different size.
Crochet Abbreviations
- sc – single crochet
- inc – increase
- dec – decrease
- MR – magic ring
- sl st – slip stitch
- FLO – front loop only
- BLO – back loop only
- R – round
This pattern is worked mainly in continuous rounds. Use a stitch marker to mark the beginning of each round and check your stitch count at the end of each round.
Giraffe Amigurumi Pattern
Head – Beige Yarn
Work in continuous rounds using beige yarn.
R1: 6 sc in MR. (6)
R2: inc around. (12)
R3: (sc, inc) × 6. (18)
R4: (2 sc, inc) × 6. (24)
R5: (3 sc, inc) × 6. (30)
R6: (4 sc, inc) × 6. (36)
R7: (5 sc, inc) × 6. (42)
R8: (6 sc, inc) × 6. (48)
R9–R15: sc around. (48)
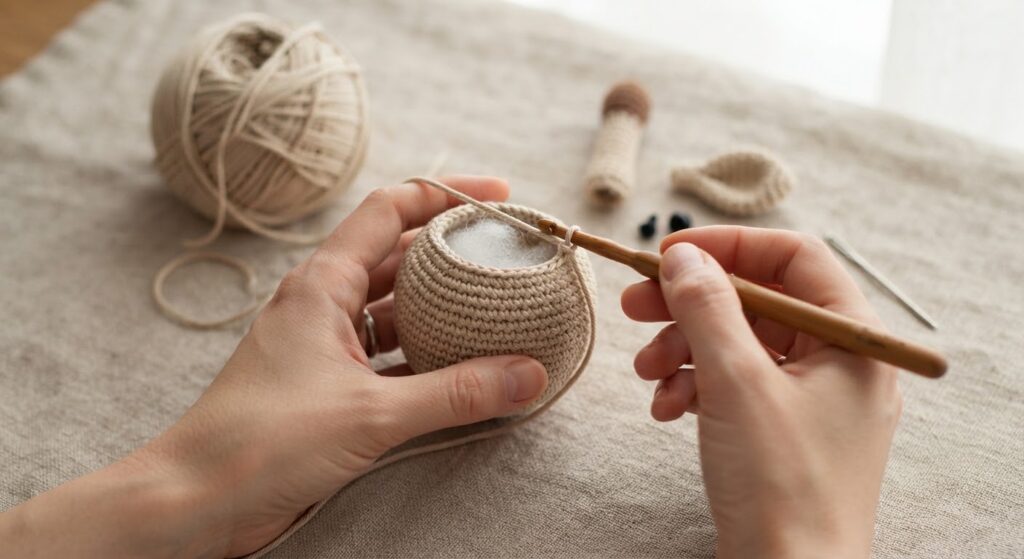
Place the safety eyes between R11 and R12, leaving approximately 10–12 stitches between them.
R16: (6 sc, dec) × 6. (42)
R17: (5 sc, dec) × 6. (36)
R18: (4 sc, dec) × 6. (30)
R19: (3 sc, dec) × 6. (24)
R20: (2 sc, dec) × 6. (18)
R21: (sc, dec) × 6. (12)
R22: dec around. (6)
Add the stuffing gradually as you work the decreases. Avoid overfilling so the head keeps its shape.
Fasten off, close the opening, and weave in the yarn end.
Muzzle – Cream Yarn
R1: 6 sc in MR. (6)
R2: inc around. (12)
R3: (sc, inc) × 6. (18)
R4: sc around. (18)
Fasten off, leaving a long yarn tail for sewing.
Lightly stuff the muzzle and sew it to the lower front of the head, centered between the eyes.
Using black yarn, embroider a small nose and a short line for the mouth.
Horns – Brown Yarn
Make 2.
R1: 6 sc in MR. (6)
R2: inc around. (12)
R3–R5: sc around. (12)
R6: (sc, dec) × 6. (6)
Lightly stuff each horn.
Fasten off, leaving a long yarn tail for sewing.
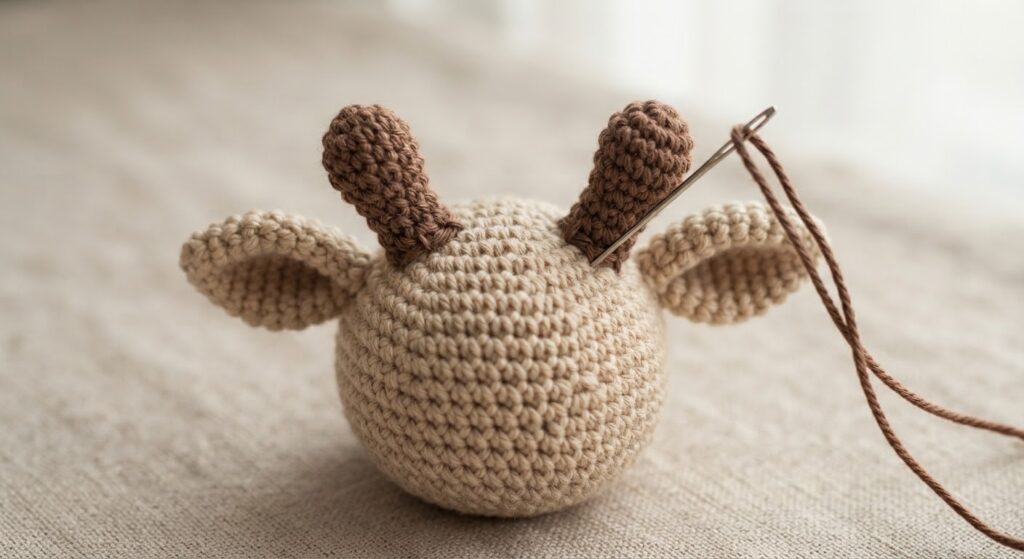
Sew the horns securely to the top of the head, positioned slightly apart.
Ears – Beige and Cream Yarn
Make 2.
R1: 6 sc in MR. (6)
R2: inc around. (12)
R3: (sc, inc) × 6. (18)
R4–R5: sc around. (18)
R6: (sc, dec) × 6. (12)
Fasten off, leaving a long yarn tail for sewing.
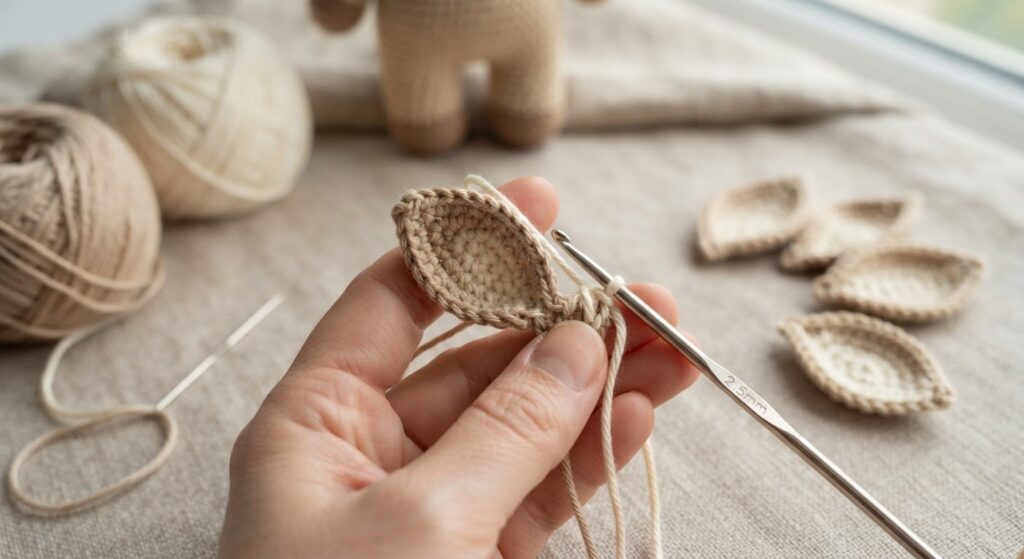
Do not overstuff the ears. Fold each ear slightly and sew it to the sides of the head, just below the horns.
For a simple inner-ear detail, embroider a few stitches with cream or white yarn. This step is optional.
Body – Beige Yarn
Work in continuous rounds using beige yarn.
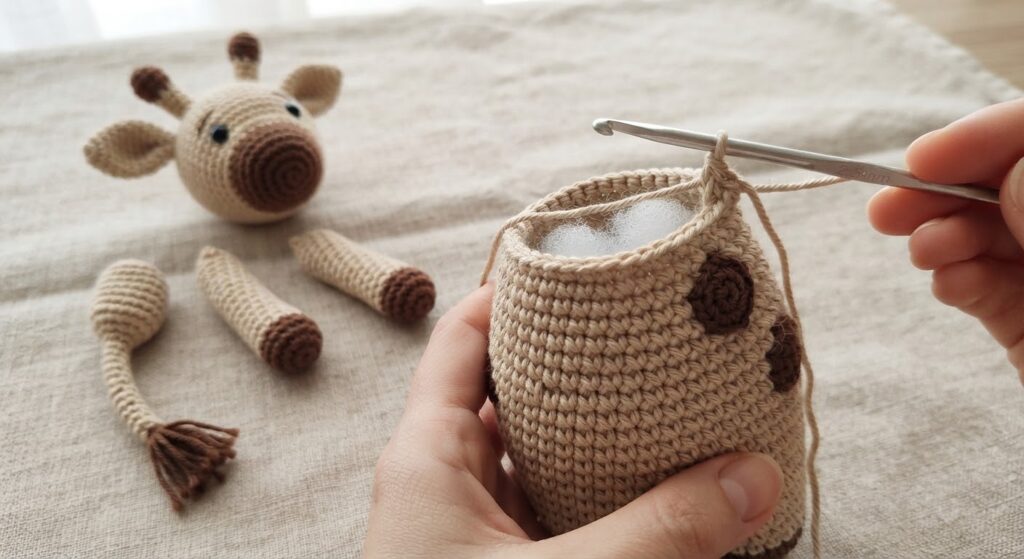
R1: 6 sc in MR. (6)
R2: inc around. (12)
R3: (sc, inc) × 6. (18)
R4: (2 sc, inc) × 6. (24)
R5: (3 sc, inc) × 6. (30)
R6–R12: sc around. (30)
R13: (3 sc, dec) × 6. (24)
R14: (2 sc, dec) × 6. (18)
R15: (sc, dec) × 6. (12)
R16: dec around. (6)
Stuff the body firmly as you work, but avoid overfilling it.
Fasten off, close the opening, and weave in the yarn end.
Front Legs – Beige Yarn
Make 2.
R1: 6 sc in MR. (6)
R2: inc around. (12)
R3: (sc, inc) × 6. (18)
R4–R6: sc around. (18)
R7: (sc, dec) × 6. (12)
R8–R10: sc around. (12)
R11: dec around. (6)
Lightly stuff the lower part of each leg. Do not overfill the legs, so they remain easy to sew to the body.
Fasten off, leaving a long yarn tail for sewing.
Sew the hind legs securely to the lower sides of the body. Position them evenly so the giraffe can sit upright.
Tail – Beige Yarn
R1: 6 sc in MR. (6)
R2–R5: sc around. (6)
Fasten off, leaving a long yarn tail for sewing.
Sew the tail to the back of the body. To finish the tail, attach a small brown yarn tuft to the end.
Giraffe Spots – Brown Yarn
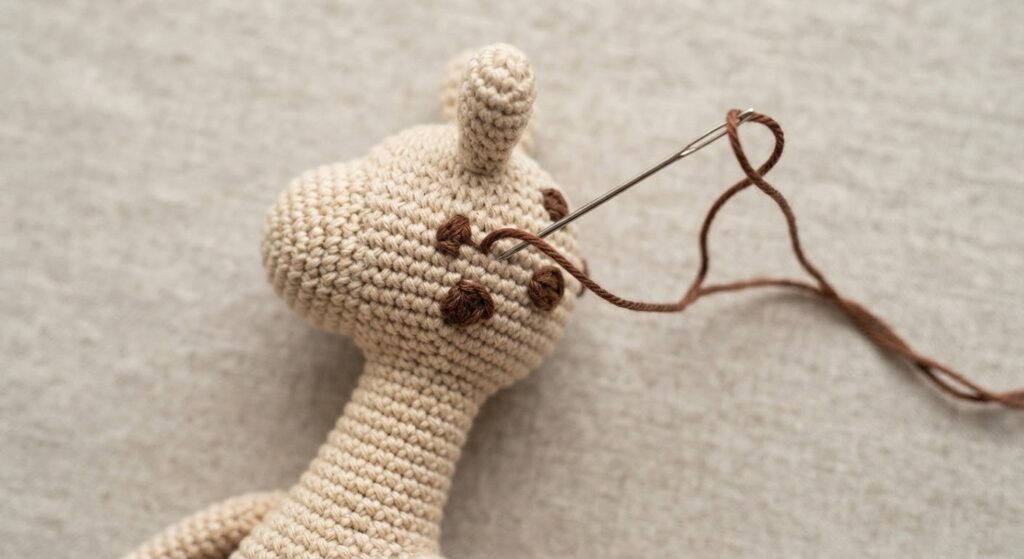
The brown spots can be embroidered directly onto the crocheted pieces after they are finished.
Use brown yarn and make small, uneven shapes with simple stitches. Vary the size and shape of the spots instead of making them all identical. Add spots to the head, body, and legs, leaving some beige areas visible between them.
There is no fixed number or placement for the spots, so you can arrange them to suit the look you want. If you prefer a simpler design, you can also use fewer spots.
Face Details and Assembly
- Embroider a small black nose on the cream muzzle and add a short line below it for the mouth.
- If desired, add a few small embroidery stitches on each side of the muzzle for whisker details.
- If you have not already attached them, sew the ears and horns securely to the head.
- Sew the head firmly to the top of the body, making sure it is centered.
- Sew the hind legs to the lower sides of the body and attach the front legs below the neck area.
- Sew the tail to the back of the body.
- Add the brown spots if you have not already done so.
- Weave in and trim all remaining yarn ends.
Check all sewn-on parts to make sure they are secure before using the finished giraffe as a toy.
Frequently Asked Questions
Can I use a different yarn color?
Yes. You can change the yarn colors to suit your preference. Beige, cream, and brown give the giraffe a traditional look, but other color combinations can also work well.
Can I use a different yarn weight?
Yes. You can use a different yarn weight, but the finished giraffe will be a different size. Choose a crochet hook that gives you firm stitches so the stuffing does not show through.
Do I have to add the brown spots?
No. The spots are optional. You can add more or fewer spots, change their size, or leave them off for a simpler design.
Can I use embroidered eyes instead of safety eyes?
Yes. If the giraffe is intended for a young child, embroidered eyes are a safer option than safety eyes. Make sure all embroidered details and sewn pieces are secure.
Safety and Care
If you are making this giraffe for a young child, replace the safety eyes with securely embroidered eyes. Safety eyes can present a choking risk if they become detached.
Check the seams and attached pieces regularly, especially if the giraffe is used as a toy. Make sure the horns, ears, legs, tail, and other sewn details remain securely attached.
To clean the finished giraffe, gently spot-clean it with a damp cloth when needed. Allow it to air dry completely before using or storing it.
Keep the finished toy away from open flames and excessive heat.



Yorum gönder