Easy Amigurumi Scarecrow Keychain – Free Crochet Pattern
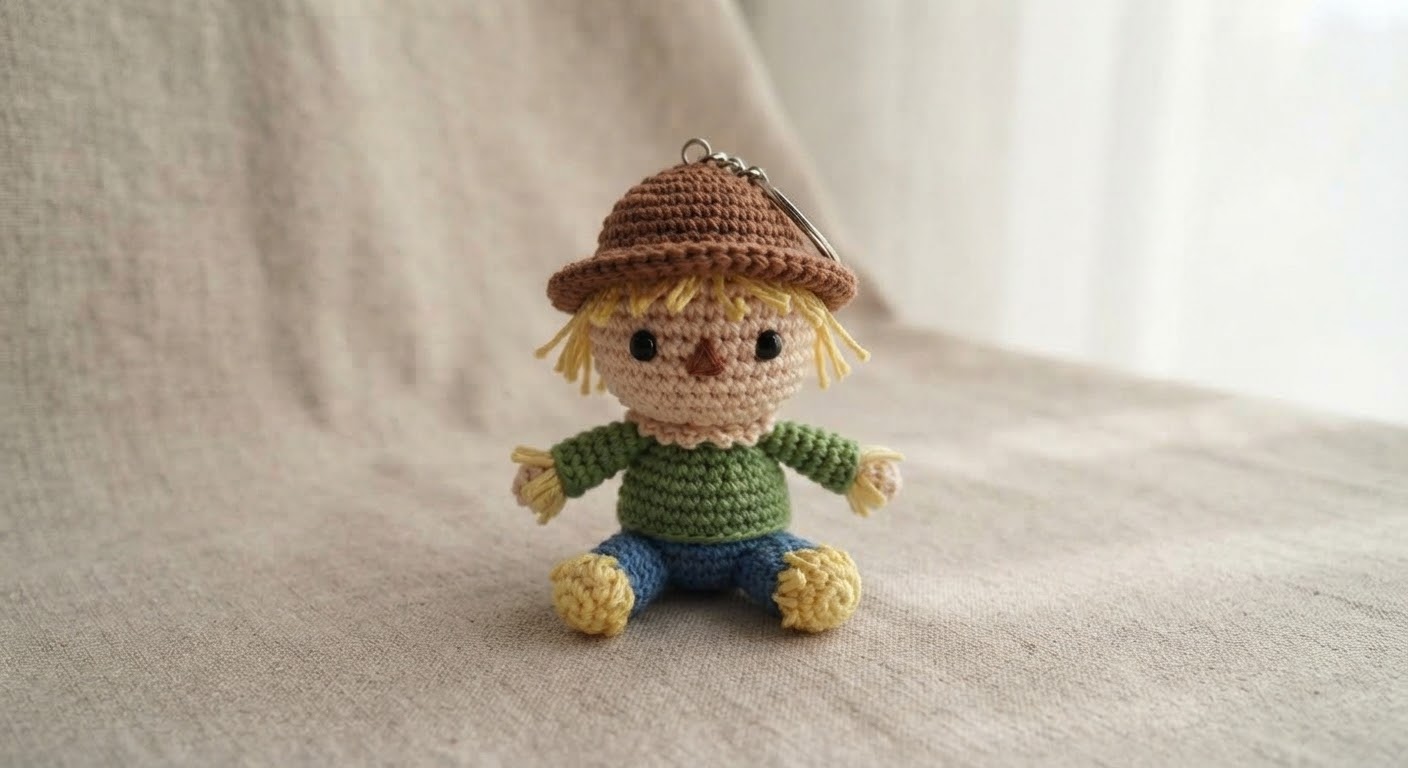
This small crochet scarecrow keychain is worked in separate head, body, arms, legs, and hat pieces. The pattern uses basic amigurumi stitches, simple color changes, stuffing, and sewing.
The finished scarecrow can be used as a keychain, bag charm, or small seasonal decoration. You can keep the colors shown in the pattern or change them to match your own project.
In this guide, you’ll find the materials, crochet abbreviations, round-by-round instructions, assembly steps, and a few tips for working with small amigurumi pieces.
Materials
Before you begin, prepare the following materials:
- Brown yarn for the hat
- Skin-tone yarn for the head
- Green yarn for the shirt and arms
- Blue or navy yarn for the pants and legs
- Yellow yarn for the straw details
- Orange yarn for the nose
- 2–2.5 mm crochet hook, or a size that gives you firm stitches
- 6–8 mm safety eyes
- Polyester fiberfill
- Small keychain ring
- Tapestry needle
- Scissors
- Stitch marker
The finished size will depend on your yarn, hook size, and crochet tension.
Use a hook that creates firm stitches so the stuffing does not show through the fabric. A stitch marker is also helpful because the main pieces are worked in continuous rounds.
If the keychain is intended for a young child, use embroidered eyes instead of plastic safety eyes and make sure all sewn and attached parts are securely fastened.
Crochet Abbreviations
This pattern uses standard US crochet terms.
- MR – Magic Ring
- sc – Single Crochet
- inc – Increase: work 2 sc in the same stitch
- dec – Decrease: crochet 2 stitches together
- ch – Chain
- sl st – Slip Stitch
- ( ) × N – Repeat the instructions inside the parentheses N times
The number at the end of each round shows the total number of stitches you should have after completing that round.
The head, body, and hat are worked in continuous rounds unless otherwise stated. Use a stitch marker to keep track of the beginning of each round.
Head – Skin-Tone Yarn
Work the head in continuous rounds using skin-tone yarn. Do not join the rounds with a slip stitch.
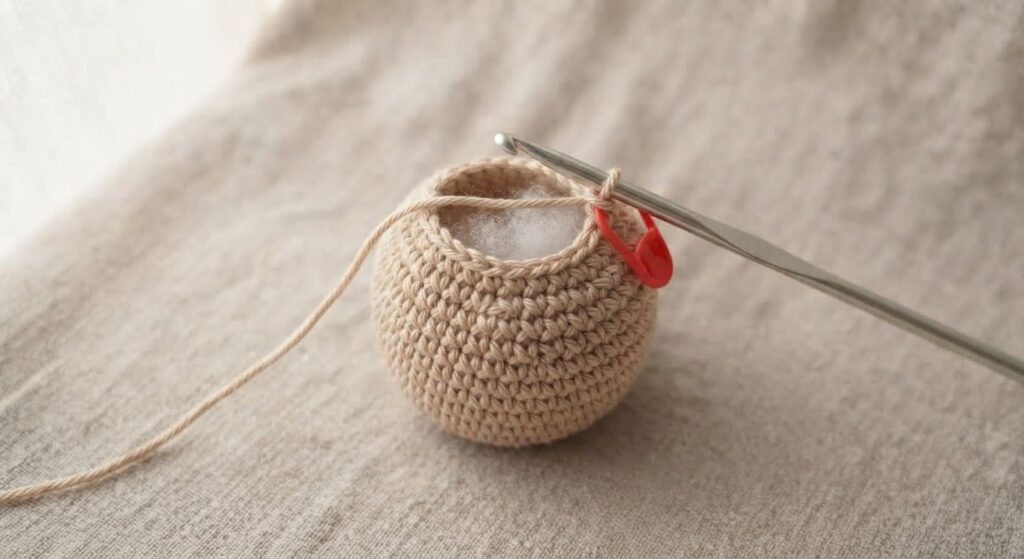
R1: 6 sc in a magic ring. (6)
R2: inc in each stitch around. (12)
R3: (sc, inc) × 6. (18)
R4: (2 sc, inc) × 6. (24)
R5: (3 sc, inc) × 6. (30)
R6: (4 sc, inc) × 6. (36)
R7: (5 sc, inc) × 6. (42)
R8: (6 sc, inc) × 6. (48)
R9–R16: sc around. (48)
Insert the safety eyes between R12 and R13, leaving approximately 7–8 stitches between them.
Using orange yarn, embroider a small triangular nose around R11. Add a small smile with dark embroidery thread approximately two rounds below the eyes.
Begin adding fiberfill gradually as you continue.
R17: (6 sc, dec) × 6. (42)
R18: (5 sc, dec) × 6. (36)
R19: (4 sc, dec) × 6. (30)
R20: (3 sc, dec) × 6. (24)
R21: (2 sc, dec) × 6. (18)
R22: (sc, dec) × 6. (12)
R23: dec × 6. (6)
Add any remaining fiberfill and make sure the head is evenly shaped.
Fasten off, leaving a long yarn tail. Using a tapestry needle, weave the yarn tail through the front loops of the remaining 6 stitches and gently pull to close the opening. Secure and weave in the end.
Body – Green Yarn
Using green yarn, work the body in continuous rounds.
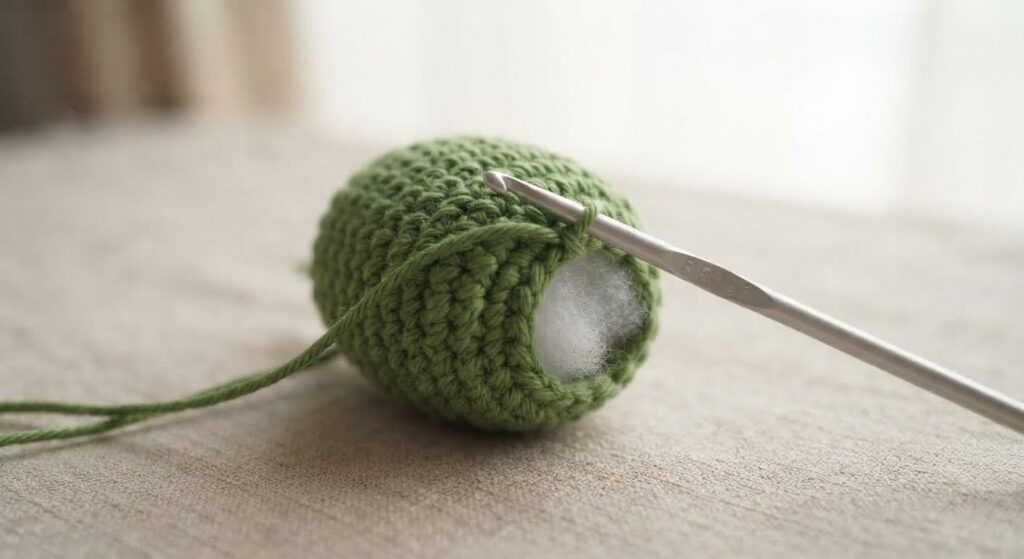
R1: 6 sc in a magic ring. (6)
R2: inc in each stitch around. (12)
R3: (sc, inc) × 6. (18)
R4: (2 sc, inc) × 6. (24)
R5: (3 sc, inc) × 6. (30)
R6: (4 sc, inc) × 6. (36)
R7–R10: sc around. (36)
R11: (4 sc, dec) × 6. (30)
R12–R14: sc around. (30)
R15: (3 sc, dec) × 6. (24)
R16: (2 sc, dec) × 6. (18)
R17: (sc, dec) × 6. (12)
R18: dec × 6. (6)
Add fiberfill gradually as you work. Shape the body with your fingers and avoid overfilling it.
Fasten off, leaving a long yarn tail for sewing. Using a tapestry needle, weave the yarn tail through the front loops of the remaining 6 stitches and gently pull to close the opening.
Leave enough of the yarn tail to attach the body securely to the head during assembly.
Legs (Make 2) – Blue Yarn
Using blue yarn
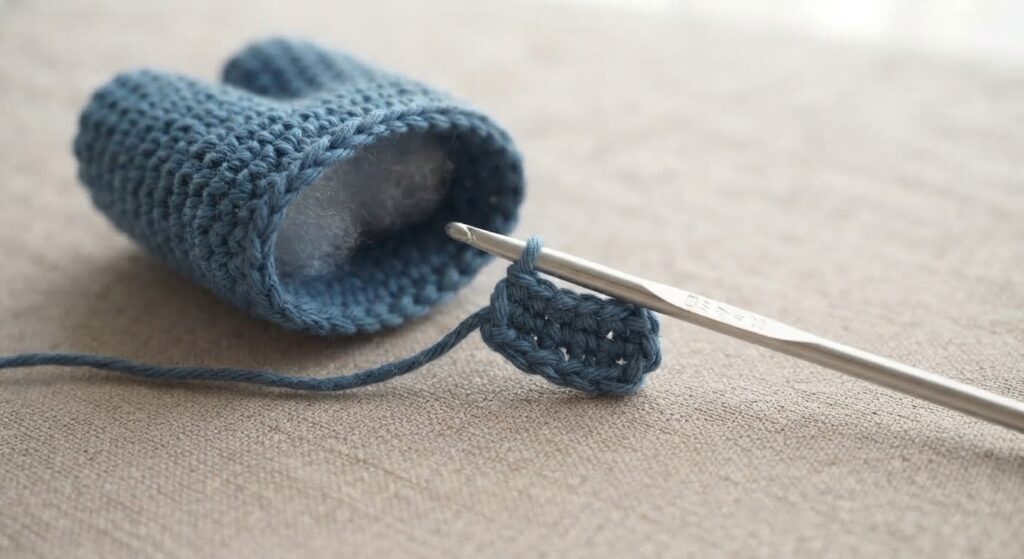
R1: 5 sc in a magic ring. (5)
R2: inc in each stitch around. (10)
R3–R6: sc around. (10)
Add a small amount of fiberfill to the lower part of each leg. Do not overstuff.
Fasten off, leaving a long yarn tail for sewing.
Sew the legs securely to the bottom of the body, checking from the front that they are positioned evenly.
For the straw detail, cut several short pieces of yellow yarn. Tie or sew them securely near the bottom of each leg, then trim the ends to the desired length.
Arms (Make 2) – Green Yarn
Using green yarn:
R1: 4 sc in a magic ring. (4)
R2: inc in each stitch around. (8)
R3–R7: sc around. (8)
Fasten off after R7, leaving a long yarn tail for sewing.
The arms can be left unstuffed. If you want them to have more shape, add only a small amount of fiberfill.
Sew the arms securely to the sides of the body around R13–R14. Check their position from the front before sewing them permanently.
For the straw detail, cut several short pieces of yellow yarn and attach them securely to the ends of the arms. Trim the yarn to an even length.
Hat – Brown Yarn
Using brown yarn, work the hat in continuous rounds.
R1: 6 sc in a magic ring. (6)
R2: inc in each stitch around. (12)
R3: (sc, inc) × 6. (18)
R4: (2 sc, inc) × 6. (24)
R5: (3 sc, inc) × 6. (30)
R6: (4 sc, inc) × 6. (36)
R7–R9: sc around. (36)
Hat Brim
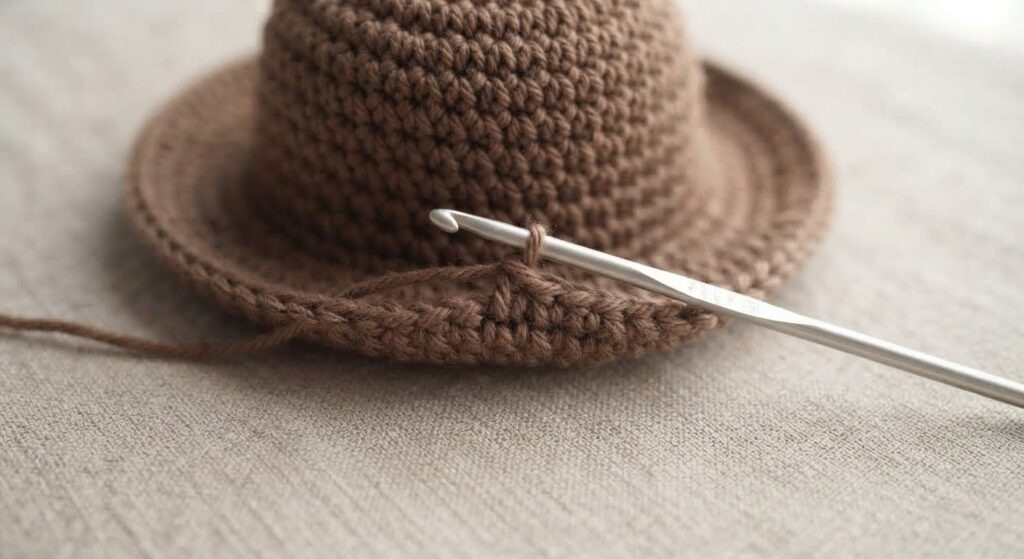
R10: Working in the front loops only (FLO), (5 sc, inc) × 6. (42)
R11: (6 sc, inc) × 6. (48)
R12: (7 sc, inc) × 6. (54)
Fasten off and weave in the yarn end.
Straw Hair and Shirt Detail
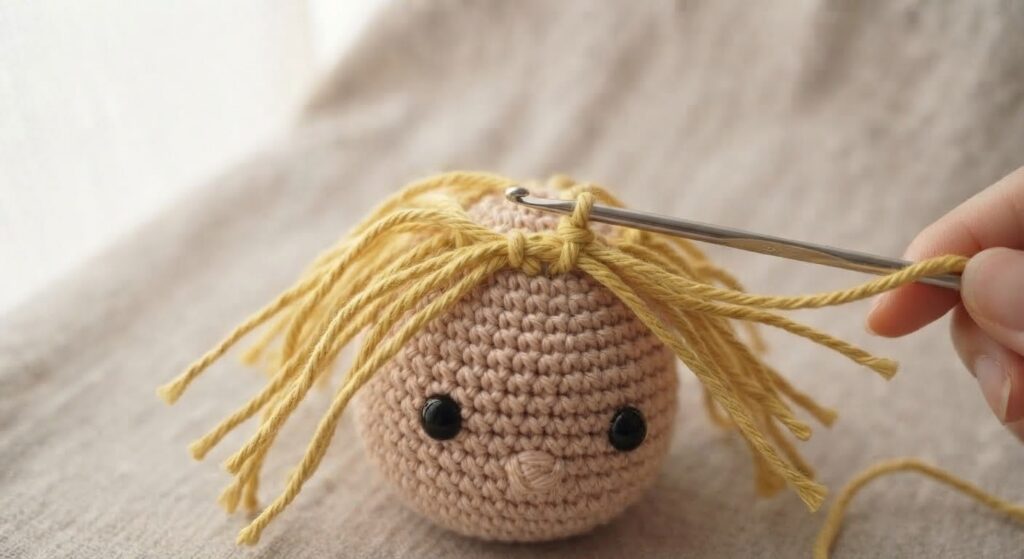
Cut several short pieces of yellow yarn and attach them around the top edge of the head to create the scarecrow’s straw hair.
For an optional shirt detail, embroider a small yellow X on the front of the green body using yellow yarn or embroidery thread.
Assembly and Finishing
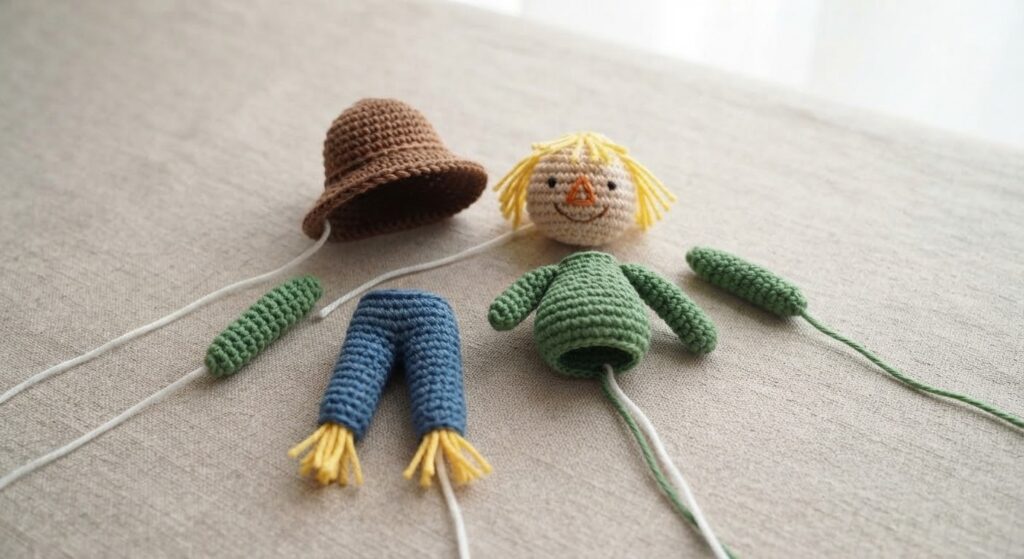
Before sewing the pieces permanently, place the head, arms, legs, and hat on the body and check their positions from the front and side.
Attach the Head
Sew the head securely to the top of the body using the long yarn tail left from the head. Work through several stitches around the join so the head is firmly attached.
Attach the Arms and Legs
If you have not already attached the arms and legs, sew the arms to the sides of the body around R13–R14.
Sew the legs evenly to the bottom of the body. Check their position from the front before securing them permanently.
Add the Hat and Straw Hair
Place the brown hat over the top of the head, positioning it so the yellow yarn pieces used for the straw hair remain visible.
Sew the hat securely to the head if needed. Do not rely on the hat simply sitting on top of the head if the finished piece will be used as a keychain.
Attach the Keychain Ring
Attach the small metal keychain ring securely to the top of the hat.
You can sew the ring directly to the stitches or create a small yarn loop and attach the ring to the loop.
Check the connection carefully before using the finished keychain. All attached parts should be firmly secured.
Final Check
Weave in any remaining yarn ends and trim the excess.
Check the head, arms, legs, hat, straw details, and keychain ring to make sure everything is securely attached.
Care
Gently hand wash the finished piece with mild soap and cold water when needed. Do not wring or twist it. Reshape it gently and allow it to air dry completely.
Frequently Asked Questions
Can a beginner make this scarecrow keychain?
Yes. The pattern uses basic stitches such as single crochet, increases, decreases, and a magic ring. Working with small pieces may take a little practice, especially when sewing the parts together.
Can I use a different type of yarn?
Yes. Cotton or cotton-blend yarn works well for amigurumi because it gives clear stitch definition and helps the finished piece keep its shape. You can also use acrylic yarn. Keep in mind that changing the yarn weight or hook size will change the finished size.
How can I make the keychain smaller?
Use thinner yarn together with a smaller crochet hook. The finished size will depend on the yarn, hook, and your crochet tension.
How do I keep the pieces from coming loose?
Leave sufficiently long yarn tails and sew the pieces through several stitches. Pay particular attention to the keychain ring, as it will be under more stress during regular use.
Can I change the colors?
Yes. You can change the colors of the hat, shirt, pants, or straw details to create a different scarecrow design. Changing the colors will not affect the stitch counts.
Can I use this pattern without a keychain ring?
Yes. The finished scarecrow can also be used as a small amigurumi figure or seasonal decoration. Simply leave out the keychain ring during assembly.
Pattern Usage
This is a crochet pattern created for personal use and learning.
Please do not copy, reproduce, translate, sell, or republish the written pattern or its instructions as your own content. If you would like to share this pattern, please link to the original article on Amyliva Handmade.
You may modify the colors or details when making your own project. Photos and written instructions from this page may not be used on other websites or social media as your own content.
If you make this pattern as a fan-inspired project, please remember that the finished design is based on a scarecrow character concept and should not be presented as an original character owned by Amyliva Handmade.

Yorum gönder