Amigurumi Seal Crochet Pattern – Free Step-by-Step Tutorial
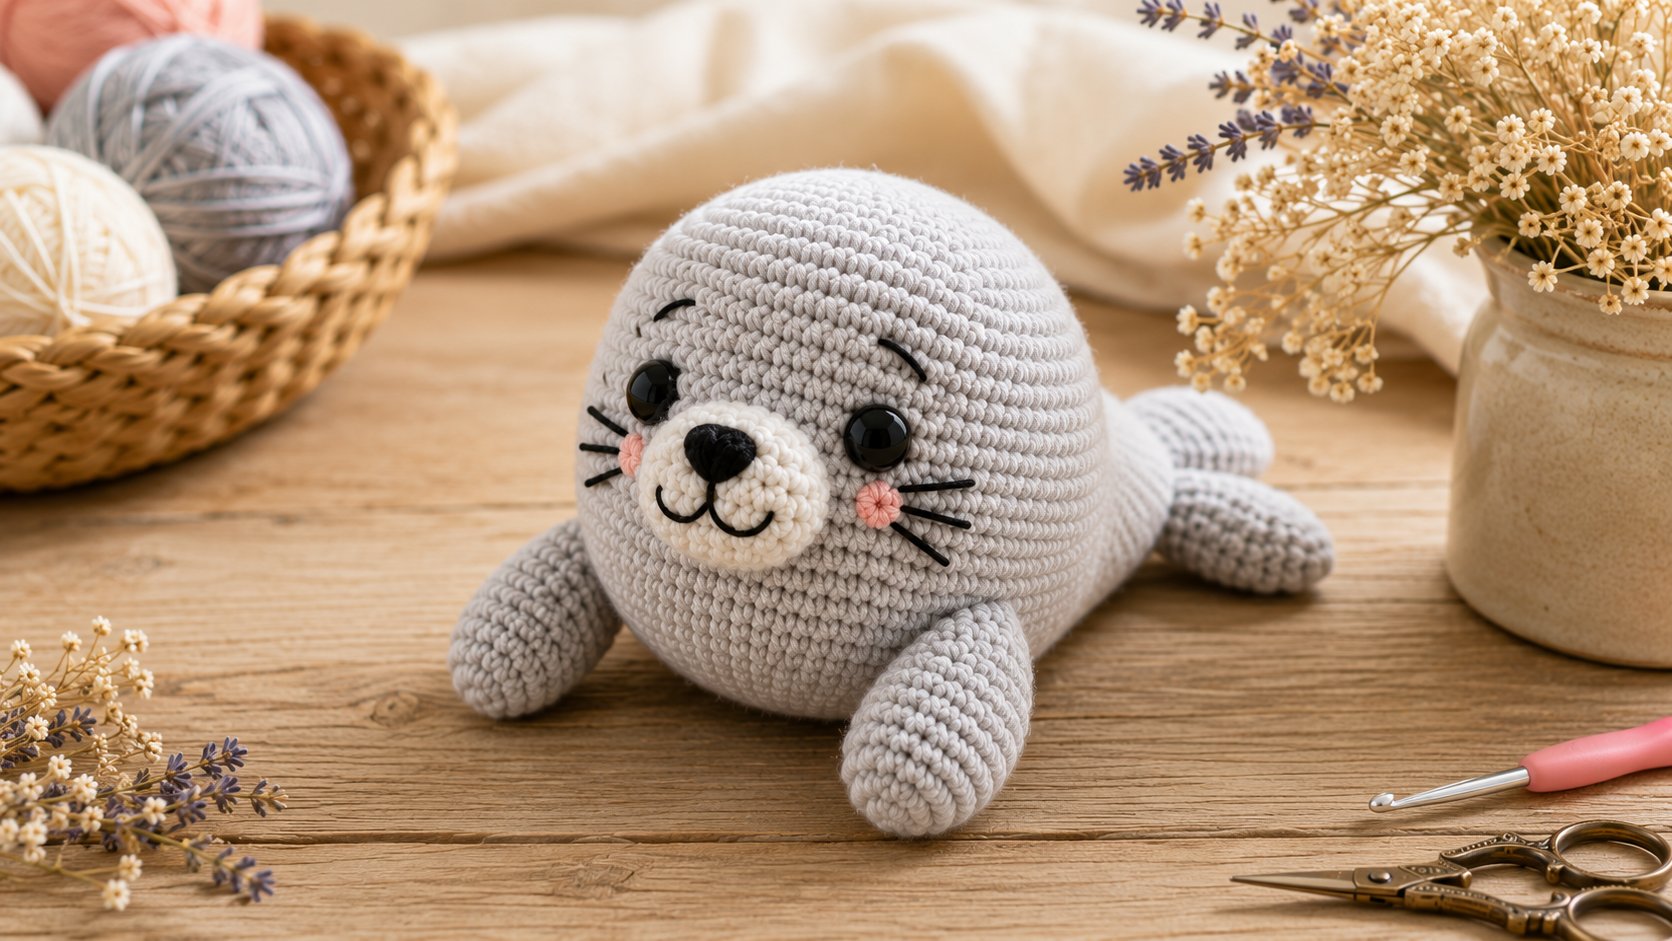
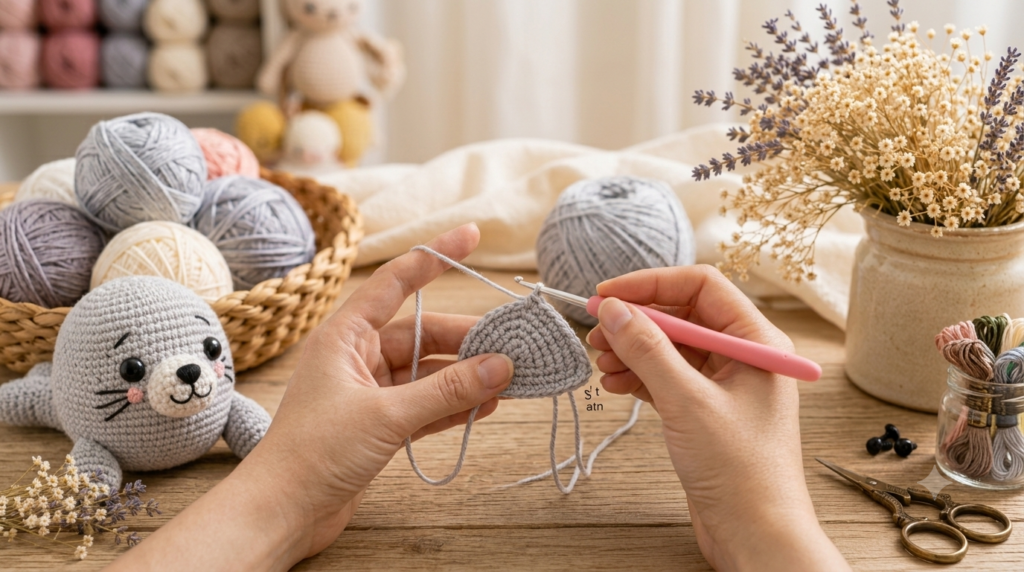
This amigurumi seal crochet pattern is worked in continuous rounds and is designed with a rounded head and body, small front flippers, and two separate tail fins. The main body and head are crocheted as one piece, while the muzzle, flippers, and tail fins are made separately and sewn on at the end.
The finished seal has a soft, rounded shape and can be made with cotton, acrylic, or a similar yarn suitable for amigurumi. The pattern uses basic amigurumi techniques, including single crochet, increases, invisible decreases, stuffing, and simple embroidery for the face.
I used a grey main color with a cream muzzle for the sample. You can change the colors or adjust the yarn and hook size if you want to make a smaller or larger seal.
Before starting, make sure you are comfortable working in continuous rounds and keeping track of your stitch count. The stitch counts at the end of each round are included to make it easier to check your work as you crochet.
About the Amigurumi Seal Pattern
This seal is made from several simple crocheted pieces. The head and body are worked together as one piece, which reduces the amount of sewing required during assembly. The muzzle, front flippers, and two tail fins are crocheted separately and attached after the main body is finished.
The shape of the seal comes mainly from the increases and decreases in the main body. Keeping the correct stitch count is important, especially while shaping the head and narrowing the body toward the tail.
For the face, the safety eyes are placed before the head is completely closed, while the nose, mouth, whiskers, and cheeks are added with embroidery after the muzzle is attached.
The pattern can be made with different yarn types, but changing the yarn weight and hook size will also change the finished size of the seal.
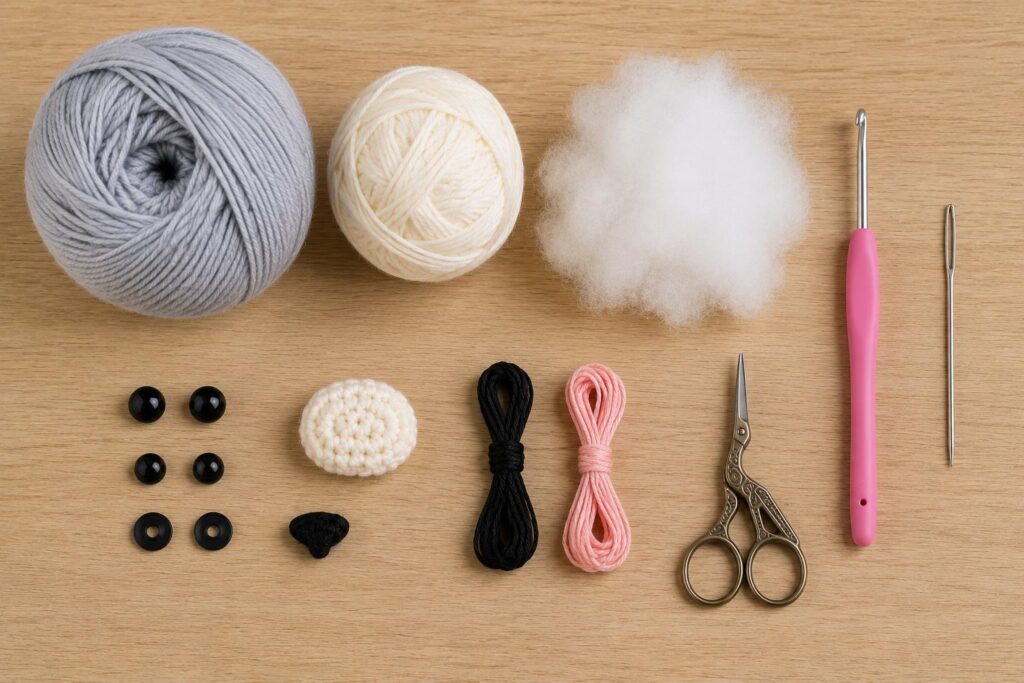
Materials and Tools
For this amigurumi seal, you will need:
- Grey yarn for the main body, approximately 60–70 g
- Cream or off-white yarn for the muzzle, approximately 10 g
- A small amount of black embroidery floss or thin black yarn for the nose, mouth, and whiskers
- A small amount of pink yarn or embroidery thread for the cheeks
- 10–12 mm black safety eyes
- 2.5 mm or 3.0 mm crochet hook
- Polyester fiberfill stuffing
- Stitch marker
- Tapestry needle
- Scissors
Yarn
A sport-weight or light worsted-weight yarn can be used for this pattern. Cotton, cotton-blend, or acrylic yarn are all suitable as long as the yarn produces a firm fabric when crocheted.
For the sample, a soft grey yarn is used for the body with cream yarn for the muzzle. YarnArt Jeans or Alize Cotton Gold can be used as alternatives.
If you use a different yarn weight, the finished size will change. A smaller hook than the yarn label recommends can help create tighter stitches and prevent the stuffing from showing through.
Before You Start
Check that your stitches are tight enough before adding the stuffing. If you can easily see the fiberfill through the fabric, try using a smaller crochet hook.
Keep a stitch marker in the first or last stitch of each round and check the stitch count at the end of every round. This is especially helpful when working the increases and decreases that shape the head and body.
Stitches and Abbreviations
This pattern uses standard US crochet terms.
- MR: Magic Ring
- ch: Chain
- sc: Single Crochet
- inc: Increase — work 2 single crochets in the same stitch
- dec: Invisible Decrease — decrease 2 stitches into 1
- st(s): Stitch(es)
- sl st: Slip Stitch
- [6]: Number of stitches at the end of the round
- (sc, inc) × 6: Repeat the instructions inside the parentheses 6 times
Invisible Decrease
An invisible decrease gives the amigurumi a smoother finish. To make one, insert the hook through the front loop of the next stitch, then through the front loop of the following stitch. Yarn over and pull through both front loops. Yarn over again and pull through the remaining two loops on the hook.
The stitch count shown at the end of each round is the total number of stitches you should have after completing that round.
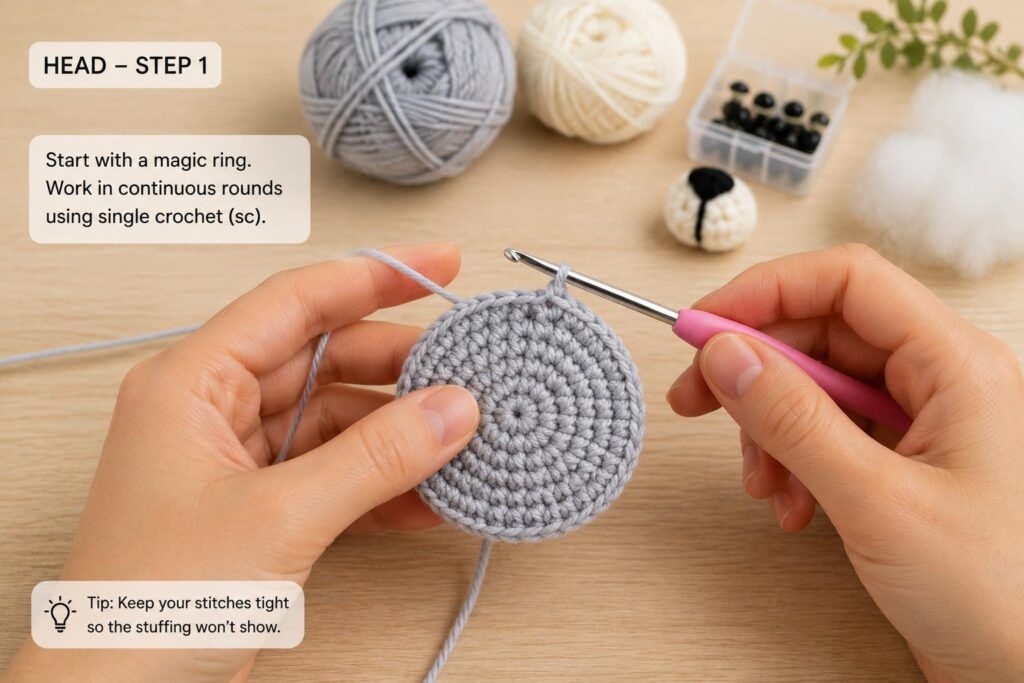
Main Body and Head
The head and body are worked as one continuous piece, starting at the nose and continuing toward the back of the seal.
Work in continuous spiral rounds. Do not join with a slip stitch at the end of a round unless the instructions specifically tell you to do so. Use a stitch marker to keep track of the beginning of each round.
Head
Round 1: Make a magic ring and work 6 sc into the ring. [6]
Round 2: Inc in each stitch around. [12]
Round 3: (1 sc, inc) × 6. [18]
Round 4: (2 sc, inc) × 6. [24]
Round 5: (3 sc, inc) × 6. [30]
Round 6: (4 sc, inc) × 6. [36]
Round 7: (5 sc, inc) × 6. [42]
Round 8: (6 sc, inc) × 6. [48]
Round 9: (7 sc, inc) × 6. [54]
Round 10: (8 sc, inc) × 6. [60]
Rounds 11–22: Sc in each stitch around. [60]
At this stage, check the shape of the head before continuing. The piece should have a rounded, slightly elongated shape rather than forming a flat circle.
Eye Placement
Place the 10–12 mm safety eyes between Rounds 14 and 15. Leave approximately 11–12 stitches between the eyes, depending on the exact position that looks best on your crocheted piece.
Before securing the backs of the safety eyes, check the placement from the front and make sure both eyes are level and symmetrical.
Shaping the Body
Round 23: (8 sc, dec) × 6. [54]
Round 24: Sc in each stitch around. [54]
Round 25: (7 sc, dec) × 6. [48]
Round 26: Sc in each stitch around. [48]
Round 27: (6 sc, dec) × 6. [42]
Round 28: Sc in each stitch around. [42]
Round 29: (5 sc, dec) × 6. [36]
Round 30: Sc in each stitch around. [36]
Begin adding fiberfill as the opening becomes smaller. Add small amounts at a time and distribute the stuffing evenly so that the head remains smooth and rounded.
Round 31: (4 sc, dec) × 6. [30]
Rounds 32–36: Sc in each stitch around. [30]
Round 37: (3 sc, dec) × 6. [24]
Rounds 38–42: Sc in each stitch around. [24]
Round 43: (2 sc, dec) × 6. [18]
Rounds 44–46: Sc in each stitch around. [18]
Round 47: (1 sc, dec) × 6. [12]
Add the remaining stuffing and shape the body with your fingers. Keep the body firm enough to hold its shape without making it overly hard.
Round 48: Dec around. [6]
Fasten off, leaving a long yarn tail for closing. Using a tapestry needle, weave the yarn through the front loops of the remaining 6 stitches. Pull gently to close the opening, secure the yarn, and weave the end inside the body.
Soft White Muzzle
The muzzle is crocheted separately in cream or off-white yarn and attached to the front of the head after the main body is finished.
Round 1: Make a magic ring and work 6 sc into the ring. [6]
Round 2: Inc in each stitch around. [12]
Round 3: (1 sc, inc) × 6. [18]
Round 4: (2 sc, inc) × 6. [24]
Round 5: Sc in each stitch around. [24]
Fasten off, leaving a long yarn tail for sewing.
Before attaching the muzzle, lightly stuff it with a small amount of fiberfill. Use just enough stuffing to give it a gentle rounded shape without making it too bulky.
Position the muzzle centrally below the eyes and sew it securely to the head using the yarn tail. Check the placement from the front as you sew so that the muzzle remains centered.
Front Flippers
Make 2.
Work each flipper in continuous rounds using the main color yarn.
Round 1: Make a magic ring and work 6 sc into the ring. [6]
Round 2: (1 sc, inc) × 3. [9]
Round 3: (2 sc, inc) × 3. [12]
Round 4: (3 sc, inc) × 3. [15]
Rounds 5–8: Sc in each stitch around. [15]
Round 9: (3 sc, dec) × 3. [12]
Round 10: Sc in each stitch around. [12]
Do not stuff the flipper. Flatten the opening and work 6 sc through both layers to close it.
Fasten off, leaving a long yarn tail for sewing.
Make the second flipper in the same way.
Attaching the Flippers
Place the flippers on both sides of the body around Rounds 32–36. Check that they are positioned at the same height before sewing them in place.
Sew each flipper securely to the body, then weave the remaining yarn inside.
Tail Fins
Make 2.
Work each tail fin in continuous rounds using the main color yarn.
Round 1: Make a magic ring and work 5 sc into the ring. [5]
Round 2: Inc in each stitch around. [10]
Round 3: (1 sc, inc) × 5. [15]
Rounds 4–6: Sc in each stitch around. [15]
Round 7: (1 sc, dec) × 5. [10]
Round 8: Dec around. [5]
Fasten off, leaving a long yarn tail for sewing.
Make the second tail fin in the same way.
Attaching the Tail Fins
Position the two fins at the back of the body, with their tips angled outward to create the characteristic V-shaped seal tail.
Before sewing, place both fins next to each other and check that they are positioned evenly. Sew them securely to the end of the body using the yarn tails, then weave in the remaining ends.
Assembly and Facial Details
Once all the crocheted pieces are finished, assemble the seal in the following order.
Attach the Muzzle
Place the cream muzzle centrally below the eyes. Check its position from the front before sewing.
If you have not already added the stuffing, place a small amount of fiberfill inside the muzzle to give it a slightly raised shape. Sew the muzzle securely to the head using the yarn tail, working around the entire edge.
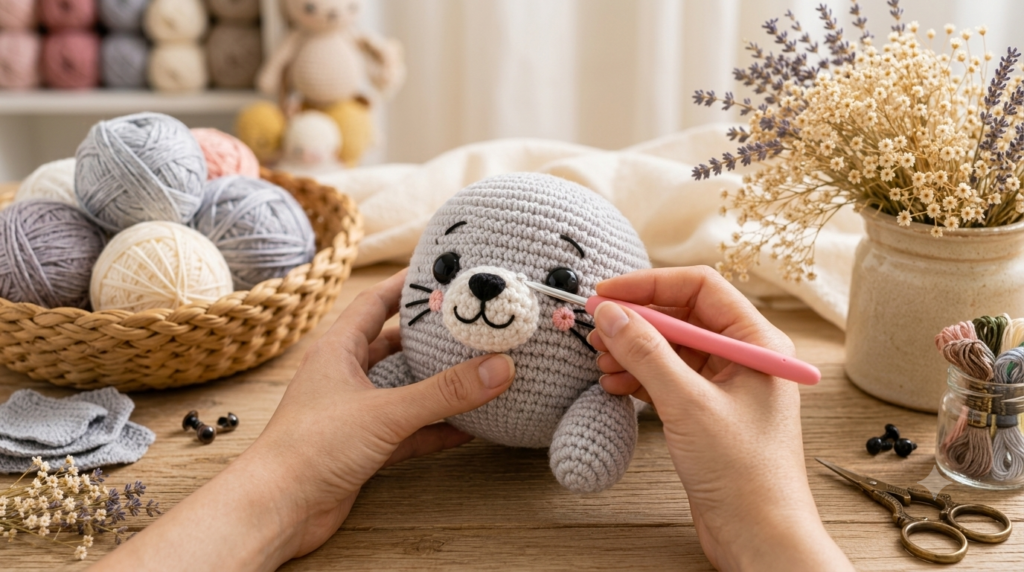
Embroider the Face
After the muzzle is attached, add the facial details with black embroidery floss or thin black yarn.
Nose: Embroider a small inverted triangle near the upper center of the muzzle.
Mouth: Add a short line beneath the nose, then embroider two small diagonal lines to form a simple curved mouth.
Whiskers: Add three thin whiskers on each side of the muzzle. Keep the stitches light and avoid pulling the yarn too tightly.
Cheeks: Add small pink embroidered areas beneath the outer corners of the eyes if you want the seal to have rosy cheeks.
Attach the Flippers
Place one flipper on each side of the body around Rounds 32–36. Check that both flippers are at the same height and angle before sewing.
Sew them firmly to the body and weave the yarn ends inside.
Attach the Tail Fins
Position the two tail fins at the back of the body, forming a V shape with the fins pointing outward.
Check the position from both the top and back before sewing. Once you are happy with the shape, sew both fins securely to the body and weave in the remaining ends.
Final Shape Check
Before considering the seal finished, check that the stuffing is evenly distributed and that the head and body are symmetrical. Gently shape the crocheted piece with your hands and adjust the flippers and tail fins if necessary.
Frequently Asked Questions
Is this amigurumi seal pattern suitable for beginners?
This pattern is suitable for beginners who are already familiar with basic amigurumi techniques. You should be comfortable with single crochet, increases, decreases, working in continuous rounds, and basic sewing.
If you are making amigurumi for the first time, it may be easier to practice the magic ring, increase, and invisible decrease before starting the seal.
How do I keep the seal evenly stuffed?
Add the fiberfill gradually as you crochet rather than waiting until the end. Use small amounts and push the stuffing gently into the head and body with the blunt end of your crochet hook or another suitable tool.
Avoid adding too much stuffing at once. Overstuffing can stretch the stitches and make the stuffing visible through the fabric.
How should I wash the finished amigurumi?
If the yarn you used is washable, gentle hand washing in cool or lukewarm water is recommended. Use a small amount of mild detergent and avoid rubbing the embroidered details.
Gently press out excess water with a clean towel and allow the seal to air-dry completely. Always follow the washing instructions for the yarn you used.
Can I use a different yarn?
Yes. You can use another yarn fiber or weight, but the finished size and appearance will change. If you change the yarn weight, choose a crochet hook that gives you a firm fabric with no large gaps between the stitches.
Can I sell finished seals made from this pattern?
Yes. You may sell finished items made from this Amyliva Handmade pattern. Please credit Amyliva Handmade as the designer and include a link to the original pattern page when possible.
The written pattern, photographs, and other original content on this page may not be copied, translated, redistributed, or presented as your own.
Pattern Usage & Copyright
This amigurumi seal pattern and the original photographs on this page were created by Amyliva Handmade.
You may use this pattern to make items for yourself, as gifts, or for sale. If you sell a finished item made from this pattern, please credit Amyliva Handmade as the original designer and link to the original pattern page when possible.
Please do not copy, translate, reproduce, redistribute, or publish this written pattern or its photographs as your own. You are welcome to share the link to this original pattern page instead.



Yorum gönder