Free Crochet Pattern: Chunky Velvet Amigurumi Puppy
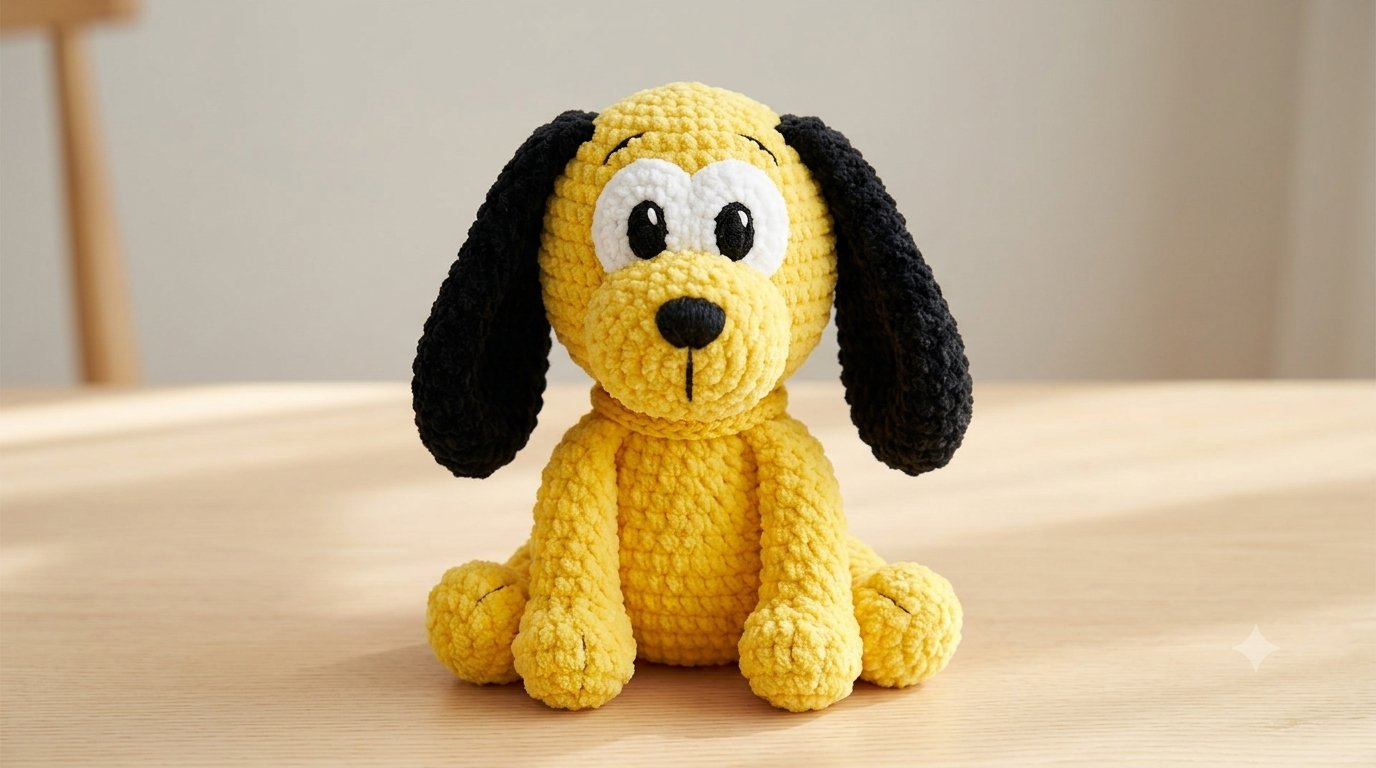
If you have some soft chenille yarn in your stash, this chunky velvet amigurumi puppy is a fun project to make when you want a larger plush-style amigurumi. The thicker yarn makes the puppy grow quickly, while the oversized head, floppy ears, round eyes, and seated body give it a simple cartoon-inspired shape.
This puppy is made from separate pieces that are crocheted individually and sewn together at the end. Working the pieces separately makes it easier to adjust the position of the eyes, muzzle, ears, legs, and tail before sewing everything permanently.
Chenille yarn can make individual stitches harder to see while you crochet, especially when working increases and decreases. Keeping a stitch marker in place, counting your stitches regularly, and using your fingers to feel for the next stitch can make the process easier. Avoid pulling the yarn too tightly, particularly when closing a magic ring, because excessive tension can put stress on plush yarn.
This pattern is best suited to intermediate crocheters who are comfortable working in continuous rounds, making increases and decreases, crocheting small pieces, stuffing amigurumi, and sewing the finished parts together. If you are new to plush yarn, take your time with the first few rounds and focus on finding each stitch rather than working quickly.
🧶 Pattern Overview
- Project Type: Chunky Amigurumi Puppy
- Skill Level: Intermediate
- Yarn Weight: Super Bulky / Category 6 Chenille or Velvet Yarn
- Detail Yarn: DK yarn for small details such as the pupils, paw pads, and tail
- Hook Sizes: 4.0 mm for the main pieces and 2.5 mm for the smaller details
- Terminology: US Crochet Terms
- Finished Size: Approximately 26–28 cm (10–11 in) tall when seated
- Construction: Individual pieces sewn together
- Stitching: Mainly continuous spiral rounds
The finished size may vary depending on your yarn, hook size, crochet tension, and the amount of stuffing used.
🧵 Materials and Tools
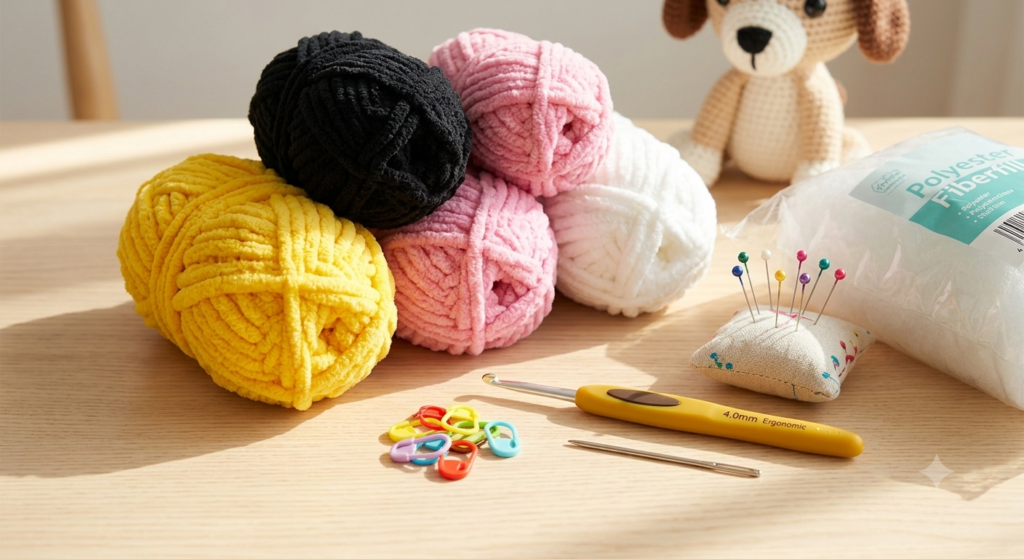
| Item | Purpose | Suggested Type / Colour |
| Colour A | Head, body, arms and legs | Super Bulky Chenille – pastel yellow |
| Colour B | Tongue | Super Bulky Chenille – pink |
| Colour C | Ears and nose | Super Bulky Chenille – black |
| Colour D | Eye bases | Super Bulky Chenille – white |
| Colour E | DK cotton or acrylic yarn | Pupils, paw pads, and tail |
| Hooks | Main and detail work | 4.0 mm and 2.5 mm |
| Stuffing | Filling | Polyester fiberfill |
| Other tools | Finishing | Stitch marker, yarn needle, pins and scissors |
Choosing and Working with Chenille Yarn
Chenille and velvet yarns are especially well suited to plush amigurumi because they create a soft, velvety surface and give the finished puppy a cuddly appearance. They also work well for a larger amigurumi like this one because the thicker yarn helps the pieces grow quickly.
Himalaya Dolphin Baby, YarnArt Dolce, and Bernat Blanket are examples of plush yarns that can work for this type of project. You do not have to use these exact brands, but try to choose a yarn with a similar thickness if you want your puppy to have proportions close to the pattern.
One challenge with chenille yarn is that the fuzzy surface can make the individual stitches difficult to see. This is especially noticeable when working into a magic ring or making increases and invisible decreases. Instead of relying only on what you can see, use your fingers to feel for the next stitch and count your stitches regularly.
A stitch marker is particularly useful when working with plush yarn. Mark the first stitch of each continuous round and check your stitch count before moving on. If you lose your place, it is usually easier to carefully find the previous stitch than to continue crocheting and try to correct the shape later.
Try not to pull the yarn too tightly when crocheting with chenille. Excessive tension can make the stitches difficult to identify and may put unnecessary stress on the yarn, especially when tightening a magic ring. A firm but relaxed tension usually gives better results.
Tip: Always check your stitch tension when changing yarn brands. A different chenille thickness can noticeably change the size and proportions of the finished puppy.
Crochet Abbreviations
This pattern uses standard US crochet terminology.
- MR: Magic Ring
- sc: Single Crochet
- inc: Increase — 2 sc in the same stitch
- inv.dec: Invisible Decrease — sc 2 stitches together
- BLO: Back Loop Only
- ch: Chain
- st / sts: Stitch / stitches
- rnd: Round
- FO: Fasten Off
- rep: Repeat
Numbers in brackets show the stitch count at the end of each round or row.
🐶 Free Chunky Crochet Dog Pattern
1. Head
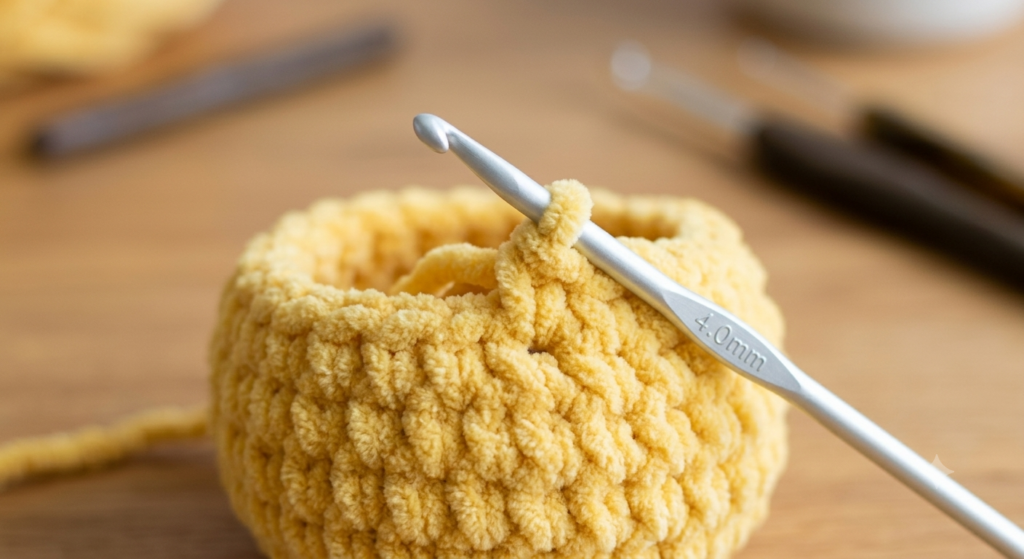
Shaping the Head
With chenille yarn, it can be difficult to see every stitch clearly, so count the stitches at the end of each round. Feel for the top of each stitch with your hook if the fuzzy yarn makes the opening difficult to identify.
Start adding fiberfill once the head has enough depth to hold its shape. Add small amounts at a time and spread the stuffing evenly. Avoid packing the head too tightly, because excessive stuffing can stretch the stitches and make the surface uneven.
Colour A — 4.0 mm hook
Work in continuous rounds.
- Rnd 1: 6 sc into MR [6]
- Rnd 2: Inc in each st around [12]
- Rnd 3: (1 sc, inc) × 6 [18]
- Rnd 4: Sc in each st around [18]
- Rnd 5: (2 sc, inc) × 6 [24]
- Rnd 6–7: Sc in each st around [24]
- Rnd 8: (3 sc, inc) × 6 [30]
- Rnd 9–12: Sc in each st around [30]
- Rnd 13: (3 sc, inv.dec) × 6 [24]
- Rnd 14: (2 sc, inv.dec) × 6 [18]
- Rnd 15: (1 sc, inv.dec) × 6 [12]
- Rnd 16: (Inv.dec ) × 6 [6]
Add the final stuffing before closing.
FO and leave a long yarn tail. Using a yarn needle, weave the tail through the front loops of the remaining 6 stitches. Pull gently to close the opening, secure the yarn, and hide the tail inside the head.
👀 2. Eyes
Positioning the Eyes
The eyes are one of the most important details for the puppy’s expression. Before sewing the white eye bases to the head, place both pieces on the surface and check their position from the front.
Try to keep the eyes at a similar height and distance from the center of the face. Pin them temporarily if needed and look at the puppy from different angles before sewing them permanently.
The black pupils can be positioned slightly toward the center to create a friendly expression. Moving them even a little can change the direction the puppy appears to be looking.
White Eye Base
Colour D — 4.0 mm hook — Make 2
- Rnd 1: 6 sc into MR [6]
- Rnd 2: Inc around [12]
- Rnd 3: (1 sc, inc) × 6 [18]
- Rnd 4: (2 sc, inc) × 6 [24]
- Rnd 5: (3 sc, inc) × 6 [30]
FO, leaving a long tail for sewing.
Pupils
Colour E — 2.5 mm hook — Make 2
For each pupil:
- Rnd 1: 6 sc into MR [6]
- Rnd 2: Inc around [12]
FO and leave a sewing tail.
Sew the black pupils onto the white eye bases. Position them slightly toward the centre of the face for a friendly expression.
You can also embroider the pupils if you prefer not to use separate crocheted pieces.
🐽 3. Muzzle
Colour A — 4.0 mm hook
Shaping the Muzzle
When you begin working around the opposite side of the chain, make sure you are working into the available loops rather than accidentally skipping a stitch. Counting the stitches at the end of each round will help keep the muzzle symmetrical.
The muzzle is worked as an oval.
- Foundation: Ch 9.
- Rnd 1: Starting in the 2nd ch from hook, sc across the chain [8]. Continue around the opposite side of the foundation chain and sc across the remaining loops [8]. Do not turn. [16]
- Rnd 2: (7 sc, inc) × 2 [18]
- Rnd 3: (8 sc, inc) × 2 [20]
- Rnd 4: (9 sc, inc) × 2 [22]
- Rnd 5–7: Sc in each st around [22]
FO, leaving a long tail for sewing.
Add a small amount of stuffing while attaching the muzzle to the lower front of the head. It should be softly rounded rather than tightly stuffed.
🐽 4. Nose
Colour C — 4.0 mm hook
Shaping and Attaching the Nose
The nose is a small detail, but its position can make a noticeable difference to the puppy’s expression. After crocheting the piece, gently shape it with your fingers so it sits neatly against the muzzle.
Use the long yarn tail to sew through several stitches of the nose and the muzzle underneath. Keep the stitches secure without pulling so tightly that the chenille fabric becomes distorted.
- Row 1: Ch 5.
- Starting in the 2nd ch from hook, sc across [4].
FO and leave a long tail.
Shape the piece slightly with your fingers and sew it securely to the upper centre of the muzzle.
👄 5. Mouth
Colour A — 4.0 mm hook
Shaping the Mouth
The mouth adds extra dimension to the puppy’s face, but it should remain soft rather than heavily stuffed. A small amount of fiberfill is enough to give it a gentle rounded shape.
When attaching the mouth, use the long yarn tail to sew through several stitches of both the mouth and the head. Secure it firmly, but avoid pulling the chenille yarn too tightly, as this can flatten or distort the crocheted piece.
- Rnd 1: 6 sc into MR [6]
- Rnd 2: Inc around [12]
- Rnd 3: (1 sc, inc) × 6 [18]
- Rnd 4–5: Sc in each st around [18]
FO, leaving a long sewing tail.
👅 6. Tongue
Colour B — 4.0 mm hook
The tongue is worked flat.
The tongue is worked as a small flat piece so it can sit naturally inside the mouth. Keep your stitches even and avoid pulling the turning chains too tightly, as this can make the edges narrower than the rest of the piece.
- Row 1: Ch 6. Starting in the 2nd ch from hook, sc across [5]
- Row 2: Ch 1, turn. Sc across [5]
- Row 3: Ch 1, turn. (Sc, inc) × 2, sc [7]
- Row 4: Ch 1, turn. Sc across [7]
FO and leave a long sewing tail.
Sew the upper edge inside the mouth so the lower portion hangs naturally.
👂 7. Ears
Colour C and Colour A — 4.0 mm hook — Make 2
Shaping the Ears
The ears are kept unstuffed so they remain soft and floppy. This helps them sit naturally against the sides of the puppy’s head instead of standing upright.
Because chenille yarn can hide the stitches, count each round carefully and use a stitch marker if needed. Keep your tension even so both ears finish at the same size.
- Rnd 1: 6 sc into MR [6]
- Rnd 2: Inc around [12]
- Rnd 3–10: Sc in each st around [12]
- Rnd 11: (1 sc, inv.dec) × 4 [8]
- Rnd 12–14: Sc in each st around [8]
Change to Colour A.
- Rnd 15–16: Sc in each st around [8]
FO and leave a long sewing tail.
Flatten the opening slightly before attaching the ears to the head. This helps create the soft floppy shape.
🐕 8. Body
Colour A — 4.0 mm hook
Shaping and Stuffing the Body
With chunky chenille yarn, add the stuffing gradually as you crochet. Start with small amounts and spread the fiberfill evenly around the inside of the body. The lower part should be firm enough to support the puppy when it is sitting, while the upper section should not be packed too tightly.
Pay particular attention to the transition between the wider body and the decreasing rounds. Keep your stitch count consistent so the body remains symmetrical.
Before finishing the body, place it on a flat surface and check that the base sits evenly. Small adjustments to the stuffing can help the puppy stand or sit more securely once the legs are attached.
Work in continuous rounds.
- Rnd 1: 6 sc into MR [6]
- Rnd 2: Inc around [12]
- Rnd 3: (1 sc, inc) × 6 [18]
- Rnd 4: (2 sc, inc) × 6 [24]
- Rnd 5: (3 sc, inc) × 6 [30]
- Rnd 6: (4 sc, inc) × 6 [36]
- Rnd 7–12: Sc in each st around [36]
- Rnd 13: (4 sc, inv.dec) × 6 [30]
- Rnd 14: Sc in each st around [30]
- Rnd 15: (3 sc, inv.dec) × 6 [24]
- Rnd 16–17: Sc in each st around [24]
- Rnd 18: (2 sc, inv.dec) × 6 [18]
- Rnd 19: Sc in each st around [18]
- Rnd 20: (1 sc, inv.dec) × 6 [12]
- Rnd 21–22: Sc in each st around [12]
Add enough stuffing to give the body a firm base while keeping the neck area neat.
FO and leave a long tail for sewing.
🐾 9. Arms
Colour A — 4.0 mm hook — Make 2
Shaping the Arms
With chenille yarn, it can be difficult to see where each stitch begins and ends. Use your fingers to feel for the stitches and check the stitch count regularly, especially around the increase and decrease rounds.
After finishing both arms, compare them side by side before attaching them to the body. They should be approximately the same length and thickness. Flattening the upper opening slightly will make it easier to sew the arms neatly against the body.
- Rnd 1: 6 sc into MR [6]
- Rnd 2: Inc around [12]
- Rnd 3: (1 sc, inc) × 6 [18]
- Rnd 4: (2 sc, inc) × 6 [24]
- Rnd 5: (3 sc, inc) × 6 [30]
- Rnd 6–7: Sc in each st around [30]
- Rnd 8: (2 sc, inv.dec) × 6 [18]
- Rnd 9: (1 sc, inv.dec) × 6 [12]
- Rnd 10: (4 sc, inv.dec) × 2 [10]
- Rnd 11–18: Sc in each st around [10]
FO and leave a long sewing tail.
Flatten the upper opening slightly before sewing the arms to the body.
🦵 10. Hind Legs
Colour A — 4.0 mm hook — Make 2
Shaping the Hind Legs
Add fiberfill gradually while crocheting the foot, keeping it soft and rounded rather than overstuffed. The leg itself should be stuffed more lightly, especially toward the upper section, so it remains flexible enough to sit naturally against the body.
Because both hind legs need to support the puppy evenly, compare them side by side before attaching them. Check that they have the same length and similar thickness. Place them against the body temporarily and adjust their angle until the puppy sits evenly.
The BLO round on the foot creates a small change in shape that helps define the transition between the foot and leg. Keep your stitches consistent in this round so the finished foot keeps its intended shape.
Foot
- Rnd 1: 6 sc into MR [6]
- Rnd 2: Inc around [12]
- Rnd 3: (1 sc, inc) × 6 [18]
- Rnd 4: (2 sc, inc) × 6 [24]
- Rnd 5: (3 sc, inc) × 6 [30]
- Rnd 6: Sc in each st around [30]
- Rnd 7: Sc in BLO around [30]
- Rnd 8: Sc in each st around [30]
Lightly stuff the foot.
Leg
- Rnd 9: (3 sc, inv.dec) × 6 [24]
- Rnd 10: (2 sc, inv.dec) × 6 [18]
- Rnd 11: (1 sc, inv.dec) × 6 [12]
- Rnd 12–22: Sc in each st around [12]
Stuff only the lower portion of the leg. Keep the upper section flexible.
FO and leave a long sewing tail.
🐕 11. Tail
Colour E — 2.5 mm hook
Shaping the Tail
After finishing the tail, gently shape it with your fingers and decide how you want it to curve before attaching it to the body. If you want the curve to hold its shape, a short piece of twisted yarn can be placed inside the tail.
Before sewing the tail permanently, pin it to the back of the body and check the position from different angles. A slightly raised or curved tail can add more character to the seated puppy, while keeping it closer to the body gives a simpler look.
- Rnd 1: 4 sc into MR [4]
- Rnd 2–23: Sc in each st around [4]
FO and leave a long tail.
If you want the tail to hold a gentle curve, you can insert a small amount of tightly twisted yarn inside while shaping it.
🐾 12. Paw Pads
Colour E — 2.5 mm hook
Attaching the Paw Pads
Place the paw pads on the center of the feet and arms first, then check their position from the front. Try to keep the placement similar on both sides so the puppy looks balanced.
Use small sewing stitches around the edges of each pad. Avoid pulling the yarn too tightly, especially with chenille yarn, because this can cause the surrounding stitches to flatten or become uneven.
Make 6 small paw pads.
For each pad:
- Rnd 1: 6 sc into MR [6]
FO and leave a short sewing tail.
Sew the pads onto the feet and front paws as desired.
🎀 13. Collar
Colour of your choice — 4.0 mm hook
- Row 1: Ch 21.
- Row 2: Starting in the 2nd ch from hook, sc across [20]
FO and leave a sewing tail.
Wrap the collar gently around the neck and secure the ends together.
Do not make the collar tight.
Shaping and Attaching the Collar
The collar should sit close to the neck without pulling tightly against the chenille yarn. Leave enough room for the plush fabric to keep its soft shape.
Position the collar evenly around the neck and secure it carefully. If you want to change the puppy’s look, you can use a different color or add a small crocheted or embroidered detail to the front.
Assembly and Finishing
Putting the Puppy Together
Use pins to hold the pieces temporarily while you check the puppy from the front, side, and back. Once you are happy with the proportions and position of each part, sew them securely in place using the yarn tails.
When working with chenille yarn, avoid pulling the sewing stitches too tightly. Gentle, secure stitches will hold the pieces in place without flattening the plush surface.”
Take your time with assembly. With amigurumi, even a small change in placement can give the face a completely different expression.
1. Attach the Eyes
Place the white eye bases approximately between Rounds 8–15 of the head.
Pin them first and check that both sides are symmetrical.
Sew the eye bases securely.
Attach the black pupils slightly toward the centre of the face.
2. Attach the Muzzle
Position the muzzle below the eyes, approximately across Rounds 5–8 of the head.
Pin it first, then sew it securely while adding a small amount of stuffing.
Attach the nose to the upper centre of the muzzle.
3. Attach the Mouth and Tongue
Place the mouth directly below the muzzle.
Sew the tongue into the mouth so that the lower part remains visible.
4. Attach the Ears
Place the ears symmetrically on both sides of the head.
A good starting point is around Round 11, but adjust the position according to the expression you want.
5. Attach the Head
Center the head over the body opening.
Use several passes with the yarn needle around the neck join to create a strong connection. This is especially important because the chenille head is relatively heavy.
6. Attach the Arms
Place the arms on either side of the body, approximately around Rounds 13–17.
Pin both arms first and check that they sit at the same height.
7. Attach the Legs
Place the legs toward the lower front of the body.
Before sewing them permanently, place the puppy on a flat surface and adjust the legs until it can sit comfortably.
8. Attach the Tail
Sew the tail to the centre back of the body around Rounds 8–10.
Shape it into a gentle curve.
9. Add the Paw Pads
Sew the small black paw pads onto the feet and front paws.
10. Add the Collar
Wrap the collar around the neck and secure it comfortably.
Checking the Final Shape
Once all the pieces are sewn together, place the puppy on a flat surface and check its overall shape. Make sure the head is sitting securely, the legs are positioned evenly, and the puppy can sit without tipping too far forward or backward.
Look at the puppy from the front and both sides. If one ear, arm, or leg appears slightly higher than the other, you can carefully adjust the sewing before trimming any remaining yarn tails.
Finally, check all sewn areas to make sure the pieces are firmly attached and there are no loose yarn ends that could come undone.
❓ Frequently Asked Questions
What yarn can I use instead of chunky chenille?
You can substitute another super bulky plush yarn with a similar thickness. Himalaya Dolphin Baby, YarnArt Dolce, and Bernat Blanket are possible alternatives.
Can I use safety eyes?
Yes. Safety eyes can be used if appropriate for the intended recipient. For babies and toddlers, embroidered or crocheted eyes are a better choice because detachable plastic components can present a choking hazard.
Why does my puppy look smaller than the pattern?
Your finished size depends on your yarn thickness, hook size, tension, and stuffing.
How can I make the puppy sit upright?
Make sure the lower body and feet are adequately stuffed, then test the leg placement on a flat surface before sewing. Small adjustments to the angle of the legs can make a big difference.
Can I sell finished items made from this pattern?
Yes, you can sell finished handmade items that you personally make from this pattern. Please do not copy, redistribute, translate, or republish the written pattern as your own. If you share your finished puppy online, crediting Amyliva Handmade as the pattern designer is appreciated.

Yorum gönder