Tiny Lightning Bolt Keychain – Free Crochet Pattern
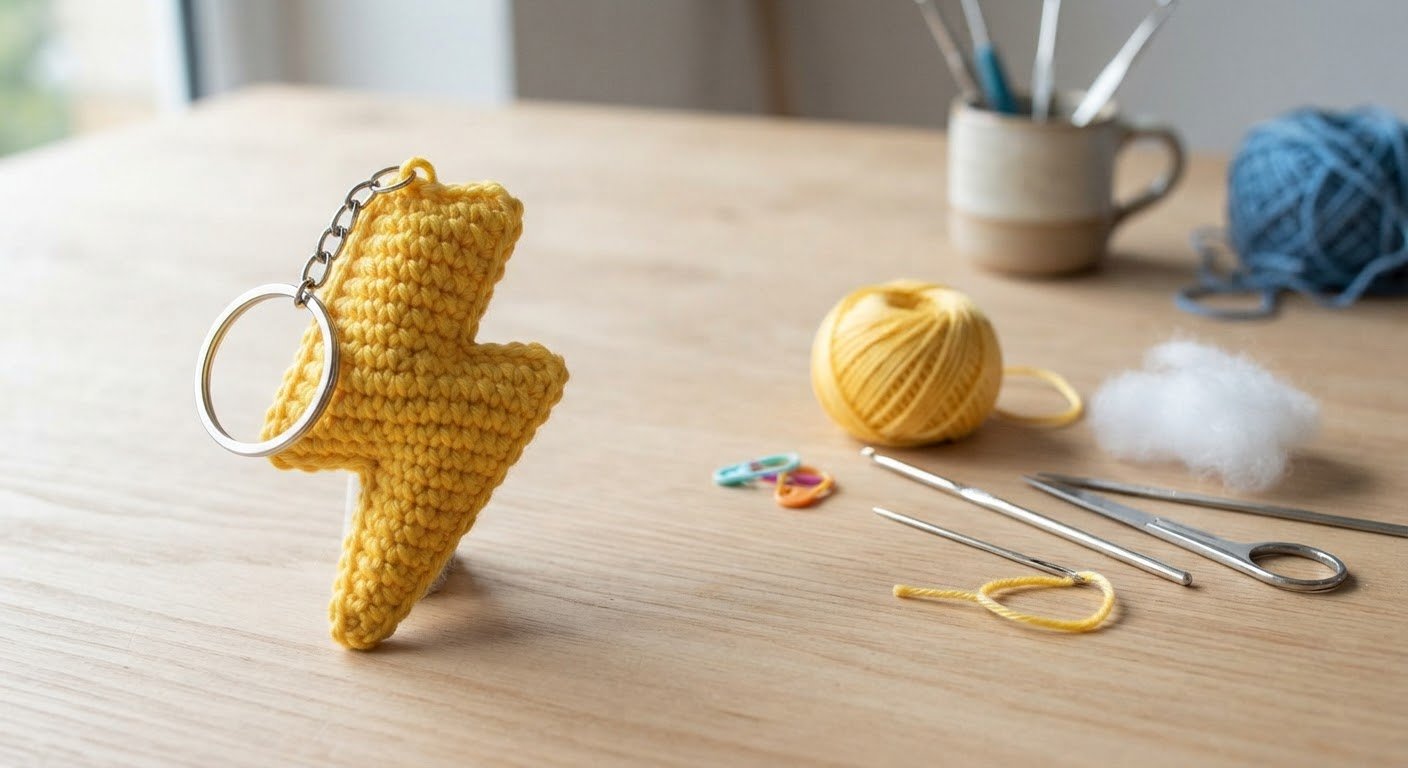
Amigurumi keychain projects are among the most fun and rewarding accessories to crochet. With their quick completion time and charming details, they make wonderful handmade gifts, bag charms, or personalised backpack decorations.
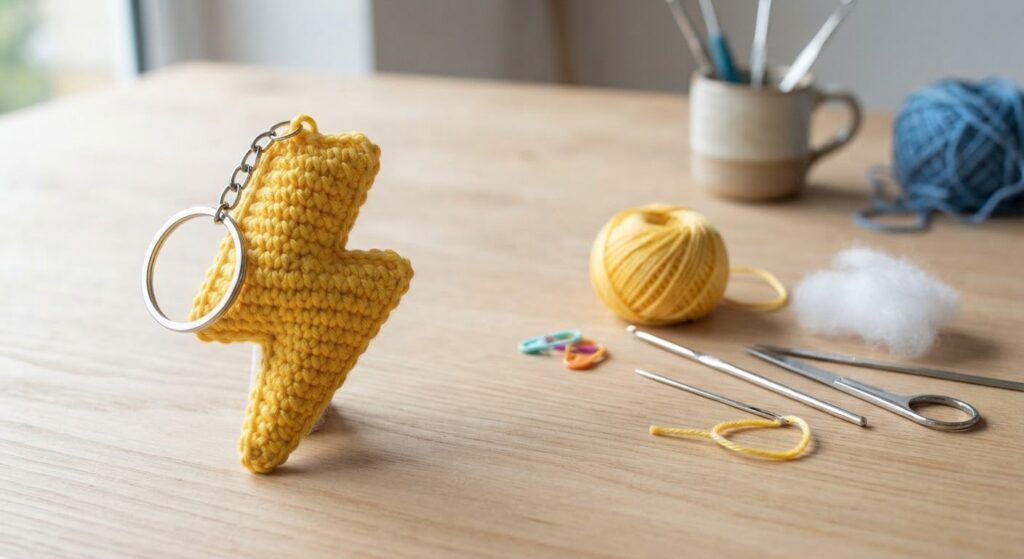
This free crochet lightning bolt keychain pattern combines a bold zigzag shape with a sturdy two-layer construction, creating a playful accessory that is both lightweight and durable. It is an excellent project for using small amounts of leftover yarn while practising basic crochet techniques.
The lightning bolt is worked in rows with simple increases, decreases, and chain stitches that create the distinctive shape. Once two identical pieces are completed, they are joined together with a small amount of stuffing to give the finished keychain extra structure and dimension.
Whether you are making a keychain, zipper pull, gift accessory, or colourful bag charm, this beginner-friendly pattern is a quick and satisfying project that can easily be customised with different colours and yarn types.
Ways to Use Your Lightning Bolt Keychain
This tiny crochet lightning bolt can be used in several different ways:
- Keychain: Attach a keyring and turn it into a cute everyday accessory.
- Bag charm: Add it to a handbag, backpack, or purse.
- Zipper pull: Attach it to a jacket, pencil case, or pouch.
- Gift accessory: Add it to a handmade gift package.
- Party favors: Make several in different colors for a fun handmade favor.
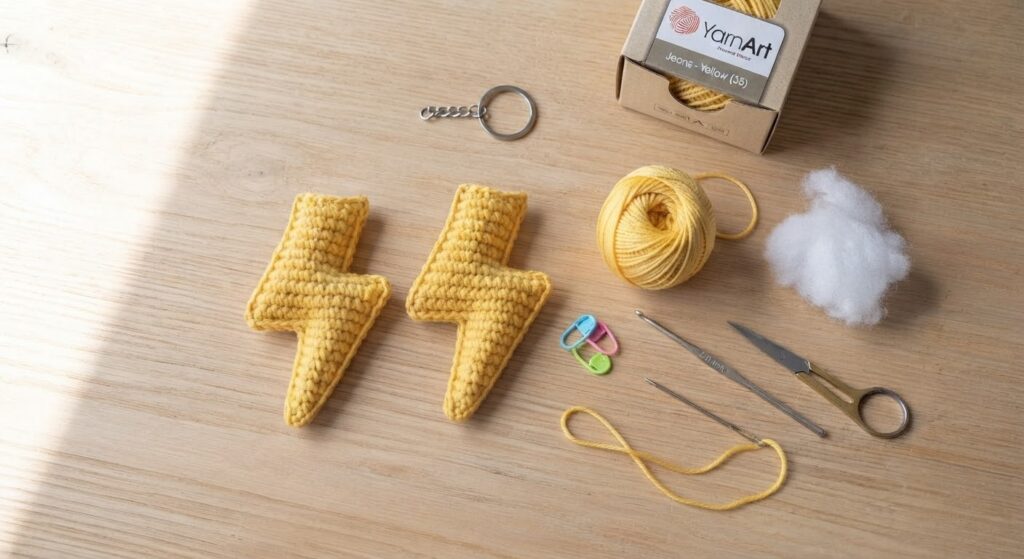
Materials
Tension Tip: For amigurumi, your stitches should be tight enough that the stuffing does not show through. If your stitches are loose, try going down by 0.5 mm on your hook size.
- Yellow cotton yarn – a small amount
- 2.0 mm crochet hook
- Small amount of polyester fiberfill
- Keychain ring or lobster clasp
- Tapestry needle
- Scissors
- Stitch marker
Why Make a Crochet Lightning Bolt Keychain?
Small crochet keychains are a practical way to use leftover yarn while creating useful handmade accessories. This lightning bolt design is especially enjoyable because it combines simple stitches with a distinctive shape that is instantly recognisable.
Unlike many amigurumi projects, this pattern works up very quickly and requires only a small amount of stuffing. The finished piece is lightweight, durable, and easy to attach to keys, bags, backpacks, and zipper pulls. It is also a great project for practising shaping techniques such as increases and decreases while creating a fun decorative accessory.
Choosing the Yarn
A smooth cotton yarn works especially well for this project because the lightning bolt depends on clean edges and clearly defined corners. Cotton yarn has relatively little stretch, which helps the crocheted pieces keep their shape when they are joined together.
A smooth DK or sport-weight cotton yarn works well for this small crochet accessory. You only need a small amount, making it a useful project for leftover yarn.
Try to avoid very fluffy or highly textured yarn for your first lightning bolt. Textured yarn can make it harder to see the individual stitches and can make the pointed corners less defined.
The yarn weight is flexible, but changing the yarn thickness or hook size will change the finished size. Choose a hook that works well with your yarn and keep your stitches firm so the finished piece holds its shape.
Common Mistakes When Crocheting Shaped Keychains
When making shaped crochet keychains, one of the most common challenges is maintaining clean edges and sharp corners. Uneven tension can cause the points of the lightning bolt to become rounded or lose definition.
Another common mistake is using too much stuffing. Because this project is designed to remain relatively flat, only a small amount of fiberfill should be added between the layers. Overstuffing can distort the shape and make the points look bulky.
It is also important to make both lightning bolt pieces the same size before joining them together. Checking the alignment of the edges and corners before assembly will help create a cleaner finished result.
Crochet Abbreviations
This pattern uses US crochet terminology.
- ch – chain
- sc – single crochet
- inc – increase
- dec – decrease
- sl st – slip stitch
- st – stitch
- FO – fasten off
Before You Begin
The lightning bolt is made from two identical crocheted pieces that are joined together after both pieces are finished.
The pieces are worked back and forth in rows. Check the stitch count at the end of each row, especially after increases and decreases, as these stitches create the angles of the lightning bolt.
Keep your tension even when working the pointed sections. Very tight stitches can make the edges difficult to join, while loose stitches can make the corners less defined.
Before joining the pieces, place them together and check that the edges and points line up. Use only a small amount of fiberfill between the layers so the finished piece keeps its flat shape.
A stitch marker can help you keep track of your rows, especially when working on a small piece.
Tiny Lightning Bolt Crochet Pattern
The lightning bolt is worked from one point to the other, with increases and decreases shaping the zigzag form. Make two identical pieces using the same yarn and hook.
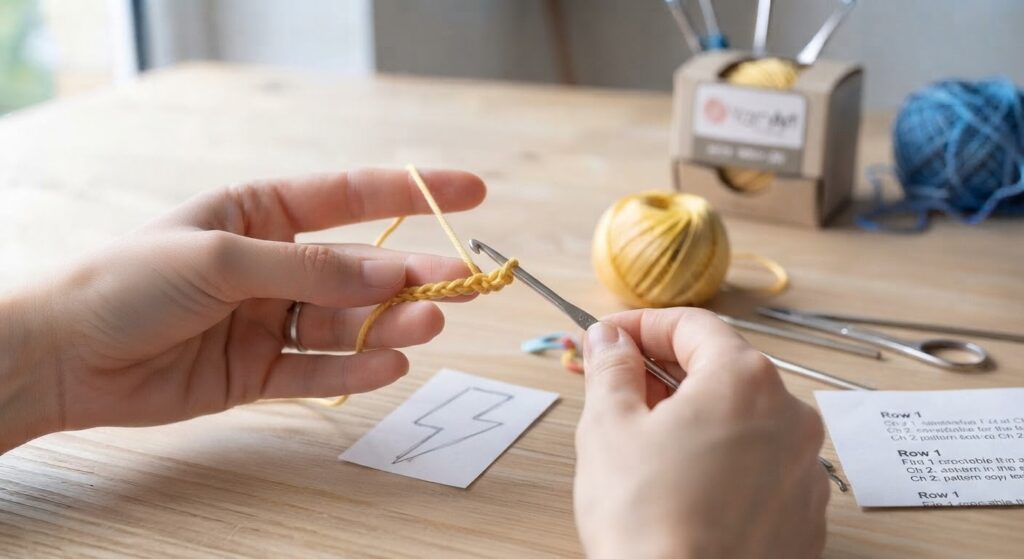
Pattern Notes
The pieces are worked back and forth in rows. After both pieces are completed, place them together and crochet around the outer edge through both layers.
Use the same yarn and hook for both pieces so they match in size and shape. Keep your tension even, especially around the diagonal sections and pointed ends.
Lightning Bolt – Make 2
Using yellow yarn:
Row 1: Ch 2. Sc in the 2nd ch from hook. (1)
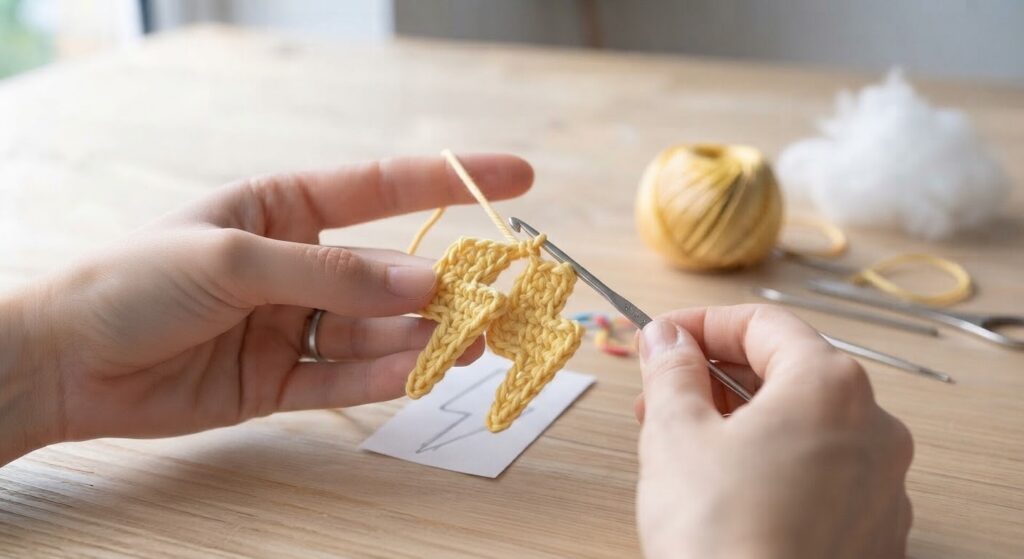
Row 2: Ch 1, turn. 2 sc in the stitch. (2)
Row 3: Ch 1, turn. Sc in each stitch across. (2)
Row 4: Ch 1, turn. 2 sc in the first stitch, sc in the next stitch. (3)
Row 5: Ch 1, turn. Sc across. (3)
Row 6: Ch 1, turn. Sc in the first 2 stitches, 2 sc in the last stitch. (4)
Row 7: Ch 1, turn. Sc across. (4)
Now create the first diagonal section.
Creating the First Diagonal
The chain stitches in Row 8 create the first diagonal section. Work into the chains carefully and keep your tension even so the edge stays defined.
Row 8: Ch 4, turn. Sc in the 2nd ch from hook, sc in the next 2 ch, then sc in each of the 4 stitches across. (7)
Row 9: Ch 1, turn. Sc across. (7)
Row 10: Ch 1, turn. Sc across. (7)
Create the center point of the lightning bolt.
Creating the Center Point
These rows shape the center point of the lightning bolt. The decreases narrow the piece and help create the change in direction. Keep the decrease stitches even and check the stitch count at the end of each row.
Row 11: Ch 1, turn. Sc in the first 3 stitches, dec, sc in the last 2 stitches. (6)
Row 12: Ch 1, turn. Sc across. (6)
Row 13: Ch 1, turn. Sc in the first 2 stitches, dec, sc in the last 2 stitches. (5)
Row 14: Ch 1, turn. Sc across. (5)
Create the lower diagonal.
Creating the Lower Diagonal
The chain stitches in Row 15 create the second diagonal section and lead toward the lower point. Work into the chains carefully and keep your tension even.
Row 15: Ch 4, turn. Sc in 2nd ch from hook, sc in next 2 ch, then sc in each of the 5 stitches across. (8)
Row 16: Ch 1, turn. Sc across. (8)
Row 17: Ch 1, turn. Sc across. (8)
Begin shaping the lower point.
Shaping the Lower Point
The final rows use decreases to form the lower point of the lightning bolt. Keep your tension even as the piece becomes narrower.
Row 18: Ch 1, turn. Dec, sc in the next 4 stitches, dec. (6)
Row 19: Ch 1, turn. Sc across. (6)
Row 20: Ch 1, turn. Dec, sc in the next 2 stitches, dec. (4)
Row 21: Ch 1, turn. Sc across. (4)
Row 22: Ch 1, turn. Dec twice. (2)
Row 23: Ch 1, turn. Dec. (1)
FO and leave a long yarn tail for assembly.
Make a second identical piece.
Joining the Two Pieces
Place the two completed lightning bolt pieces together, aligning the points and outer edges.
Using yellow yarn, insert your hook through both layers near one point and begin working single crochet stitches through both pieces along the edge.
Work around the outer edge, making sure your hook passes through both layers at the corners and points. If the pieces shift, realign them before continuing.
After joining about half of the edge, add a small amount of polyester fiberfill between the layers. Spread it evenly into the wider sections without pushing the edges apart.
Continue crocheting around the remaining edge until the two pieces are fully joined.
When you have joined the entire edge, finish with a slip stitch. Fasten off and weave the yarn end securely between the layers.
Tip for Sharp Corners
Take extra care around the pointed ends. Avoid pulling the yarn too tightly, as this can make the points look rounded or uneven.
As you work around each point, gently shape the corner with your fingers and keep the layers aligned.
Adding the Keychain
Attach the keychain ring to the top point of the finished lightning bolt.
For a secure attachment, use a strong piece of yarn and sew through the top point several times. Pass the yarn through the keychain ring and around the ring before sewing back through the crochet stitches.
Make several passes through the same area and tie the yarn securely. Before using the keychain, gently pull the ring to check the attachment and reinforce the stitches if needed.
Easy Color Ideas
Bright yellow gives the lightning bolt a classic look, but you can use any color you like.
Try:
- Yellow
- White
- Black
- Pastel pink
- Lavender
- Mint green
- Sky blue
- Orange
You can also use two contrasting colors for the two layers instead of making both pieces the same color. For example, a yellow front piece with a white back can create a simple two-tone effect.
Small amounts of leftover yarn can also be used to make lightning bolts in different colors.
Care Instructions
If needed, gently hand wash the lightning bolt with mild detergent and cool or lukewarm water. Avoid soaking it for a long time, especially when metal hardware is attached.
Use mild detergent and avoid very hot water. Do not twist or wring the crochet piece, as this can distort the pointed shape.
After washing, gently press out excess water with a clean towel and reshape the lightning bolt with your fingers while it is damp.
Allow the keychain to air dry completely. Keep it away from direct heat, which can affect the yarn and keychain hardware.
Creative Ways to Customize Your Lightning Bolt
One of the best features of this keychain pattern is how easily it can be personalized. While bright yellow creates a classic lightning bolt appearance, different colors can completely change the style of the finished accessory.
Try using pastel shades for a softer look, bright neon colors for a playful design, or contrasting colors on the front and back layers. You can also attach the lightning bolt to backpacks, pencil cases, handbags, or gift packaging for a unique handmade touch.
For themed collections, consider making several lightning bolts in different colors using leftover yarn. Small projects like this are perfect for reducing yarn waste while creating practical accessories.
Frequently Asked Questions
How much yarn do I need?
Only a small amount of yarn is needed, which makes this project perfect for leftover yarn scraps.
Can I make the lightning bolt larger?
Yes. Use thicker yarn and a larger hook to make a bigger lightning bolt. The finished size and shape will change depending on the yarn and hook size.
Can I use acrylic yarn?
Yes. Acrylic yarn can also be used, although cotton yarn usually gives the edges a cleaner and firmer appearance.
Can I sell the finished keychains?
Yes. You may sell finished keychains made from this pattern. Please credit Amyliva Handmade as the pattern source.
Pattern Usage & Copyright
This crochet pattern is for personal use and may not be copied, reproduced, translated, or redistributed. You may sell finished items made from this pattern, but please do not copy, reproduce, translate, or redistribute the written pattern or publish it as your own.
If you share your finished lightning bolt, you are welcome to credit Amyliva Handmade as the pattern source.
Best Uses for a Crochet Lightning Bolt Keychain
This crochet lightning bolt can be used as a keychain, bag charm, zipper pull, backpack decoration, or handmade gift accessory. Its compact size and lightweight construction make it easy to carry while adding a fun handmade detail to everyday items.
Because it requires only a small amount of yarn, it is also a practical project for craft fairs, gift sets, and scrap-yarn collections. Multiple bolts in different colors can be created quickly and displayed together as a coordinated set.
Final Thoughts
This tiny crochet lightning bolt keychain is a quick and enjoyable project that combines simple stitches with an eye-catching shape. The two-layer construction provides extra durability, while the pointed zigzag design makes it instantly recognizable.
Whether you are looking for a beginner-friendly crochet project, a creative use for leftover yarn, or a handmade accessory for everyday use, this lightning bolt keychain is a fun addition to any crochet collection.


Yorum gönder