Sweet Watermelon Amigurumi – Free Crochet Pattern
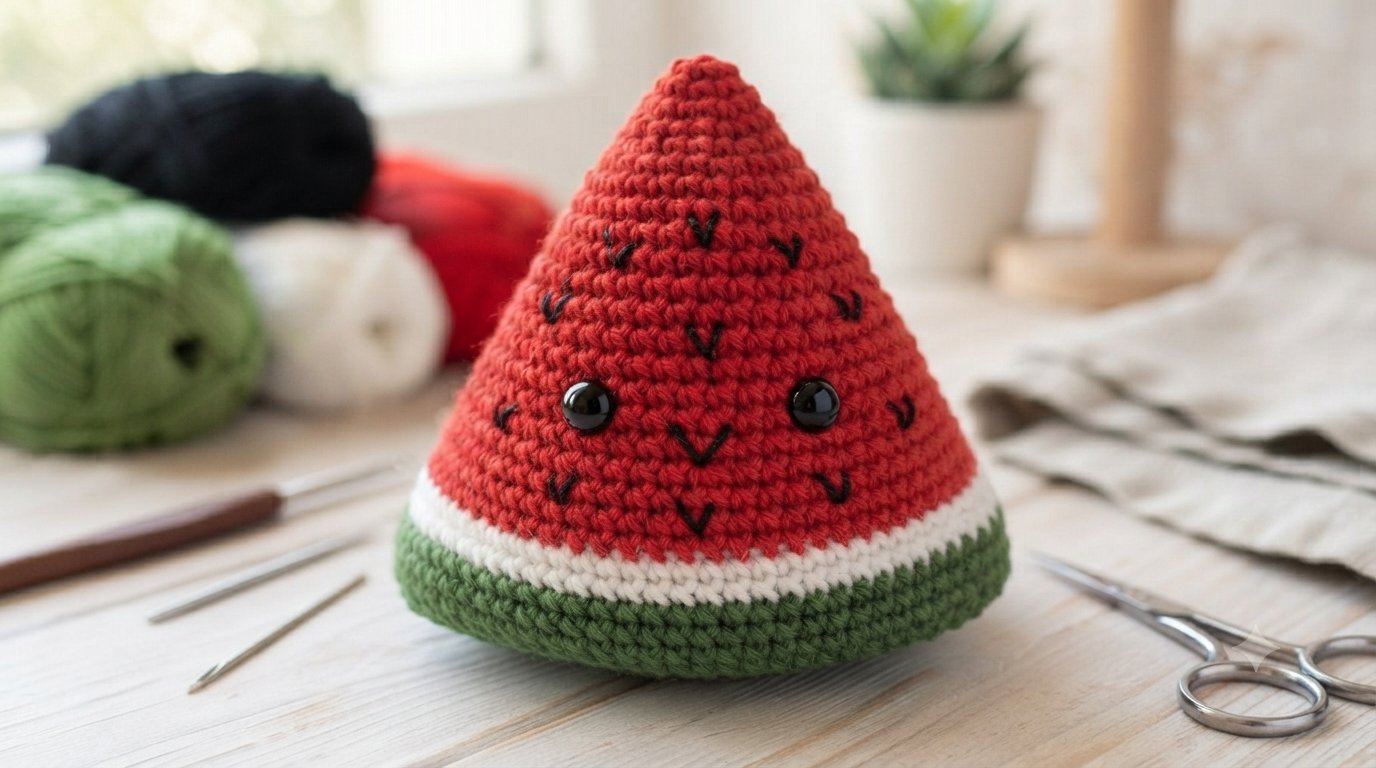
There is something fun about turning a simple ball of yarn into a little piece of summer. This sweet watermelon amigurumi is a small and cheerful crochet project made with just a few colors of yarn. The finished piece has a simple watermelon-slice shape, with a green rind, a white inner layer, a red center, and tiny embroidered seeds.
I made this project as a small amigurumi that does not take a lot of yarn or time to finish. It is also a nice way to use leftover cotton yarn from other projects. The shape is worked directly in continuous rounds, with simple increases and decreases used to create the rounded watermelon slice.
You can keep the colors close to a traditional watermelon, or change them to create your own version. The finished piece can be used as a small decoration, ornament, photo prop, or even turned into a keychain by adding a metal ring.
In this free crochet pattern, I’ll show you how to crochet the watermelon from the foundation chain through the final shaping, stuffing, face, and embroidered seeds. I’ve also included notes about color changes, stuffing, sizing, and a few common questions that may come up while making it.
Project Details
- Skill level: Beginner
- Crochet terms: US terminology
- Finished size: Approximately 7 cm high and 6 cm wide
- Project type: Watermelon amigurumi, decoration, ornament, or handmade gift
- Main techniques: Working around a foundation chain, continuous rounds, increases, decreases, color changes, stuffing, and embroidery
- Construction: The watermelon is crocheted as one main piece, then stuffed and finished with embroidered eyes, a smile, and watermelon seeds
- Estimated crochet time: About 1–2 hours, depending on your pace and experience
Finished Size
- Height: Approximately 7 cm
- Width: Approximately 6 cm
Size may vary slightly depending on yarn type, hook size, and individual tension.

Materials
- Green cotton yarn for the watermelon rind
- White cotton yarn for the inner rind
- Red cotton yarn for the watermelon flesh
- Small amount of black embroidery thread for the eyes, mouth, and seeds
- 2.0 mm crochet hook
- Polyester fiberfill
- 4 mm safety eyes
- Yarn needle
- Scissors
- Stitch marker
Sport, DK, or light worsted-weight cotton yarn can be used for this project. Choose a hook size that gives you firm, even stitches so the fiberfill does not show through the finished piece.
You only need small amounts of each color, which makes this a useful project for using leftover yarn from other amigurumi projects.
Skill Level
Beginner
This pattern is suitable for beginners who know the basic crochet stitches, including single crochet, increases, and decreases. You should also be comfortable working in continuous rounds and crocheting around a foundation chain.
Abbreviations
This pattern uses standard US crochet terminology.
- ch – chain
- sc – single crochet
- inc – increase (2 sc in the same stitch)
- dec – decrease (invisible decrease recommended)
- BLO – back loop only
- st – stitch
- R – round
Important Crochet Notes
Working Around the Foundation Chain
The first round is worked around both sides of the foundation chain. This creates the oval base that forms the bottom of the watermelon.
Continuous Rounds
The watermelon is worked in continuous spiral rounds, so do not join the rounds with a slip stitch unless the pattern specifically tells you to do so.
Using a Stitch Marker
Place a stitch marker in the first stitch of each round. Move it up as you work so you can keep track of the beginning of each round.
Changing Colors
When changing from green to white and then to red, make the color change during the last stitch of the previous round. This helps keep the transition between colors neat.
Keep your stitches firm and consistent throughout the project. Loose stitches can make the shape uneven and may allow the stuffing to show through.
Start with Green Yarn
Make a slip knot and chain 15.
Round 1
Starting in the second chain from the hook:
13 sc, inc in the last chain.
Turn your work and crochet along the other side of the foundation chain:
13 sc, inc in the same end stitch.
(30 sts)
Round 2
Work the following sequence around:
(3 sc in next st), 12 sc, (3 sc in next st), sc,
(3 sc in next st), 12 sc, (3 sc in next st), sc.
(38 sts)
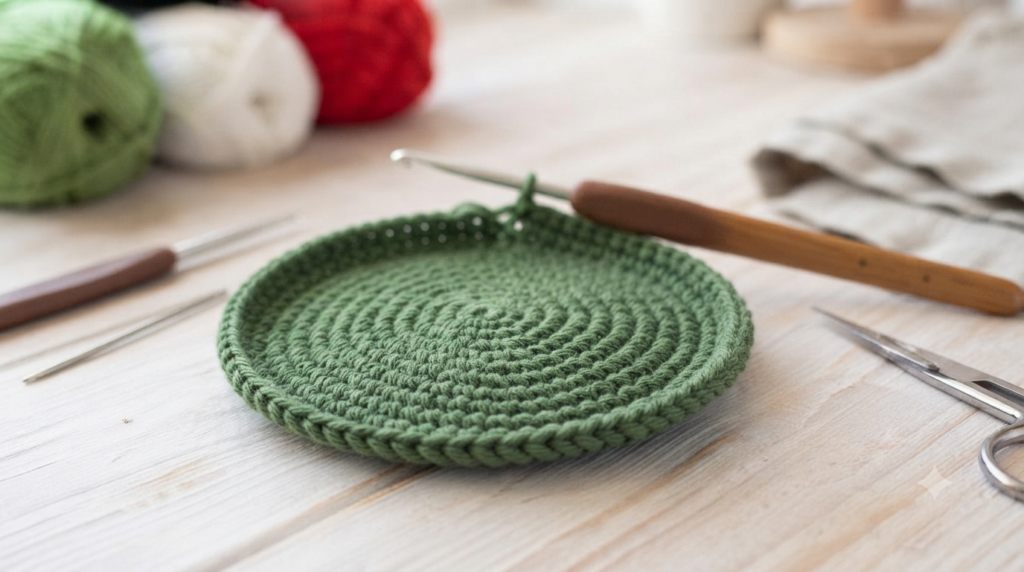
Round 3
38 sc in BLO.
Working this round in the back loops only creates a defined edge around the base of the watermelon and helps the piece keep its shape.
Round 4
sc, dec, 12 sc, dec, 3 sc, dec, 12 sc, dec, 2 sc.
(34 sts)
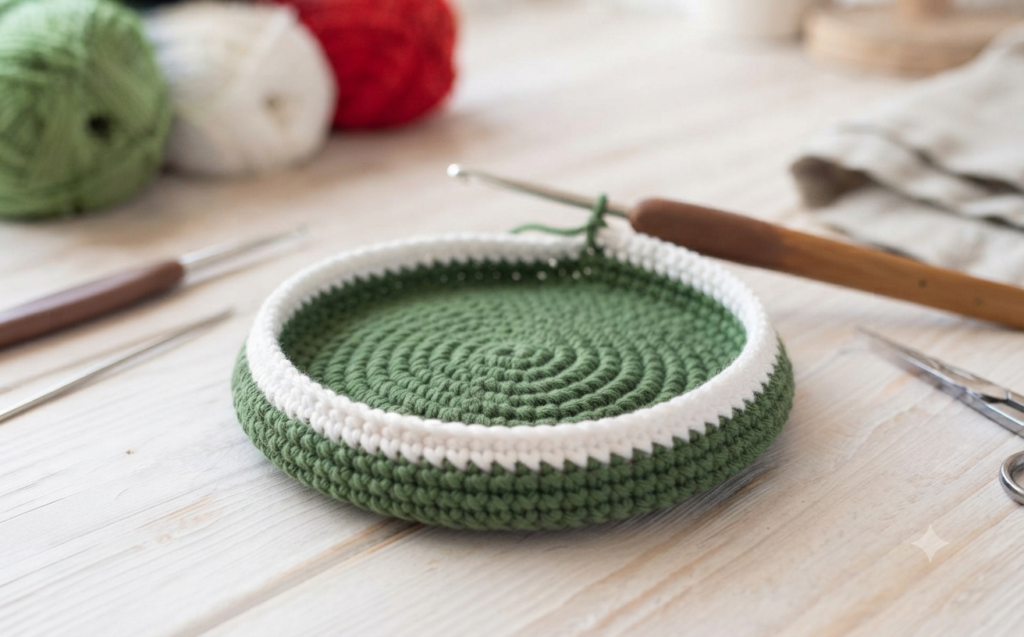
Change to White Yarn
Change to white yarn at the end of Round 4.
Round 5
34 sc.
This white round forms the lighter inner rind between the green outer rind and the red watermelon flesh.
Change to Red Yarn
Change to red yarn at the end of Round 5.
Round 6
sc, dec, 10 sc, dec, 3 sc, dec, 10 sc, dec, 2 sc.
(30 sts)
Round 7
30 sc.
Round 8
sc, dec, 8 sc, dec, 3 sc, dec, 8 sc, dec, 2 sc.
(26 sts)
Round 9
26 sc.
Round 10
sc, dec, 6 sc, dec, 3 sc, dec, 6 sc, dec, 2 sc.
(22 sts)
Adding the Eyes
Place the 4 mm safety eyes between Rounds 10 and 11.
Position them on the wider front side of the watermelon, leaving about 4–5 stitches between the eyes. Before securing the backs, check the placement from the front to make sure the eyes are level and centered.
If you are making this piece for a young child, use embroidered eyes instead of safety eyes. Small plastic eyes can be a choking hazard.
Continue Shaping
Round 11
22 sc.
Round 12
2 sc, dec, 4 sc, dec, 3 sc, dec, 4 sc, dec, sc.
(18 sts)
Round 13
18 sc.
Round 14
2 sc, dec, 2 sc, dec, 3 sc, dec, 2 sc, dec, sc.
(14 sts)
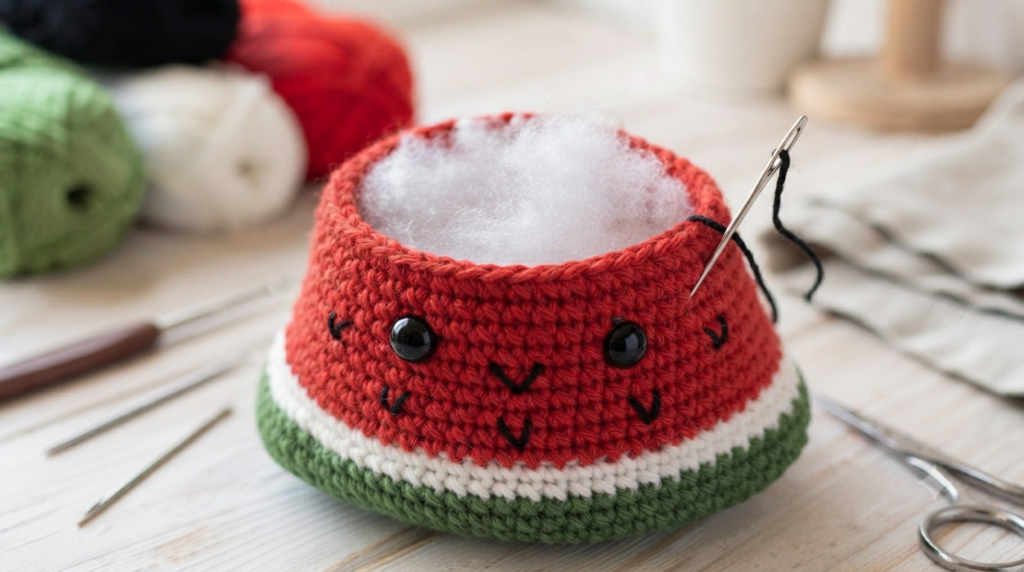
Begin Stuffing
Start adding small amounts of polyester fiberfill after Round 14. Add the stuffing gradually rather than filling the piece all at once.
Distribute the fiberfill evenly as you continue with the remaining rounds. The watermelon should feel firm enough to hold its shape, but avoid overstuffing because too much pressure can distort the crochet stitches.
Round 15
14 sc.
Round 16
2 sc, 2 dec, 3 sc, 2 dec, sc.
(10 sts)
Round 17
10 sc.
Round 18
3 sc, dec, 3 sc, dec.
(8 sts)
Closing & Finishing
Before closing, check the shape and add a little more fiberfill if needed. Avoid overstuffing.
Cut the yarn, leaving a long tail. Using a yarn needle, weave the yarn through the front loops of the remaining 8 stitches. Pull gently to close the opening, then fasten off and weave the remaining tail into the piece.
Face
Embroider a small smile between the eyes using black embroidery thread.
Watermelon Seeds
Using black embroidery thread, add small vertical stitches across the red section to create the watermelon seeds. Space the seeds unevenly for a more natural look, or keep them evenly spaced for a cleaner appearance.
Styling Ideas & Uses
This little watermelon can be used in several ways depending on how you want to display or finish it.
- Add a small loop and use it as a Christmas or summer ornament.
- Attach a keychain ring to the top to turn it into a small keychain or bag charm.
- Use it as decorative play food for crochet play sets.
- Add it to a seasonal display on a shelf, tray, or desk.
- Use it as a small photo prop for summer-themed handmade projects.
You can also make several watermelon slices in different sizes or colors and display them together.
Care Instructions
Keep the watermelon amigurumi away from excessive moisture and heat.
For light cleaning, gently wipe the surface with a damp cloth and a small amount of mild soap if needed. Do not soak the piece or use a washing machine, as the shape and embroidered details may be affected.
Allow it to air dry completely before storing or using it again.
Safety Note
This amigurumi contains small parts, including safety eyes, that may pose a choking hazard.
It is intended as a decorative handmade item, ornament, or keychain rather than a toy for babies or young children. If you make it for a child, use embroidered eyes instead of plastic safety eyes and make sure all embroidered details are secure.
If you add keychain hardware, check that it is firmly attached before use.
Frequently Asked Questions
Is this watermelon pattern beginner-friendly?
Yes. This pattern uses basic stitches and simple increases and decreases. You should be comfortable working in continuous rounds and crocheting around a foundation chain.
Can I use a different yarn?
Yes. Cotton, acrylic, or plush yarn can be used. Keep in mind that changing the yarn weight or hook size will change the finished size and texture.
Can I sell finished watermelon amigurumi?
Yes. You may sell finished items made from this pattern. Please credit Amyliva Handmade as the designer. The written pattern and photographs may not be copied, resold, or redistributed.
How can I keep the watermelon shape firm?
Add the fiberfill gradually as you work and distribute it evenly. Make sure there are no large empty spaces, but avoid overstuffing because it can distort the stitches and shape.
Can I make the watermelon larger or smaller?
Yes. Use thinner yarn with a smaller hook for a smaller piece, or thicker yarn with a larger hook for a larger one. Keep your stitches firm enough that the stuffing does not show through.
Pattern Usage & Copyright
This crochet pattern is designed by Amyliva Handmade, and the photographs on this page are original content from Amyliva Handmade.
You may use this pattern to make finished watermelon amigurumi for yourself, as gifts, or for sale. If you sell a finished item made from this pattern, please credit Amyliva Handmade as the designer.
Please do not copy, reproduce, translate, publish, redistribute, or sell this written pattern or the photographs as your own. You may share a link to this original pattern page so others can access the free pattern.


1 yorum