Crochet Chamomile Flower – Free Crochet Pattern
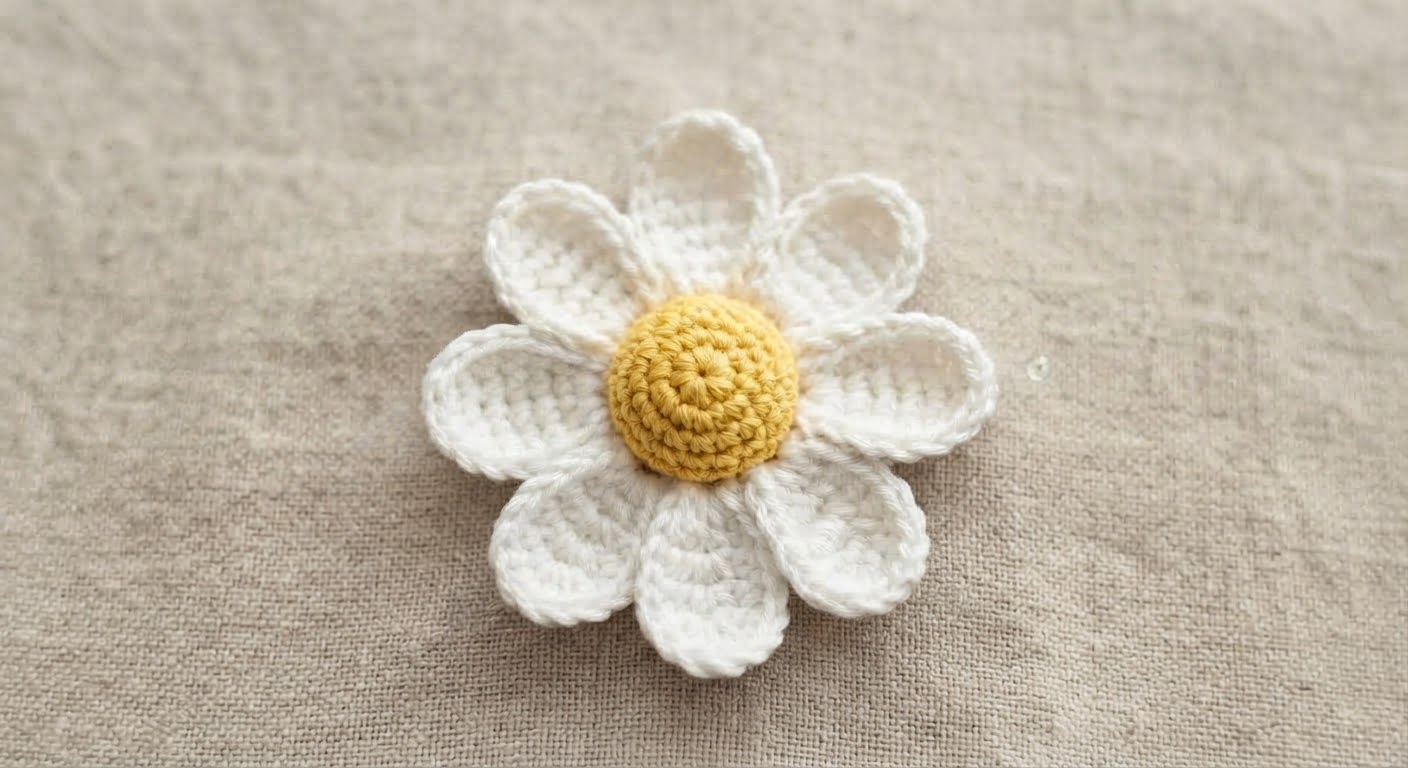
Crochet chamomile flowers are loved for their simple beauty and soft, cheerful appearance. With their white petals and sunny yellow centers, they are easy to recognize and make a lovely crochet project for any season.
You can use the finished flower on its own or add it to other handmade projects, such as a crochet bouquet, bag charm, keychain, or decoration.
In this tutorial, I’ll show you how to crochet the yellow flower center and seven individual petals, then sew everything together to create the finished flower. The pattern uses basic amigurumi stitches and is suitable for confident beginners and intermediate crocheters.
Uses
Crochet chamomile flowers are small and simple projects that don’t require much yarn, which makes them a nice choice when you have small amounts of cotton yarn left from other projects.
You can use your finished flower in several ways:
- Small home decoration
- Bag charm or keychain
- Embellishment for handmade accessories
- Part of a crochet flower bouquet
- Handmade gift
You can use different yarn weights or colors to change the size and appearance of the flower.
Materials
For this crochet chamomile flower, cotton yarn works especially well because it gives the petals a neat shape and clear stitch definition.
Yarn
- Yellow cotton yarn for the flower center
- White cotton yarn for the petals
A DK or sport weight cotton yarn is a good choice for this project. You can use another yarn weight if you prefer, but keep in mind that the finished flower size will change.
Crochet Hook
Use a 2.0–2.25 mm crochet hook, or choose a size that gives you firm, even stitches with your yarn.
Other Supplies
- Polyester fiberfill
- Yarn needle
- Scissors
- Stitch marker
- Sewing pins or stitch markers for positioning the petals
You only need a small amount of stuffing for the yellow center.
Abbreviations
This crochet chamomile flower pattern uses standard US crochet terminology. Keep this list nearby while you work if you need to check an abbreviation.
- MR – magic ring
- sc – single crochet
- inc – increase (2 sc in the same stitch)
- dec – decrease (single crochet two stitches together)
- st – stitch
Step-by-Step Crochet Instructions
Flower Center (Yellow Yarn)
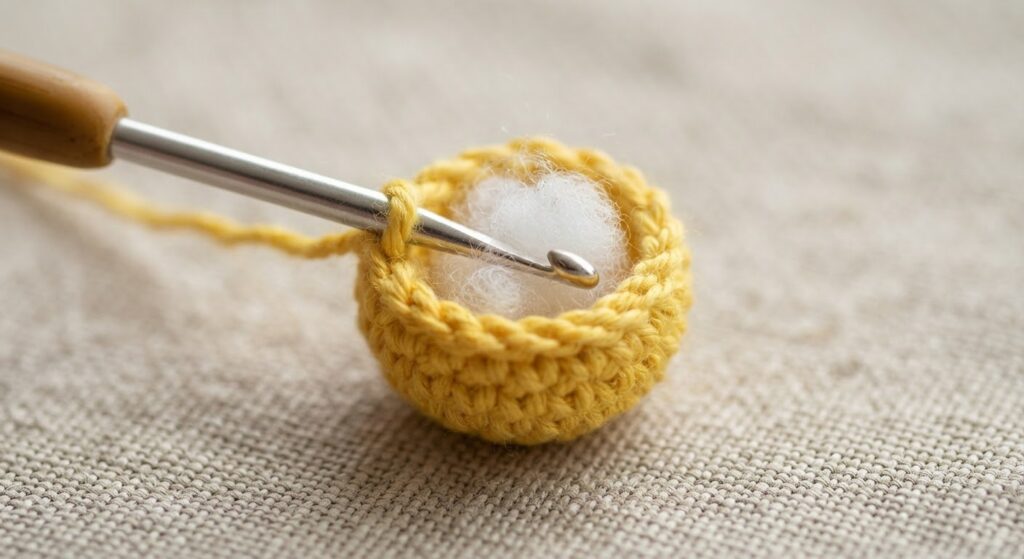
The flower center is worked in continuous rounds using yellow yarn. Do not join at the end of each round.
Round 1:
6 sc in MR (6)
Round 2:
inc in each stitch around (12)
Round 3:
(sc, inc) × 6 (18)
Rounds 4–5:
18 sc
Round 6:
(sc, dec) × 6 (12)
Lightly stuff the center with a small amount of fiberfill. Avoid overstuffing, as too much filling can stretch the stitches and change the shape.
Round 7:
dec around (6)
Cut the yarn, leaving a long enough tail to close the opening. Using a yarn needle, weave the yarn through the front loops of the remaining 6 stitches and gently pull to close.
Secure the yarn and hide the remaining tail inside the center.
💡 Tip: The center should be firm enough to keep its round shape, but it doesn’t need to be tightly stuffed.
Petals (White Yarn – Make 7)
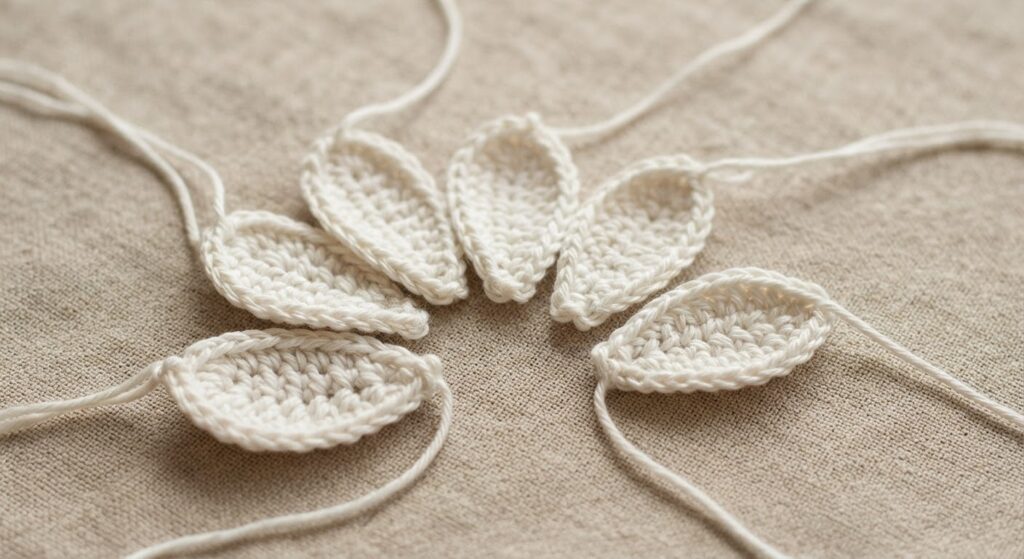
The petals are worked separately and then sewn around the yellow center. Making each petal individually gives the flower a fuller, three-dimensional look.
Round 1:
6 sc in MR (6)
Round 2:
inc in each stitch around (12)
Round 3:
(2 sc, inc) × 4 (16)
Rounds 4–6:
sc in each stitch around (16)
These rounds create the main length and shape of the petal.
Round 7:
(2 sc, dec) × 4 (12)
Round 8:
(1 sc, dec) × 4 (8)
Closing the Petal
Fold the petal flat and crochet 4 sc through both layers to close the bottom edge.
Fasten off, leaving a long yarn tail for sewing.
Repeat the same steps until you have 7 petals in total.
Assembly
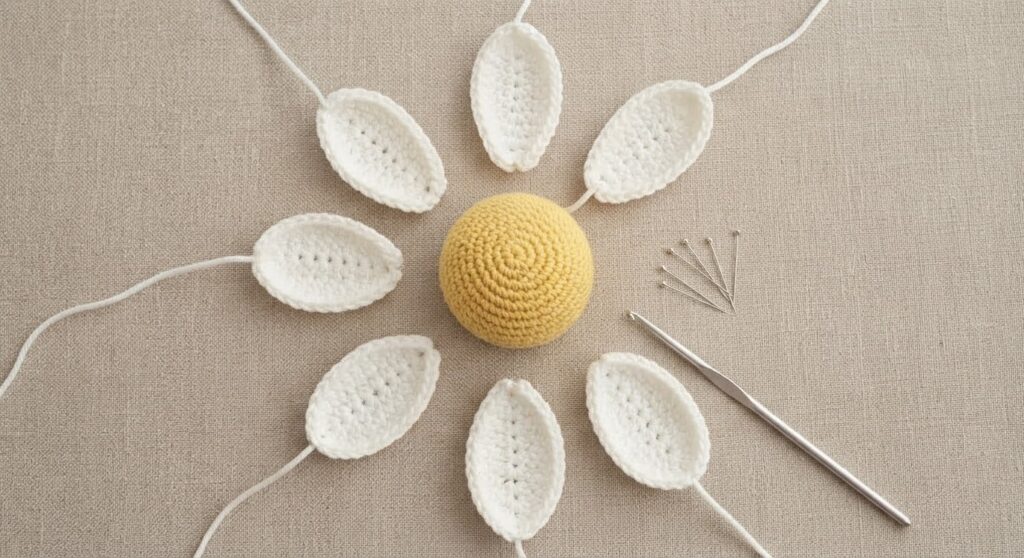
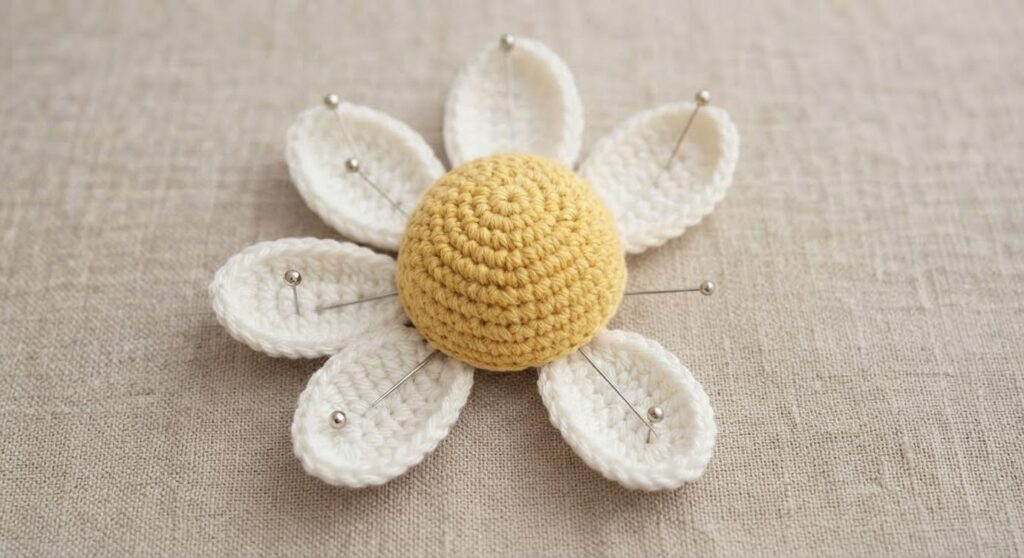
Once all seven petals are finished, arrange them evenly around the yellow center.
Before sewing, place all the petals around the center and adjust the spacing until the flower looks balanced. You can use sewing pins or stitch markers to hold them temporarily in place.
Using the long yarn tails, sew the bottom of each petal securely to the yellow center. Position the petals evenly around the yellow center, keeping the stitches small and neat.
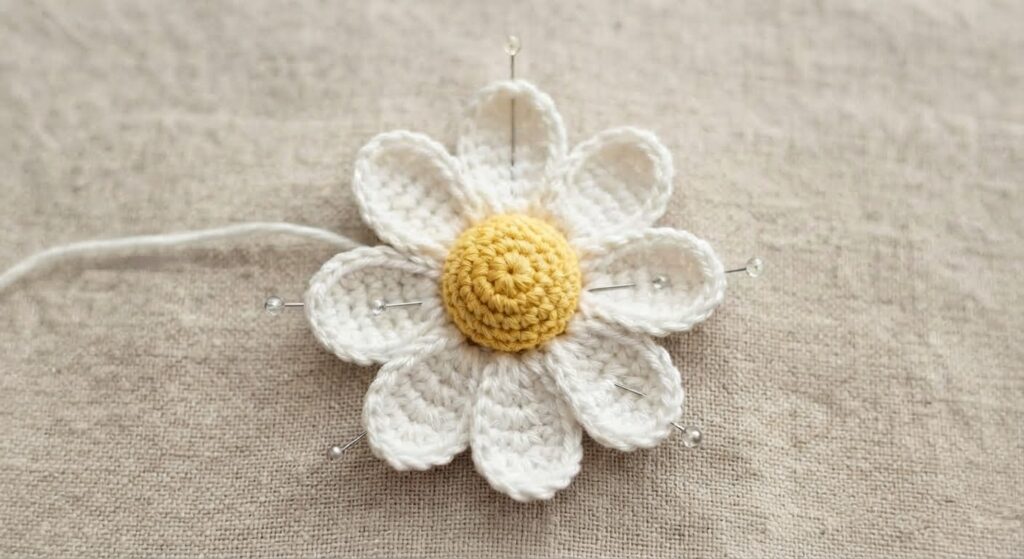
Continue around the flower until all seven petals are securely attached.
Shaping the Flower
After sewing the petals in place, gently arrange them with your fingers. You can leave them slightly curved for a softer, more natural look, or flatten them gently for a more traditional chamomile shape.
Avoid pulling the petals too tightly while sewing, as this can cause them to bunch together.
💡 Tip: Check the flower from the front before hiding the yarn tails. Small adjustments at this stage can help make the petals look more evenly spaced.
Ways to Use Your Crochet Chamomile Flower
You can use the finished flower as a small handmade decoration or add it to other crochet projects.
Crochet Bouquet
Make several flowers and combine them to create a simple everlasting bouquet. You can sew them together or attach them to floral wire for a more traditional flower arrangement.
Bag Charms & Keychains
Add a small keyring or lobster clasp to turn the flower into a cute bag charm or keychain.
Home Decor
Use individual flowers to decorate baskets, cushions, wall hangings, or small seasonal displays.
Hair & Accessories
Attach the flower to a hair clip, headband, or another handmade accessory.
Handmade Gifts
A few crochet chamomile flowers can make a sweet addition to a handmade gift or gift wrapping.
You can also experiment with different colors and yarn weights to create flowers in different sizes and styles.
Frequently Asked Questions (FAQ)
Why are my crochet petals curling?
Petals can curl when the stitches are worked too tightly. Try using a slightly larger crochet hook, or gently shape the petals with your fingers after finishing them.
Can I make more than seven petals?
Yes. You can make 8 or 9 petals if you want a fuller flower. Just make sure to space them evenly around the yellow center.
What yarn works best for this crochet flower?
Cotton yarn is a great choice because it gives the petals clear stitch definition and helps them hold their shape.
Can I make the flower smaller or larger?
Yes. You can change the yarn weight and hook size to adjust the finished size. Keep in mind that this will also affect the amount of yarn and stuffing needed.
Is this crochet chamomile pattern beginner-friendly?
Yes. If you are comfortable with basic stitches such as single crochet, increases, and decreases, this project is suitable for confident beginners.
Pattern Usage & Copyright
This crochet pattern is designed by Amyliva Handmade.
You may use this pattern to make finished crochet chamomile flowers for yourself, as gifts, or for sale. If you sell a finished item made from this pattern, please credit Amyliva Handmade as the designer.
Please do not copy, reproduce, translate, publish, redistribute, or sell this written pattern or the photographs as your own. You may share the link to this original pattern page instead.



Yorum gönder