Cute Little Monster Amigurumi Pattern – Free Crochet Pattern
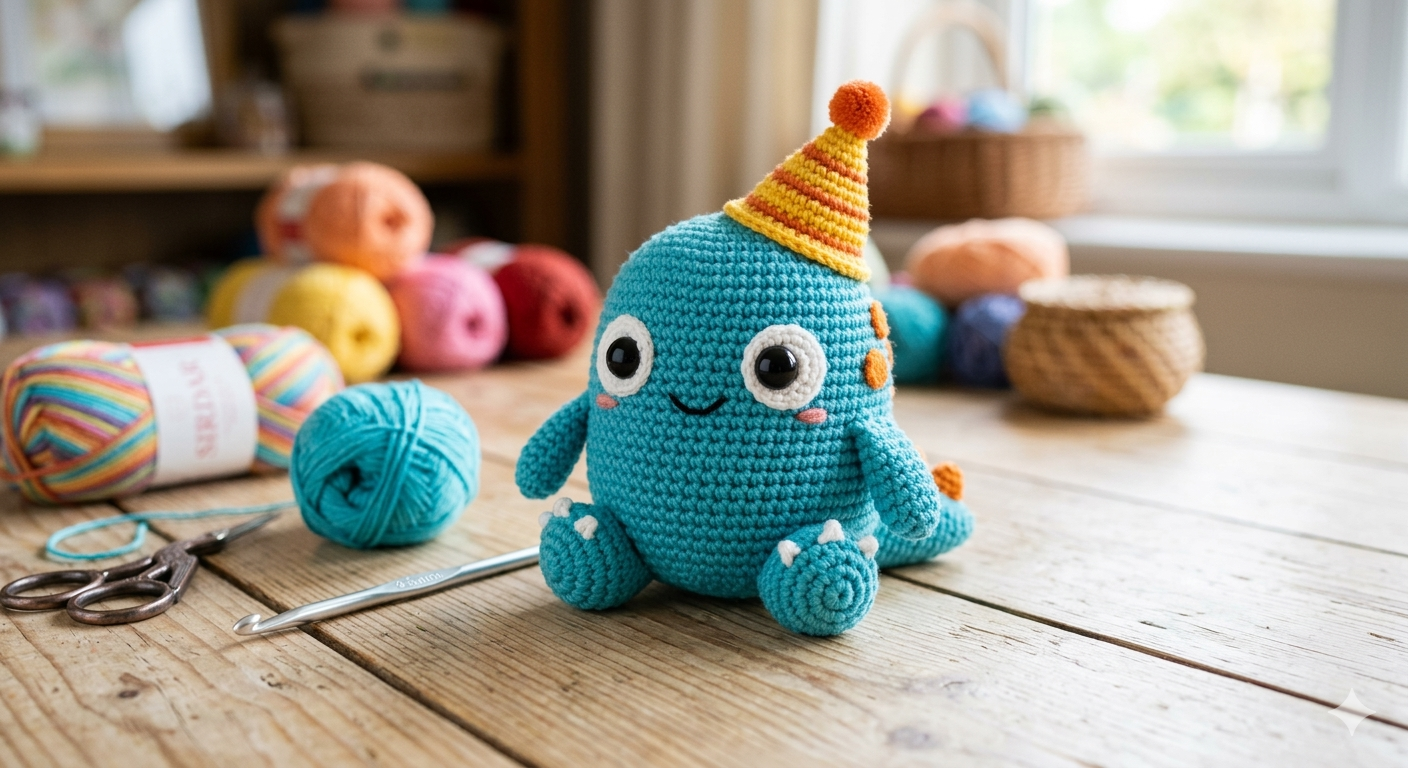
Amigurumi crochet projects are one of the most enjoyable ways to transform yarn into adorable handmade creations. Among the many amigurumi designs, cute little monsters are especially popular because they allow you to use bright colors, playful shapes, and creative expressions.
In this tutorial, you’ll learn how to crochet a cute little monster using simple amigurumi techniques. The project includes a rounded body, small arms, playful eyes, and optional decorative details that you can customize with your favorite colors.
The pattern uses basic stitches such as single crochet, increases, and decreases, making it a fun project for crocheters who are comfortable with basic amigurumi techniques.
These tiny crochet monsters make perfect gifts, nursery decorations, desk toys, or handmade collectibles. The techniques used in this project will also help you improve your amigurumi skills and understand how shaping works in crochet.
Materials Needed for Amigurumi Monsters
Before starting your crochet project, it is important to prepare the right tools and materials. Using the correct yarn weight and hook size will help your amigurumi toy keep its shape and look neat.
Yarn
Choose cotton yarn or cotton blend yarn for best results. Cotton yarn creates a firm structure which is ideal for amigurumi.
Recommended yarn types:
- Cotton yarn (DK or worsted weight)
- Acrylic yarn (soft plush look)
- Cotton-acrylic blend
Using different colors will make your monsters more playful and unique.
Crochet Hook
For amigurumi projects, the hook size should be slightly smaller than the yarn recommendation to create tight stitches.
Recommended size:
2.25 mm – 3 mm crochet hook
Tight stitches prevent the stuffing from showing through the fabric.
Other Materials
You will also need:
- 10 mm safety eyes
- Polyester fiberfill stuffing
- Yarn needle for sewing parts
- Stitch marker
- Scissors
A stitch marker is very helpful because amigurumi is typically worked in continuous spiral rounds.
Understanding the Basic Amigurumi Techniques
Before beginning the pattern, it is important to understand a few fundamental crochet techniques used in almost every amigurumi project.
Magic Ring (MR)
The magic ring technique allows you to start crocheting in a closed circle. It creates a tight center with no visible hole.
Steps:
- Wrap yarn around your fingers to form a loop.
- Insert the hook into the loop.
- Pull up a loop and chain one.
- Crochet the required number of stitches into the ring.
- Pull the yarn tail to close the circle.
The magic ring is the most commonly used method for starting amigurumi pieces.
Single Crochet (sc)
Single crochet is the primary stitch used in amigurumi.
Steps:
- Insert hook into the stitch.
- Yarn over and pull up a loop.
- Yarn over again and pull through both loops.
Using tight single crochet stitches ensures a clean and professional amigurumi finish.
Increase (inc)
An increase means working two single crochets into the same stitch.
This technique allows the crochet piece to expand and create rounded shapes such as the body or head.
Decrease (dec)
A decrease reduces stitches and helps shape the toy.
The preferred method in amigurumi is the invisible decrease because it creates smoother results.
Steps:
- Insert hook into the front loop of the first stitch.
- Insert hook into the front loop of the next stitch.
- Yarn over and pull through both loops.
- Yarn over and pull through remaining loops.
This technique prevents gaps in the crochet fabric.
How to Crochet the Monster Legs and Body
The legs and body of the monster are crocheted as one continuous piece. This technique creates a seamless look and improves durability.
Step 1 – First Leg
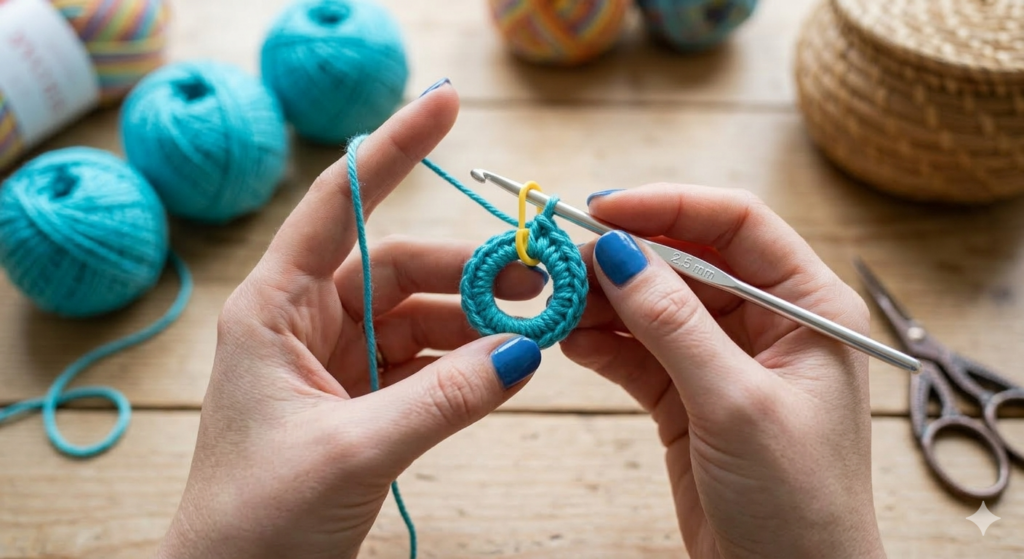
Start with a magic ring.
Round 1: 6 sc in MR
Round 2: inc in each stitch (12)
Round 3: 12 sc
Finish the first leg and fasten off.
Step 2 – Second Leg
Repeat the same steps for the second leg.
After completing round 3 of the second leg, do not fasten off. Instead, continue working to join both legs.
Step 3 – Joining the Legs
After completing Round 3 of the second leg, do not fasten off.
Place the two legs side by side with the feet facing forward. Chain 2 to create the bridge between the legs.
Continue from the second leg:
Work 1 sc in each of the 12 stitches around the second leg, then work 1 sc in each of the 2 chain stitches. Continue around the first leg, working 1 sc in each of its 12 stitches, then work 1 sc in the remaining 2 chain stitches.
You now have 26 stitches in total.
Place a stitch marker to mark the beginning of the new round and continue working in continuous rounds to form the body.
Step 4 – Shaping the Body
Continue working in continuous rounds from the 26 stitches of the leg-joining round.
Round 5: Work 1 sc in each stitch around. [26]
Round 6: (12 sc, 1 inc) × 2. [28]
Round 7: (13 sc, 1 inc) × 2. [30]
Round 8: (4 sc, 1 inc) × 6. [36]
Rounds 9–12: Work 1 sc in each stitch around. [36]
Begin stuffing the body gradually. Add small amounts of fiberfill as you work, keeping the shape rounded without overstuffing.
Round 13: (4 sc, 1 dec) × 6. [30]
Round 14: (3 sc, 1 dec) × 6. [24]
Round 15: (2 sc, 1 dec) × 6. [18]
Round 16: (1 sc, 1 dec) × 6. [12]
Add any remaining stuffing and shape the body gently with your fingers.
Round 17: Work 6 dec around. [6]
Fasten off, leaving a long yarn tail. Thread the yarn needle through the front loops of the remaining 6 stitches and pull to close the opening. Secure the yarn and hide the tail inside the body.
Creating the Monster Eyes
Large cartoon-style eyes are what give these monsters their adorable personality.
Eye Base
Round 1: MR with 6 sc
Round 2: 6 inc (12)
Round 3–4: 12 sc
Fasten off and leave a long tail for sewing.
Attaching Safety Eyes
Insert the 10 mm safety eyes through the crochet fabric before attaching the backing.
Position the eyes symmetrically and sew the white eye pieces around them.
Place the eyes evenly on the upper front of the body, around Rounds 7–9. Check their position from the front before securing the backs.
Crocheting the Monster Arms
Make 2 arms.
Round 1: Make a Magic Ring and work 6 sc into the ring. [6]
Round 2: Work 1 sc in each stitch around. [6]
Rounds 3–6: Work 1 sc in each stitch around. [6]
Do not overstuff the arms. Add a small amount of fiberfill if you want them to have a little more shape.
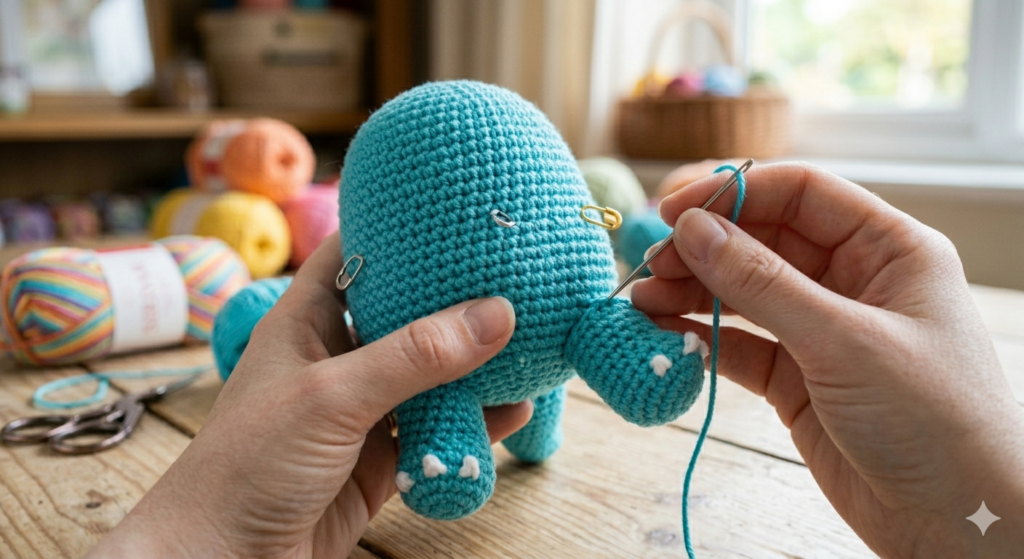
Fasten off, leaving a long yarn tail for sewing. Sew the arms to opposite sides of the body around Rounds 13–15, positioning them evenly so the monster’s arms sit at the same height.
Optional Crochet Hat
The hat is worked in continuous rounds and can be made in a color that matches or contrasts with your monster.
Round 1: Make a Magic Ring and work 6 sc into the ring. [6]
Round 2: Work 1 sc in each stitch around. [6]
Round 3: (1 sc, 1 inc) × 3. [9]
Round 4: Work 1 sc in each stitch around. [9]
Round 5: (2 sc, 1 inc) × 3. [12]
Fasten off, leaving a long yarn tail for sewing.
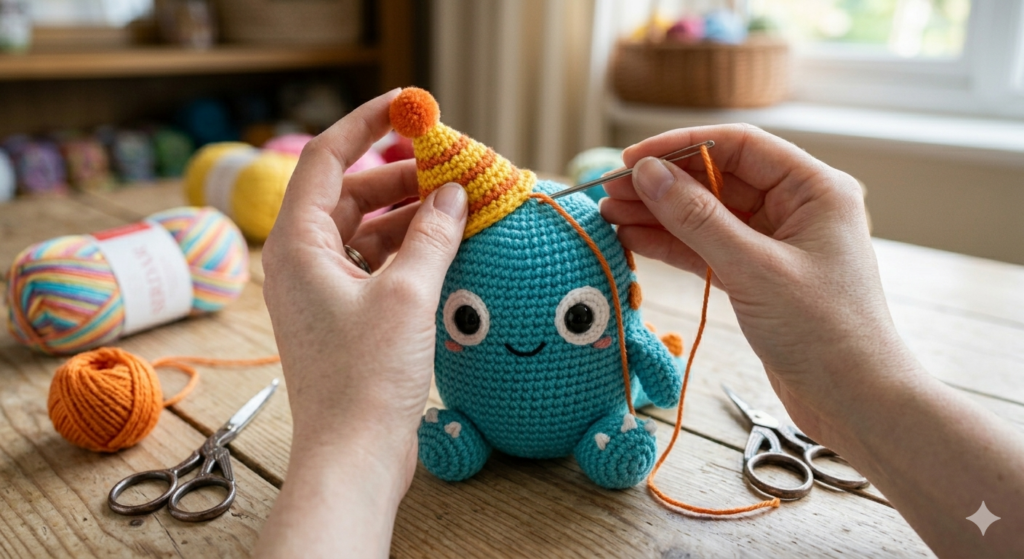
Place the hat on top of the monster’s head and sew it securely in place. You can use different colors or add simple stripes to create your own style.
Assembling the Amigurumi Monster
Once all the crocheted pieces are finished, assemble the monster carefully.
- Attach the safety eyes securely and check that they are positioned evenly.
- Sew the arms to opposite sides of the body.
- Add optional details such as small teeth, a tongue, or embroidered features.
- If you made the hat, place it on the head and sew it securely in place.
- Weave in and hide all remaining yarn ends.
Take a moment to check the finished monster from different angles and adjust any details that need straightening.
Frequently Asked Questions
Is this pattern suitable for beginners?
Yes. This amigurumi monster pattern mainly uses single crochet, increases, and decreases, making it beginner friendly.
What yarn works best for amigurumi?
Cotton yarn is usually the best option because it keeps the shape well and produces neat stitches.
How big will the finished monster be?
The finished size will vary depending on your yarn weight, hook size, and crochet tension. Using different yarn weights can also create smaller or larger monsters.
Can I sell finished monsters?
Yes, you can sell finished handmade items made from this pattern. Please do not redistribute or resell the pattern itself.
Pattern Use
This crochet pattern is for personal use and may not be copied, reproduced, translated, or redistributed. You may sell finished items made from this pattern.



Yorum gönder