Free Amigurumi Rainbow Caterpillar Pattern – Easy Chunky Crochet
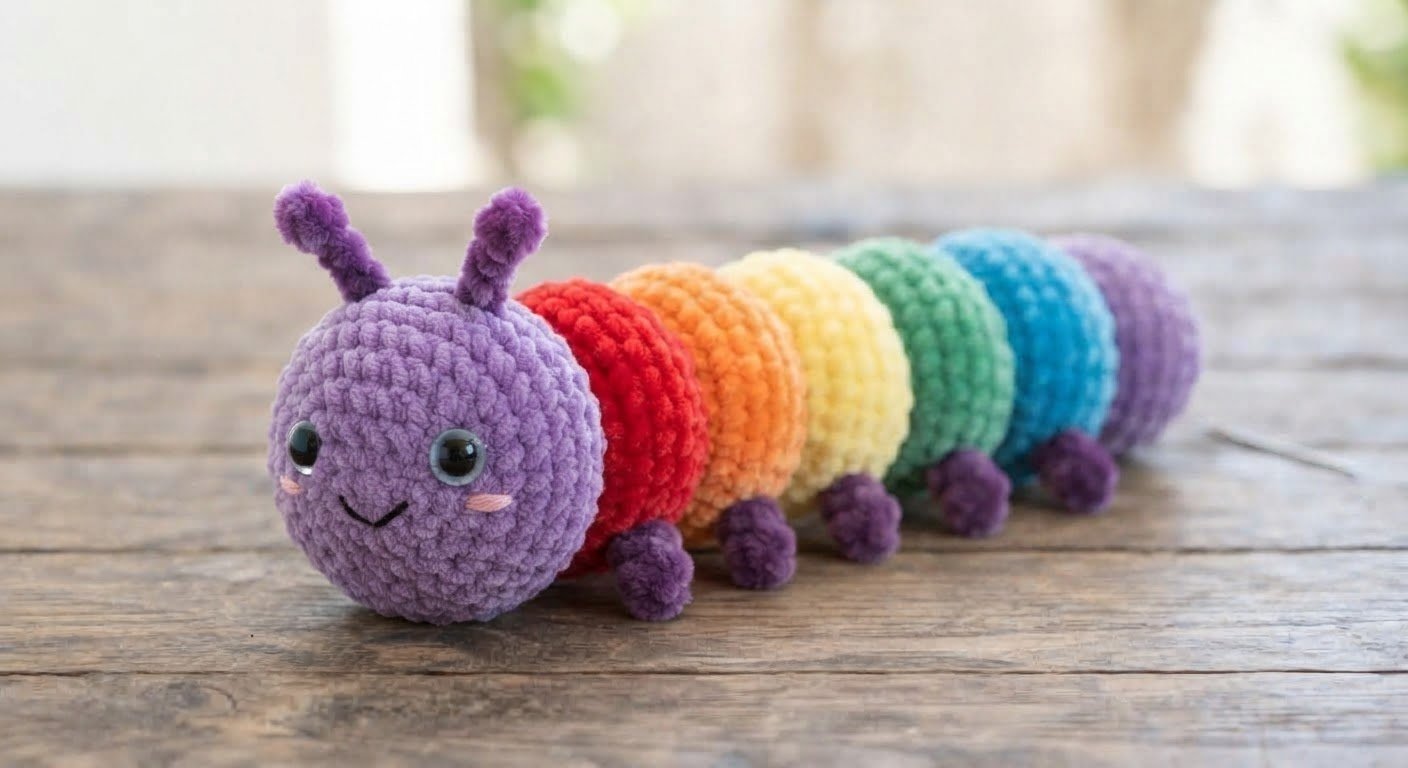
A Soft, Colorful, and Squishy Crochet Project
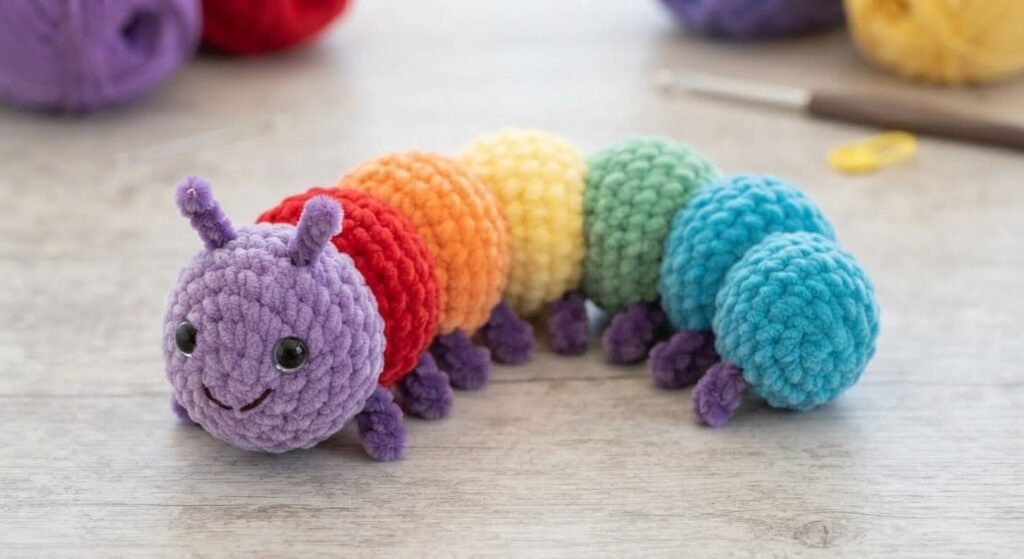
This free amigurumi rainbow caterpillar pattern is a fun and colorful project made with chunky chenille yarn. Its soft, plush texture and bright rainbow sections make it a cheerful addition to an amigurumi collection and a lovely handmade gift.
The pattern uses basic amigurumi techniques, including single crochet, increases, decreases, and working in continuous rounds. If you are new to amigurumi or chunky yarn, this project is a good opportunity to practice these techniques while creating a cute finished piece.
You can follow the six colors used in the pattern or choose your own color combination. Try bright rainbow shades for a playful look, soft pastels for a more delicate caterpillar, or even one color for a simple design.
The finished caterpillar can be used as a decorative handmade item, gift, or part of a colorful amigurumi collection.
Why You’ll Love This Rainbow Caterpillar
This rainbow caterpillar is one of those small crochet projects that is simple to make but still has plenty of personality. The chunky chenille yarn gives it a soft, plush feel, while the colorful sections make each finished caterpillar fun and unique.
Simple Crochet Techniques
The pattern mainly uses basic stitches such as single crochet, increases, and decreases. If you already know these stitches, you can focus on getting comfortable with the chunky yarn and shaping the different sections.
Soft and Plush
Chenille yarn gives the caterpillar a soft and squishy texture that makes it especially satisfying to hold. It also helps the finished piece look full and rounded.
Easy to Customize
You can follow the rainbow colors in the pattern or choose your own combination. Try pastel shades, brighter colors, or even make the entire caterpillar in one color.
Materials & Tools You’ll Need
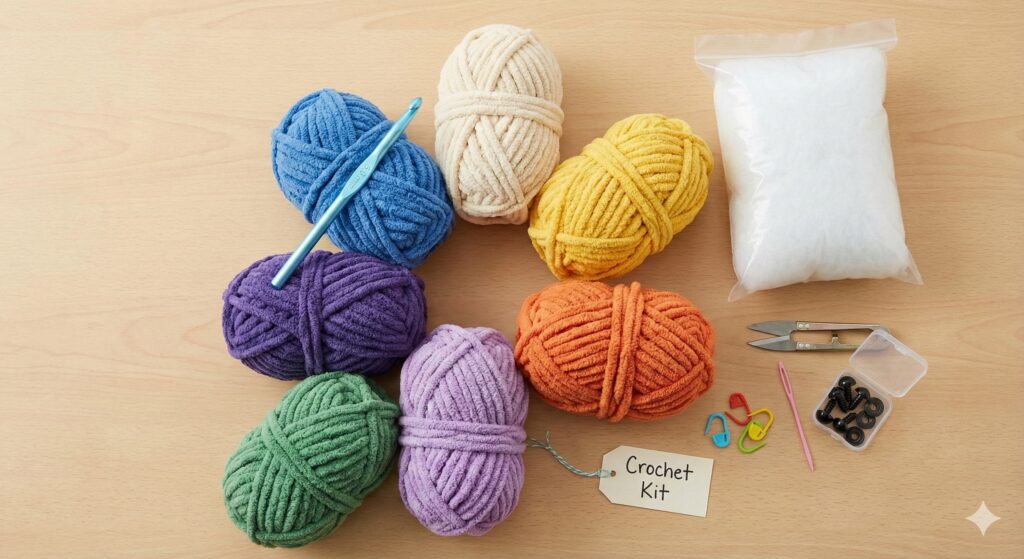
This rainbow caterpillar doesn’t require many supplies. The most important thing is choosing a chunky chenille yarn that works well with your crochet hook and gives you firm, even stitches.
Yarn and Hook
- Chunky / chenille yarn in 6 colors – Choose colors you enjoy, or follow the rainbow combination used in this pattern.
- 6.0 mm crochet hook – You can adjust the hook size if needed to create firm stitches with your yarn.
Other Supplies
- Polyester fiberfill – For stuffing the head and body
- Yarn needle – For sewing the pieces together and weaving in yarn ends
- Stitch marker – Helpful when working in continuous rounds
- Scissors
- 12–15 mm safety eyes – Optional; you can embroider the eyes instead
Choosing Your Yarn
Chunky chenille yarn can make amigurumi feel soft and plush, but it can also make individual stitches harder to see. If you’re new to this type of yarn, take your time and use a stitch marker to keep track of your rounds.
The exact amount of yarn will depend on the yarn brand, your tension, and the size of your finished caterpillar. Using the same or a similar yarn weight throughout the project will help keep the body sections consistent.
Quick Tips Before You Start
- Use a stitch marker: Chenille yarn can make stitches difficult to see, so a stitch marker will help you keep track of your rounds.
- Keep your tension firm: Tight, even stitches help prevent the stuffing from showing through.
- Stuff gradually: Add small amounts of fiberfill as you work and shape each section gently. Avoid overstuffing, which can make the caterpillar too firm or change its shape.
- Take your time with the first rounds: If you’re new to chenille yarn, the stitches may feel difficult to see at first. Once you get used to the texture, the pattern becomes easier to follow.
Head Pattern – Purple
Using purple chenille yarn, start with a magic ring.
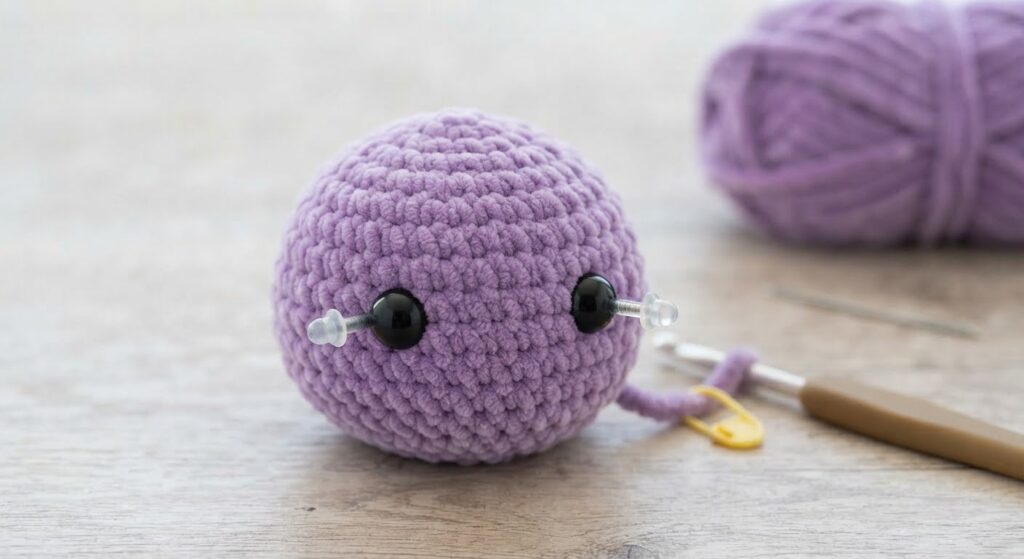
Rnd 1: 6 sc in a magic ring (6)
Rnd 2: inc around (12)
Rnd 3: (sc, inc) ×6 (18)
Rnd 4: (2 sc, inc) ×6 (24)
Rnd 5: (3 sc, inc) ×6 (30)
Rnd 6–10: sc around (30)
Place the safety eyes between Rounds 8 and 9, approximately 8 stitches apart. Check the placement from the front before securing them.
Rnd 11: (3 sc, dec) ×6 (24)
Rnd 12: (2 sc, dec) ×6 (18)
Start adding fiberfill and continue stuffing gradually as you work. Keep the head rounded without making it too firm.
Rnd 13: (sc, dec) ×6 (12)
Rnd 14: dec ×6 (6)
Fasten off, leaving a long yarn tail. Use a yarn needle to close the remaining opening, then weave in the end securely.
Embroider a small smile beneath the eyes.
For a child-friendly version: Embroider the eyes instead of using safety eyes to avoid small detachable parts.
Rainbow Body
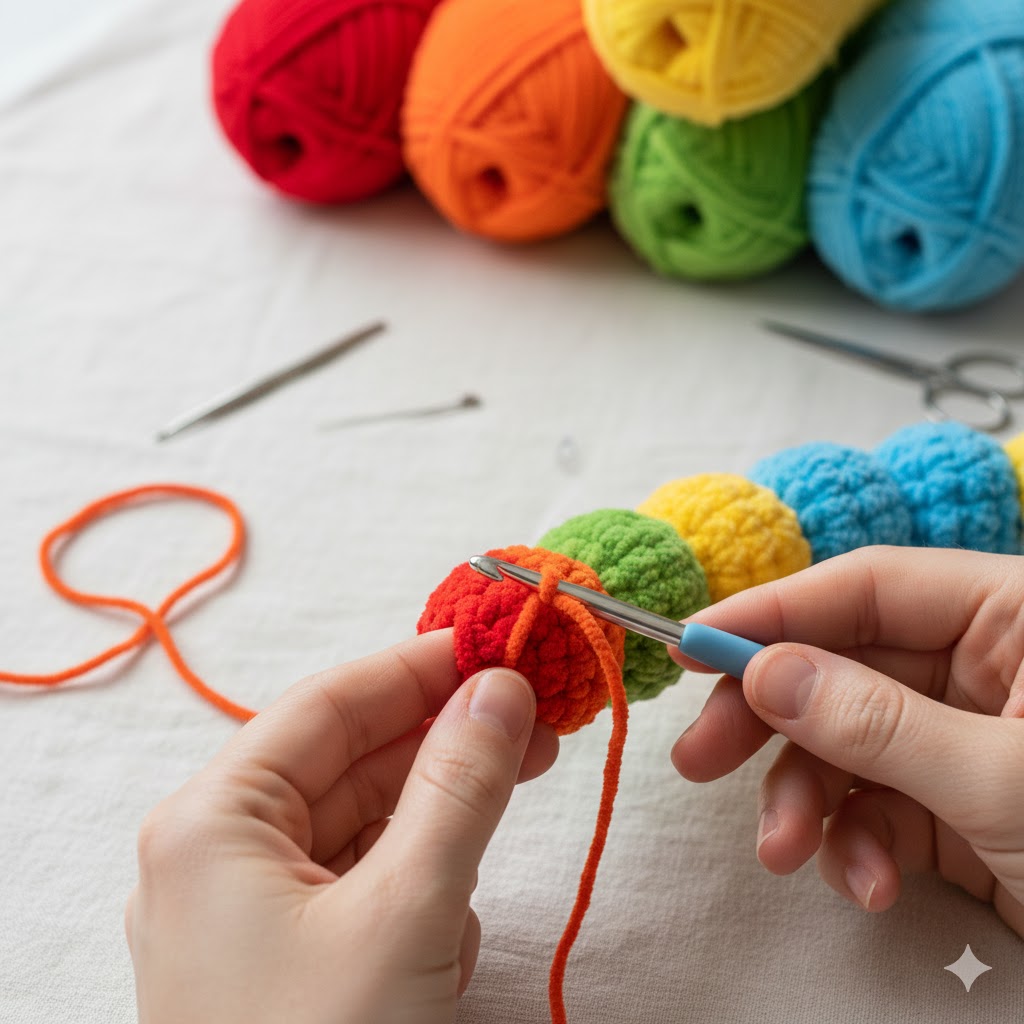
The body is worked in continuous rounds without fastening off between color sections. Change colors at the beginning of each new section and continue crocheting around the body. Add stuffing gradually as you work to keep the caterpillar soft and evenly shaped.
Purple Body Section – First Body Segment
Using purple yarn:
Rnd 1: 6 sc in a magic ring (6)
Rnd 2: inc around (12)
Rnd 3: (sc, inc) ×6 (18)
Rnd 4: (2 sc, inc) ×6 (24)
Rnd 5: (3 sc, inc) ×6 (30)
Rnd 6–9: sc around (30)
Rnd 10: (3 sc, dec) ×6 (24)
Do not fasten off. Continue with the next color section.
Red Body Section
Change to red yarn and continue working in continuous rounds.
Rnd 11: Change to red and sc around (24)
Rnd 12: sc around (24)
Rnd 13: sc around (24)
Rnd 14: sc around (24)
Rnd 15: sc around (24)
Rnd 16: sc around (24)
Rnd 17: sc around (24)
Rnd 18: sc around (24)
Do not fasten off. Continue with the orange section.
Orange Body Section
Change to orange yarn.
Rnd 19: (3 sc, inc) ×6 (30)
Rnd 20–22: sc around (30)
Rnd 23: (3 sc, dec) ×6 (24)
Add a small amount of fiberfill and gently shape this section.
Yellow Body Section
Change to yellow yarn.
Rnd 24: (3 sc, inc) ×6 (30)
Rnd 25–27: sc around (30)
Rnd 28: (3 sc, dec) ×6 (24)
Continue adding fiberfill gradually as you work.
Green Body Section
Change to green yarn.
Rnd 29: (3 sc, inc) ×6 (30)
Rnd 30–32: sc around (30)
Rnd 33: (3 sc, dec) ×6 (24)
Keep the stuffing soft and evenly distributed.
Blue Body Section
Change to blue yarn.
Rnd 34: (3 sc, inc) ×6 (30)
Rnd 35–37: sc around (30)
Rnd 38: (3 sc, dec) ×6 (24)
Add the remaining stuffing gradually and gently shape the final section.
Rnd 39: (2 sc, dec) ×6 (18)
Rnd 40: (sc, dec) ×6 (12)
Add any remaining stuffing and shape the body before closing.
Rnd 41: dec ×6 (6)
Fasten off, leaving a long yarn tail. Close the remaining opening with a yarn needle, weave in the end securely, and trim the excess.
Antennae and Legs
Antennae – Make 2
Rnd 1: 5 sc in a magic ring (5)
Rnd 2–5: sc around (5)
Fasten off, leaving a long yarn tail for sewing.
Legs – Make 6
Rnd 1: 6 sc in a magic ring (6)
Rnd 2: (sc, inc) ×3 (9)
Rnd 3–5: sc around (9)
Rnd 6: (sc, dec) ×3 (6)
Fasten off, leaving a long yarn tail for sewing.
Assembly Instructions
Attach the Head
Place the head at the front of the purple body section. Using the yarn tail, sew the head securely to the body with small, even stitches around the join.
Attach the Antennae
Position the two antennae on top of the head, slightly above the eyes. Sew them securely in place and weave in the yarn ends.
Attach the Legs
Turn the caterpillar over and position the six legs along the underside of the body. Space them as evenly as possible, then sew each leg securely in place.
Final Shaping
Weave in any remaining yarn ends and trim the excess. Gently shape the caterpillar with your hands so that the body sections are rounded and evenly stuffed.

Customization Ideas
One of the best things about this rainbow caterpillar is how easy it is to change the colors and small details.
Add Small Details
You can give your caterpillar a little more personality by adding embroidered cheeks, a tiny bow, or a small flower.
Care Instructions
Chenille yarn is soft but can be delicate, so gentle cleaning is best.
- Spot clean when possible.
- If needed, hand wash gently with mild detergent and lukewarm water.
- Do not wring or twist the caterpillar.
- Gently press out excess water with a clean towel.
- Reshape the caterpillar while damp and let it air dry completely.
- Avoid high heat and tumble drying.
Troubleshooting & Tips
Stuffing Is Showing
If you can see the stuffing through the stitches, try using a slightly smaller hook or keeping your tension a little firmer. Avoid making the stitches so tight that they become difficult to work into.
Color Changes Look Uneven
When changing colors, complete the final yarn-over of the last stitch with the new color. This helps create a cleaner transition between sections.
The Caterpillar Feels Too Firm
If the body feels hard or loses its soft, plush texture, you may have added too much stuffing. Remove a small amount and reshape the section until it feels soft but still holds its shape.
Frequently Asked Questions
Is this pattern suitable for beginners?
Yes. The pattern uses basic stitches such as single crochet, increases, and decreases. If you are new to chenille yarn, the stitches may take a little practice at first.
How many body sections does the caterpillar have?
The pattern includes six colored body sections: purple, red, orange, yellow, green, and blue.
Can I use different colors?
Absolutely. You can use pastel shades, bright colors, or any combination you like. You can also make the caterpillar in a single color.
Can I sell the finished caterpillar?
Yes. You may sell finished handmade items made from this pattern. If you share your finished caterpillar online, please credit Amyliva Handmade as the designer and link back to the original pattern when possible.
Please do not copy, translate, repost, or redistribute the written pattern or its images.
Safety and Use
This crochet caterpillar is intended as a decorative handmade item and is not a toy for babies or young children.
If you use safety eyes or other small parts, keep the finished item away from children who may pull off or swallow small pieces. For a child-friendly version, embroider the eyes and make sure all sewn details are securely attached.



Yorum gönder