Free Amigurumi Cloud Keychain Pattern – Easy Crochet Project
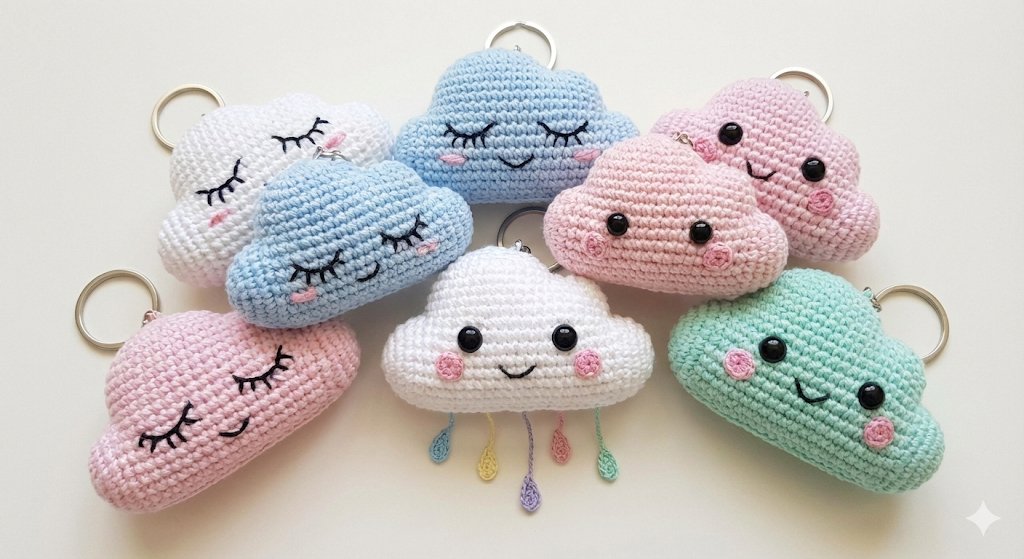
Looking for a small crochet project that is quick to make and easy to customize? This free amigurumi cloud keychain pattern is a fun project for beginners who want to practice simple amigurumi techniques while making something useful.
The finished cloud is small, soft, and lightweight, making it a cute accessory for a keyring, handbag, backpack, or gift. You can make it in classic white, experiment with pastel colors, or create a whole collection of colorful clouds.
The cloud body is crocheted in one piece, so there are no separate pieces to assemble or sew together. The pattern uses basic amigurumi techniques, including single crochet, increases, decreases, and working in continuous rounds.
If this is your first amigurumi project, don’t worry if your stitches aren’t perfect at first. Working on a small project like this is a great way to practice your tension, stitch counting, and shaping skills.
Why You’ll Love This Mini Cloud
- Beginner-friendly: Uses basic crochet stitches and simple shaping.
- Quick to make: A small project that can usually be finished in a few hours.
- One-piece body: The main cloud is crocheted as a single piece.
- Easy to customize: Try different colors, facial expressions, or decorative details.
- Useful and giftable: Turn your finished cloud into a keychain, bag charm, or small handmade gift.
Whether you’re learning amigurumi or simply looking for a quick weekend project, this little cloud is a fun way to use a small amount of yarn and create something cute.
Why This Mini Cloud Is Perfect for Beginners
If you’re new to amigurumi, starting with a small project can make the learning process much less intimidating. This mini cloud combines a simple shape with a few basic techniques, so you can practice your skills without having to manage a complicated pattern.
Simple One-Piece Construction
The main cloud body is crocheted as one piece, which means you don’t have several separate body parts to assemble afterward.
This makes the project especially convenient for beginners who are still learning how to sew crochet pieces together neatly.
Uses Basic Amigurumi Techniques
You only need a few fundamental techniques to make the cloud:
- Single crochet (sc)
- Increase (inc)
- Decrease (dec)
- Magic ring (MR)
- Working in continuous rounds
If the magic ring feels difficult at first, you can also use the alternative method explained later in the pattern.
A Small Project With Quick Results
Because the finished cloud is small, you can see your progress quickly. Depending on your crochet speed, the project can usually be completed in a few hours.
Finishing a small project can be encouraging when you’re learning amigurumi and can give you the confidence to try a more detailed design next.
Easy to Customize
The basic cloud shape gives you plenty of room to add your own ideas.
You can change the yarn color, embroider a different facial expression, add cheeks, or create several clouds in different colors. You could even make a small collection of clouds as matching keychains or handmade gifts.
Great for Gifts and Accessories
Once finished, the cloud can be attached to a keychain ring and used as a small bag or backpack charm. It also makes a simple handmade gift for someone who enjoys cute crochet accessories.
The small size means you can make several without needing a large amount of yarn, making this a useful project for using up leftover yarn from other crochet projects.
Make It Your Own
The basic cloud shape is easy to personalize. Try making:
- A classic white cloud with a simple face
- Soft pastel clouds in pink, blue, yellow, or lavender
- Clouds with embroidered cheeks and different expressions
- Matching cloud keychains in several colors
- A small set of clouds as handmade party favors or gifts
Because the project uses only a small amount of yarn, it’s also a great way to use leftover yarn from other crochet projects.
If you enjoy making small crochet accessories, you can explore more free crochet patterns and amigurumi projects here on Amyliva Handmade.
Materials You Need
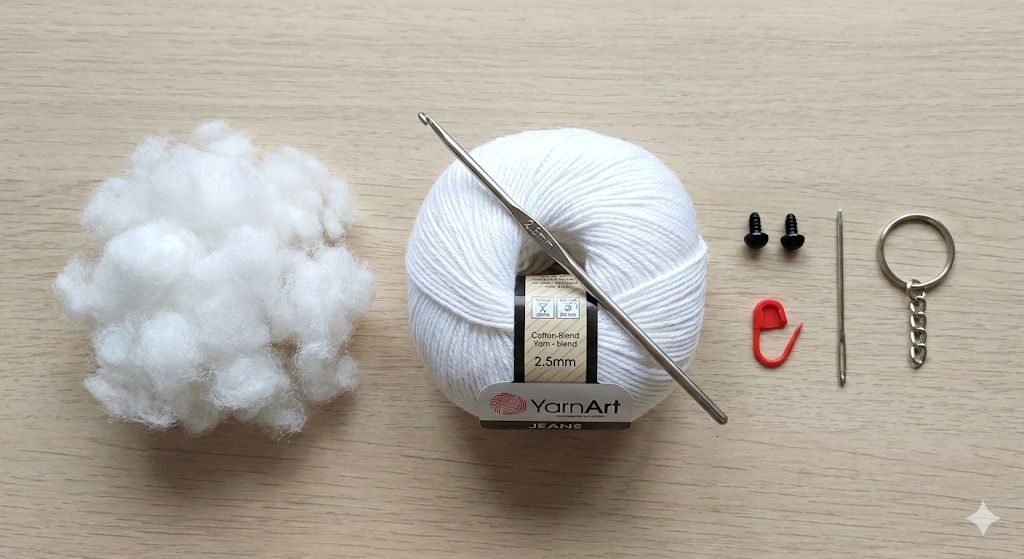
You only need a few basic supplies to crochet this mini cloud keychain. Using smooth yarn and the recommended hook size will make it easier to see your stitches and create a neat, firm shape.
Yarn
A smooth cotton or cotton-blend yarn works well for this project because it creates clearly defined stitches and helps the finished cloud keep its shape.
Recommended yarn:
- YarnArt Jeans
- Gazzal Baby Cotton
- Main color: White
You can also use another yarn with a similar weight and adjust your hook size if necessary.
Crochet Hook
- 2.0 mm or 2.5 mm crochet hook
For amigurumi, a smaller hook is usually preferred because it creates tighter stitches and helps prevent the stuffing from showing through the fabric.
Other Supplies
- 6–8 mm safety eyes – optional; you can embroider the eyes instead
- Polyester fiberfill – for stuffing the cloud
- Stitch marker – useful for marking the beginning of each round
- Tapestry needle – for closing the opening and weaving in yarn ends
- Keychain ring – for turning the finished cloud into a keychain
- Black embroidery floss – optional, for the eyes and smile
- Pink embroidery floss or yarn – optional, for the cheeks
Before You Start
Check that your yarn, hook, and other supplies are ready before beginning. Since this is a small amigurumi project, you only need a relatively small amount of yarn.
If you are making the cloud for a young child, consider embroidering the facial details instead of using safety eyes or other small detachable parts.
Abbreviations (US Terms)
This pattern uses US crochet terminology. If you normally follow UK crochet patterns, keep in mind that some stitch names and abbreviations are different.
- MR – Magic Ring
- sc – Single Crochet
- inc – Increase
- dec – Decrease
- ch – Chain
- st – Stitch
- rnd – Round
Repeat notation: When a pattern says “×6,” repeat the instructions inside the parentheses six times.
Example:
(1 sc, inc) ×6 means repeat 1 single crochet, then 1 increase six times.
Mini Amigurumi Cloud Keychain Pattern
The cloud body is crocheted in continuous rounds, so you do not join each round with a slip stitch. Use a stitch marker to mark the first stitch of each round and move it up as you work.
The increases in the middle of the pattern create the soft, rounded bumps that give the cloud its characteristic shape.
Cloud Body
Using white yarn, make a magic ring.
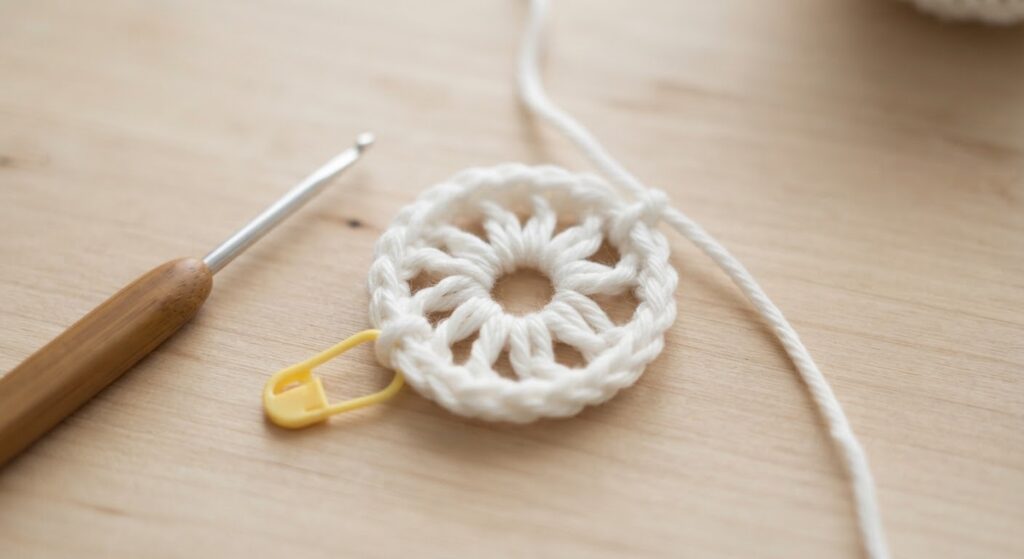
Round 1: 6 sc in MR (6)
Round 2: inc around (12)
Round 3: (1 sc, inc) ×6 (18)
Round 4: (2 sc, inc) ×6 (24)
Round 5: sc around (24)
Round 6: 4 sc, 4 inc, 16 sc (28)
Round 7: sc around (28)
Round 8: 8 sc, 3 inc, 17 sc (31)
Round 9: sc around (31)
Begin adding small amounts of polyester fiberfill. Add the stuffing gradually and distribute it evenly as you continue crocheting.
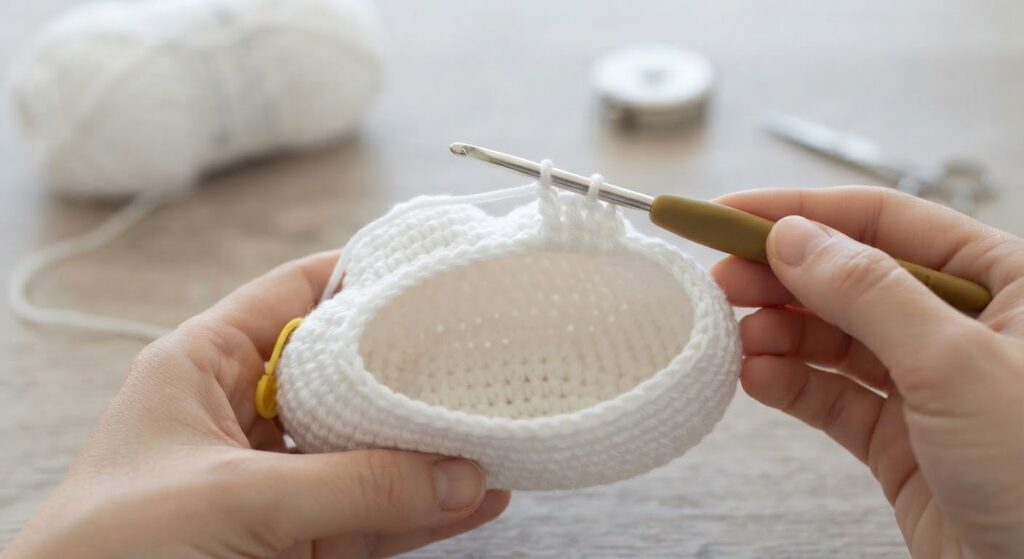
Round 10: 8 sc, 3 dec, 17 sc (28)
Round 11: sc around (28)
Round 12: 4 sc, 4 dec, 16 sc (24)
Round 13: sc around (24)
Round 14: (2 sc, dec) ×6 (18)
Round 15: (1 sc, dec) ×6 (12)
Add any remaining stuffing needed to maintain the shape. Avoid overfilling the cloud, as too much stuffing can make the stitches stretch and change the shape.
Round 16: dec ×6 (6)
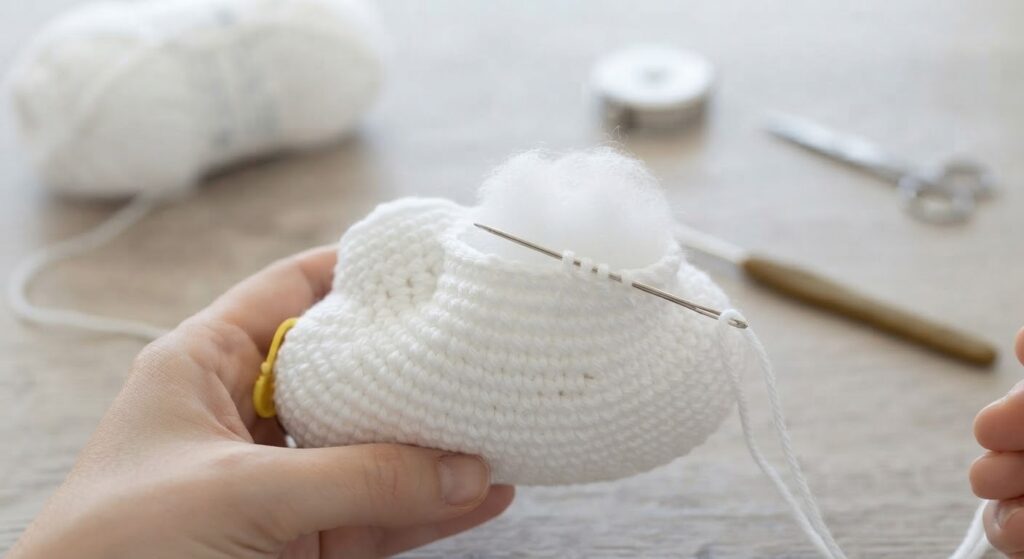
Fasten off, leaving a long yarn tail. Thread the tail onto a tapestry needle and close the remaining opening by working through the front loops of the final stitches. Pull gently to close the hole, then weave the yarn securely through the finished piece and trim the excess.
Finally, gently shape the cloud with your fingers so the rounded sections are visible and the piece has a soft, puffy appearance.
Face Details
Now it’s time to give your little cloud a cute expression. You can use safety eyes or embroider the face, depending on the look you want.
Eye Placement
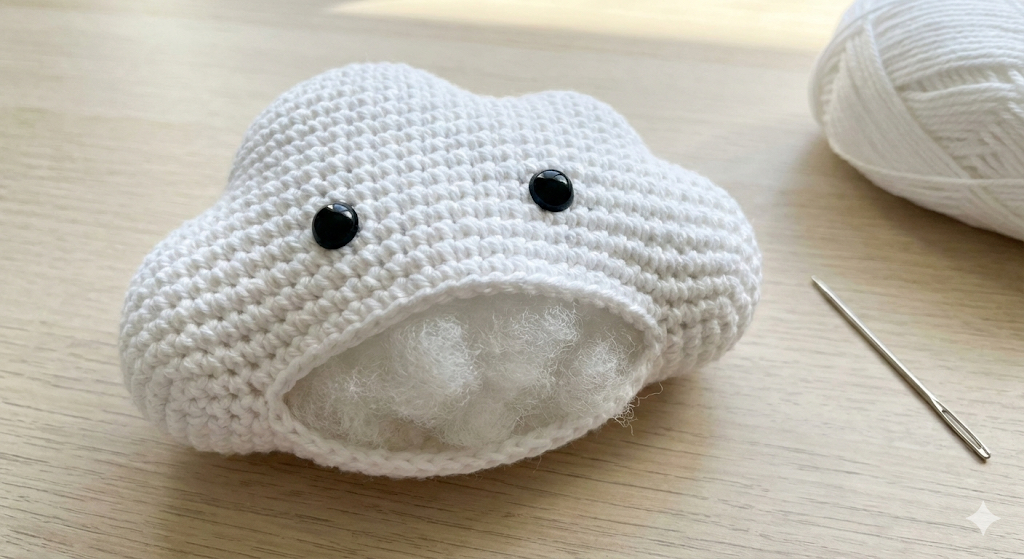
If you are using safety eyes, place them on the front of the cloud between Rounds 6 and 7, leaving approximately 4–5 stitches between the eyes.
Before attaching the safety eyes permanently, check their position from the front to make sure the face looks centered.
Embroidered Face
For a softer and more child-friendly option, embroider the eyes using black embroidery floss or black yarn.
Add a small embroidered smile underneath the eyes. You can also add tiny pink cheeks using pink embroidery floss or a small amount of pink yarn.
Keep the facial details simple so they complement the rounded shape of the cloud.
Safety note: Safety eyes contain small parts and are not suitable for babies or young children who may put small objects in their mouths. For items intended for young children, embroidered facial details are a safer alternative.
Keychain Attachment
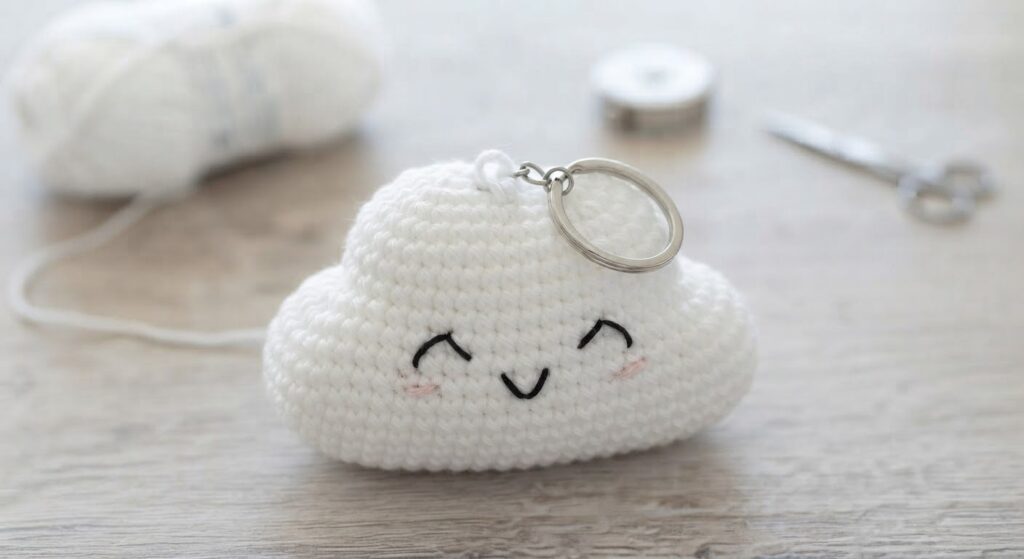
Once the cloud is finished and the face is in place, you can turn it into a keychain by attaching a metal keychain ring to the top.
How to Attach the Keychain Ring
- Choose the top center of the cloud where you want the ring to sit.
- Thread a length of strong yarn onto a tapestry needle.
- Pass the needle through several stitches at the top of the cloud.
- Attach the yarn securely to the keychain ring with several small stitches.
- Check the attachment by gently pulling the ring to make sure it is firmly secured.
- Weave in and trim any remaining yarn ends.
Using several stitches rather than attaching the ring to a single stitch helps distribute the tension and makes the attachment more secure.
Tip: If you plan to use the cloud frequently on a bag or backpack, take extra care when securing the ring. A loose attachment can come undone with repeated pulling or movement.
Finishing
Before using your cloud keychain, take a moment to check the finished piece and make any small adjustments.
- Gently shape the stuffed cloud with your fingers.
- Check that the stuffing is evenly distributed.
- Make sure the face is centered and secure.
- Check that the keychain ring is firmly attached.
- Weave in any remaining yarn ends and trim them neatly.
Avoid pulling the stitches too tightly while shaping the cloud. The goal is to keep the finished piece soft and slightly puffy while allowing the rounded sections to remain visible.
Your mini amigurumi cloud is now ready to use as a keychain, bag charm, or handmade gift.
Beginner Tips for a Perfect Cloud
A few small details can make a big difference when crocheting amigurumi. If this is one of your first projects, these tips can help you achieve a neat, rounded cloud shape.
Tip 1 – Keep Your Stitches Tight and Even
Amigurumi usually requires tighter stitches than many flat crochet projects. Loose stitches can leave visible gaps where the stuffing shows through.
If your stitches look too open, try using a smaller crochet hook. Avoid pulling the yarn excessively tight, though, as this can make it difficult to insert your hook into the stitches.
Tip 2 – Don’t Overstuff the Cloud
Adding too much fiberfill can stretch the crochet fabric and make the cloud look overly firm or uneven.
Add small amounts of stuffing gradually and use your fingers to distribute it evenly. The finished cloud should feel soft and keep its rounded shape without putting too much pressure on the stitches.
Tip 3 – Use a Stitch Marker
This pattern is worked in continuous rounds, also called a spiral. Place a stitch marker in the first stitch of each round and move it up as you crochet.
This makes it easier to keep track of your rounds and helps prevent accidentally adding or skipping stitches.
Tip 4 – Check Your Stitch Count
The stitch count at the end of each round is included in parentheses in the pattern.
Take a moment to check your count, especially after working increases and decreases. If your count is incorrect, fixing the problem immediately is much easier than trying to find the mistake several rounds later.
Tip 5 – Shape the Cloud at the End
Once the cloud is stuffed and closed, gently press and shape it with your fingers.
Small adjustments can help the rounded sections become more noticeable and give the finished cloud a softer, more natural appearance.
Safety for Young Children
This crochet cloud keychain is designed as a decorative accessory, not as a baby or toddler toy.
The finished project may contain small parts, such as safety eyes and a metal keychain ring, which can become a choking hazard if they are removed or placed in a child’s mouth.
Keep the finished keychain away from babies and young children who may chew on or swallow small parts.
If you are making the cloud for a young child, consider embroidering the eyes, smile, and cheeks instead of using safety eyes. Make sure all embroidered details and the keychain attachment are securely fastened.
Always supervise young children around handmade items that contain small or detachable parts.
Cleaning & Washing
Your crochet cloud may collect dust or dirt over time, especially if you use it regularly as a keychain or bag charm. Gentle cleaning can help keep it looking fresh.
Before washing, check the care instructions for the yarn you used.
For Gentle Cleaning
- Hand wash with mild detergent and lukewarm water when possible.
- If the yarn label allows machine washing, use a delicate cycle and place the crochet piece inside a laundry bag.
- Avoid harsh detergents or bleach.
- Do not wring or twist the cloud, as this can distort its shape.
- Gently press out excess water with a clean towel.
- Reshape the cloud with your fingers while it is still damp.
- Allow it to air dry completely.
Avoid high heat from a dryer unless the yarn manufacturer specifically recommends it. Heat can affect some fibers and may also damage or loosen the keychain attachment.
If your cloud has safety eyes or a metal keychain ring attached, hand washing is generally the gentler option.
Customization Ideas
One of the fun things about making a crochet cloud is how easy it is to change the colors and details. Once you have made the basic shape, you can create different versions to match your style or make personalized gifts.
Try Different Colors
White is a classic choice for a cloud, but you don’t have to stick to traditional colors.
Try soft pastel shades such as:
- Light blue
- Pale pink
- Lavender
- Mint green
- Soft yellow
You can also use several colors to create a collection of colorful clouds.
Change the Facial Expression
A small change to the face can give each cloud a completely different personality.
Try:
- A simple smiling face
- Closed embroidered eyes
- Blushing cheeks
- A surprised expression
- Different eye sizes or shapes
For items intended for young children, use embroidered details instead of detachable safety eyes.
Create a Rain Cloud
Turn your cloud into a rainy-day design by adding small crocheted or embroidered raindrops underneath.
You could use blue, lavender, or pastel-colored yarn to create a cute weather-themed keychain.
Make a Rainbow Cloud
For a colorful version, add small rainbow details to the cloud using different yarn colors. This can also be a fun way to use leftover yarn from other projects.
Make a Matching Set
Instead of making just one cloud, create several in different colors and styles.
A collection of mini clouds can make cute matching gifts, party favors, or decorative accessories.
Use the Cloud for Other Projects
The finished cloud doesn’t have to be used only as a keychain. You can leave off the keychain ring and use the crocheted cloud as a small decoration, gift embellishment, or part of another crochet project.
If you enjoy experimenting, make a few different versions and see which combination of colors and facial details you like best.
Frequently Asked Questions (FAQ)
1. How long does this crochet cloud keychain take to make?
The cloud is a small project, so it can usually be completed in 1–3 hours, depending on your crochet speed and experience.
If you’re making amigurumi for the first time, it may take a little longer while you get used to working in continuous rounds.
2. Can I make the cloud bigger or smaller?
Yes. You can change the finished size by using a different yarn weight and an appropriately sized crochet hook.
Using thicker yarn will generally create a larger cloud, while thinner yarn can produce a smaller version. Keep in mind that changing the yarn and hook size will also change the amount of yarn needed and the final appearance.
3. Why does my cloud look uneven?
Uneven tension, incorrect stitch counts, or uneven stuffing can affect the shape of the finished cloud.
First, check the stitch count for each round. Then make sure the stuffing is distributed gradually and evenly. Avoid adding too much fiberfill, as overstuffing can stretch the stitches and distort the shape.
4. Why can I see the stuffing through my stitches?
This usually happens when the stitches are too loose or the hook is too large for the yarn.
Try using a smaller crochet hook and keeping your tension consistent. For amigurumi, the stitches should be firm enough that the stuffing does not easily show through the fabric.
5. Can I use embroidered eyes instead of safety eyes?
Yes. Embroidered eyes are a good alternative if you prefer not to use safety eyes.
They are also a better option when making the cloud for a young child because safety eyes contain small detachable parts.
6. Can I sell finished clouds made from this pattern?
Yes. You may sell finished items made from this pattern.
If you share your finished cloud online, please credit Amyliva Handmade as the designer and link back to the original pattern at Amyliva.com when possible.
Please do not repost, copy, translate, or redistribute the written pattern or its images.
7. Can I use a different type of yarn?
Yes. You can use another smooth cotton or cotton-blend yarn with a similar weight.
Different yarns can produce slightly different results, so you may need to adjust your hook size to achieve firm amigurumi stitches.
8. Is this pattern suitable for complete beginners?
Yes. The pattern uses basic amigurumi techniques such as single crochet, increases, decreases, and continuous rounds.
If you are completely new to crochet, it can help to practice these stitches separately before starting the cloud.
🛑 Pattern & Image Usage Notice
All photos, designs, and written instructions in this post are the property of Amyliva Handmade.
You may sell the finished items, but you cannot repost, copy, translate, or redistribute this pattern or any of its images without written permission.
If you share your finished project online, please give credit by tagging: @AmylivaHandmade and linking back to Amyliva.com.



Yorum gönder