Crochet Your Own Cute One-Eyed Green Monster
Crochet Your Own Cute One-Eyed Green Monster
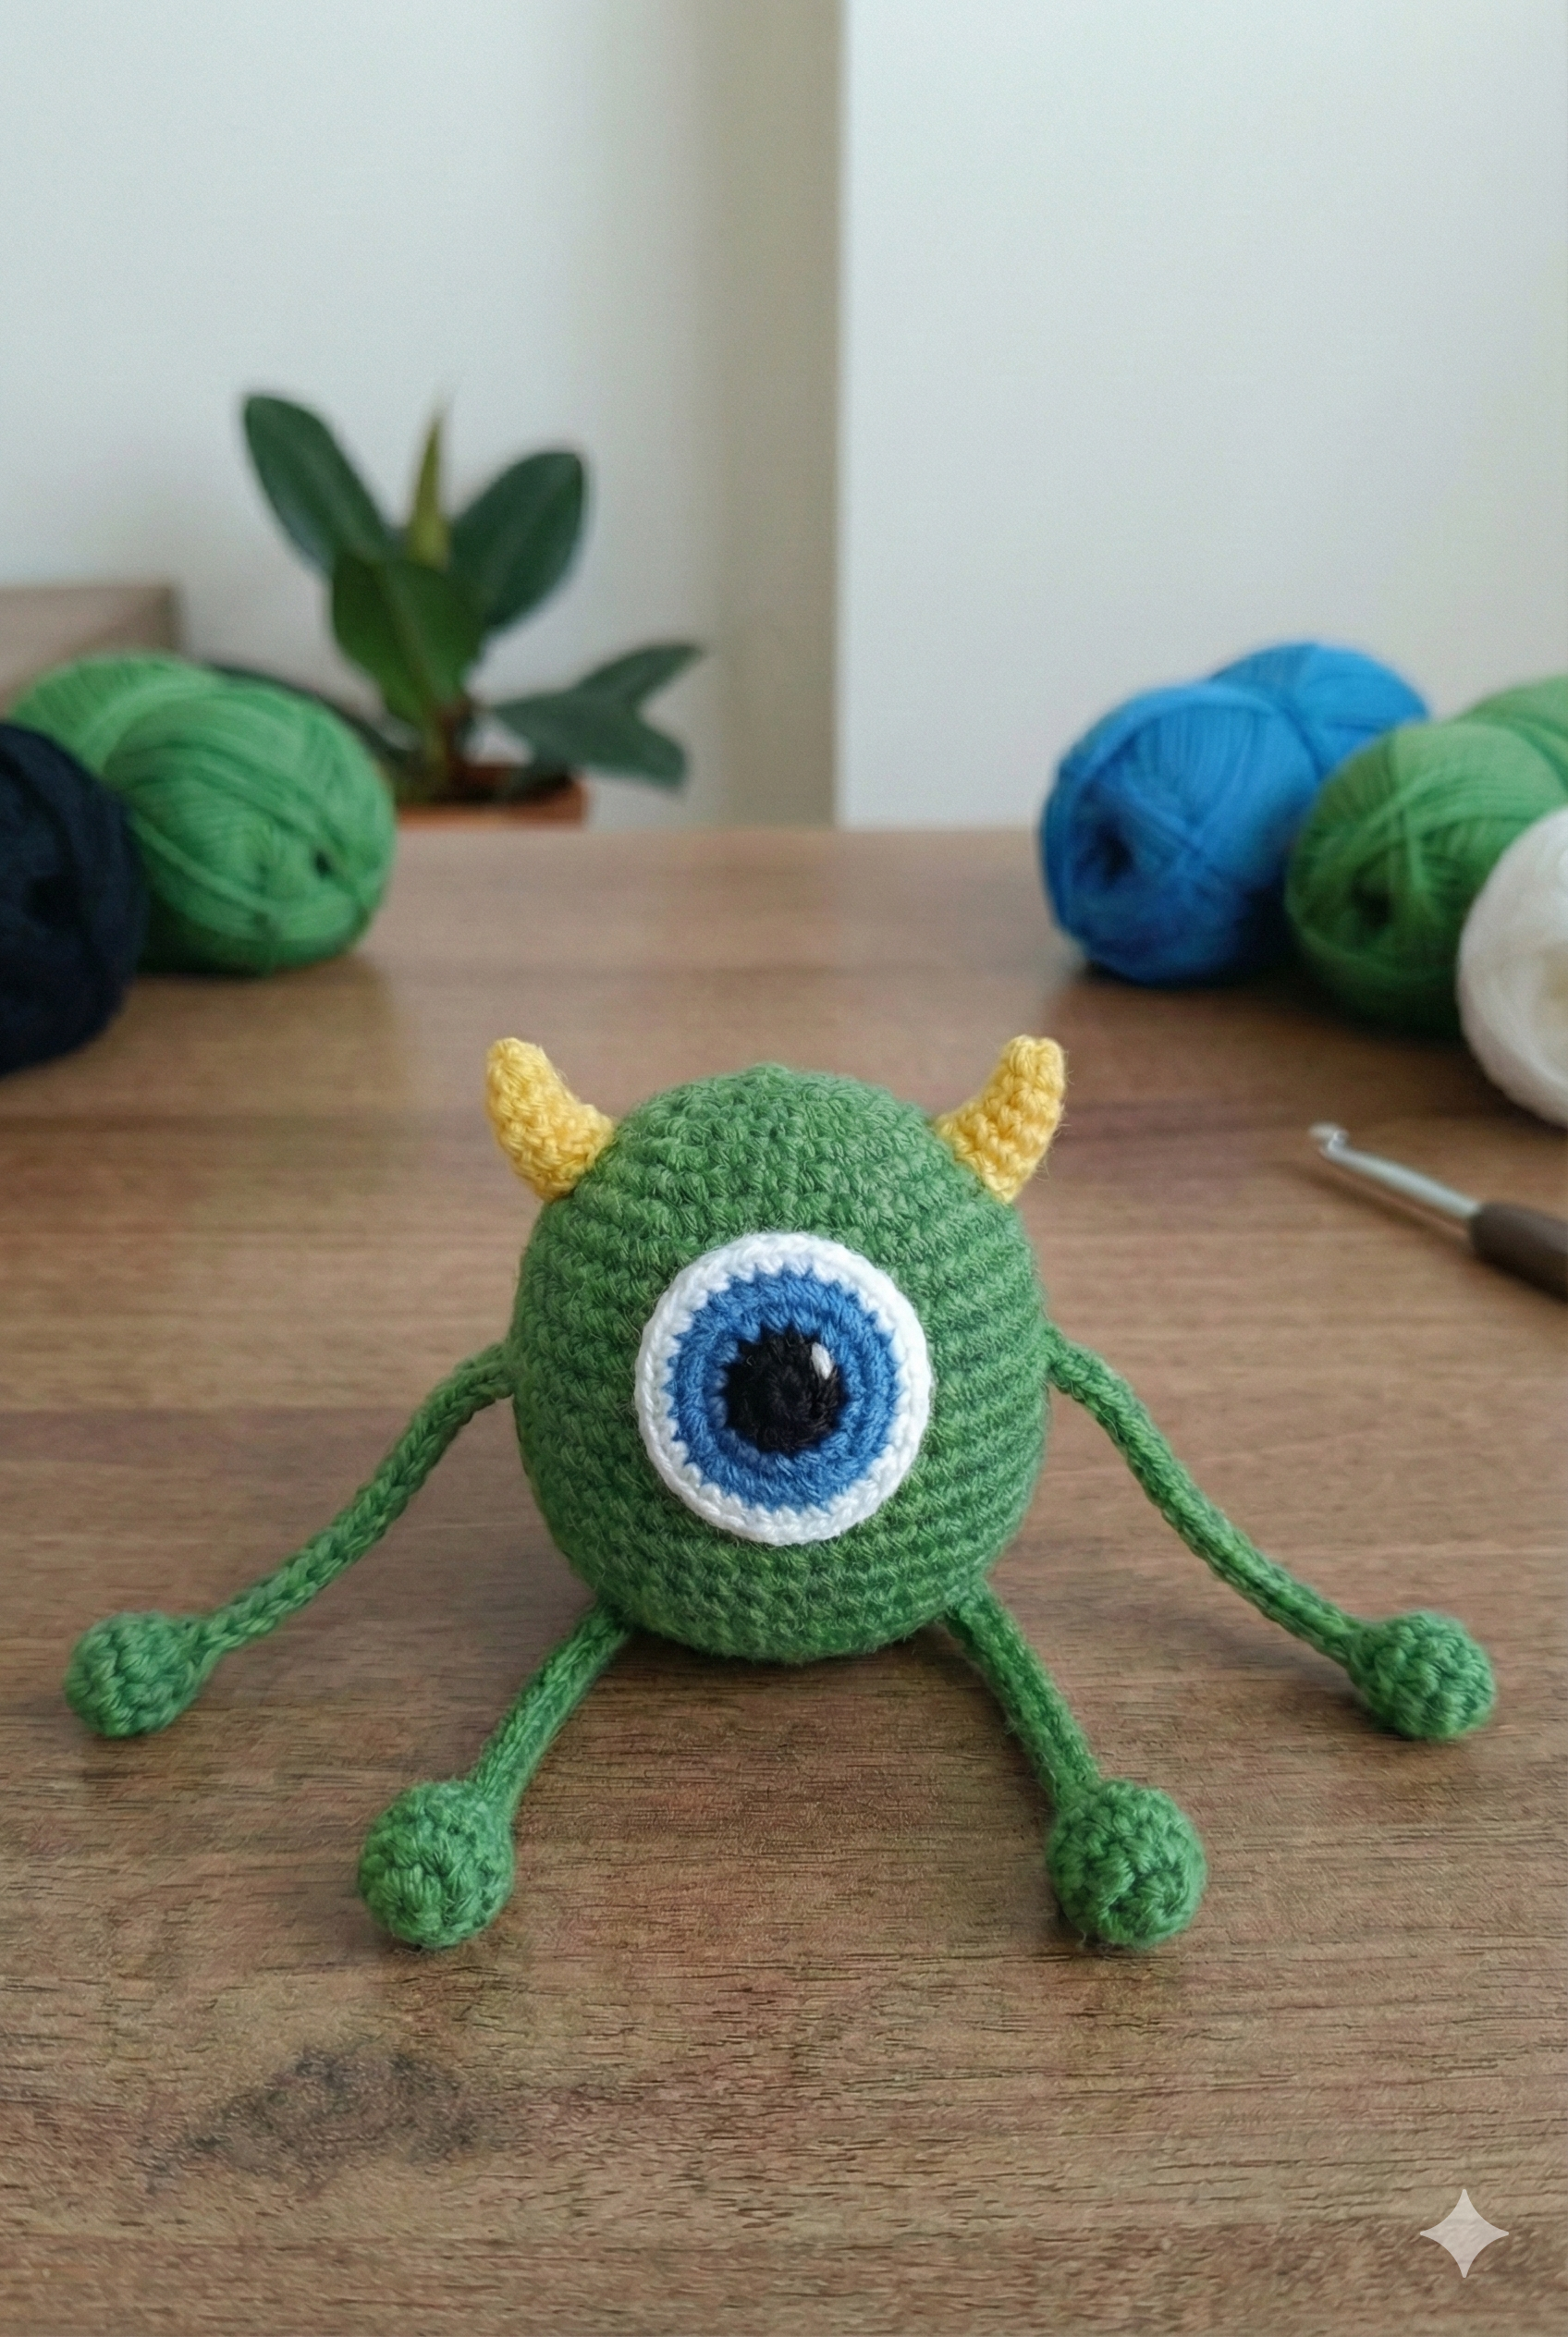
If you love making cute and unusual amigurumi, this little one-eyed green monster is a fun project to add to your crochet list.
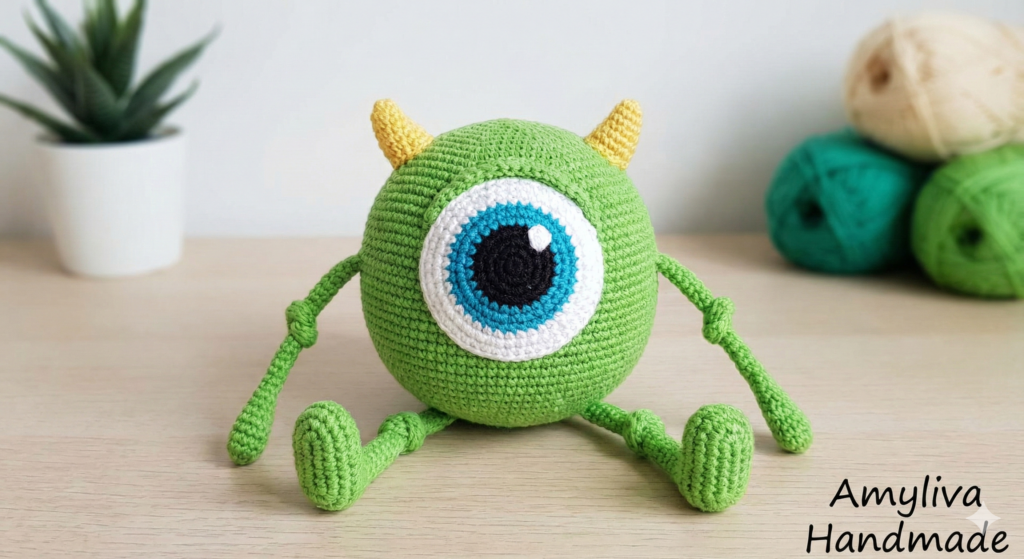
With its round body, oversized eye, tiny horns, and simple knotted arms and legs, this friendly monster has plenty of personality without requiring complicated crochet techniques.
This project is suitable for crocheters who are comfortable with basic amigurumi techniques such as working in continuous rounds, making increases and decreases, and sewing small pieces onto a finished project.
In this tutorial, you’ll crochet the rounded monster body, make the colorful eye and small horns, create the arms and legs, and then assemble everything to bring your little green monster to life.
You can also customize the monster by changing the colors, adding an embroidered smile, or experimenting with different yarn types.
So grab your crochet hook and your favorite colors, and let’s get started! 🧶💚
Materials and Tools Needed
Before you begin, gather all the materials you’ll need for your one-eyed green monster.
- Yarn: DK or Worsted weight yarn in green, white, blue, black, and a small amount of yellow for the horns. Cotton or acrylic yarn works well.
- Crochet hook: 2.5–3.0 mm for DK weight yarn, or choose a hook that creates firm stitches with your yarn.
- Fiberfill: Polyester stuffing for the body.
- Tapestry needle: For sewing the pieces together and weaving in yarn ends.
- Stitch marker: Helpful for keeping track of continuous rounds.
- Scissors: For cutting the yarn.
💡 Tip: Amigurumi is usually worked with a smaller hook than you would normally use for the same yarn weight. Firm stitches help prevent the stuffing from showing through the fabric.
Key Techniques and Abbreviations
This pattern uses US crochet terminology and basic amigurumi techniques.
Abbreviations
- MR – Magic Ring
- sc – Single Crochet
- inc – Increase (2 sc in the same stitch)
- dec – Decrease (single crochet two stitches together)
- sl st – Slip Stitch
- ch – Chain
- FO – Fasten Off
Helpful Techniques
Continuous Rounds:
The monster’s body is worked in a continuous spiral. Do not join rounds with a slip stitch unless the instructions specifically tell you to do so. Use a stitch marker to identify the first stitch of each round.
Invisible Decrease:
For a neater finish, you can use an invisible decrease. Insert the hook through the front loop of the first stitch, then through the front loop of the next stitch. Yarn over and pull through both front loops, then yarn over and pull through the remaining two loops on the hook.
Firm Tension:
Keep your stitches firm and even while crocheting the body. This helps prevent the fiberfill from showing through the finished piece.
Phase 1: The Body
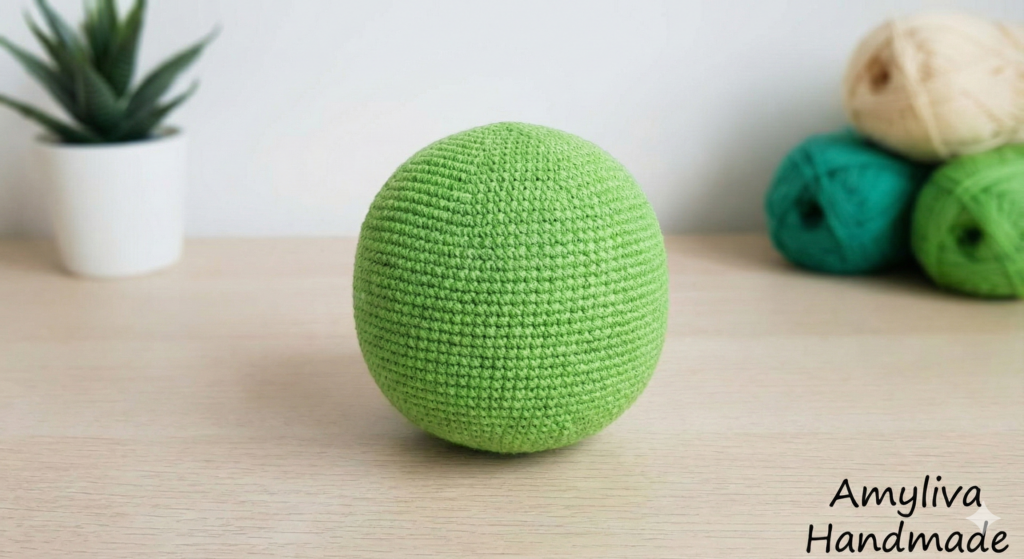
The monster’s body is worked in continuous rounds to create a rounded, ball-shaped form.
Keep a stitch marker in the first stitch of each round and move it as you work.
Body Pattern
Using green yarn:
R1:
MR, 6 sc into the ring. (6 sts)
R2:
inc in each stitch around. (12 sts)
R3:
(1 sc, inc) × 6. (18 sts)
R4:
(2 sc, inc) × 6. (24 sts)
R5:
(3 sc, inc) × 6. (30 sts)
R6–R10:
sc in each stitch around. (30 sts per round)
R11:
(3 sc, dec) × 6. (24 sts)
R12:
(2 sc, dec) × 6. (18 sts)
Stuffing
Begin stuffing the body at this stage.
Add the fiberfill gradually and distribute it evenly toward the sides to create a smooth, rounded shape. The body should be firm but still slightly soft when gently pressed.
R13:
(1 sc, dec) × 6. (12 sts)
R14:
dec around. (6 sts)
Cut the yarn, leaving a tail for closing. Using a yarn needle, weave the yarn tail through the front loops of the remaining 6 stitches. Pull gently to close the opening, secure the yarn, and hide the remaining end inside the body.
Phase 2: The Eye
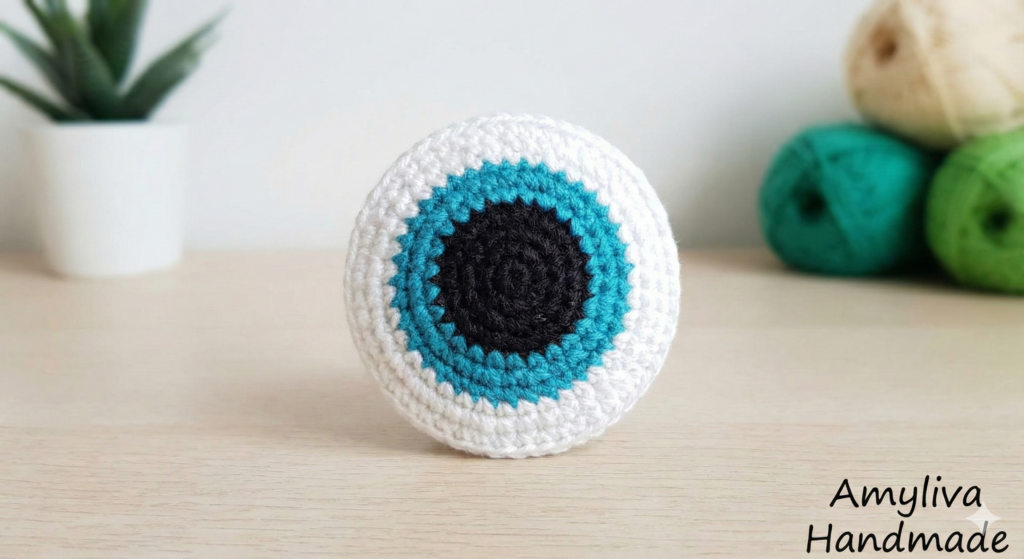
The eye is worked as a small flat circle using black, blue, and white yarn. The color changes create the layered look of the monster’s eye.
Eye Pattern
Start with black yarn.
R1:
MR, 6 sc into the ring. Join with a sl st to the first stitch. Change to blue yarn. (6 sts)
R2:
With blue yarn, ch 1 (does not count as a stitch), inc in each stitch around. Join with a sl st to the first stitch. Change to white yarn. (12 sts)
R3:
With white yarn, ch 1, (1 sc, inc) × 6. Join with a sl st to the first stitch. (18 sts)
Fasten off, leaving a long white yarn tail for sewing the eye onto the body.
💡 Tip: When changing colors, make the color change during the final yarn-over of the last stitch in the previous color. This helps create a cleaner transition between colors.
Before sewing the eye onto the body, check its position and make sure it is centered on the front of the monster.
Phase 3: The Horns
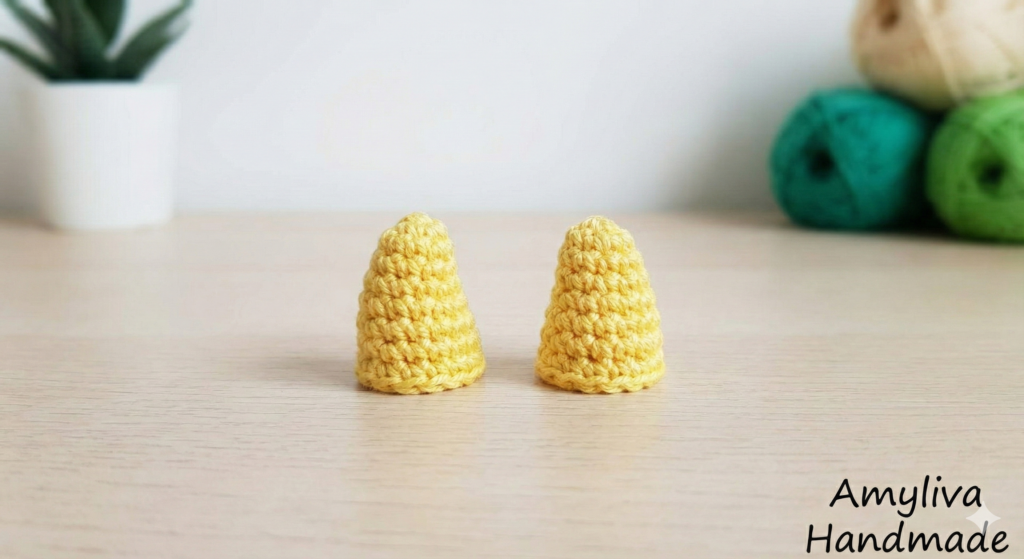
The small yellow horns add a playful detail to the top of the monster’s head. They are made as simple crochet pieces and shaped slightly when attached.
Horns Pattern
Make 2 using yellow yarn.
Step 1:
Ch 4.
Step 2:
Starting in the second chain from the hook, work 1 sl st in the first chain space, followed by 2 sc.
Step 3:
Fasten off, leaving a long yarn tail for sewing.
Gently pinch or fold each piece while sewing it onto the top of the monster to give the horns a slightly raised shape.
Attaching the Horns
Position the two horns on top of the body, leaving a small space between them.
Use the yarn tails and a tapestry needle to sew each horn securely to the body. Weave in and hide the remaining yarn ends inside the monster.
💡 Tip: Pin the horns in place before sewing so you can adjust their position and make sure they look symmetrical.
Phase 4: Arms and Legs
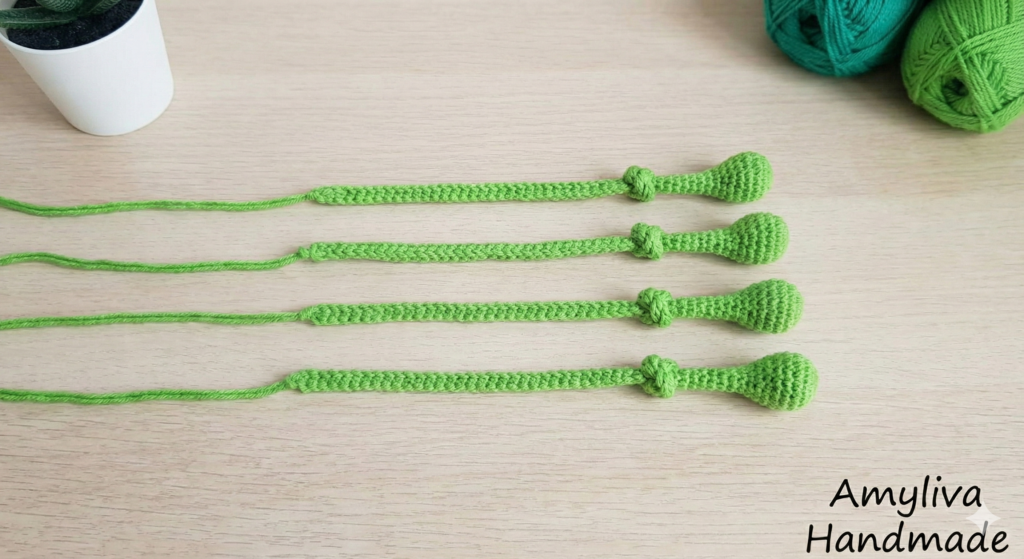
The monster’s arms and legs are made from simple crochet chains with knotted ends. This creates the playful, simple look of the finished character.
Arms and Legs Pattern
Make 4 pieces using green yarn.
Step 1:
Chain 20 stitches, keeping the chain slightly loose.
Step 2:
At the end of the chain, tie a secure knot.
Step 3:
Tie a second knot directly over the first knot to create a slightly larger end.
Step 4:
Pull the knots firmly to secure them.
Leave a yarn tail at the opposite end of each piece for attaching it to the body.
Preparing the Pieces for Assembly
Make sure the knots are secure before attaching the arms and legs.
The two longer pieces will be used as the arms and the other two as the legs. You can adjust the placement during assembly to give your monster the sitting or standing position you prefer.

Assembly: Bringing It All Together
Now it’s time to assemble the pieces and give your little green monster its personality.
1. Position the Pieces
Before sewing anything permanently, place the eye, horns, arms, and legs on the body. Use pins if needed to check their positions.
2. Attach the Eye
Place the eye on the front center of the green body.
Using the long white yarn tail and a tapestry needle, sew around the outer edge of the white circle. Work small, secure stitches to attach the eye firmly to the body.
3. Attach the Horns
Position the two horns on the top of the body with a small space between them.
Sew each horn securely to the body using the yarn tails.
4. Attach the Arms and Legs
Attach two of the chained pieces to the lower part of the body to create the legs.
Attach the remaining two pieces to the sides of the body to create the arms.
Before sewing them permanently, check that the arms and legs are positioned evenly.
5. Add the Smile
The smile is optional.
Using black embroidery floss or a small amount of black yarn, embroider a simple curved smile underneath the eye.
Weave in and hide all remaining yarn ends inside the body.
Your one-eyed green monster is now finished! 💚
Safety Information
This crochet monster is intended as a handmade decorative item or collectible.
If you make this project for a child, keep the following safety points in mind:
- The knotted ends of the arms and legs and the small horns may present a choking hazard if they become detached.
- Check that all crocheted pieces are sewn securely to the body.
- Inspect the finished item regularly for loose or damaged parts.
- This project does not use plastic safety eyes, but the crocheted eye should still be attached securely.
- For young children and babies, adult supervision is recommended. Keep the finished item away from children who may put small objects in their mouths.
- If making the monster for a child, use suitable, washable yarn and stuffing.
For decorative use, keep the finished monster in a clean, dry place and handle it gently to help maintain its shape.
Frequently Asked Questions
Why does my monster body look more like a hexagon than a round ball?
This can happen when increases line up in the same areas of each round. Try slightly offsetting the increases when working a larger version of the body. Keeping your tension even can also help create a smoother shape.
Why can I see the stuffing through my stitches?
Your stitches may be too loose or your crochet hook may be too large for your yarn. Try using a smaller hook or maintaining firmer tension. Adding the stuffing gradually can also help prevent the stitches from stretching.
Can I make the monster larger or smaller?
Yes. You can adjust the size by changing your yarn weight and hook size. For a larger body, you can also add additional increase rounds before working the even rounds. If you change the body size significantly, adjust the eye and other details proportionally.
Can I use a different yarn color?
Absolutely. You can change the green body to any color you like and choose contrasting colors for the eye and horns.
Can I sell finished monsters made from this pattern?
Yes. You may sell finished items made from this pattern, provided they are handmade by you in limited quantities. Credit to Amyliva Handmade is appreciated.
Can I share or sell the written pattern?
Please do not copy, redistribute, translate, or sell the written pattern. If you would like to share it with another crocheter, please share the original Amyliva Handmade page instead.
Terms of Use
This crochet pattern is provided by Amyliva Handmade for personal use and enjoyment.
You May
- Make finished monsters for yourself or as gifts.
- Sell finished handmade items made from this pattern in limited quantities.
- Share photos of your finished projects and credit Amyliva Handmade.
Please Do Not
- Copy, reproduce, or redistribute this written pattern.
- Sell or claim the pattern as your own.
- Translate or republish the written pattern on another website or platform.
- Copy or redistribute the pattern images as your own.
If you would like to share this pattern with another crocheter, please share the original Amyliva Handmade page rather than copying the instructions.
© Amyliva Handmade. All rights reserved.
Thank you for supporting Amyliva Handmade and independent crochet designers. 💚🧶
Happy crocheting!


1 yorum