Easy & Cute Crochet Cookie Amigurumi Keychain – Free Pattern
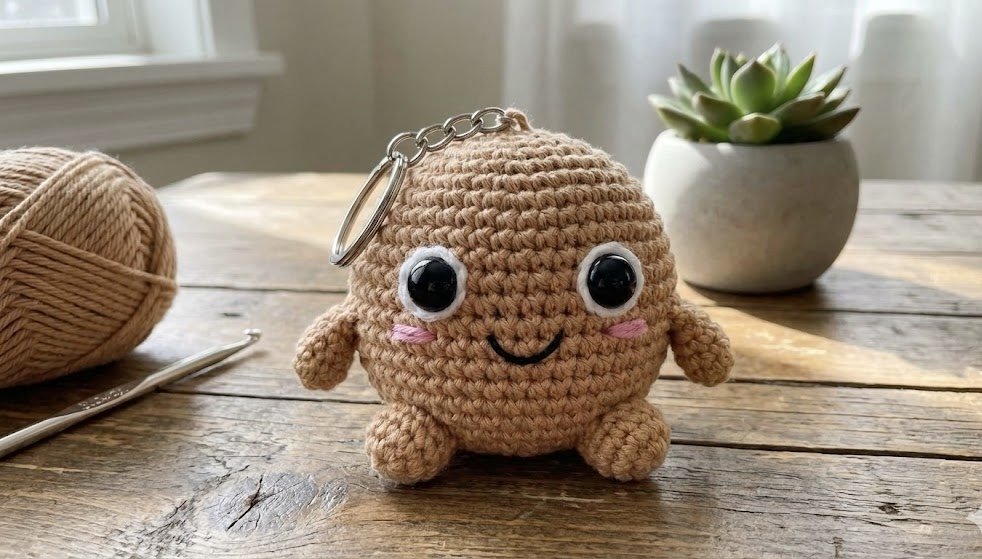
There is something fun about turning an everyday snack into a tiny crochet character. This little cookie has a simple round shape, embroidered details, rosy cheeks, and small arms and legs that give it a playful look.
The cookie is crocheted in light brown yarn and lightly stuffed so it keeps its shape without becoming too firm. The eyes are placed on small white crochet circles, while the cheeks and smile are added separately.
I made this design small enough to use as a keychain or bag charm. You can attach the hardware directly to the top of the cookie or make a crocheted loop if you prefer a softer finish.
The pattern is worked mostly in continuous rounds and uses basic amigurumi techniques. The instructions also explain when to add the face, how to assemble the arms and legs, and how to reinforce the keychain attachment.
Note: This post may contain affiliate links. If you purchase through them, I may earn a small commission at no extra cost to you.
Materials & Tools
For this cookie keychain, cotton yarn works well because it gives the small piece a firm shape and keeps the stitches easy to see. You can also use acrylic yarn if that is what you have available.
Recommended Supplies
- Yarn: Sport (2) or DK (3) weight yarn
- Color A: Light brown – cookie body, arms, and legs
- Color B: White – eye backings
- Color C: Pink – cheeks
- Crochet hook: 2.0–2.5 mm
- Safety eyes: 8–9 mm
- Polyester fiberfill
- Black embroidery thread – mouth
- Keychain hardware: split ring, lobster clasp, or short chain
- Yarn needle
- Stitch markers
- Scissors
The exact yarn weight and hook size can be adjusted slightly depending on your tension. The finished cookie should be firm enough to hold its shape but still have a little softness after stuffing.
Crochet Cookie Amigurumi Keychain Pattern
Skill Level
Beginner to Intermediate
The crochet stitches used in this pattern are basic, but the project also involves working with small pieces, placing the facial details evenly, sewing the arms and legs securely, and attaching the keychain hardware. Beginners who are comfortable with a magic ring, single crochet, increases, and decreases should be able to follow the pattern.
This pattern uses US crochet terms and is worked in continuous rounds unless otherwise stated. Place a stitch marker in the first stitch of each round and move it up as you work.
Abbreviations
- MR — Magic Ring
- sc — Single Crochet
- inc — Increase
- dec — Invisible Decrease
- sl st — Slip Stitch
- ch — Chain
- R — Round
Part 1: Body (Cookie)
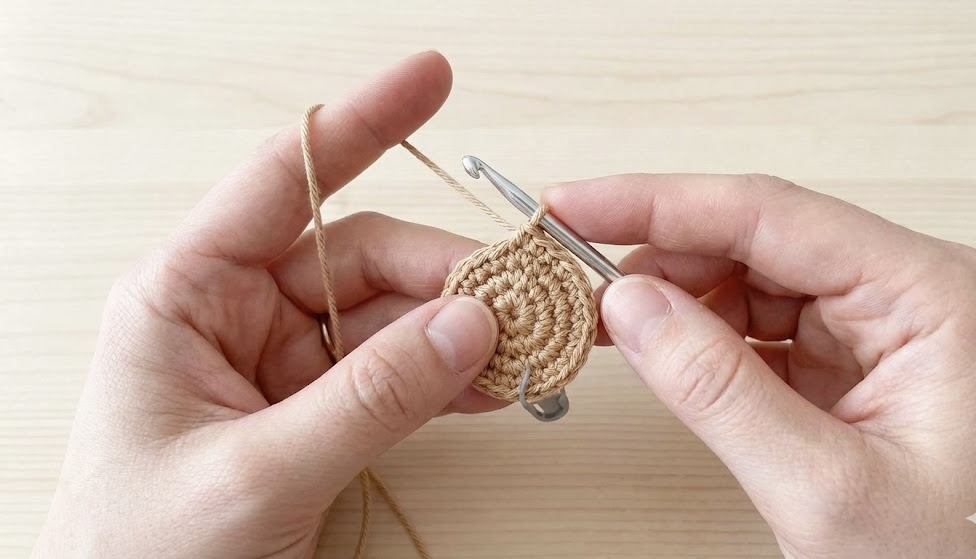
Work the cookie body in light brown yarn using continuous rounds. Place a stitch marker in the first stitch of each round and move it up as you work.
R1: 6 sc into MR. (6)
R2: inc around. (12)
R3: (1 sc, inc) × 6. (18)
R4: (2 sc, inc) × 6. (24)
R5: (3 sc, inc) × 6. (30)
R6: (4 sc, inc) × 6. (36)
R7: (5 sc, inc) × 6. (42)
R8–R16: sc around. (42)
If you want a slightly thicker cookie, you can add one or two extra rounds of sc here before starting the decreases.
R17: (5 sc, dec) × 6. (36)
R18: (4 sc, dec) × 6. (30)
Do not close the opening yet. The face details are easier to place while the cookie is still open, so you can reach the inside when securing the safety-eye washers.
Part 2: Eyes (Make 2)
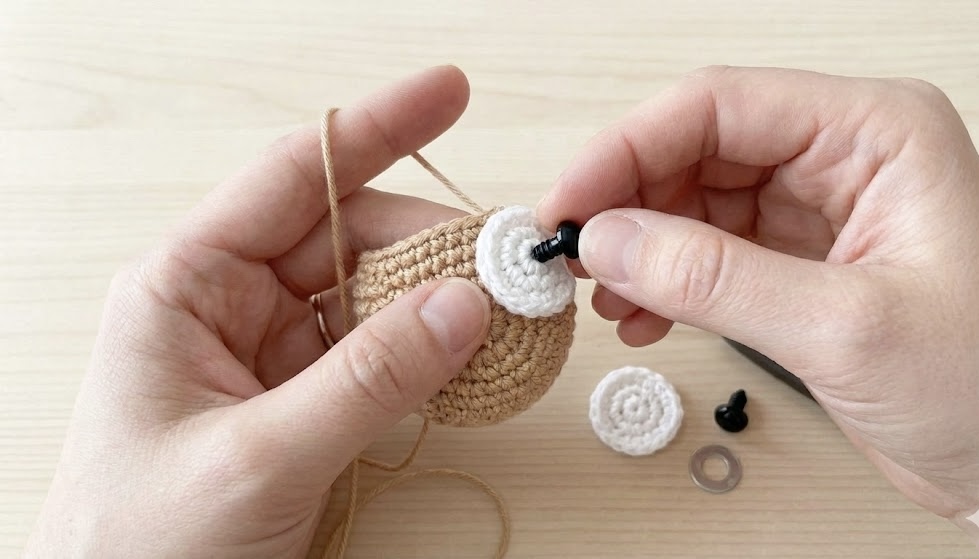
Using white yarn, crochet two small circles for the eye backings.
R1: 6 sc into MR. (6)
R2: inc around. (12)
Slip stitch to finish and leave a long yarn tail for sewing.
Attaching the Eyes
Insert one black safety eye through the center of each white crochet circle.
Before securing the washers, place both eyes on the cookie body and check their position from the front. They should sit at the same height and have an even space between them.
For this design, position the eyes around R11–R12. Adjust the spacing slightly if needed so the face looks balanced with the shape of your cookie.
Once you are happy with the placement, secure the safety eyes from the inside with their washers and sew the white eye backings neatly to the body.
Part 3: Face Detail
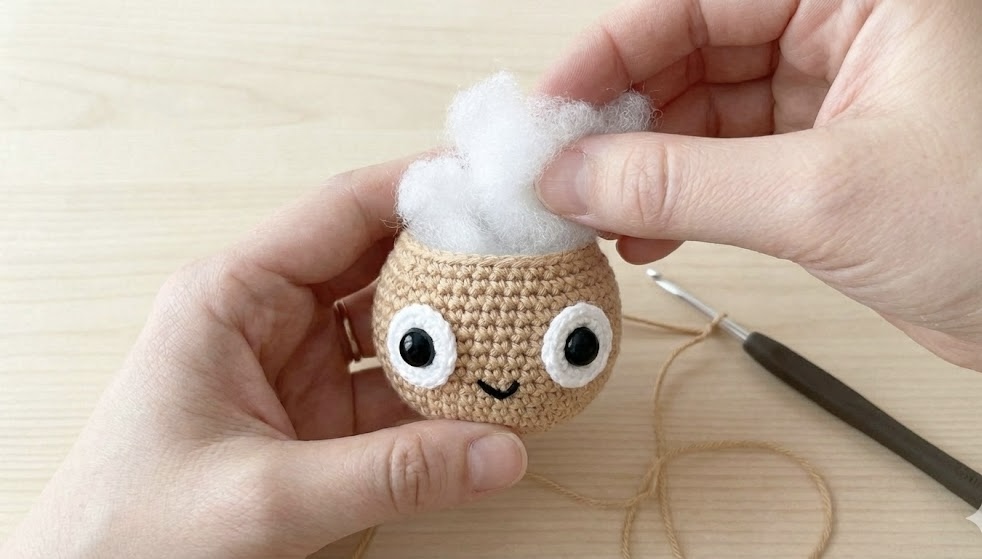
Cheeks
Using pink yarn, add two small cheeks to the cookie.
You can embroider each cheek with a few short horizontal stitches, or crochet two small circles:
R1: 6 sc into MR. (6)
Fasten off, leaving a yarn tail for sewing. Sew one cheek onto each side of the face, keeping them at the same height.
Choose the cheek size and placement according to the size of your finished cookie. They should sit below and slightly to the outside of the eyes.
Mouth
Using black embroidery thread, stitch a small smile between the cheeks.
A simple U-shaped smile works well for this design. Keep the stitches neat and avoid pulling the thread too tightly, as this can distort the crochet fabric.
Part 4: Close the Body
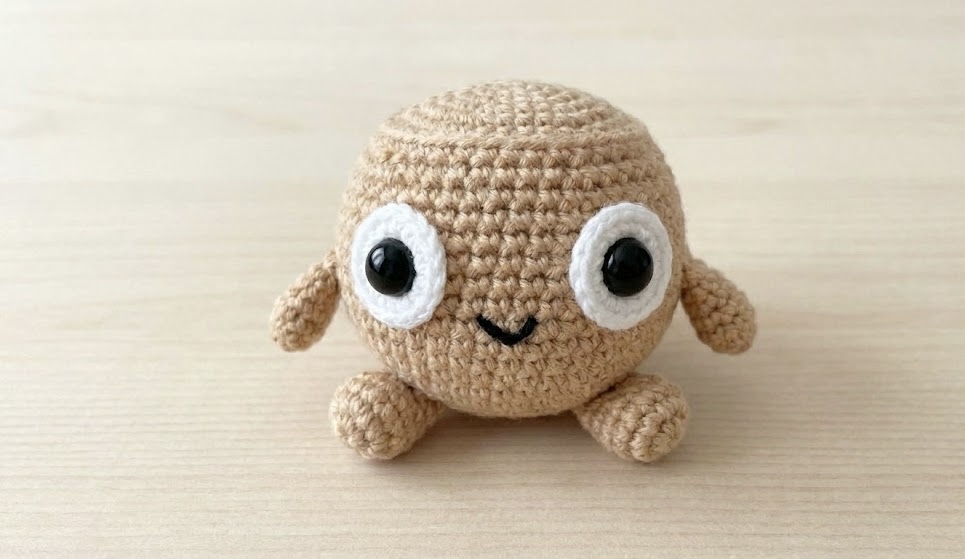
Add the polyester fiberfill gradually through the opening. Work a little stuffing into different areas of the cookie rather than filling only the center. The body should feel evenly filled and keep its round shape without becoming too firm.
Check the face once more before closing the opening. Make sure the eyes, cheeks, and mouth are still positioned correctly.
R19: (3 sc, dec) × 6. (24)
R20: (2 sc, dec) × 6. (18)
R21: (1 sc, dec) × 6. (12)
R22: dec × 6. (6)
Fasten off, leaving a yarn tail. Using a yarn needle, weave the yarn through the front loops of the remaining stitches and gently pull to close the opening.
Secure the yarn, weave in the end, and trim any excess.
Part 5: Arms and Legs
Arms — Make 2
Using light brown yarn:
R1: 5 sc into MR. (5)
R2–R3: sc around. (5)
Fasten off and leave a long yarn tail for sewing.
Add a small amount of stuffing only if needed to give the arms a little shape. Sew the arms securely to the sides of the cookie around R13. Check the position from the front before finishing the sewing, making sure both arms sit at a similar height.
Legs — Make 2
Using light brown yarn:
R1: 6 sc into MR. (6)
R2: (1 sc, inc) × 3. (9)
R3–R4: sc around. (9)
Fasten off and leave a long yarn tail for sewing.
Add a small amount of stuffing to each leg. Sew the legs securely to the bottom of the cookie, keeping them evenly spaced. Check that the cookie can sit or hang naturally before securing the yarn ends.
Part 6: Turn the Cookie Into a Keychain
Once the arms, legs, and face details are securely attached, you can add the keychain hardware.
Method 1: Metal Jump Ring
Choose a strong jump ring that is suitable for the size of your finished cookie. At the top center of the cookie, pass the ring through several crochet stitches rather than pulling it through a single stitch.
If the stitches feel loose, reinforce the area with a few stitches using matching yarn before attaching the ring. Close the jump ring firmly and attach the keychain clasp or hardware.
Method 2: Crochet Loop
For a softer attachment, make a small loop with the light brown yarn.
Chain 10–15 stitches, then slip stitch into the same area where the yarn was attached to form the loop. Sew the base of the loop securely to the top center of the cookie, using several passes with the yarn needle.
Attach the keychain ring to the finished loop and check the connection by gently pulling on it before using the keychain.
Whichever method you choose, make sure the attachment is firmly secured. The top of the cookie should not stretch or pull apart when the keychain is in use.
Frequently Asked Questions
Can I use acrylic yarn instead of cotton yarn?
Yes. Acrylic yarn can be used for this project. Cotton usually gives a firmer shape and makes the small stitches easier to see, but the most important thing is to choose a yarn and hook combination that gives you a tight, even fabric.
Is this keychain safe for babies and young children?
No. This project contains small parts, including safety eyes and keychain hardware, which can be choking or injury hazards. It is intended as a decorative keychain or bag charm, not as a toy for babies or young children.
For a child-safe version, embroider the eyes and avoid metal keychain hardware. Adult supervision is still recommended.
What if my cookie looks too soft or flat?
Check your crochet tension first. If the stitches are loose, a smaller hook may help create a firmer fabric. When stuffing the body, add fiberfill gradually and distribute it evenly rather than packing it tightly into one area.
What should I do if the keychain attachment feels loose?
Do not use the keychain until the attachment has been reinforced. Sew the crochet loop several times through the top of the cookie, or reinforce the stitches where the metal ring is attached. The connection should stay firmly in place when gently pulled.
Can I sell finished cookie keychains made from this pattern?
Yes. You may sell finished items made from this pattern. The written pattern itself may not be copied, resold, translated, published, or redistributed as your own work.
Care Instructions
A crochet keychain can collect dust and dirt with regular use, especially when attached to a bag. Gentle cleaning will help keep the stitches and small details in good condition.
- Spot clean with a slightly damp cloth when needed.
- Avoid soaking the cookie, particularly if it has metal keychain hardware.
- Do not use bleach or harsh cleaning products.
- Let it air dry completely before using it again.
- Check the keychain attachment occasionally and reinforce it if the ring or crochet loop becomes loose.
Copyright & Usage Policy
This crochet cookie amigurumi keychain pattern is designed by Amyliva Handmade and is provided for personal crafting and making finished items.
You may make finished cookie keychains for yourself, as gifts, or for sale. Please do not copy, reproduce, translate, publish, resell, or redistribute the written pattern, in whole or in part, as your own.
Please do not use the pattern photos or written instructions as your own content. If you would like to share the pattern with others, please share a link to this page rather than copying the instructions.
Thank you for respecting the original pattern and the work that goes into creating and sharing it.



Yorum gönder