Velvet Yarn Amigurumi Octopus Pattern – Free Crochet Tutorial
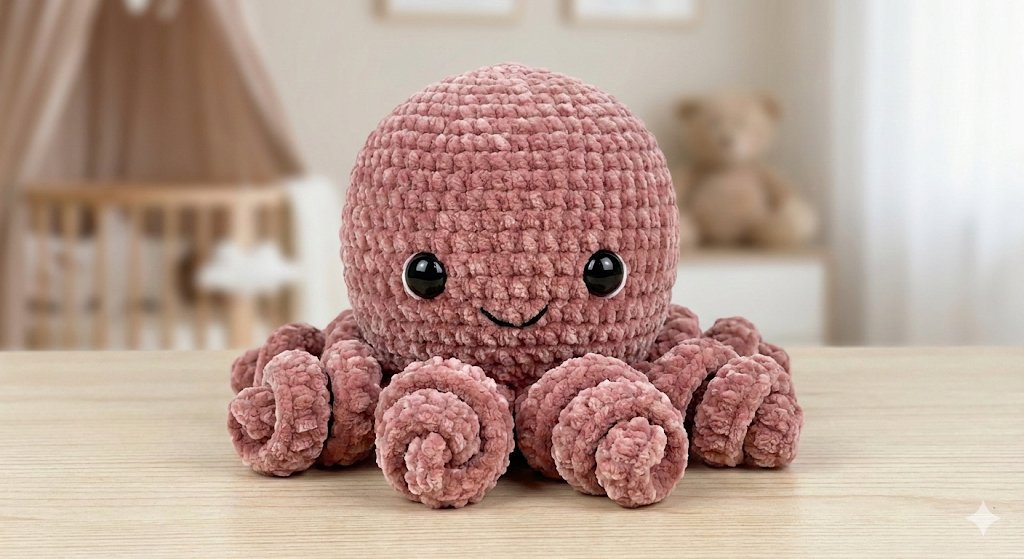
If you love soft and cuddly crochet projects, this velvet yarn amigurumi octopus is a fun little project to try. Its plush texture, simple shape, and curly tentacles make it a cute handmade toy or a small gift for someone who loves crochet and amigurumi.
This octopus is worked in a few simple pieces: the head and body are crocheted as one piece, while the eight tentacles are made separately and sewn to the bottom. The pattern uses basic amigurumi techniques, including single crochet, increases, decreases, stuffing, and simple sewing.
In this tutorial, I’ll walk you through each part of the project step by step, including how to work with velvet yarn, shape the body, make the curled tentacles, attach the pieces, and add the facial details. The pattern is written in standard US crochet terms.
Why Velvet Yarn Works Well for This Octopus
Velvet yarn gives this octopus a soft, plush texture that makes the finished piece especially cuddly. It also helps create a smooth-looking surface and gives the tentacles a fuller appearance.
However, velvet yarn can be a little different to work with than regular cotton or acrylic yarn. The fuzzy texture can make individual stitches harder to see, especially when working increases and decreases. For this reason, using a stitch marker and counting your stitches at the end of each round can make the project much easier.
Another advantage of velvet yarn is that it works up relatively quickly because it is usually thicker than the yarn used for small traditional amigurumi. The finished octopus also has a soft, squishy feel that works well for plush-style crochet projects.
If you are new to velvet yarn, take your time with the first few rounds and check your stitch count regularly. Once you get used to the texture, the rest of the project becomes much easier to manage.
Materials You Need
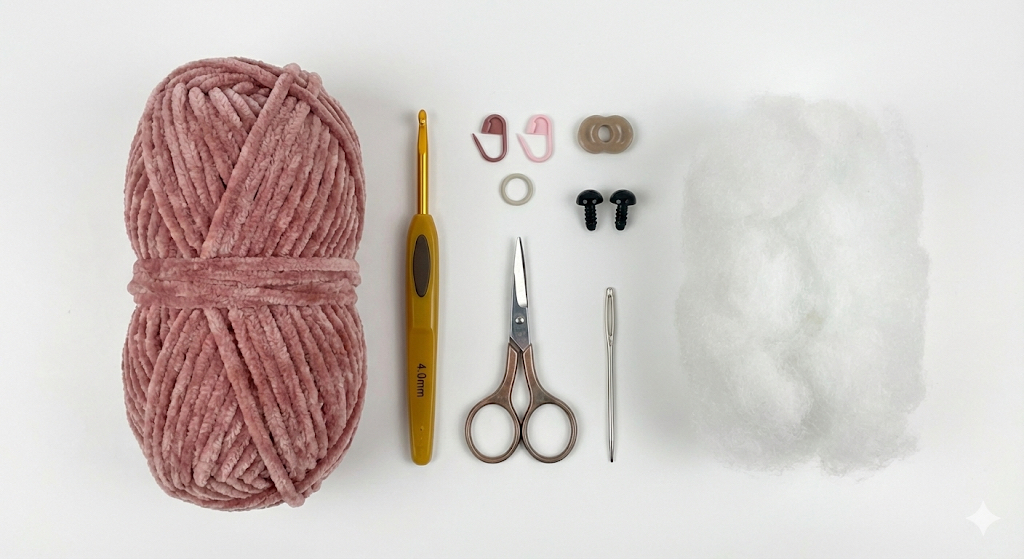
- Velvet yarn: Thick velvet or chenille-style yarn in your preferred color. The amount needed may vary depending on the yarn brand, thickness, and your crochet tension.
- Crochet hook: 4.0 mm crochet hook, or a size that gives you firm, tight stitches with your chosen velvet yarn.
- Safety eyes: 8 mm safety eyes.
- Polyester fiberfill: For stuffing the head and body.
- Stitch marker: Helpful for marking the beginning of each round, especially when working with velvet yarn.
- Yarn needle: For sewing the tentacles to the body and weaving in the ends.
- Scissors: For cutting the yarn.
- Optional: A small amount of blush for the cheeks and black embroidery thread for the mouth.
- Optional for a keychain: A small keychain ring and a little extra yarn for attaching it securely.
Before You Start
The head and body are worked in continuous rounds. The tentacles are made separately and attached to the body after crocheting.
Use a stitch marker to mark the beginning of each round and count your stitches carefully as you work.
Because velvet yarn can make individual stitches difficult to see, good lighting and careful stitch counting are especially helpful.
The finished size may vary depending on your yarn, hook size, and crochet tension.
Crochet Stitches Used (US Terms)
This pattern uses basic crochet stitches and amigurumi techniques. If you are familiar with the stitches below, you should be able to follow the pattern comfortably.
- MR – Magic Ring: A method for starting crochet projects worked in the round with a closed center.
- SC – Single Crochet: Insert the hook into the stitch, yarn over, pull up a loop, yarn over again, and pull through both loops on the hook.
- INC – Increase: Work two single crochet stitches into the same stitch.
- DEC – Decrease: Combine two stitches into one, usually by working a single crochet decrease.
- CH – Chain: A basic crochet stitch used to create the foundation chain for the tentacles.
- SL ST – Slip Stitch: A short stitch used for joining or finishing crochet work.
Pattern Notes
- Numbers in parentheses at the end of a round indicate the total number of stitches you should have after completing that round.
- “SC around” means to work one single crochet into every stitch around.
- “INC around” means to work an increase in every stitch around.
- “DEC around” means to work a decrease in every stitch around.
- When a sequence is written as (SC, INC) x6, repeat the sequence six times around the round.
Head & Body – One Piece
The head and body are crocheted as one piece in continuous rounds. Use a stitch marker to mark the beginning of each round.
Round 1: Make a magic ring and work 6 SC into the ring. (6)
Round 2: INC around. (12)
Round 3: (SC, INC) repeat 6 times. (18)
Round 4: (2 SC, INC) repeat 6 times. (24)
Rounds 5–9: SC around. (24)
Round 10: (2 SC, DEC) repeat 6 times. (18)
Round 11: (SC, DEC) repeat 6 times. (12)
At this point, insert the safety eyes between Rounds 7 and 8. Position them evenly on the front of the body.
Begin adding polyester fiberfill. Stuff the body gradually and evenly, making sure there are no large empty spaces. Do not overstuff, as this can stretch the stitches and change the shape of the octopus.
Round 12: DEC around. (6)
Cut the yarn, leaving a long tail for closing. Using a yarn needle, weave the yarn through the remaining front loops and pull gently to close the opening. Secure the yarn and weave in the remaining end.
Tentacles
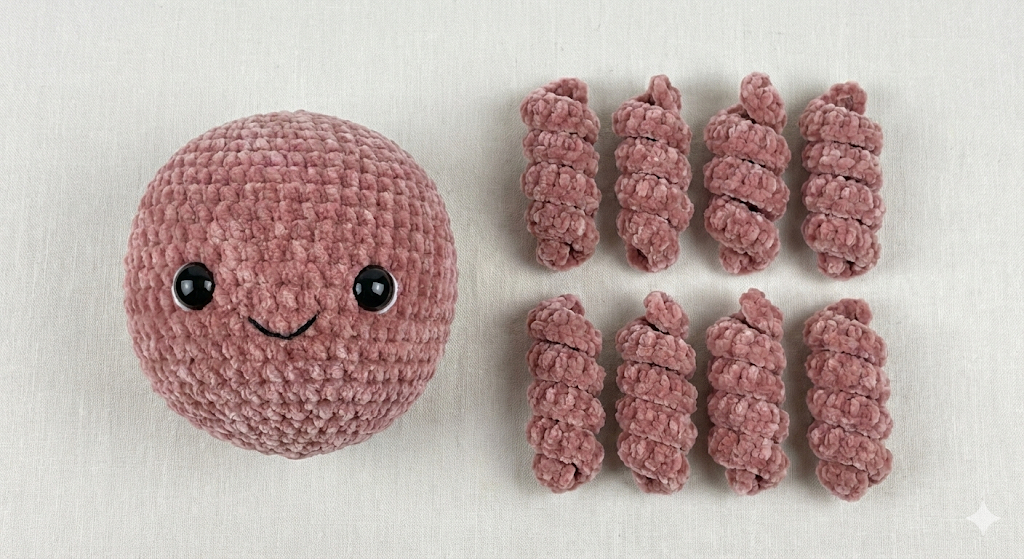
Make 8 identical tentacles.
Row 1: Chain 20.
Row 2: Starting in the second chain from the hook, work 3 SC in each chain across.
Fasten off, leaving a long yarn tail for sewing.
Gently shape the finished tentacle with your fingers to enhance its natural curl. Repeat the same steps to make all 8 tentacles.
Assembly Instructions
Once the body and all 8 tentacles are finished, arrange the tentacles around the bottom of the body before sewing them in place.
Position the Tentacles
Place the 8 tentacles evenly around the lower edge of the body. Check the spacing from different angles to make sure the octopus looks balanced.
Sew the Tentacles
Using the yarn tails and a yarn needle, sew each tentacle securely to the bottom of the body. Make several stitches through the base of each tentacle so it stays firmly attached.
After attaching each tentacle, gently adjust its position and curl before moving on to the next one.
Once all 8 tentacles are securely attached, weave in any remaining yarn ends. Gently shape the body and tentacles with your fingers to create an even, rounded appearance.
Face and Finishing Details
Embroidered Smile
Use a small amount of black embroidery thread and a yarn needle to create a simple curved smile. Keep the stitches small and check the placement before securing the thread inside the body.
If you prefer embroidered eyes instead of safety eyes, you can also add them using black embroidery thread. Make sure the thread ends are secured firmly inside the body.
Shaping the Octopus
After attaching the tentacles and finishing the face, gently shape the body with your fingers. Adjust the stuffing from the outside to create a smooth, rounded shape.
You can also gently curl each tentacle with your fingers to give the octopus a soft, playful appearance.
Optional Keychain
If you want to turn your octopus into a keychain, attach a small keychain ring securely to the top of the body using strong stitches and matching yarn.
Make sure the ring is firmly attached before using the finished piece as a keychain.
Tips for Working With Velvet Yarn
Velvet and chenille-style yarns have a soft, plush texture, but they can make individual stitches harder to see. A few simple habits can make crocheting with this type of yarn much easier.
Use a Hook That Matches Your Tension
A 4.0 mm hook is recommended for this pattern. If you notice large gaps between the stitches, try a slightly smaller hook. The stitches should be firm enough to keep the stuffing from showing through.
Mark the Beginning of Each Round
Place a stitch marker in the first stitch of every round and move it up as you work. This is especially helpful when the stitches are difficult to identify.
Count Your Stitches
Check your stitch count at the end of each round, especially after increases and decreases. This helps prevent the body from becoming wider or narrower than intended.
Stuff Gradually
Add small amounts of fiberfill as you work instead of filling the entire body at the end. Distribute the stuffing evenly and avoid making the body so firm that the stitches become stretched.
Secure the Starting Tail
Velvet yarn can be slippery, so secure the starting tail carefully. Weave it through several stitches before trimming it to help prevent the center from loosening.
Avoid Unraveling Too Often
Try not to repeatedly pull out and redo your stitches. Friction can affect the soft surface of velvet yarn and make it look worn. If you need to undo your work, do it slowly and gently.
Take Your Time With the First Few Rounds
The first few rounds can be the most difficult because the stitches are small and harder to see. Once the piece becomes larger, it is usually easier to identify the stitches and maintain the correct shape.
Common Mistakes and How to Avoid Them
The Stuffing Is Visible
If the fiberfill is showing through the stitches, your tension may be too loose or your hook may be too large for the yarn. Try a slightly smaller hook and keep your stitches consistent.
The Body Looks Uneven
An uneven body is often caused by accidentally adding or skipping stitches. Check the stitch count at the end of each round, especially after increases and decreases.
The Tentacles Are Different Lengths
Make sure all 8 tentacles start with the same number of chains and that your tension remains consistent. Small differences can become more noticeable after the tentacles are attached.
The Tentacles Do Not Curl Evenly
After crocheting each tentacle, gently shape it with your fingers before sewing it to the body. Compare all 8 tentacles so their curves are similar.
The Eyes Are Not Level
Before securing the backs of the safety eyes, check the face from the front and adjust their positions if necessary. It is much easier to correct the placement before the backs are secured.
The Body Is Too Firm or Too Soft
Add the stuffing gradually and distribute it evenly. If the body feels too firm or the stitches are stretching, remove a little stuffing. If it feels flat or collapses easily, add a little more.
The Magic Ring Comes Loose
Velvet yarn can be slippery. After completing the first round, gently tighten the starting tail and secure it by weaving the tail through several stitches.
Ways to Use Your Finished Octopus
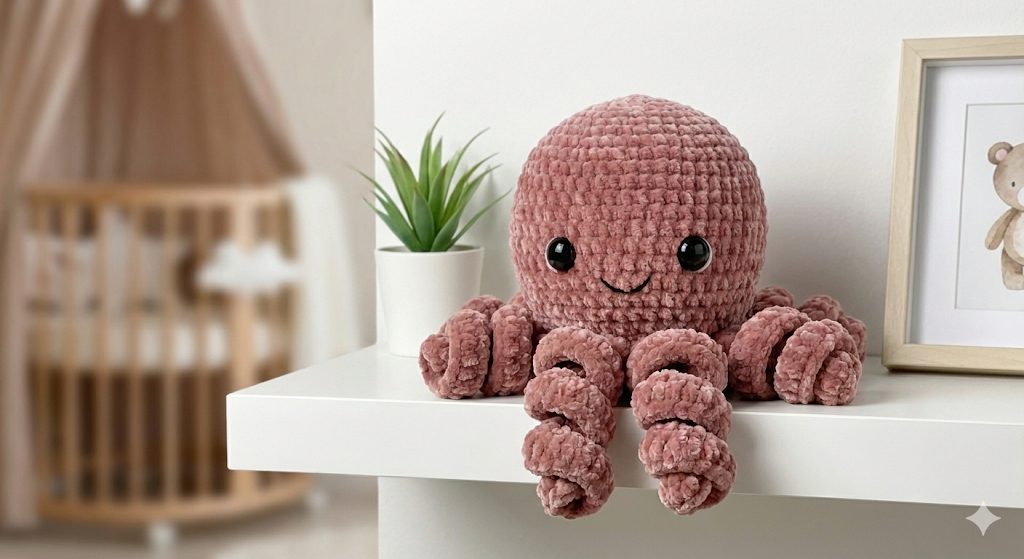
Once your velvet octopus is finished, you can use it in several simple ways.
- Handmade gift: A cute little gift for friends, family, or anyone who enjoys handmade crochet.
- Plush decoration: Place it on a shelf, desk, bedside table, or other small space.
- Amigurumi collection: Add it to a collection of handmade crochet animals and sea creatures.
- Keychain: If you added a secure keychain ring, use it as a small bag or key accessory.
You can also experiment with different velvet yarn colors to create octopuses with different personalities and styles.
Care Instructions
Because velvet yarn has a soft, plush surface, gentle cleaning will help keep your octopus looking its best.
- Hand wash gently: If the toy needs cleaning, wash it by hand with mild soap and cool or lukewarm water.
- Avoid hot water: Hot water may affect the shape or texture of the yarn.
- Do not wring: Gently press out excess water instead of twisting or squeezing the toy.
- Air dry: Reshape the octopus and allow it to dry completely in a well-ventilated area.
- Avoid high heat: Do not place the finished piece in a dryer or expose it to direct high heat.
If safety eyes are used, check that they remain firmly attached after cleaning and before giving the finished toy to a child.
Frequently Asked Questions
Can I use a different type of yarn?
Yes. You can use another soft yarn if you prefer, but the finished size and texture may be different. If you change the yarn thickness, you may also need to adjust the hook size.
Can I make the octopus larger or smaller?
Yes. Changing the yarn weight and hook size can change the finished size. You can also adjust the number of body rounds, but keep the increases and decreases consistent with the shape of the pattern.
Why are my stitches difficult to see?
This is common when working with velvet or chenille-style yarn. The fuzzy fibers can hide individual stitches. Good lighting, a stitch marker, and careful stitch counting can make the project easier.
Why does my octopus look uneven?
Check your stitch counts first. Accidentally adding or skipping a stitch can change the shape of the body. Uneven stuffing can also affect the finished appearance, so add the fiberfill gradually and distribute it evenly.
How can I make the tentacles curl nicely?
After crocheting each tentacle, gently shape it with your fingers. Try to give all 8 tentacles a similar curve before sewing them to the body.
Can I use embroidered eyes instead of safety eyes?
Yes. Embroidered eyes are an alternative if you prefer not to use plastic safety eyes. Use suitable embroidery thread and secure the ends firmly inside the body.
Is this pattern suitable for beginners?
The body uses basic amigurumi stitches such as single crochet, increases, and decreases. Beginners who are comfortable with these stitches should be able to follow the pattern. Velvet yarn can be slightly more difficult to see and handle than smooth yarn, so working slowly and counting carefully is recommended.
How should I store my finished octopus?
Keep it in a clean, dry place away from excessive moisture and direct heat. If it becomes dusty, gently clean it according to the care instructions above.


Yorum gönder