Mini Amigurumi Ice Cream – Free Crochet Pattern
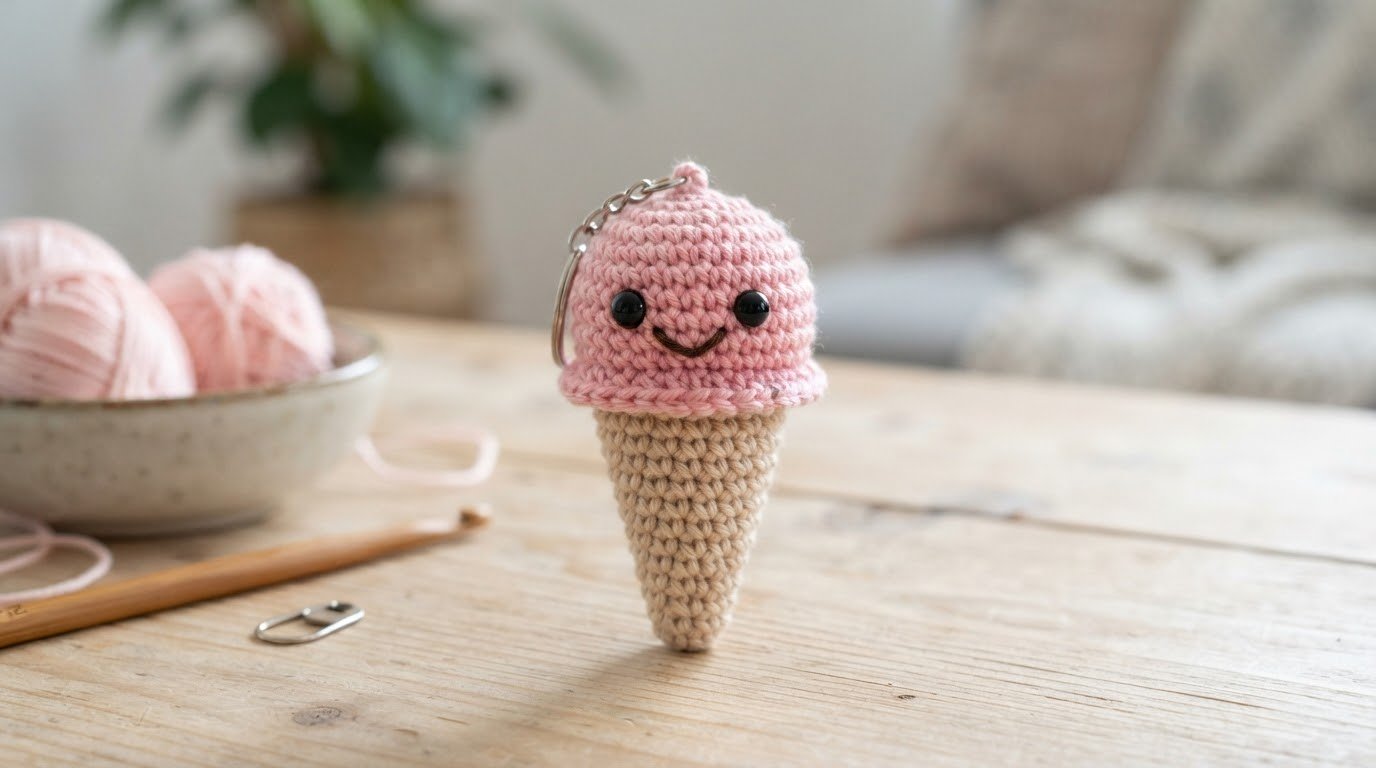
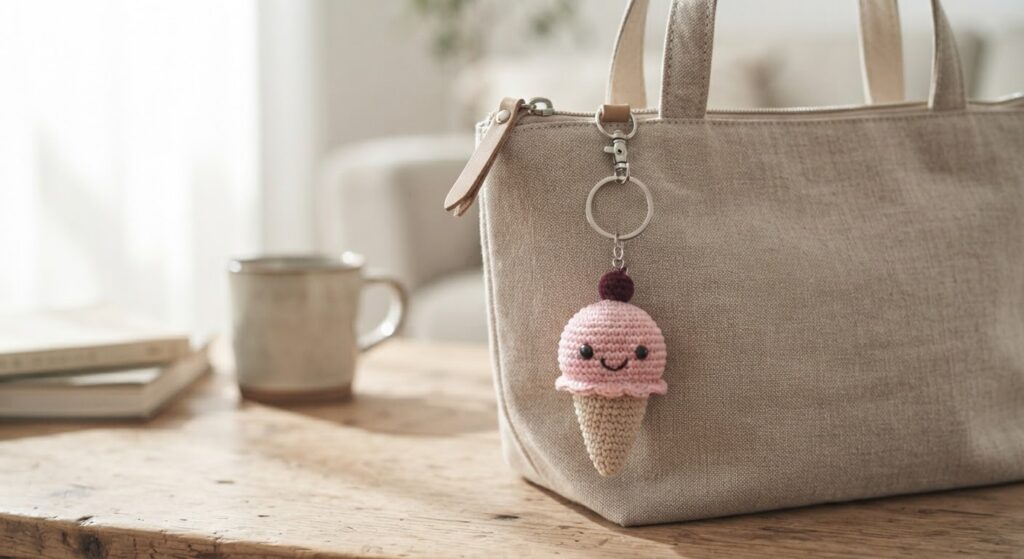
This mini crochet ice cream is a small amigurumi project made with basic stitches. It consists of two main crocheted pieces: a tapered cone and a rounded scoop, which are sewn together during assembly.
Whether you are looking for a sweet summer accessory or a charming handmade gift for a friend, this mini crochet ice cream is a delightful and quick project to make.
I used pink for the scoop and beige for the cone, but the colors can easily be changed. The small size makes this project suitable for a keychain, bag charm, or small handmade decoration.
In this free crochet pattern, I’ll show you how to crochet the cone and scoop, add the facial details, and assemble the finished ice cream.
Project Details
- Skill level: Easy
- Crochet terms: US terms
- Approximate crochet time: 1–2 hours
- Finished size: approximately 5–7 cm tall, depending on yarn, hook size, and tension
- Main techniques: magic ring, single crochet, increases, decreases, continuous rounds, and basic sewing
- Pieces: 1 cone and 1 scoop
The finished size may vary slightly from one crocheter to another. Using thicker yarn or a larger hook will generally produce a larger ice cream.
Materials
- Pink cotton yarn for the ice cream scoop
- Beige cotton yarn for the cone
- A small amount of black embroidery thread for the smile
- 2.0–2.5 mm crochet hook
- Polyester fiberfill
- 6 mm safety eyes
- Tapestry needle
- Scissors
- Stitch marker
- Optional: small keychain ring or lobster clasp
Using a smooth cotton yarn helps keep the stitches neat and makes it much easier to control the shape of the small scoop and cone.
Cotton yarn works well for this small project because it keeps the stitches neat and makes it easier to control the shape. Choose a hook size that gives you a firm fabric so the fiberfill does not show through the stitches.
If you plan to use the finished ice cream as a keychain or bag charm, choose lightweight hardware that is securely attached during assembly.
How Long Does It Take to Crochet This Mini Ice Cream?
This mini crochet ice cream is a quick and enjoyable project that can usually be completed in 1 to 2 hours. The exact time will depend on your crochet speed, assembly experience, and whether you add optional details such as a keychain attachment or decorative embellishments.
Because the project consists of only two main pieces, it works up quickly and is suitable for an evening crochet session. Taking a little extra time during assembly can help keep the scoop centered and create a neater finished result.
—
Best Yarn for a Crochet Ice Cream
Cotton yarn is one of the best choices for this project because it provides excellent stitch definition and helps both the cone and scoop maintain their shape. Smooth cotton yarn also makes it easier to see the stitches when working increases and decreases.
Acrylic yarn can also be used if you prefer a softer appearance. Regardless of the yarn type, choose a hook size that creates a firm fabric so the stuffing does not show through the stitches. Using the same yarn weight for both the cone and scoop will help maintain balanced proportions.
Crochet Techniques
This pattern uses a few basic amigurumi techniques:
- Magic ring (MR)
- Single crochet (sc)
- Increase (inc)
- Decrease (dec)
- Working in continuous rounds
- Basic sewing for assembly
The cone and scoop are crocheted separately and joined after both pieces are finished. The scoop also requires gradual stuffing and simple facial embroidery.
The pattern uses US crochet terms. Numbers in parentheses show the total number of stitches at the end of each round.
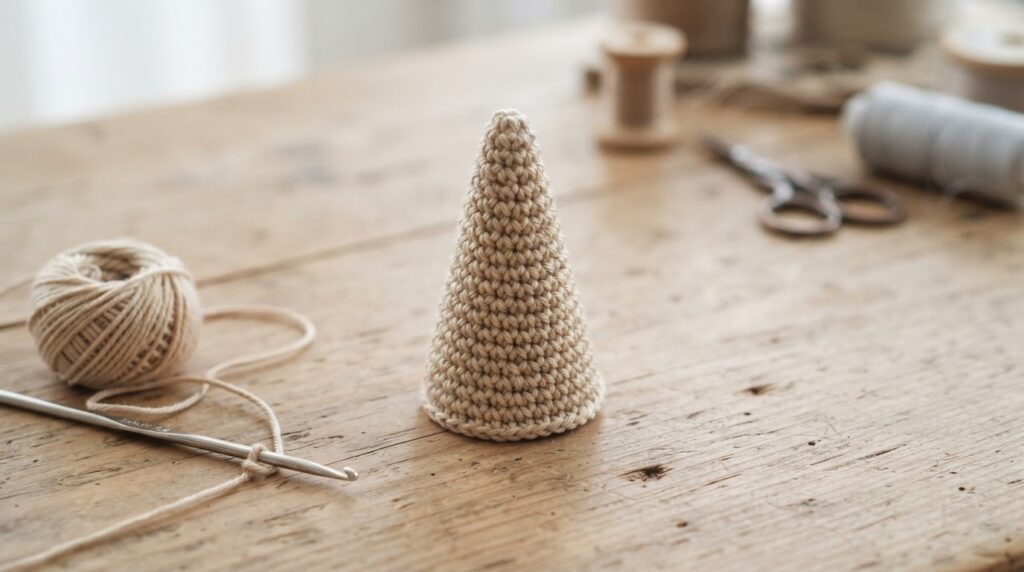
Cone
Work with beige yarn.
R1: 4 sc into a magic ring (4)
R2: sc around (4)
R3: (1 sc, inc) around (6)
R4: sc around (6)
R5: (2 sc, inc) around (8)
R6: sc around (8)
R7: (3 sc, inc) around (10)
R8: sc around (10)
R9: (4 sc, inc) around (12)
R10: sc around (12)
R11: 6 dec (6)
Fasten off and leave a long yarn tail for sewing.
The cone gradually widens as you work the increases. The final decrease round brings the top opening down to approximately 6 stitches, creating a small opening that can be joined to the bottom of the scoop.
Keep the cone lightly shaped while sewing so it does not flatten or twist.
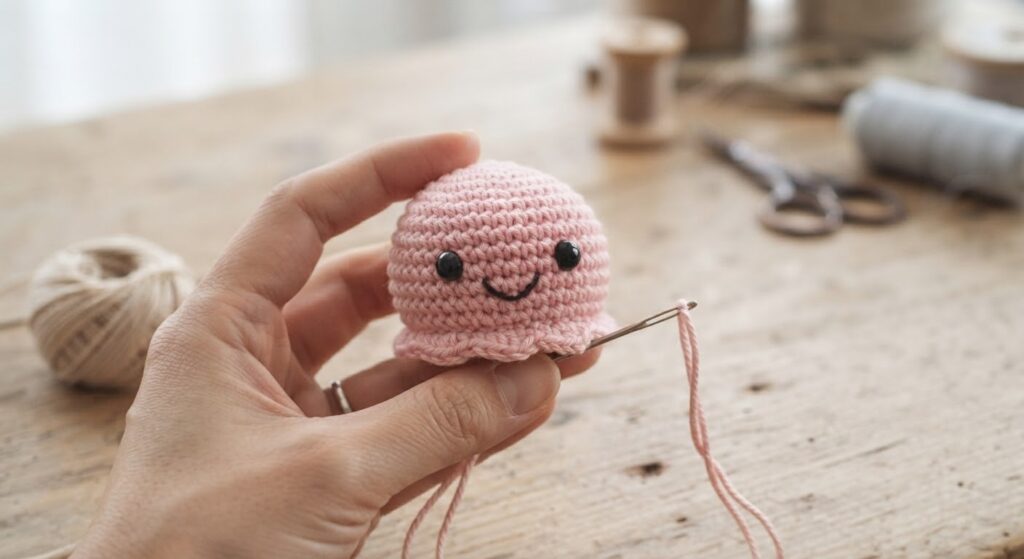
Scoop
Work with pink yarn.
R1: 6 sc into a magic ring (6)
R2: inc around (12)
R3: (1 sc, inc) around (18)
R4: (2 sc, inc) around (24)
R5–R6: sc around (24)
R7: 6 dec, 12 sc (18)
R8: 3 dec, 12 sc (15)
Begin adding small amounts of fiberfill through the opening. Distribute the stuffing evenly with the blunt end of your crochet hook or a tapestry needle. Do not overstuff, as the stitches can stretch and change the shape of the scoop.
Insert the 6 mm safety eyes between R4 and R5, checking that they are level and centered before securing them.
R9: 3 dec, 9 sc (12)
R10: 6 dec (6)
Add a little more fiberfill if needed before the opening becomes too small. The scoop should feel firm but still keep its rounded shape.
Fasten off, close the remaining 6 stitches with a tapestry needle, and weave in the yarn end.
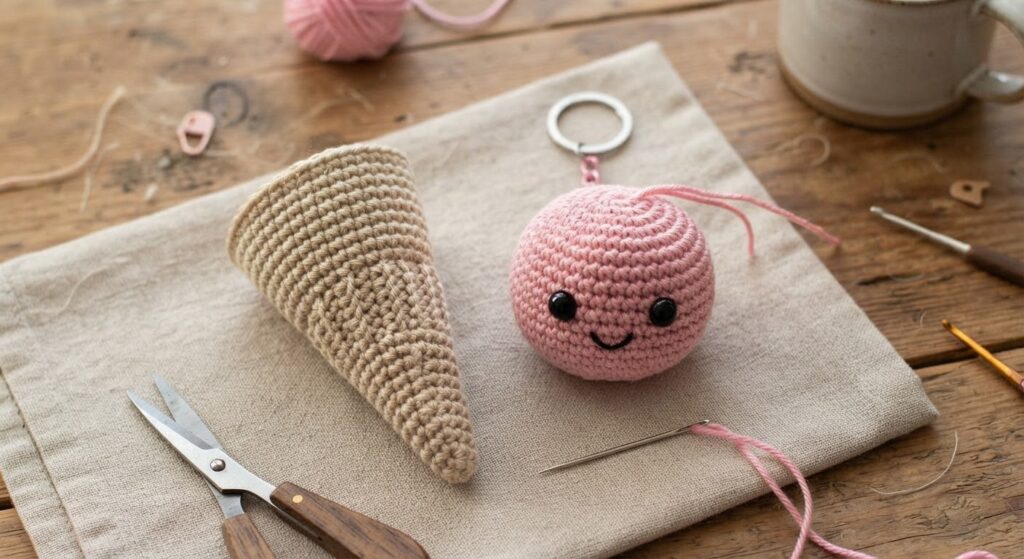
Assembly
Place the pink scoop on top of the beige cone and check that it sits evenly before sewing.
Using the long yarn tail from the cone, sew the top edge of the cone to the bottom of the scoop. Work through several stitches around the connection, keeping the stitches evenly spaced. Make sure the scoop stays centered while you sew.
Once the scoop is securely attached, weave the remaining yarn tail into the cone and trim the excess.
Embroider a small smile below the eyes using black embroidery thread. Keep the stitches small so the facial expression stays neat on the small scoop.
If you want to use the ice cream as a keychain or bag charm, attach a small, lightweight keychain ring or lobster clasp securely to the top of the scoop. Sew the attachment through several stitches using strong yarn, making several passes through the same area. Gently pull the hardware to check that it is secure before using the finished piece.
Weave in any remaining loose yarn ends and check the entire piece for loose stitches or attachments.
Optional Add-ons
You can change the look of the finished ice cream with a few small details:
- Add a small crochet or yarn pom-pom on top to make a cherry.
- Embroider tiny sprinkles on the scoop using leftover yarn or embroidery thread.
- Make the scoop in different colors to create different ice cream flavors.
- Use a different color for the cone if you want a more colorful version.
- Add a small keychain ring or lobster clasp if you want to use the ice cream as a bag charm or keychain.
Keep any added decorations small and sew them securely to the finished piece, especially if the ice cream will be carried around as a keychain or bag charm.
Helpful Tips
- Keep your stitches tight and consistent so the fiberfill does not show through the scoop.
- Use a stitch marker when working in continuous rounds, especially when making the increases and decreases.
- Add fiberfill gradually rather than filling the scoop all at once. This makes it easier to keep the shape even.
- Do not overstuff the scoop near the final decrease rounds, as too much stuffing can stretch the stitches.
- When attaching the scoop to the cone, keep the scoop centered and sew through several stitches for a secure connection.
- Leave a long yarn tail on the cone so you have enough yarn for sewing during assembly.
- Check the position of the safety eyes and embroidered smile before finishing the face.
- If you make a keychain, use lightweight hardware and reinforce the attachment with several passes of yarn.
- Gently test the cone, scoop, decorations, and keychain attachment before using the finished piece.
Common Mistakes to Avoid
One common mistake is overstuffing the scoop. Too much fiberfill can stretch the stitches and make the stuffing visible between them.
Another common issue is attaching the scoop off-center on the cone. Before sewing permanently, place the scoop on top of the cone and check the position from several angles.
If you are adding a keychain ring, reinforce the attachment with multiple passes of yarn through the same area. This helps prevent the hardware from pulling loose during everyday use.
FAQ
How big is the finished mini ice cream?
The finished size depends on your yarn, hook size, and crochet tension. With the materials listed in this pattern, it will make a small decorative ice cream suitable for a keychain or bag charm.
Can I use different yarn colors?
Yes. You can use any color combination you like for the scoop and cone. Making several scoops in different colors is an easy way to create different ice cream designs.
Can I make the ice cream larger or smaller?
Yes. Changing the yarn weight and hook size will change the finished size. For the most consistent result, use the same yarn weight and hook size for both the cone and scoop.
Why does my scoop look uneven?
Uneven tension or too much stuffing can affect the shape. Add the fiberfill gradually and distribute it evenly as you work. If the stitches begin to stretch, remove a small amount of stuffing.
Why doesn’t my scoop fit the cone?
The size can vary because of yarn, hook size, and tension. Make sure both pieces are made with the same yarn weight and hook size. Before sewing, place the scoop on the cone and check that it is centered.
Can I embroider the eyes instead of using safety eyes?
Yes. You can embroider both the eyes and smile with black embroidery thread. This is a useful alternative if you prefer not to use plastic safety eyes.
Can I use this as a keychain?
Yes. Attach lightweight keychain hardware securely through several stitches at the top of the scoop. Test the attachment gently before using it as a keychain or bag charm.
Can I make different ice cream flavors?
Yes. Change the scoop color to create different flavors. You can also add small embroidered sprinkles or other securely sewn decorations.
Can I sell finished ice cream pieces made from this pattern?
Yes. You may sell finished pieces made from this pattern with credit to Amyliva Handmade. Please do not sell, copy, repost, translate, or distribute the written pattern or photographs as your own.
Can I wash the finished crochet ice cream?
Spot cleaning is recommended. Avoid soaking the ice cream in water because the combination of yarn and fiberfill stuffing may not respond well to prolonged moisture. Allow it to dry completely before using it again.
Final Thoughts
This mini crochet ice cream is a fun and beginner-friendly amigurumi project that can be completed with a small amount of yarn and a few basic supplies. Its compact size makes it suitable for keychains, bag charms, gifts, and small handmade decorations.
By experimenting with different yarn colours and simple embellishments, you can easily create a variety of ice cream flavours and styles. Whether you make one or a whole collection, this sweet project is a quick and enjoyable way to practise basic amigurumi techniques.
Safety Note
This crochet ice cream is intended as a handmade decorative item, keychain, or bag charm.
Check that the scoop and cone are securely sewn together before using the finished piece. If you use safety eyes, embroidered decorations, or other small parts, make sure they are firmly attached.
If you use the ice cream as a keychain, inspect the keychain hardware and yarn attachment regularly. Do not use the item if the hardware becomes loose or any part is damaged.
Safety eyes and small decorative pieces can be a choking hazard. Keep the finished item away from babies, young children, and pets.
Copyright and Terms of Use
This crochet pattern and the accompanying photographs are original content by Amyliva Handmade.
You may use this pattern to make finished ice cream pieces for yourself, as gifts, or for small-scale sale, with credit to Amyliva Handmade.
Please do not copy, repost, translate, publish, or redistribute this written pattern or its photographs as your own. You may share the pattern by linking to the original Amyliva Handmade post.
The finished crochet item is handmade from this pattern, but the pattern itself remains the property of Amyliva Handmade.

Yorum gönder