Mini Amigurumi Bear – Free Crochet Pattern
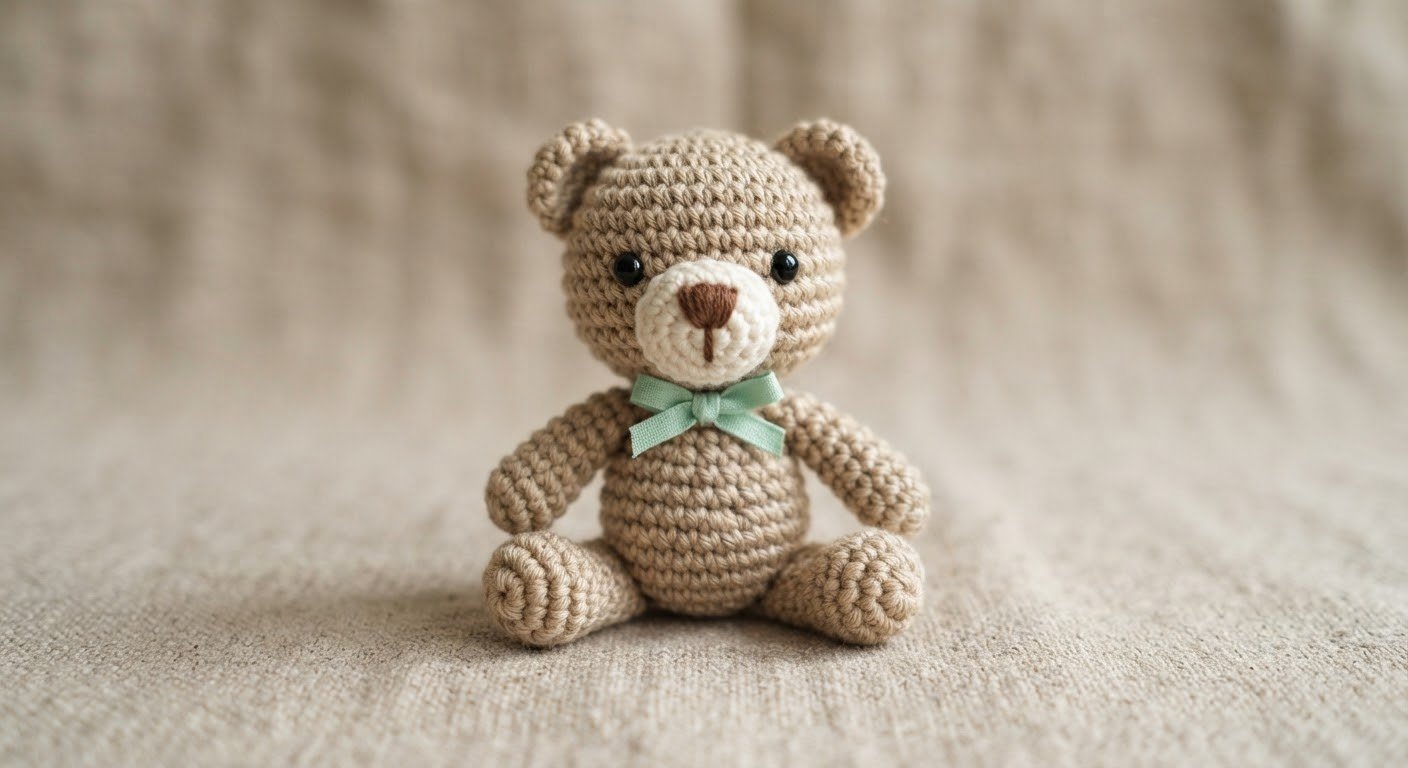
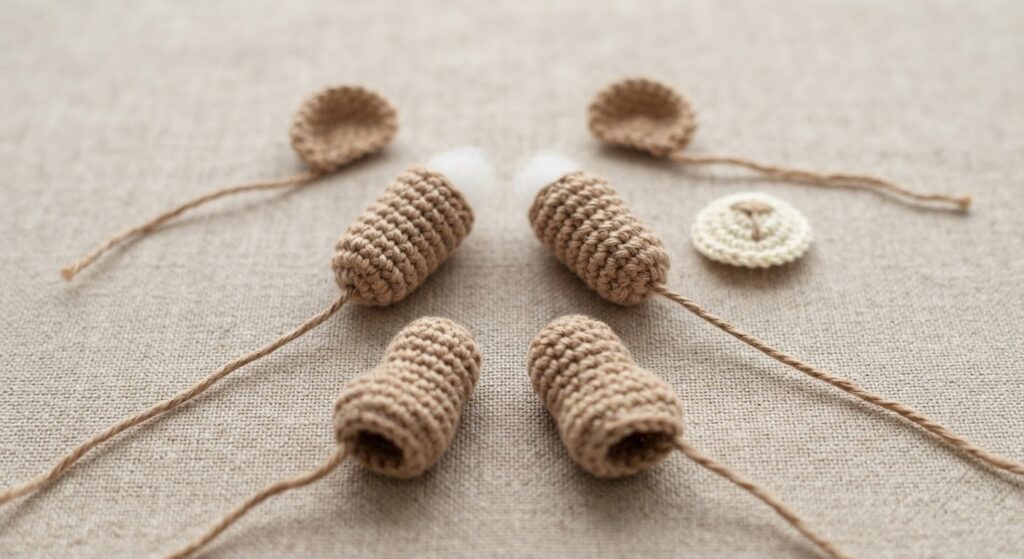
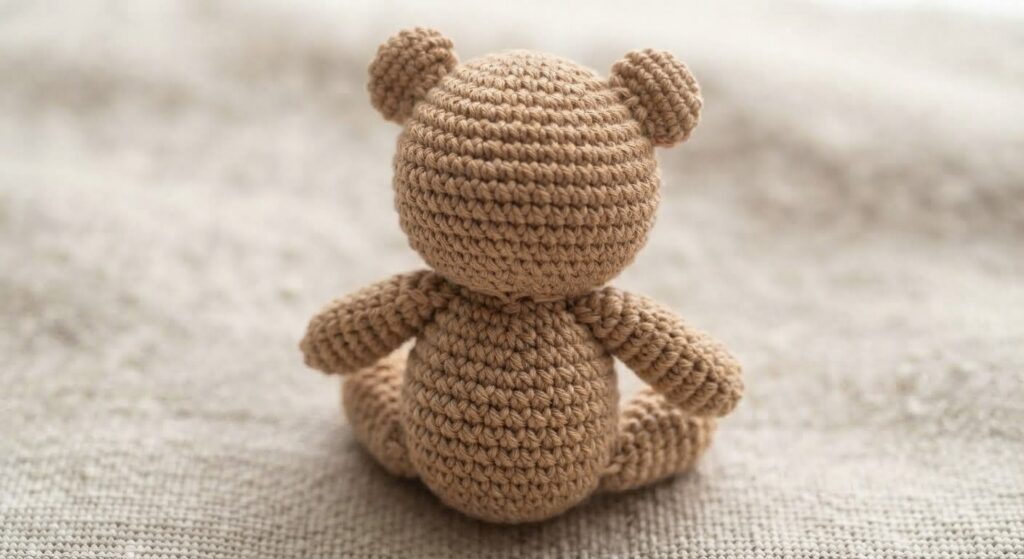
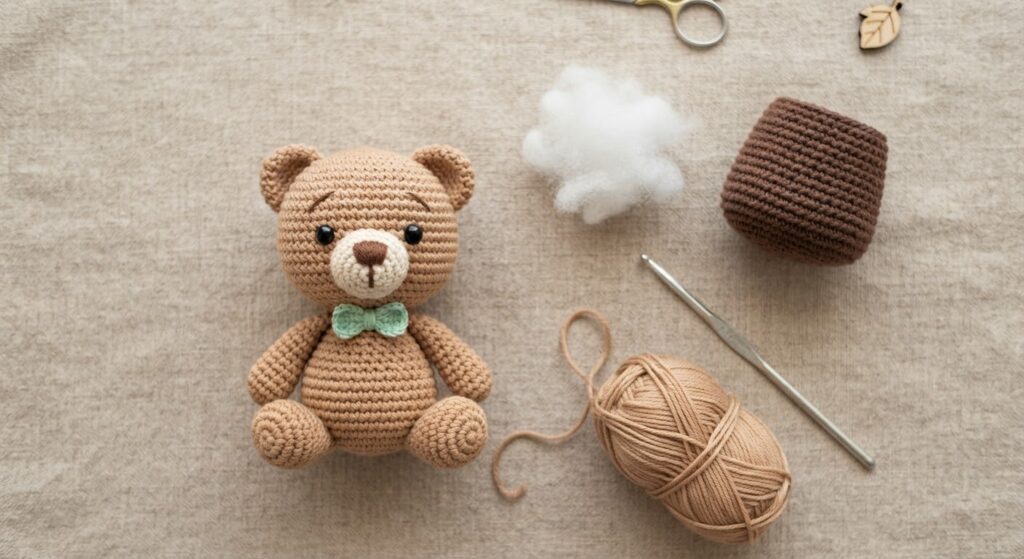
This mini amigurumi bear is a small crochet project made with simple single crochet stitches and a few separate pieces. The head and body are worked as one piece, while the arms, legs, ears, and muzzle are crocheted separately and sewn on.
I designed this bear with a simple rounded shape, small ears, short limbs, and a little bow tie. It is a nice project when you want to make a small amigurumi without working a complicated body shape.
You can keep the classic light brown and white color combination or change the colors to match your own style.
About the Mini Amigurumi Bear
The head and body are worked in continuous rounds as one piece. The arms, legs, ears, and muzzle are made separately and attached after crocheting.
The bear is intentionally kept small, so the arms and legs use very few stitches. This gives the finished bear a simple miniature shape without adding unnecessary shaping.
The pattern uses US crochet terms.
Finished Size
The finished size will depend on the yarn, hook size, and your crochet tension. With the materials listed below, the bear is designed to be a small, palm-sized amigurumi.
For the most accurate size, measure your finished bear after assembly.
Materials
- Light brown cotton yarn
- Small amount of white cotton yarn for the muzzle
- Small amount of mint green cotton yarn for the bow tie
- 2.0 mm crochet hook
- 6 mm safety eyes
- Polyester fiberfill
- Tapestry needle
- Scissors
- Stitch marker
Sport or DK weight yarn can also be used, but changing the yarn weight will change the finished size.
Abbreviations
US crochet terms:
- MR – magic ring
- ch – chain
- sc – single crochet
- inc – increase
- dec – decrease
- sl st – slip stitch
- st/sts – stitch/stitches
Pattern Notes
- The head and body are worked as one piece.
- Work in continuous rounds unless the pattern says otherwise.
- Use a stitch marker to keep track of the beginning of each round.
- Keep your stitches tight enough that the stuffing does not show through.
- Add stuffing gradually rather than filling the piece all at once.
- Do not overstuff the head or body, as this can change the shape.
- Leave long yarn tails on the small pieces so they can be sewn securely to the body.
Head and Body
With light brown yarn.
Round 1
6 sc in MR. (6)
Round 2
inc around. (12)
Round 3
(sc, inc) around. (18)
Round 4
(2 sc, inc) around. (24)
Rounds 5–9
sc around. (24)
Round 10
(2 sc, dec) around. (18)
Round 11
(sc, dec) around. (12)
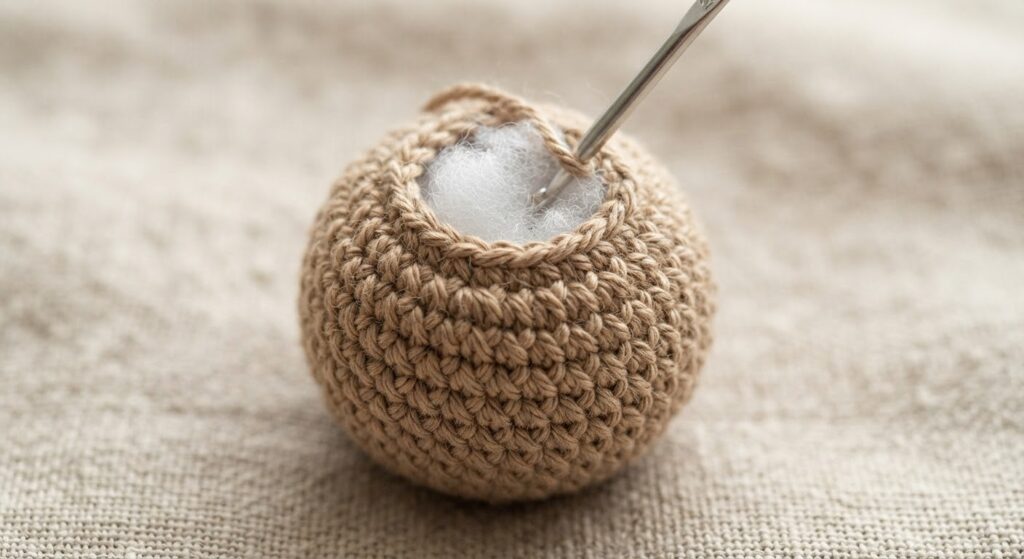
Start adding fiberfill. Continue stuffing gradually as you work.
Round 12
dec around. (6)
Fasten off and leave a long yarn tail.
Close the remaining opening by weaving the yarn tail through the front loops of the six stitches. Pull gently to close the opening, secure the yarn, and weave in the end.
Checking the Shape
At this point, the piece should have a small rounded head and body shape rather than a long body.
The increases create the widest part of the piece at 24 stitches. The decreases then bring the opening down to 6 stitches, giving the bear its rounded shape.
If the piece looks too flat, add a little more stuffing before closing it. If it looks very stretched or lumpy, remove some stuffing rather than pulling the stitches tighter.
Arms
Make 2 with light brown yarn.
Round 1
6 sc in MR. (6)
Rounds 2–4
sc around. (6)
Add a small amount of fiberfill. The arms should remain soft and flexible rather than firm.
Fasten off and leave a long yarn tail for sewing.
Do not close the opening completely if you find it easier to sew the arm directly to the body. Flattening the opening slightly before sewing will make attachment easier.
Legs
Make 2 with light brown yarn.
Round 1
6 sc in MR. (6)
Rounds 2–3
sc around. (6)
Add a small amount of fiberfill, mainly toward the lower part of the leg.
Fasten off and leave a long yarn tail for sewing.
Flatten the opening slightly before attaching the legs.
Ears
Make 2 with light brown yarn.
Round 1
6 sc in MR. (6)
Round 2
(sc, inc) around. (9)
Fasten off and leave a long yarn tail.
Do not stuff the ears.
Flatten each ear gently between your fingers before sewing.
Muzzle
With white yarn.
Round 1
6 sc in MR. (6)
Round 2
(sc, inc) around. (9)
Fasten off and leave a long yarn tail.
Embroider a small nose in the center of the muzzle using black or dark brown embroidery thread.
Do not add a large amount of stuffing. A small amount of fiberfill can be used if you want the muzzle to have a slightly raised shape.
Bow Tie
With mint green yarn.
Chain 6.
Row 1
Starting in the second chain from the hook, sc across. (5)
Row 2
ch 1, turn, sc across. (5)
Fasten off and leave a long yarn tail.
Fold or pinch the small rectangle in the center to form a bow shape. Wrap the yarn around the center several times and secure it at the back.
Leave enough yarn to sew the bow to the bear.
Assembly
Take a few minutes to position all the pieces before sewing. Using pins first makes it much easier to keep both sides even.
1. Attach the Legs
Place the legs near the bottom of the body, with approximately 4–5 stitches between the inner edges of the legs.
The legs should sit at roughly the same height on both sides.
Pin them in place first and check that the bear can sit evenly before sewing.
Sew each leg securely to the lower part of the body using the long yarn tail.
2. Attach the Arms
Place one arm on each side of the body.
For this small bear, position the arms approximately around Rounds 7–9 of the head/body piece, depending on how your stitches line up.
The lower part of each arm should sit slightly below the widest part of the body.
Pin both arms before sewing and check that they are at the same height.
Sew around the opening of each arm several times so the attachment is secure.
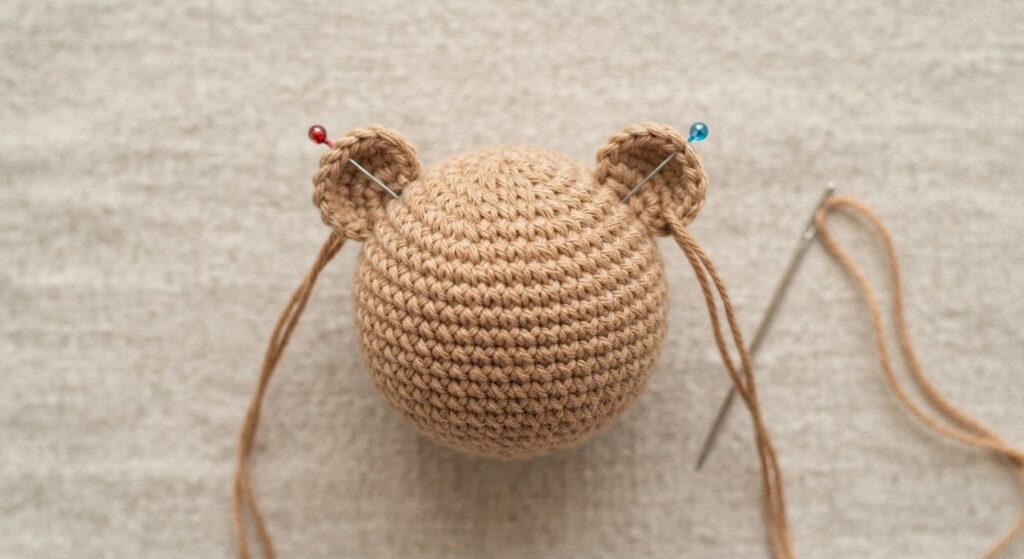
3. Attach the Ears
Place the ears on the upper part of the head.
A good starting position is around Rounds 3–5, with the ears slightly toward the sides rather than directly on top.
The exact position can be adjusted depending on how rounded your bear looks.
Pin both ears first and check them from the front.
Make sure they are at approximately the same height before sewing.
Sew around the lower edge of each ear securely.
4. Add the Safety Eyes
Place the safety eyes between Rounds 6 and 7 of the head.
Leave approximately 4–5 stitches between the eyes when measuring across the front of the face.
Before pushing the backs of the safety eyes into place, look at the bear from the front and check that the eyes are level.
If you prefer embroidered eyes, you can make small black eyes instead.
5. Attach the Muzzle
Center the white muzzle below the eyes.
The top of the muzzle should sit approximately around Round 7–8, depending on the exact position of your eyes.
Pin it in place before sewing.
Sew around the edge of the muzzle with the long yarn tail, keeping the stitches small and even.
If you added a little stuffing to the muzzle, make sure it remains slightly rounded but not bulky.
6. Add the Bow Tie
Place the mint green bow directly below the muzzle.
Center it carefully before sewing.
A small bow works well for this miniature bear, so avoid making it too large compared with the face.
Sew through the center and back of the bow several times to keep it securely attached.
7. Finish the Bear
Check all sewn pieces from the front, back, and sides.
Make sure:
- both ears are at a similar height
- both arms are positioned evenly
- the legs are attached securely
- the eyes are level
- the muzzle is centered
- the bow tie is attached firmly
Weave in the remaining yarn ends and trim any excess yarn.
Tips for a Neater Mini Bear
Keep your tension tight
Amigurumi looks cleaner when the stitches are tight enough that the stuffing does not show through.
If you can easily see large gaps between your stitches, try using a smaller hook.
Stuff gradually
Adding too much stuffing at once can stretch the crochet fabric and make the bear look uneven.
Add a little at a time and shape the head and body with your fingers as you work.
Use pins before sewing
This is especially helpful for small amigurumi.
Place the ears, arms, legs, and muzzle with pins first. Look at the bear from the front and side before sewing anything permanently.
Leave long sewing tails
Short yarn tails can make small pieces difficult to attach securely. Leaving a longer tail gives you enough yarn to sew around the entire edge.
Check the face before securing the eyes
Safety eyes are difficult to reposition once the backs have been attached.
Place both eyes first and check their distance and height before locking them into place.
Common Problems
The bear looks too flat
Add a little more fiberfill and shape the head and body with your fingers. Avoid packing the stuffing too tightly.
The stuffing is visible
Your crochet tension may be too loose for the hook and yarn combination. Try a smaller hook or crochet more tightly.
The ears look uneven
Do not sew them immediately after crocheting. Pin both ears first and compare their height and angle from the front.
The face does not look centered
The muzzle and eyes can look off-center even when the difference is only one stitch. Before sewing the muzzle, use the center of the head as a guide and compare both sides.
The bear does not sit evenly
Check the position of both legs. If one leg is slightly higher, carefully adjust it before sewing the final stitches.
Color Ideas
You can keep the traditional light brown bear with a white muzzle and mint green bow, or change the colors to suit your project.
Some simple combinations are:
- Cream bear with pastel pink bow
- Dark brown bear with cream muzzle
- Beige bear with sage green bow
- White bear with soft blue bow
- Light gray bear with dusty pink bow
Using the same pattern with different yarn colors is an easy way to make a small collection of bears.
Making the Bear Larger or Smaller
The easiest way to change the finished size is to use a different yarn weight and an appropriate hook size.
Thicker yarn and a larger hook will generally create a larger bear.
Thinner yarn and a smaller hook will create a smaller bear.
Keep in mind that changing the yarn and hook also changes the size of the individual pieces, so the finished proportions may vary.
Is This Mini Bear Suitable for Beginners?
Yes. The pattern mainly uses single crochet, increases, decreases, and simple sewing.
The most important part for a beginner is keeping track of the stitch counts and placing the facial features carefully.
If you are new to amigurumi, using a stitch marker and counting each round will make the pattern much easier to follow.
Safety Note
This bear is made with small parts, including safety eyes and crocheted pieces.
Safety eyes and other small components can be a choking hazard. If the finished bear is intended for a young child, use embroidered facial features instead of safety eyes and make sure every sewn piece is securely attached.
Keep loose yarn, small parts, and unfinished pieces away from babies and pets.
Frequently Asked Questions
Can I use a different yarn color?
Yes. Any color combination can be used. The stitch counts remain the same.
Can I use embroidered eyes instead of safety eyes?
Yes. Embroidered eyes are a good option when you want to avoid plastic safety eyes.
Can I make the bear bigger?
Yes. Using thicker yarn and a larger hook will usually produce a larger bear.
Can I make the bear without a bow tie?
Of course. The bow tie is a decorative detail and can simply be left off.
Do I have to use cotton yarn?
No. Cotton is useful for small amigurumi because it gives the stitches a clear shape, but other yarn fibers can also be used. The finished size and texture will change depending on the yarn.
Copyright
This crochet pattern is an original Amyliva Handmade design.
You may make finished bears for personal use or in small quantities with credit to Amyliva Handmade. Please do not copy, repost, translate, redistribute, or publish this pattern or the photographs as your own.
If you would like to share the pattern, please share the original Amyliva Handmade link rather than reproducing the instructions.
Happy crocheting!




3 comments