Crochet Snowflake Ornament – Free Crochet Pattern
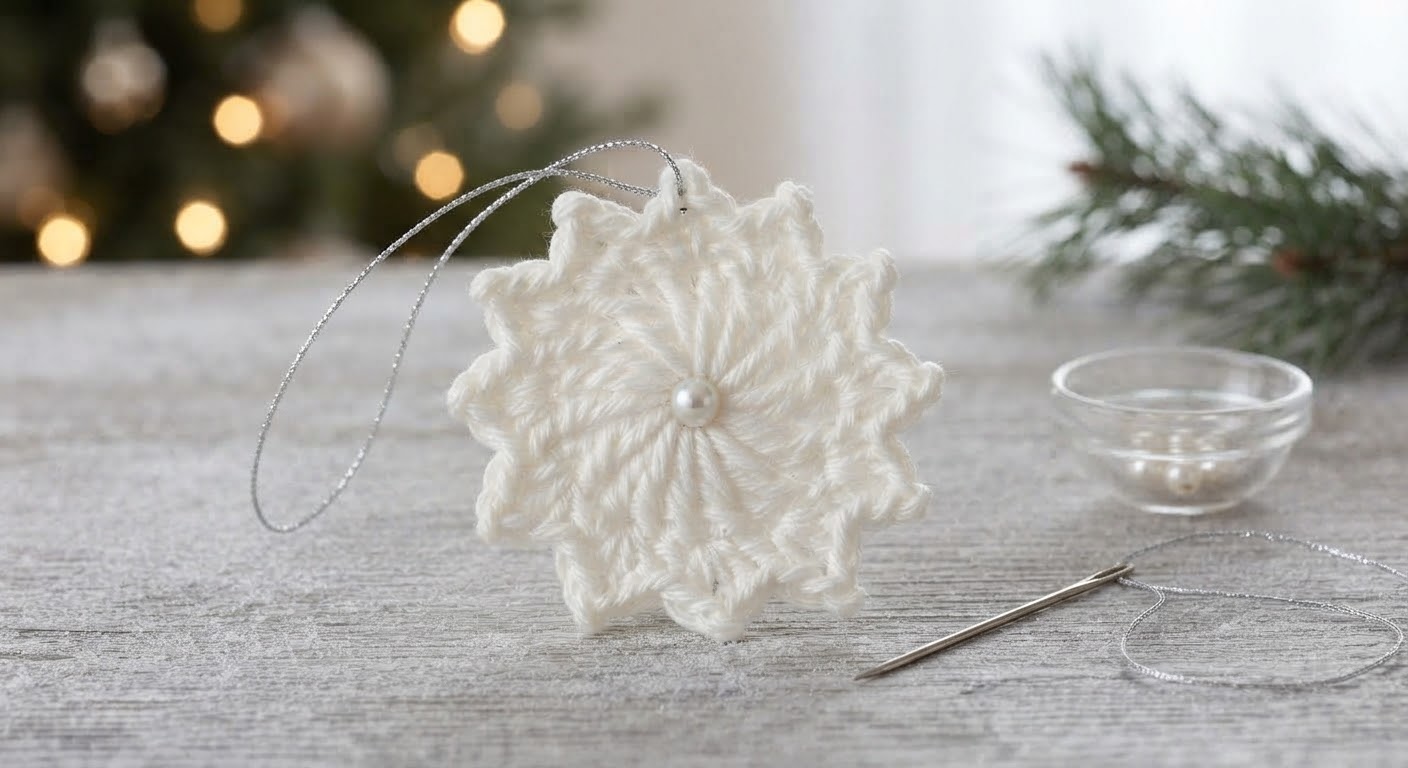
This crochet snowflake ornament is a small project that can be used for Christmas tree decorations, gift wrapping, or other winter displays. It is worked in the round with basic crochet stitches and finished with a simple picot-style edging.
The snowflake uses a small amount of fingering or 4-ply cotton yarn, making it a useful project for leftover yarn. After crocheting, the finished piece can be blocked to help define the shape and keep the 12-point design flat.
You can make the snowflake in white, cream, icy blue, or another color that suits your holiday decorations. A small thread or ribbon loop can be added to turn it into a hanging ornament.
Materials and Tools
- Fingering or 4-ply cotton yarn in white, pearl, or icy blue — approximately 5–10 g per snowflake
- 2.5 mm crochet hook, or a size that gives you firm stitches
- Tapestry needle
- Scissors
- Blocking mat or foam board
- Rustproof pins
- Small spray bottle
- Optional: fabric stiffener or white glue for stiffening
- Optional: metallic thread or thin ribbon for a hanging loop
- Optional: small pearl or bead for decoration
Crochet Abbreviations
US crochet terms are used throughout the pattern.
- ch – chain
- sl st – slip stitch
- sc – single crochet
- dc – double crochet
- st(s) – stitch(es)
Skill Level
Easy to intermediate
Size and Gauge
Finished diameter: approximately 3.5–4 inches (9–10 cm)
Gauge: Not critical for this project. Work with firm, even tension to help the snowflake keep its shape.
Crochet Snowflake Pattern
Round 1 – The Center
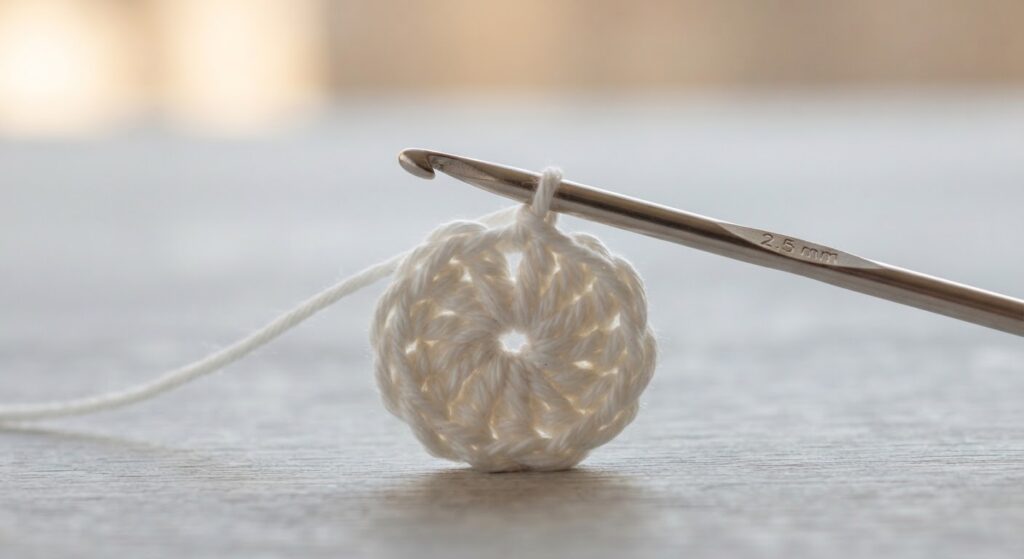
Make a magic ring.
Ch 3. This counts as the first dc.
Work 11 dc into the magic ring. You should have 12 dc in total, including the starting ch-3.
Join with a sl st to the top of the starting ch-3.
Pull the magic ring tight to close the center.
Round 2 – Foundation Loops
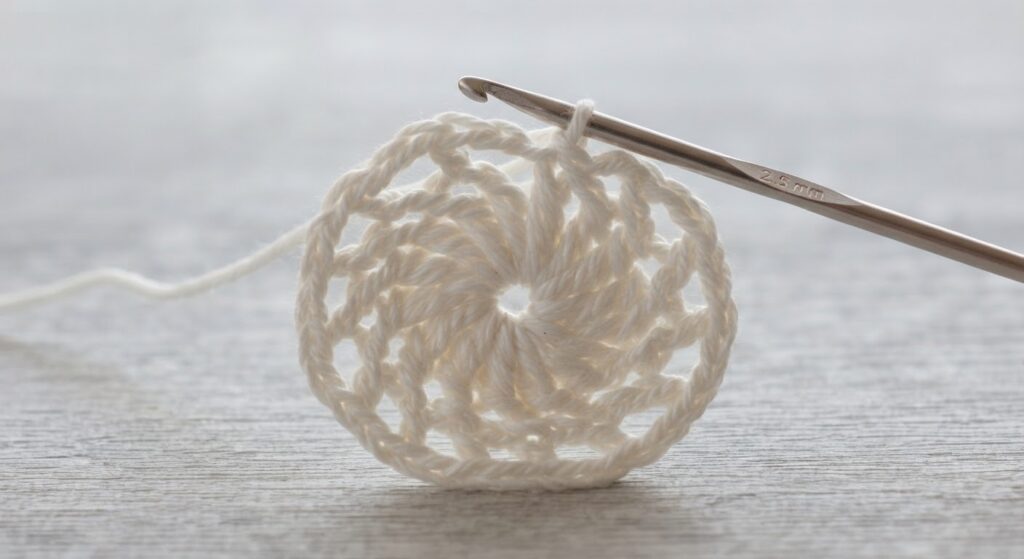
Ch 1.
Sc in the same stitch, ch 3.
Repeat from * around, working into each stitch of the previous round. You should have 12 ch-3 spaces.
Join with a sl st to the first sc.
Round 3 – Creating the Petal Base
Sl st into the next ch-3 space.
Ch 3 (counts as the first dc), 2 dc, ch 2, 3 dc in the same ch-3 space. This creates the first shell.
Skip the next sc, sl st into the next ch-3 space, then work 3 dc, ch 2, 3 dc in the same space.
Repeat from * around until you have 12 shells.
Join with a sl st to the top of the starting ch-3.
Round 4 – Forming the Points
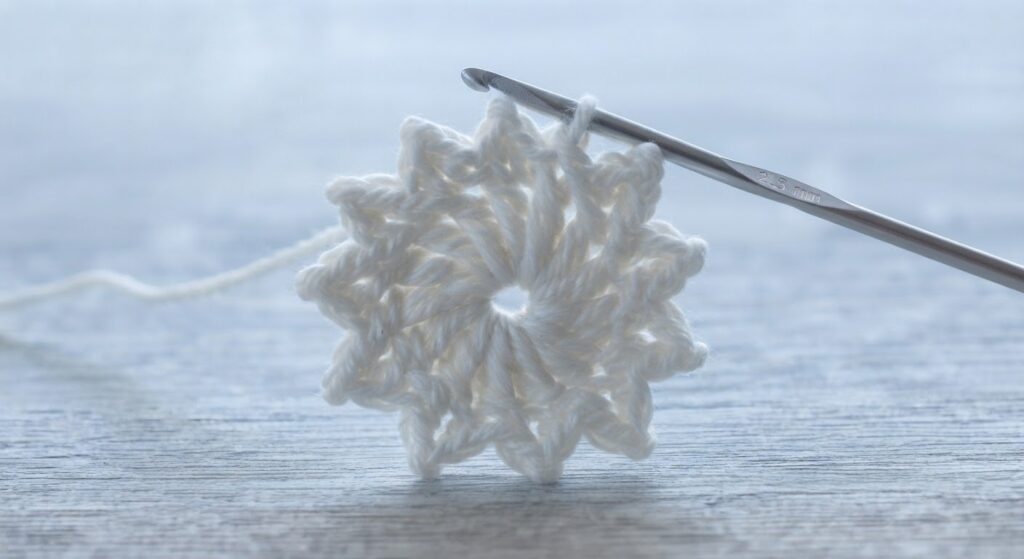
Sl st into the next ch-2 space.
Ch 1, sc in the same space, ch 5, sc in the same space.
Move to the next shell and work sc in its ch-2 space, ch 5, sc in the same space.
Repeat from around all 12 shells.
Join with a sl st to the first sc.
Round 5 – Adding the Picot-Style Edges
Sl st into the first ch-5 loop.
Ch 1, then work (sc, ch 3, sc) in the same ch-5 loop.
Repeat (sc, ch 3, sc) in each ch-5 loop around.
Join with a sl st, fasten off, and weave in the ends neatly.
Blocking and Stiffening
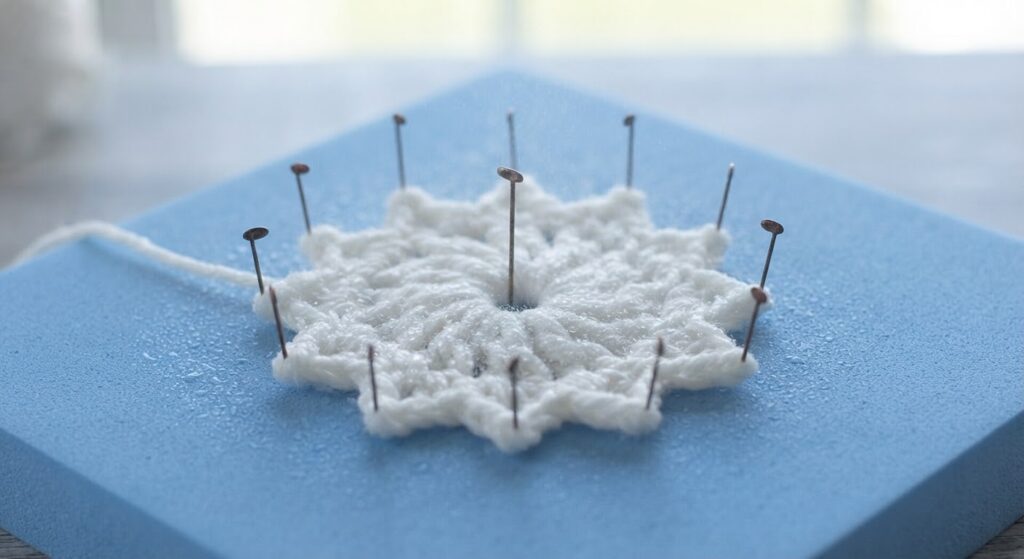
Blocking helps open up the snowflake points and gives the finished ornament a more defined shape.
- Lightly spray the finished snowflake with water until it is damp.
- Place it on a blocking mat or foam board and gently pin each point, keeping the 12-point shape as even as possible.
- Allow the snowflake to dry completely, usually for 12–24 hours.
- If you want a firmer ornament, apply a 50:50 mixture of white glue and water to both sides. Reshape and pin the snowflake again, then allow it to dry completely.
Make sure the snowflake is completely dry before removing the pins.
Finishing the Snowflake
- Add a small metallic thread or thin satin ribbon loop at the top if you want to hang the snowflake as an ornament.
- If desired, sew a small pearl or bead to the center for a decorative detail.
- Use the finished snowflake as a Christmas tree ornament, gift tag, or winter decoration.
Variations
Change the Size
Use a smaller or larger crochet hook to create a different-sized snowflake. Keep your tension firm so the finished piece holds its shape.
Try Different Colors
White is a classic choice, but you can also use cream, icy blue, silver, or other colors that suit your winter decorations.
Add Beads
For extra decoration, sew small seed beads or pearls onto the finished snowflake after blocking and stiffening.
Make a Layered Snowflake
Make two snowflakes and sew them together with the points slightly offset to create a simple layered effect.
Frequently Asked Questions
Is this crochet snowflake pattern beginner-friendly?
This pattern is suitable for crocheters who are comfortable with basic stitches and working in the round. The picot-style edging and shaping require some attention to stitch placement.
How long does one snowflake take to make?
The crocheting itself usually takes about 30–40 minutes, depending on your experience and crochet speed. Blocking and stiffening will add additional drying time.
Can I sell finished snowflakes made from this pattern?
Yes. You may sell finished snowflakes made from this pattern. Please credit AmyLiva Handmade as the pattern designer when sharing or selling your finished items.
How can I make the snowflake sparkle?
You can use metallic thread, sew on small beads or pearls, or add other lightweight decorative details after the snowflake has been blocked and dried.
Pattern Usage
This crochet pattern was designed and written by AmyLiva Handmade.
You may use this pattern to make snowflakes for personal use or small-quantity sale. Please credit AmyLiva Handmade as the pattern designer when sharing or selling finished items made from this pattern.
The written pattern may not be copied, reproduced, translated, or redistributed, in whole or in part.

Yorum gönder