Easy Amigurumi Heart Pattern: Free Crochet Tutorial
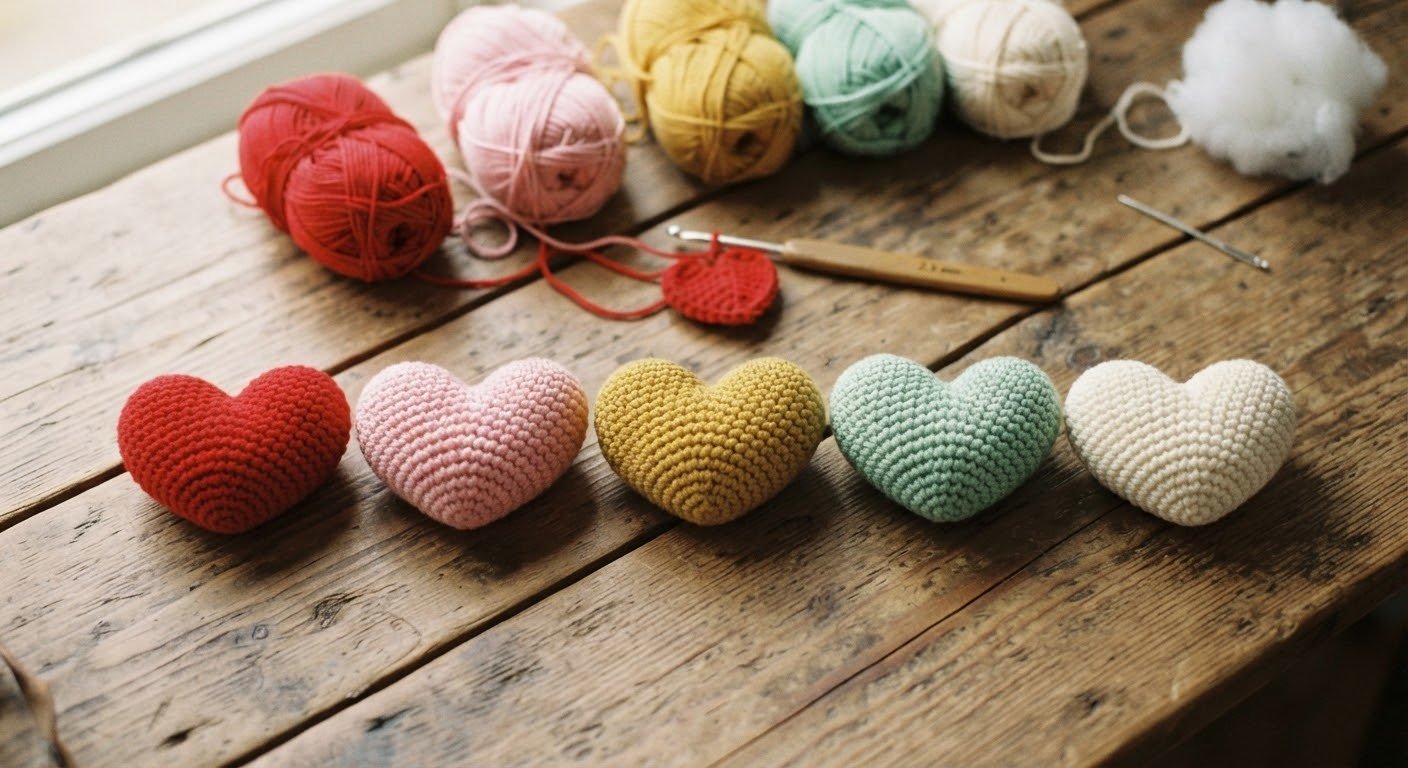
This little amigurumi heart is a lovely way to use a small amount of yarn and practise shaping a crochet project. It is made from two rounded top pieces that are joined together before you crochet the lower part of the heart.
The pattern uses basic stitches, including single crochet, increases, and decreases. The main part to take slowly is joining the two rounded pieces. Keeping them aligned helps create a balanced heart shape, with two even curves at the top and a neat point at the bottom.
You can make the heart in red, pink, cream, or any color you like. Once finished, it can be used as a small decoration, a handmade gift, or a keychain.
In this tutorial, you’ll find the materials list, US crochet terms, round-by-round instructions, joining guidance, stuffing tips, and ideas for using your finished heart. The final size will depend on your yarn, hook size, and crochet tension.
Materials and Tools
You only need a few basic supplies to crochet this amigurumi heart.
- Yarn: A small amount of cotton yarn or medium-weight acrylic yarn. Choose a smooth yarn so your stitches are easy to see.
- Crochet hook: A 2.5 mm hook, or a size that gives you a firm fabric with no visible gaps.
- Fiberfill stuffing: Use small amounts at a time so you can shape the heart evenly.
- Yarn needle: For closing the final opening and weaving in the ends.
- Scissors: To cut the yarn neatly.
- Stitch marker: Optional, but useful for marking the beginning of each round.
A useful tip: Your stitches should be tight enough to keep the stuffing from showing through. If you can see gaps between the stitches, try a smaller hook. The finished heart size will vary depending on your yarn and tension.
How Long Does It Take to Crochet This Heart?
Most crocheters can finish this heart in about 1–2 hours. If you are new to amigurumi, allow a little extra time to count your stitches, join the two rounded pieces, and shape the heart neatly.
The crocheting itself is fairly quick. Joining the top pieces and distributing the stuffing evenly usually require the most attention.
If this is your first heart, take your time with the decreases near the bottom. A few minutes spent shaping the heart as you work can make a noticeable difference to the finished result.
Best Yarn for Crochet Hearts
Cotton yarn is a good choice for this heart because it gives the stitches clear definition and helps the finished shape hold its form. It is especially useful if you want a neat, firm finish.
A smooth acrylic yarn also works well and can give the heart a softer feel. Choose a yarn you are comfortable working with, particularly if you are still learning to crochet amigurumi.
Keep in mind that changing the yarn will affect the finished size. A thicker yarn will usually make a larger heart, while a finer yarn will produce a smaller one. If you change the yarn weight, you may also need to adjust your hook size to keep the stuffing from showing through.
For your first attempt, I recommend using one smooth yarn throughout the project. It makes it easier to see your stitches and spot any uneven increases or decreases.
Basic Stitches and Techniques
This pattern uses a few common crochet stitches. If you are familiar with single crochet and simple increases and decreases, you should be able to follow the instructions.
- MR (Magic Ring): A loop that can be pulled closed to create a tight starting circle.
- sc (Single Crochet): Insert the hook into the stitch, yarn over and pull up a loop, yarn over again, and pull through both loops.
- inc (Increase): Work 2 single crochet stitches into the same stitch to increase the stitch count by one.
- dec (Decrease): Combine two stitches into one. An invisible single crochet decrease helps keep the outside of the heart looking neat.
- sl st (Slip Stitch): Insert the hook into the stitch, yarn over, and pull through both the stitch and the loop on the hook.
- st(s) (Stitch/Stitches): The individual loops you work into during a round.
Reading the Pattern
The instructions use US crochet terminology. Numbers in parentheses show how many times to repeat a sequence, and the number in square brackets gives the total stitch count at the end of that round.
For example, (1 sc, inc) × 6 [18] means you work 1 single crochet, then an increase, and repeat that sequence six times to make 18 stitches.
Use a stitch marker to mark the first stitch of each round. It makes counting easier and helps prevent the heart from becoming uneven because of a missed or extra stitch.
Free Amigurumi Heart Pattern (US Terms)
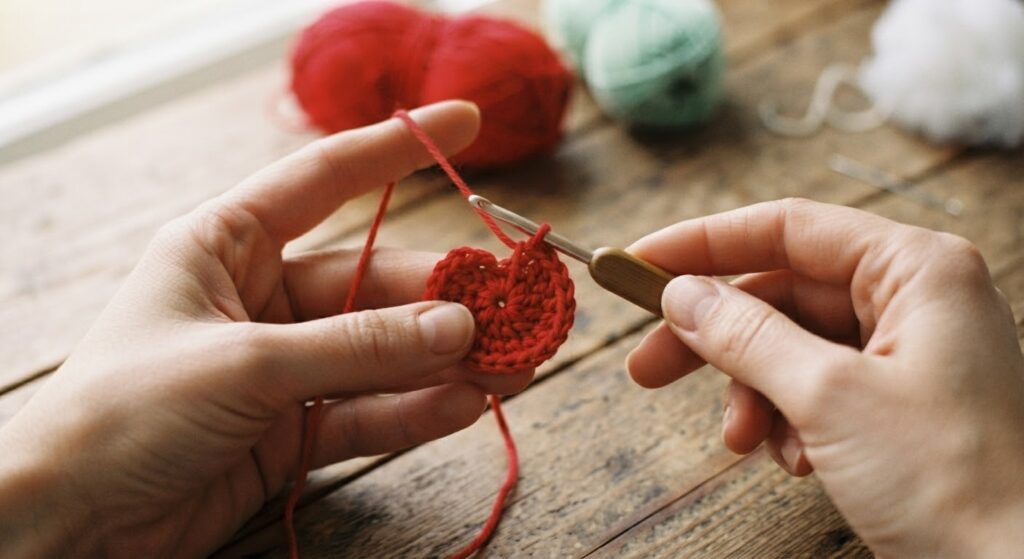
Part 1: Crochet the Two Top Pieces (Make 2)
You will crochet two small rounded pieces to form the top curves of the heart. Make both pieces using the same yarn, hook, and stitch count so they are as similar in size as possible.
Round 1: Make 6 sc in a magic ring. [6]
Round 2: Inc in each stitch around. [12]
Round 3: (1 sc, inc) × 6. [18]
Fasten off the first piece and weave in its yarn tail. Leave the second piece attached to the yarn, as you will use it to begin joining the two pieces.
Before moving on, count the stitches in both pieces. Each should have 18 stitches. Matching stitch counts will make the joining step easier and help keep the top of the heart balanced.
Part 2: Join the Two Top Pieces
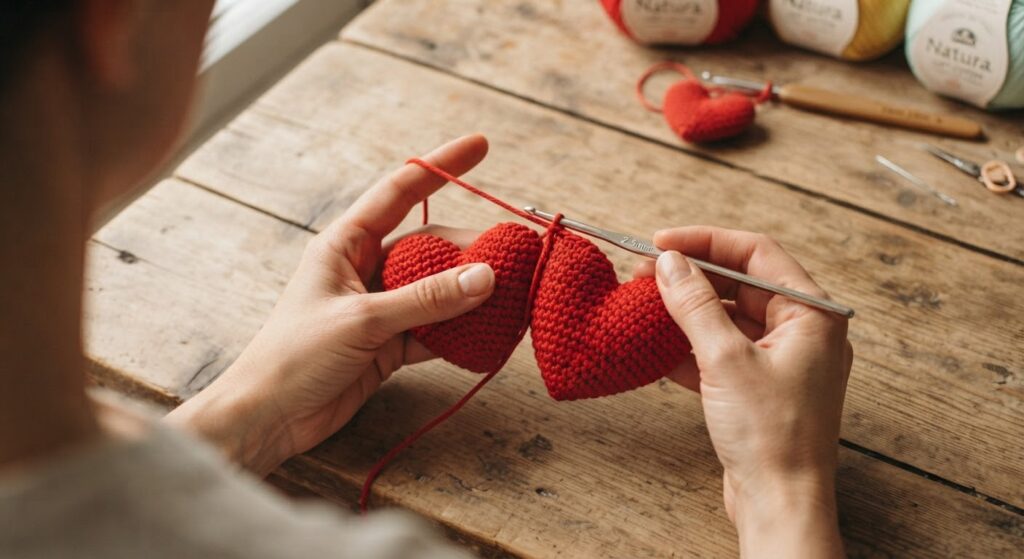
Place the two rounded pieces side by side, with the right sides facing outward. Check that both pieces sit at the same height before you begin joining them.
Using the yarn still attached to the second piece, work single crochet stitches through the stitches of both pieces where they meet. This connects the two rounded tops and creates the beginning of the heart shape.
Take your time as you work around the join. Keep the pieces aligned and check that neither one twists or folds inward.
Important: The joining method and stitch placement determine the stitch count for the next round. The pattern below assumes you have 36 stitches after joining the two 18-stitch pieces. Count your stitches before moving on.
Part 3: Crochet the Heart Shape
Round 4: After joining the two top pieces, sc in each stitch around. Count your stitches at the end of the round. The expected total is 36 stitches if the joining method has created 36 stitches. [36]
Rounds 5–6: Sc in each stitch around. [36 each round]
Round 7: (4 sc, dec) × 6. [30]
Round 8: (3 sc, dec) × 6. [24]
Round 9: (2 sc, dec) × 6. [18]
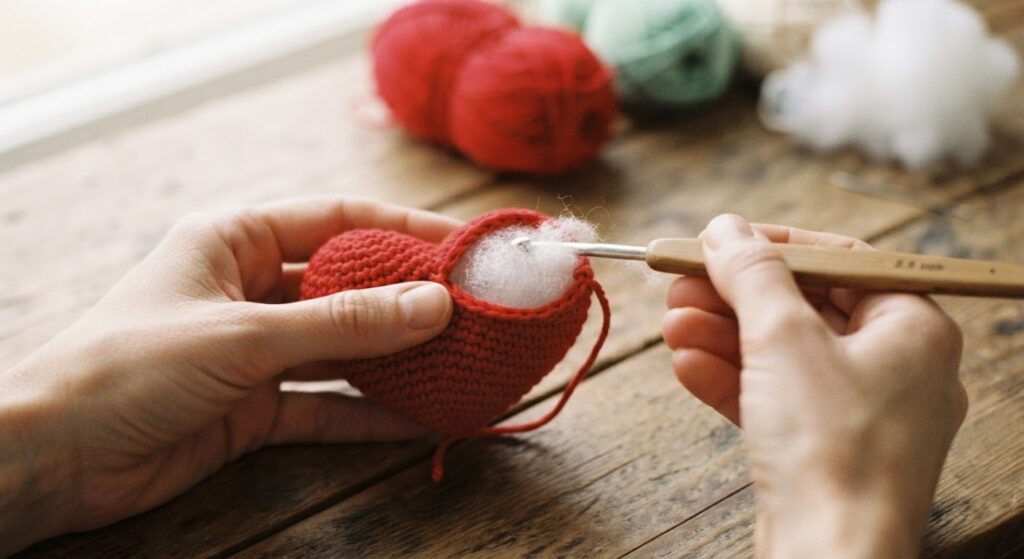
Begin adding fiberfill. Distribute it evenly under both rounded tops and along the sides, keeping the center neat.
Round 10: (1 sc, dec) × 6. [12]
Add a little more stuffing if needed, but leave enough room to close the opening comfortably.
Round 11: Dec around. [6]
Fasten off, leaving a yarn tail. Using a yarn needle, thread the tail through the front loops of the remaining stitches and pull gently to close the opening. Weave in the end securely.
Shape the heart with your fingers, gently rounding the two top curves and defining the point at the bottom.
Beginner Tips for Success
A few small details can make a noticeable difference to the finished heart.
- Use a stitch marker: Mark the first stitch of every round, especially when working increases and decreases. It is easy to lose track when crocheting in a spiral.
- Keep both top pieces similar: Use the same tension for both pieces and count each round. If one is larger than the other, the top of the heart may look uneven after joining.
- Check the shape as you go: After joining the pieces, pause to make sure they sit at the same height and face outward.
- Stuff gradually: Add small amounts of fiberfill rather than pushing in one large piece. This makes it easier to fill the curves evenly without stretching the stitches.
- Shape the point carefully: As you work the lower rounds, guide the stuffing toward the sides and away from the closing opening. This helps the bottom form a clearer point.
- Check for gaps: If the stuffing shows through, try using a smaller hook or adjusting your tension on the next attempt.
If your first heart is not perfectly symmetrical, don’t worry. Small differences are common in handmade crochet, and careful stitch counting and gentle shaping can help improve the result.
Finishing Your Crochet Heart
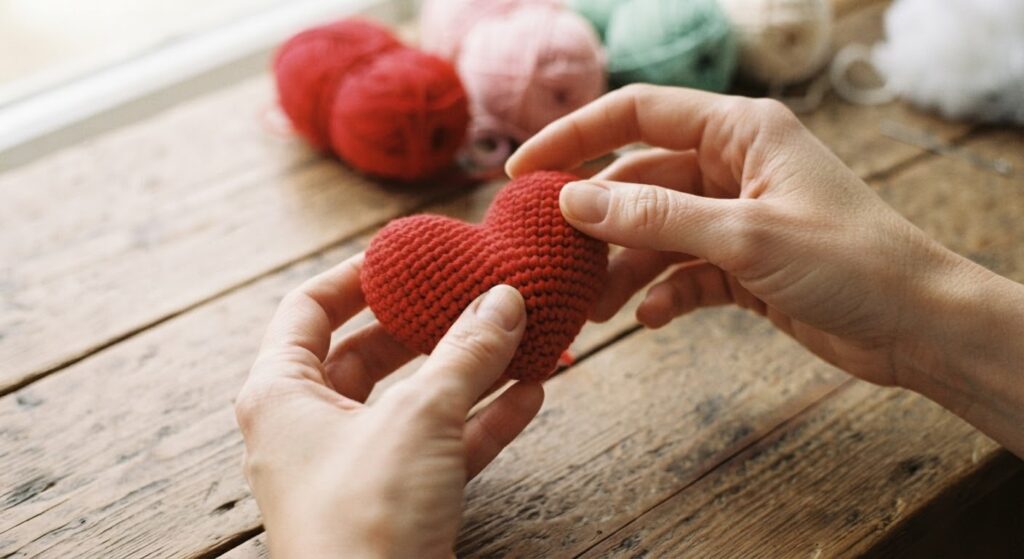
Once you have closed the final opening, take a moment to shape the heart before weaving in the yarn tail completely.
Use your fingers to round out the two upper curves and gently define the point at the bottom. If one side looks fuller than the other, move the stuffing around with your fingers until the shape looks more balanced.
Check the center where the two top pieces meet. If it looks bulky, gently adjust the stuffing underneath rather than pulling the stitches too tightly.
Weave in the remaining yarn securely, then trim the excess. Avoid cutting too close to the stitches, as the yarn end could work loose with handling.
Before using the heart as a gift or decoration, check that there are no loose yarn ends and that the stuffing is fully enclosed. If you plan to attach it to a keychain, make sure the attachment is secure before use.
Creative Ways to Use Your Crochet Heart
Once you have finished your amigurumi heart, there are several ways to use it. Its small size makes it suitable for quick handmade gifts and simple accessories.
- Keychain: Attach a metal keyring using a secure loop of yarn or a suitable connector. Check the attachment regularly if the heart will be handled often.
- Gift decoration: Tie the heart to a wrapped present or gift bag for a personal handmade touch.
- Valentine’s Day gift: Make a pair of hearts in red and pink, or choose colors that match the recipient’s taste.
- Home decoration: Display a few hearts in a small bowl, place them on a shelf, or use them as part of a seasonal arrangement.
- Garland: Crochet several hearts in coordinating colors and join them along a length of yarn to make a simple decorative garland.
- Bag charm: Attach a sturdy loop to the top and use the heart as a decorative charm on a bag or backpack.
You can also experiment with different yarn colors to make the same pattern suitable for birthdays, anniversaries, or everyday gifts. If making the heart for a young child, avoid small detachable parts and follow appropriate toy-safety guidance.
Things to Watch For
A few details are worth checking while you crochet your heart. Catching small problems early is easier than trying to correct the shape after the opening has been closed.
- Uneven top curves: Make sure both rounded pieces have the same stitch count and are similar in size before joining them.
- A bulky join: Keep the two pieces aligned and avoid pulling the joining stitches too tightly. Excess tension can make the center look pinched.
- Visible stuffing: If fiberfill shows through the stitches, use smaller amounts of stuffing and check whether your hook is too large for your yarn.
- A rounded rather than pointed bottom: Pay attention to the decrease rounds and guide the stuffing away from the bottom opening as you shape the heart.
- A lopsided finish: Before fastening off, compare both sides and gently redistribute the stuffing with your fingers.
The heart may look a little flat while you are still crocheting it. Shape it gently after stuffing and closing, but avoid pulling the stitches hard, as this can distort the fabric.
Common Mistakes to Avoid
Even a simple amigurumi heart can look different depending on stitch tension, joining, and stuffing. These are the most common problems to watch for.
- Skipping stitch counts: Missing an increase or decrease can change the shape. Count each round before moving on.
- Making the top pieces different sizes: Use the same yarn and hook for both pieces, and check that each has 18 stitches after Round 3.
- Joining the pieces unevenly: Align the two rounded pieces before joining them. If one sits higher than the other, the finished heart may look tilted.
- Overstuffing the heart: Too much fiberfill can stretch the stitches and make the heart look round instead of clearly shaped. Add stuffing gradually.
- Pulling the closing yarn too hard: Close the final opening gently to avoid puckering or distorting the bottom point.
- Leaving loose ends: Weave in the yarn tails securely so they do not work loose with use.
If the heart does not look quite right on your first attempt, check the stitch counts and stuffing before starting again. Often, a small adjustment is enough to improve the shape.
Changing the Size of Your Amigurumi Heart
You can make this heart in different sizes by changing the yarn and hook. The stitch counts in the pattern can stay the same, but the finished dimensions will vary.
- For a smaller heart: Use finer yarn and a smaller hook. Keep your stitches tight enough to prevent the stuffing from showing.
- For a larger heart: Choose a thicker yarn and a suitable larger hook. Check that the fabric still feels firm and holds the stuffing securely.
- For a softer heart: Use a yarn with a softer texture, but avoid stuffing too firmly if you want a more flexible finish.
Changing yarn weight will affect the final size, so an exact measurement cannot be guaranteed without making a sample. If you need several hearts to be the same size, use the same yarn, hook, and tension for each one.
For a first project, I recommend following the original materials and stitch counts before experimenting with different sizes.
Care and Use
How you care for your crochet heart depends on the yarn you use. Check the yarn label for washing instructions, especially if you are making the heart as a gift.
- Spot cleaning: For a small mark, gently dab the area with a clean cloth and a little cool water. Avoid rubbing, which may distort the stitches.
- Hand washing: If the yarn label allows it, wash gently in cool water with mild detergent. Do not twist or wring the heart.
- Drying: Press out excess water with a towel and leave the heart to air-dry completely. Reshape the curves and point while it is still slightly damp.
- Keeping its shape: Store the heart somewhere dry and avoid placing heavy items on top of it for long periods.
If you have used safety eyes, glued decorations, or a keychain fitting, check their care requirements separately. A handmade heart with small detachable parts is a decoration or accessory, not automatically a safe toy for young children.
My Personal Suggestions
If this is your first time making an amigurumi heart, I recommend concentrating on three things: matching the top pieces, keeping track of your stitches, and adding the stuffing gradually.
Before joining the pieces, place them side by side and compare their size. Even a small difference can become more noticeable once the heart is assembled.
I also recommend checking the shape before closing the final opening. It is much easier to move the fiberfill around while you can still reach inside. Use small amounts and work them into the rounded sections without stretching the stitches.
For color choices, red and pink are classic, but cream, lilac, mint, and other soft shades work just as well. If you want to make several hearts as a set, using the same yarn and hook will help keep their sizes consistent.
Most importantly, don’t rush the joining step. A neat join and balanced stuffing will do more for the finished heart than trying to make every stitch look perfect.
Frequently Asked Questions
Why does my crochet heart look uneven?
The two rounded top pieces may have different stitch counts or tension. Check that both pieces have 18 stitches after Round 3, and compare their sizes before joining them. Uneven stuffing can also affect the final shape.
How much stuffing should I use?
Add fiberfill in small amounts until the heart feels gently firm. Use your fingers to distribute it evenly through the rounded tops and lower section. Too much stuffing can stretch the stitches and make the heart look bulky.
Can I use a different yarn?
Yes. Cotton and acrylic yarn both work well. Changing the yarn weight will change the finished size, so choose a suitable hook and keep your stitches firm enough to enclose the stuffing.
Can I turn this crochet heart into a keychain?
Yes. Attach a suitable keyring or connector securely to the top of the heart. Check the attachment before use, especially if the keychain will be handled frequently.
Which colors work best for a crochet heart?
Red and pink are traditional choices, but cream, white, lilac, yellow, and mint are also lovely options. You can choose colors to match a gift, season, or room.
How should I wash my finished heart?
Follow the care instructions for your yarn. If hand washing is suitable, use cool water and mild detergent, avoid wringing, and let the heart air-dry completely.
Is this pattern suitable for beginners?
The pattern uses basic stitches, increases, and decreases, so it can be a good practice project. Beginners should take extra care when joining the two top pieces and count each round to keep the shape balanced.
Final Thoughts
This easy amigurumi heart is a small project that lets you practise shaping, joining pieces, and working decreases. Once you understand how the two rounded tops come together, you can make more hearts in different colors for gifts, decorations, or accessories.
Take your time with the stitch counts and stuffing, especially near the bottom point. These small details help the heart keep its shape and give it a neat finish.
I hope this free crochet pattern gives you a useful starting point for your next handmade project. Choose your favorite yarn color, gather your supplies, and enjoy making your own little crochet heart.
Pattern Usage & Copyright
This crochet pattern is provided for personal use and enjoyment. You may make finished crochet hearts for yourself or as gifts.
If you share photos of a heart made from this pattern on social media, please credit Amyliva Handmade and link to Amyliva.com when possible.
Please do not copy, republish, or redistribute the written pattern or present it as your own. If you would like to share the pattern with others, direct them to this original page on Amyliva.com.
Thank you for supporting original crochet tutorials and the time that goes into creating free patterns.

Yorum gönder