Step by Step Amigurumi
amigurumi, amigurumi animal, amigurumi designs, AmyLiva Handmade, belly patch, crafts, Crochet Pattern, DIY, DIY amigurumi, free amigurumi pattern, free crochet pattern, handmade, handmade toy, HandmadeWithLove, kawaii crochet, knitting, soft baby doll, storytelling amigurumi
admin
0 Yorumlar
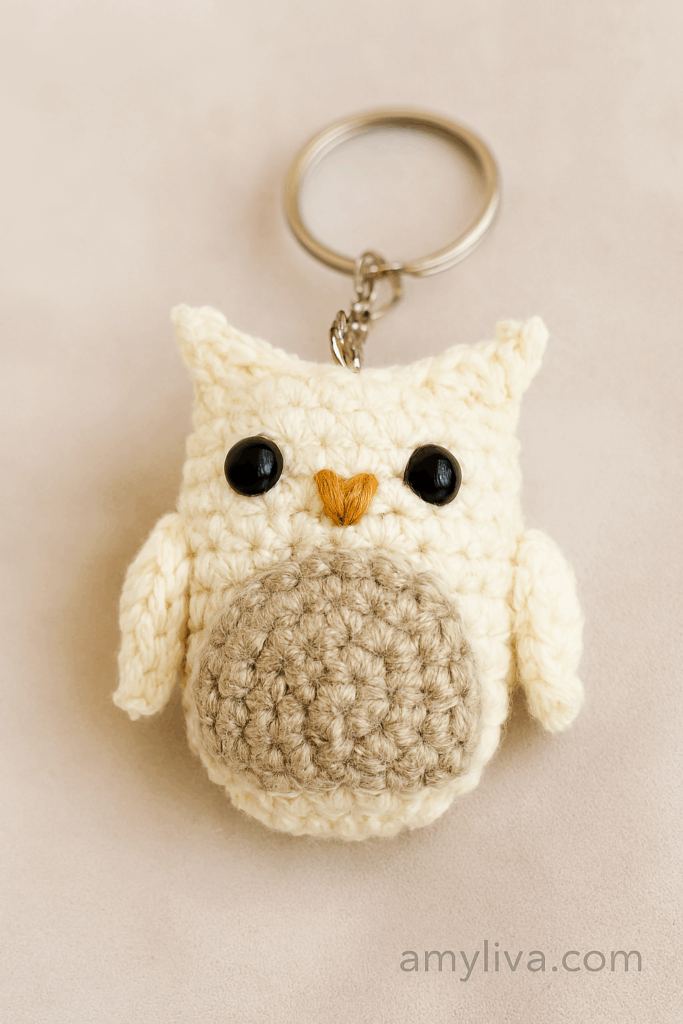
The Ultimate Guide to Crocheting Amigurumi Owl Keychains (Free Pattern)
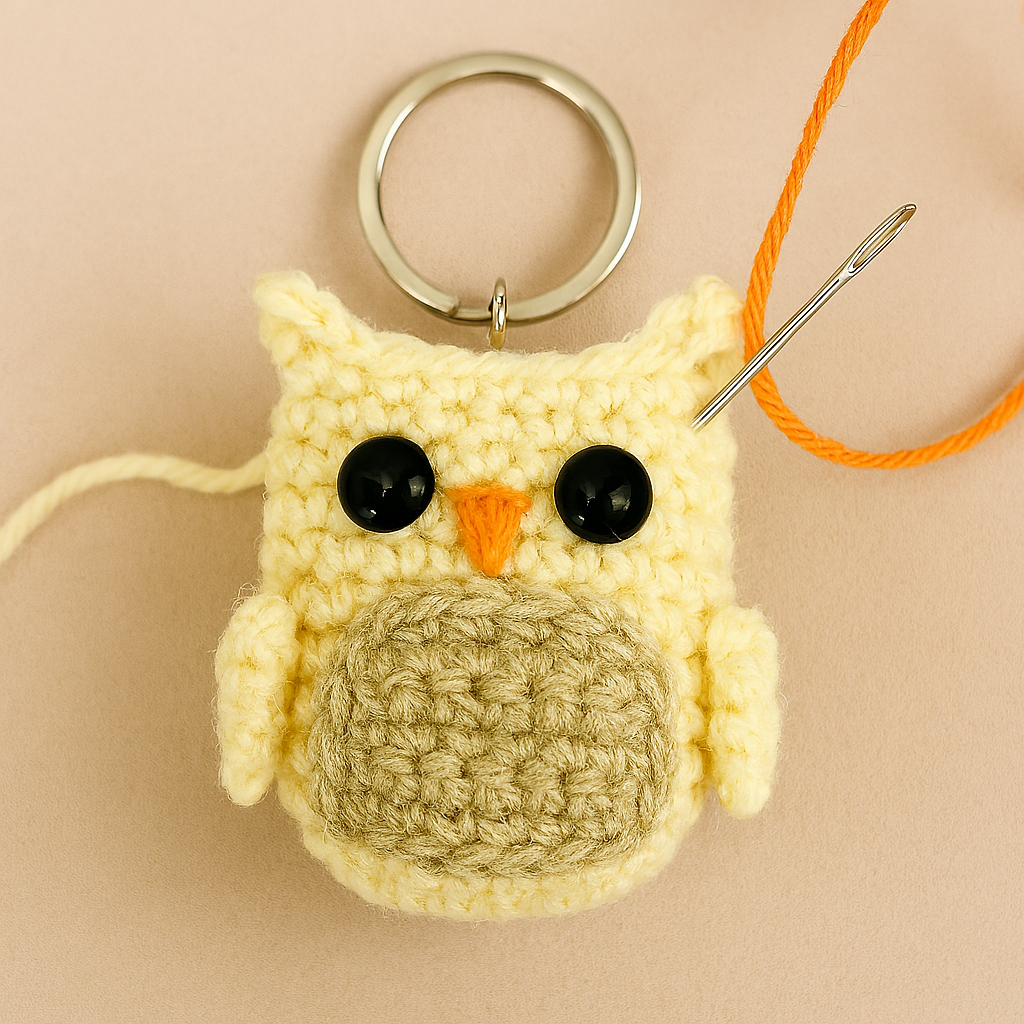
Welcome, fellow crafters, to your next obsession! Are you ready to dive into a project that’s not only incredibly cute but also perfect for using up leftover yarn? Our adorable crocheted owl keychains are more than just a charming accessory—they’re a delightful, quick, and satisfying project that anyone, from a beginner to a seasoned pro, can master. This is the only guide you’ll ever need to make your very own owl keychain, complete with a free, step-by-step pattern, and all the tips and tricks to make your finished piece truly unique.
The Magic of Amigurumi: Why These Owls Are So Special
Amigurumi, the Japanese art of crocheting small stuffed creatures, is a wonderfully meditative craft. It’s all about creating something with character, and these owls are no exception. Their big, expressive eyes and plump bodies give them a personality all their own.
• A Quick & Rewarding Project: Unlike larger amigurumi projects, these keychains can be completed in just a few hours. You get the joy of finishing a craft without the long-term commitment.
• Perfect for Gifts: Handcrafted gifts show you care. These little owls make thoughtful presents for friends, family, or as unique party favors.
• Scrap Yarn Buster: Got a bin full of yarn scraps? This is the perfect project to turn those small bits into something beautiful and useful.
• Portable and Practical: Once finished, they’re not just for display. Attach them to your keys, backpack, or purse to add a personal, handmade touch to your everyday items.
Before You Begin: What You’ll Need
Having the right tools is the first step to a successful project. Here’s a comprehensive checklist of materials you will need to follow this pattern.
• Yarn: Worsted weight yarn is recommended. You’ll need three colors: a main body color (like the orange shown), a contrasting belly color (white), and a dark color for the eyes (black or dark brown). A small amount of yarn for the nose is also needed.
• Crochet Hook: A size G/6 (4.00 mm) hook works well for worsted-weight yarn. Choose a hook size that gives you a tight enough stitch so that the stuffing doesn’t show through.
• Safety Eyes: 6mm or 8mm safety eyes. These are essential for giving your owls their characteristic look.
• Poly-Fil or Fiberfill Stuffing: A good quality stuffing to make your owls plump and firm.
• Key Ring: The metal ring to turn your owl into a keychain.
• Tapestry Needle: For weaving in ends and sewing on the wings and eyes.
• Stitch Marker: To keep track of your rounds.
• Scissors: A small, sharp pair is best.
Amigurumi Essentials: A Quick Refresher for Beginners
If you’re new to amigurumi, a few key techniques will be your best friends. These aren’t just for this pattern; they’re the foundation of almost every amigurumi project you’ll ever make.
1. The Magic Ring: This is the most common way to start a project worked in the round. It creates a tightly closed center, preventing a hole from forming at the top of your owl’s head.
• How to: Wrap the yarn around your fingers to form a loop. Insert your hook into the loop, yarn over, and pull up a loop. Yarn over again and pull through both loops on your hook to create your first chain stitch. Work your first round of single crochet stitches into this ring.
2. Single Crochet Stitch (sc): The workhorse of amigurumi. It’s a simple stitch that creates a dense fabric, perfect for holding stuffing.
3. Increasing & Decreasing:
• Increase (inc): Work two single crochet stitches into the same stitch. This makes your work get wider.
• Invisible Decrease (inv dec): This technique creates a seamless decrease that is less noticeable than a regular decrease. It’s a game-changer for a smooth finish.
The Free Crochet Owl Keychain Pattern
Now for the fun part! This pattern is written in standard US crochet terms. Follow the instructions carefully and don’t be afraid to take your time. Remember to use a stitch marker at the beginning of each round to stay on track.
Materials:
• Worsted weight yarn in three colors (Color A, B, C)
• 4.00 mm crochet hook
• 6mm or 8mm safety eyes
• Fiberfill stuffing
• Tapestry needle, scissors
Instructions for the Body (Color A):
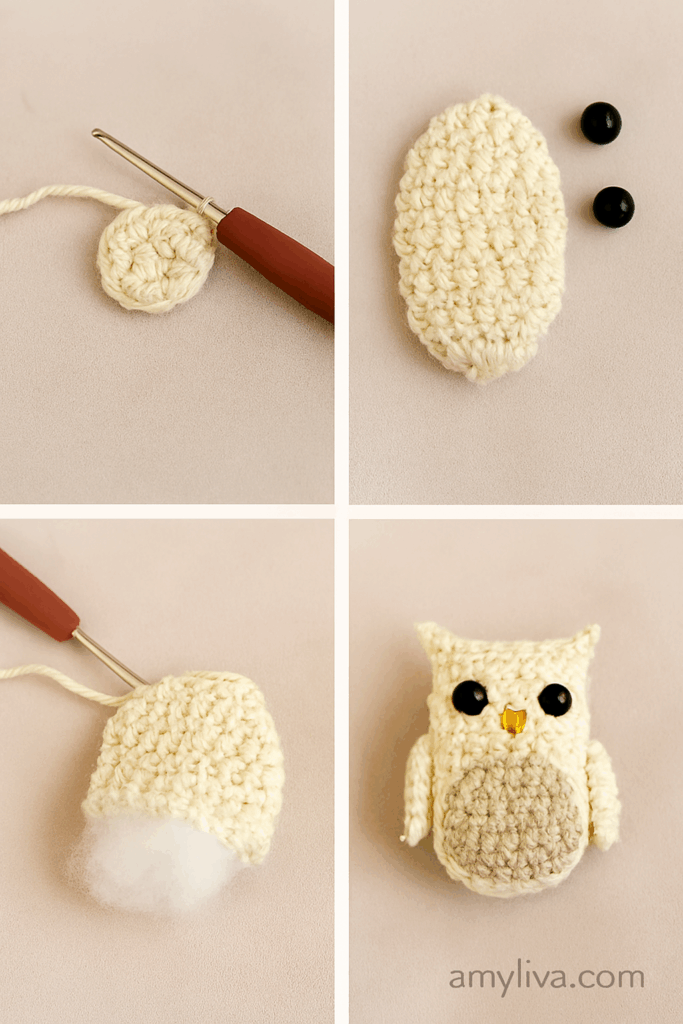
• Round 1: Start with a magic ring and work 6 sc into the ring. (6 stitches)
• Round 2: 2 sc in each stitch around. (12 stitches)
• Round 3: [1 sc, inc] x 6. (18 stitches)
• Round 4: [2 sc, inc] x 6. (24 stitches)
• Round 5: [3 sc, inc] x 6. (30 stitches)
• Rounds 6-10: Sc in each stitch around. (30 stitches)
• Round 11: [3 sc, inv dec] x 6. (24 stitches)
• Round 12: Sc in each stitch around. (24 stitches)
• Round 13: [2 sc, inv dec] x 6. (18 stitches)
• Stuff the body firmly. Add the safety eyes between rounds 9 and 10, about 6-8 stitches apart. Make sure they are centered.
• Round 14: [1 sc, inv dec] x 6. (12 stitches)
• Round 15: [Inv dec] x 6. (6 stitches)
• Fasten off and weave in the end to close the hole.
Instructions for the Belly Patch (Color B):
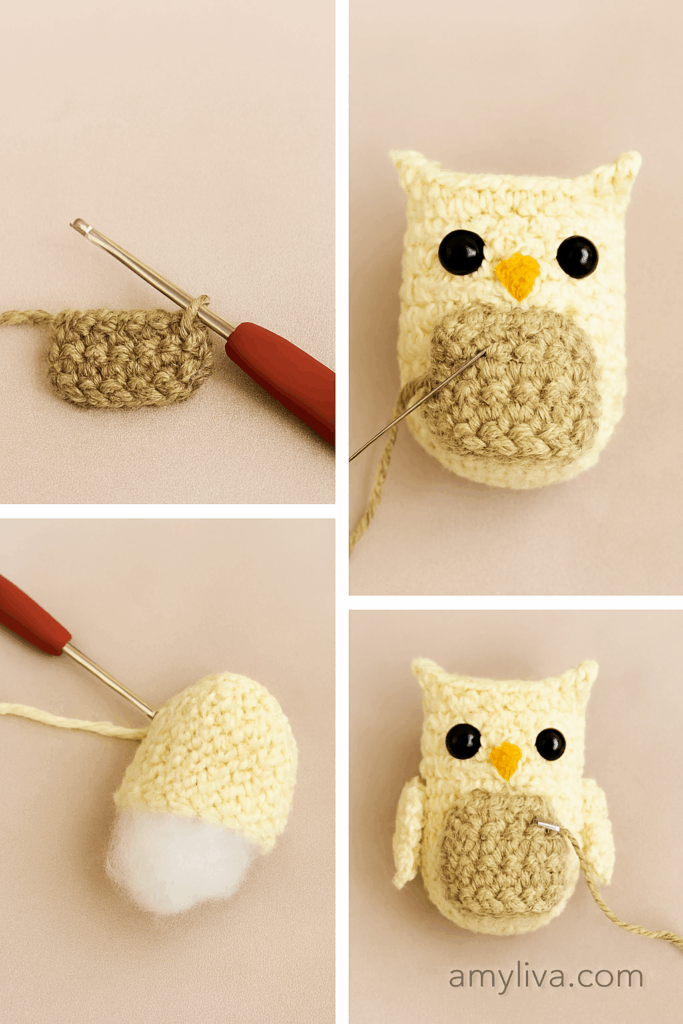
• Row 1: Chain 5. Starting in the 2nd chain from the hook, sc in each stitch across. (4 stitches)
• Row 2: Chain 1, turn. Sc in each stitch across. (4 stitches)
• Rows 3-4: Repeat Row 2.
• Fasten off, leaving a long tail for sewing. Using your tapestry needle, sew the belly patch onto the front of the body.
Instructions for the Wings (Make 2, Color A):
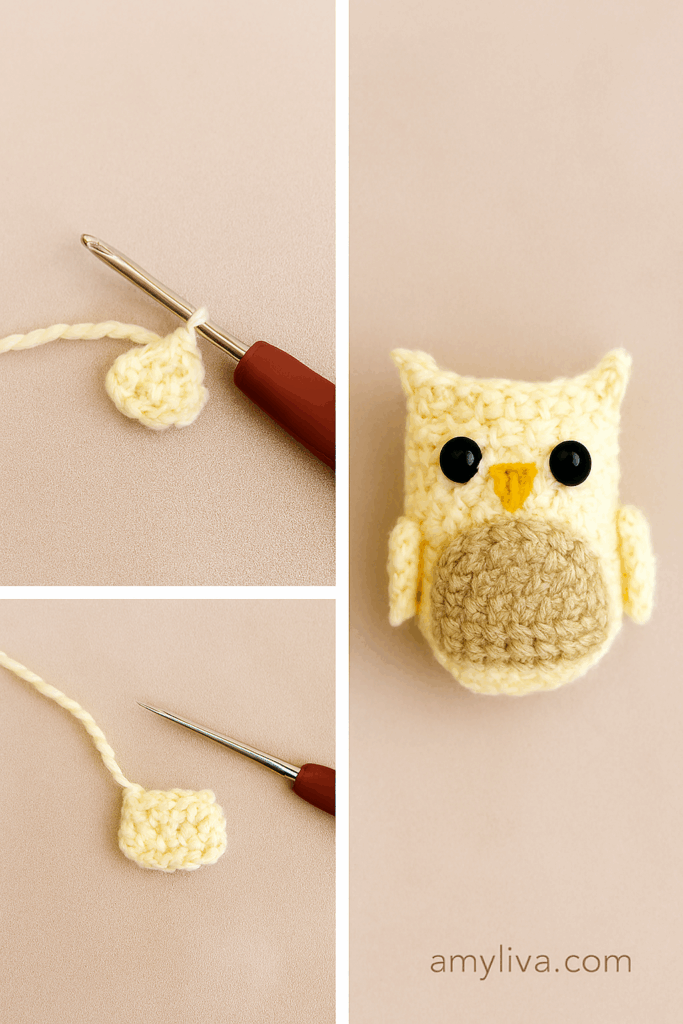
• Round 1: Chain 4. Starting in the 2nd chain from the hook, sc, hdc, dc in the last chain. Chain 2 and sl st into the base of the last stitch.
• Fasten off, leaving a long tail for sewing. Sew the wings to the sides of the owl’s body.
Instructions for the Ears (Make 2, Color A):
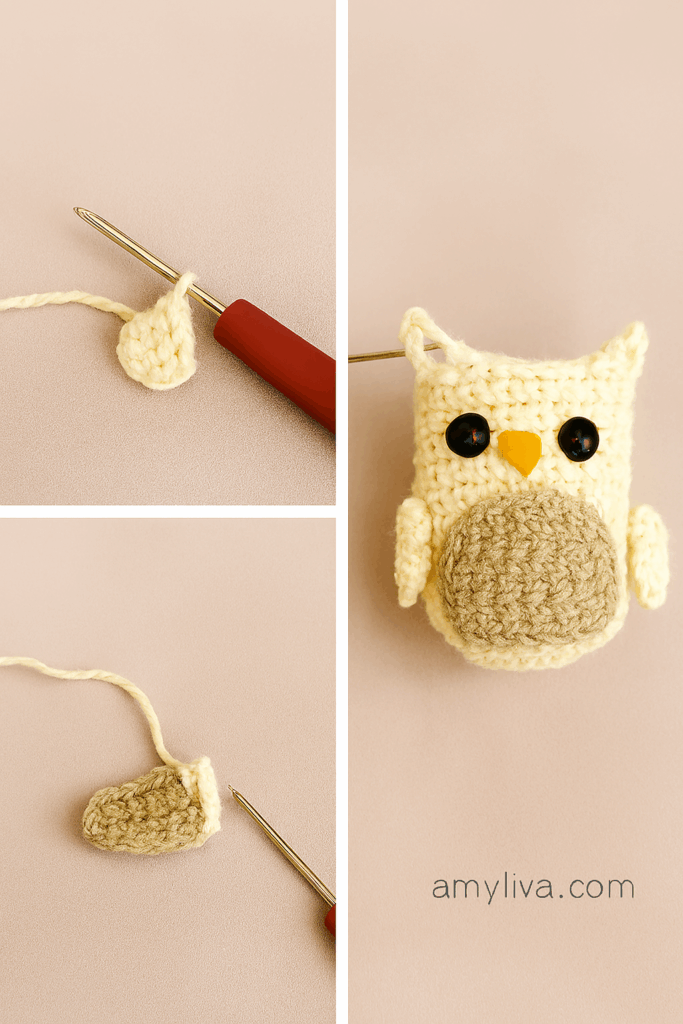
• Row 1: Chain 3. Starting in the 2nd chain from the hook, sc, hdc.
• Fasten off, leaving a long tail for sewing. Pinch the base of each ear to form a triangle and sew them to the top of the owl’s head.
Finishing Touches:
• Using a small amount of orange yarn, embroider a small triangular nose between the eyes.
• Attach your owl to a key ring. Your new keychain is complete!
Troubleshooting & Advanced Tips
• My stuffing is showing! This means your stitches are too loose. Try using a smaller hook size.
• My owl is lumpy. Make sure you stuff your owl evenly and firmly. Use small pieces of fiberfill to fill every nook and cranny.
• Want to get creative? Change the colors to match your favorite animals, or use textured yarn for a unique look. You can also add a small bow tie, a scarf, or even a mini hat for a fun flair!
Frequently Asked Questions About Amigurumi
• Q: What is the best yarn for amigurumi?
• A: 100% cotton yarn is a popular choice for amigurumi. It holds its shape well and gives stitches a crisp, defined look. Worsted weight is a great starting point for beginners as it’s easy to work with and widely available.
• Q: Can I sell the finished products from this pattern?
• A: Yes, you can! Many crafters earn income by selling their finished amigurumi pieces. However, we ask that you do not sell or redistribute the pattern itself. If you sell your creations, please credit Amyliva.com as the pattern source. This helps support independent designers and the crochet community.
• Q: How do I make my stitches more consistent?
• A: Practice is key! Also, ensure you have a comfortable grip on your hook and maintain an even tension on your yarn. A tight stitch is essential for amigurumi, as it keeps the stuffing from showing through.
• Q: What if I can’t find safety eyes?
• A: You can use black yarn to embroider eyes directly onto the owl’s face. This is a great alternative for baby-safe items or if you prefer a softer look. You can also use buttons, but be mindful of a choking hazard if you’re gifting the item to a small child.
The Joy of Crafting and Community
This free crochet pattern is more than just a set of instructions. It’s a gateway to a vibrant and supportive community of makers. We love seeing your creations! Share your finished owl keychains on social media and tag us @amylivahandmade. You can also join our email list to receive exclusive updates on new free patterns, tutorials, and special offers.
Thank you for choosing Amyliva.com for your crafting journey. We believe that every handmade item tells a story, and we can’t wait to see the stories you create with these cute little owls. Happy crocheting!

Yorum gönder