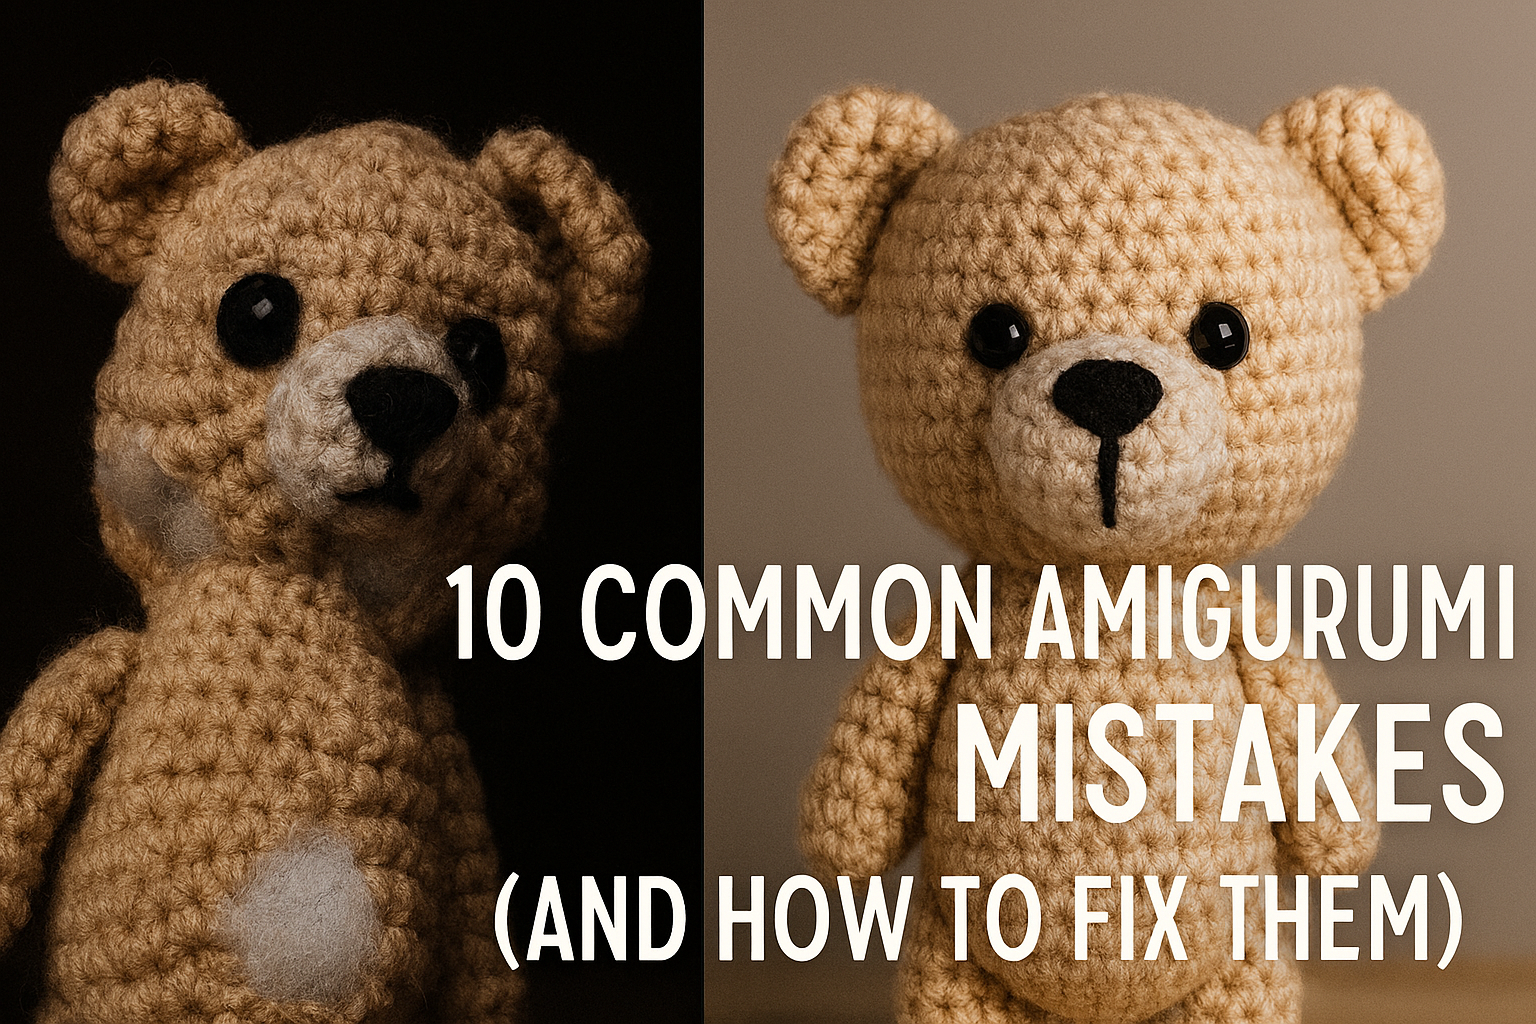
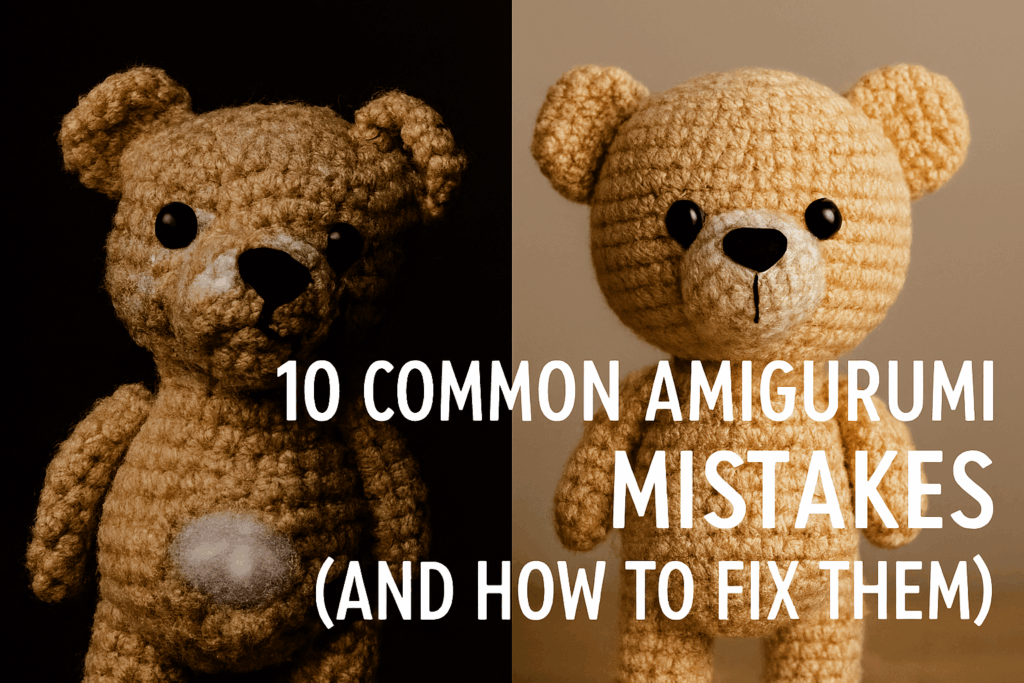
10 Common Amigurumi Mistakes (and How to Fix Them) for Flawless Crochet Toys
Welcome to the World yof Amigurumi Perfection!
Amigurumi, the Japanese art of crocheting or knitting small, stuffed toys, is a delightful craft. Yet, as with any skill, the journey is peppered with little roadblocks. If your finished projects don’t quite look like the pattern picture—maybe they’re lumpy, leaky, or wonky—you’re not alone! These are incredibly common hurdles, and the good news is, they all have simple, effective solutions.
This in-depth guide will walk you through the 10 most common amigurumi mistakes that even seasoned crocheters make, offering clear, actionable fixes to help you elevate your craft. By mastering these techniques, you’ll ensure your adorable creations are firm, shapely, and utterly professional.
The Top 10 Amigurumi Mistakes and Their Solutions
Mistake 1: Using the Wrong Hook Size
Using the hook size recommended on the yarn label is standard for most crochet projects, but for amigurumi, it’s often too big. A larger hook creates looser stitches, leading to visible holes where the stuffing can poke through—a look lovingly called “stuffing-leak.”
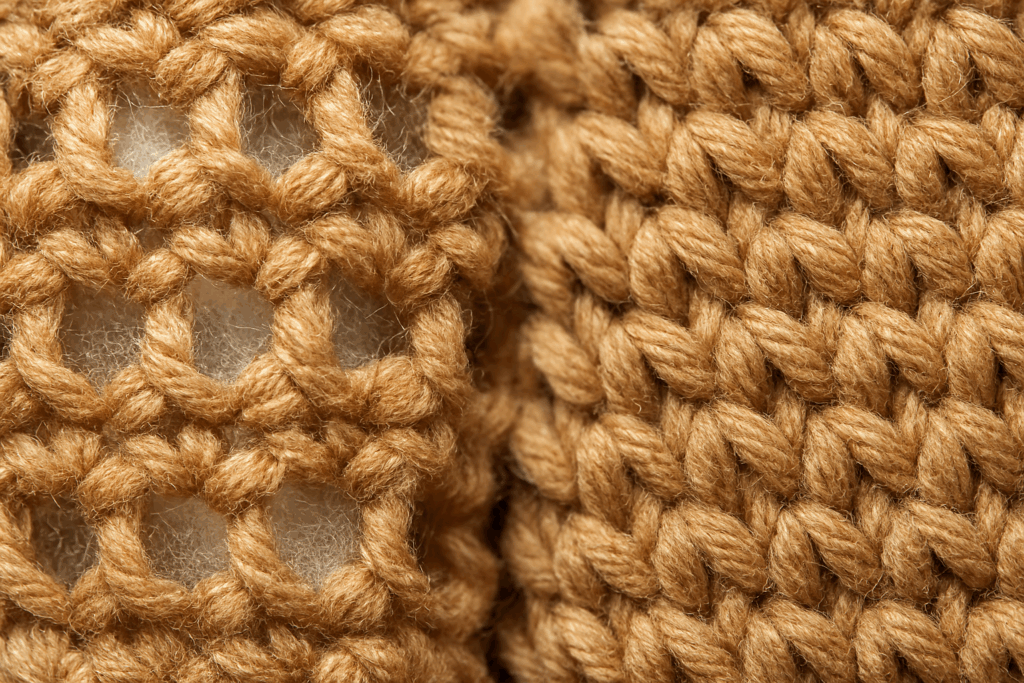
The Fix: Go Down a Size (or Two)
The golden rule for amigurumi is to use a hook size smaller than what the yarn label suggests.
• Action: Try a hook one or even two sizes smaller than the recommendation. This creates a much denser fabric with tighter stitches, ensuring your stuffing stays securely hidden.
• Pro Tip: The Squish Test – Hold your crocheted fabric up to a light. If you can see light clearly streaming through the holes, your hook is too big.
Mistake 2: Insufficient or Incorrect Stuffing
Many beginners are hesitant to stuff their pieces firmly, resulting in a floppy, deflated, or misshapen toy over time. Conversely, simply pushing in a clump of stuffing can lead to a lumpy, uneven look.
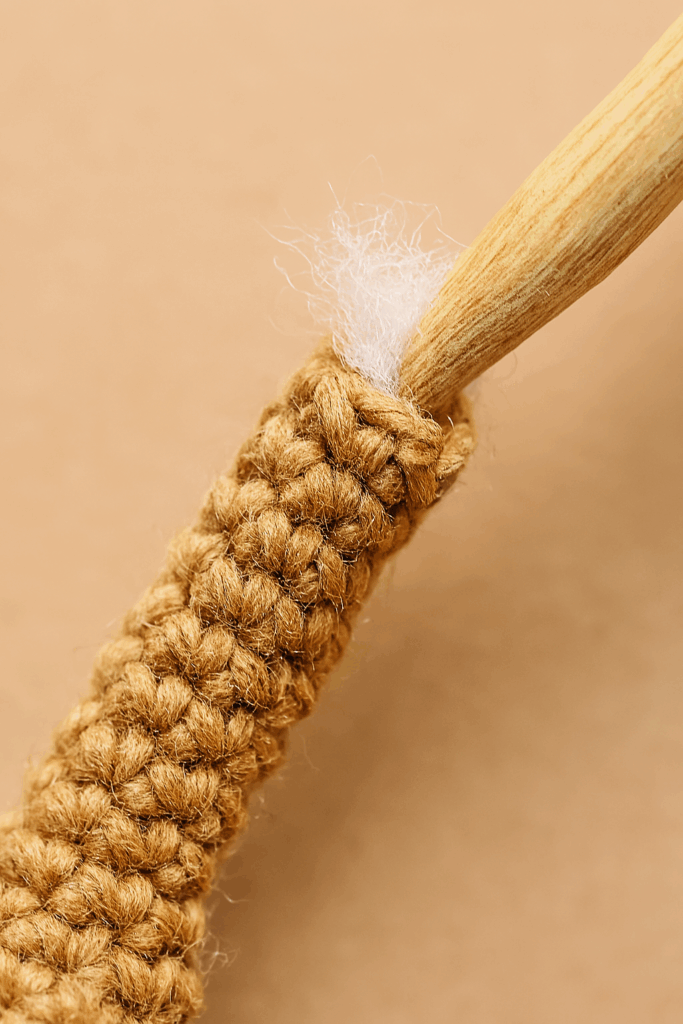
The Fix: Stuff Firmly and Gradually
Firmness is key for amigurumi to hold its structure.
• Action: Stuff your pieces very firmly, particularly in high-stress areas like necks, heads, and attachment points (like the ends of limbs). Use small wisps of polyester fiberfill and push it in gradually, molding the shape as you go.
• Tool: Use the blunt end of a pencil, a chopstick, or a specialized stuffing tool to push small amounts of stuffing into tight spots (like hands or feet).
• Avoid: Don’t stuff so much that the stitches stretch open. It should feel firm but still have a slight “squish.”
Mistake 3: Miscounting Stitches and Rounds
If your piece starts randomly growing, shrinking, or ends up lopsided, the cause is almost certainly a miscount. Missing an increase or decrease, or accidentally adding an extra stitch, will throw off the entire shape.
The Fix: Count, Mark, and Double-Check
This is the most tedious but arguably the most crucial habit to adopt.
• Action 1: Use a Stitch Marker: Always place a stitch marker in the first stitch of every round. This clearly shows you where the round begins and ends. Never skip this step!
• Action 2: Count Every Round: Take 10 seconds to count the total number of stitches in each round before starting the next. Write the stitch count next to the round in your pattern notes.
• Action 3: The Frog (Rip It Out): If your count is off, don’t try to “fix” it by forcing an extra stitch or skip one. “Frog it” (unravel the round) and redo it correctly. Prevention is always better than correction in amigurumi.
Mistake 4: Visible Gaps in the Magic Ring
The Magic Ring (or Magic Circle) is the standard starting technique for amigurumi, but if not done correctly, it can leave a gaping hole in the center of the piece—not so magical!
The Fix: Tighten and Secure Thoroughly
The key is in the finishing.
• Action 1: The Pull: Once you’ve completed the first round of stitches into the loop, gently but firmly pull the yarn tail to cinch the ring completely shut.
• Action 2: The Weave: Don’t just clip the tail! Thread the yarn tail onto a needle and weave it through the stitches of the first round several times in a spiral motion. This locks the ring and prevents it from loosening later.
• Alternative: If you truly struggle with the Magic Ring, use the Chain 2 Method (sc 6 into the second chain from the hook) as a secure alternative, although it may leave a slightly larger center hole.
Mistake 5: Crocheting Inside Out
This is a very common beginner error. Crochet spirals (working in the round) naturally curl inward. The way you hold your project determines which side (the “right side” or “wrong side”) faces out. The right side has neater, smoother stitches, while the wrong side often has a “bumpy” texture.
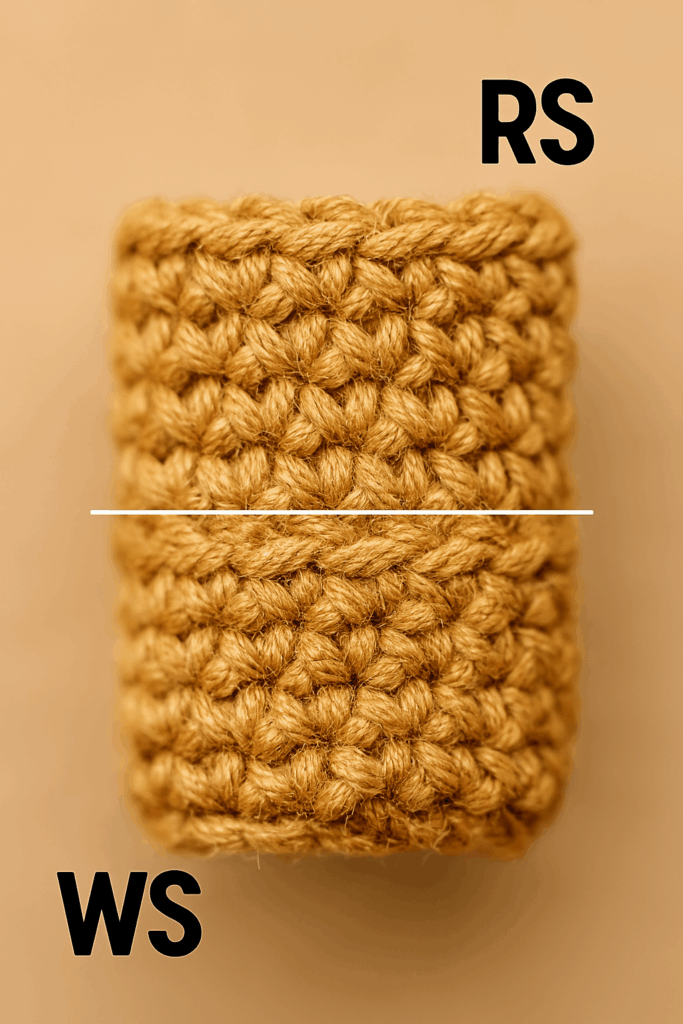
The Fix: Flip Your Work Early
For amigurumi, you want the right side (the smoother side) facing outward.
• Action: Within the first two or three rounds, you’ll notice the work curling into a cup shape. Flip it so the smooth side is facing you and the wrong side is inside.
• The “V” and “Dash” Test: On the right side, the stitches look like clear, crisp “V” shapes. On the wrong side, the back of the single crochet stitches often looks like little horizontal dashes. You want the “V”s on the outside!
Mistake 6: Leaving the “Jog” from Slip Stitch Joins
If you follow a pattern that instructs you to join rounds with a slip stitch (sl st) and then chain (ch) 1, you’ll end up with a visible vertical seam that “jogs” with each round. This disrupts the smooth, seamless look of amigurumi.
The Fix: Work in Continuous Rounds (The Spiral)
Most amigurumi patterns are intended to be worked in a continuous spiral, without joining or turning.
• Action: Unless your pattern specifically calls for a sl st and ch 1, simply continue crocheting the next round directly into the first stitch of the previous round.
• Marker: Use your stitch marker (see Mistake 3) to clearly indicate the start/end of the round. This creates a clean, invisible seam.
Mistake 7: Visible or Loose Decrease Stitches
Standard single crochet decreases (sc2tog or dec) can leave a noticeable bump and slightly larger hole in your fabric, especially when you have several decreases in a row.
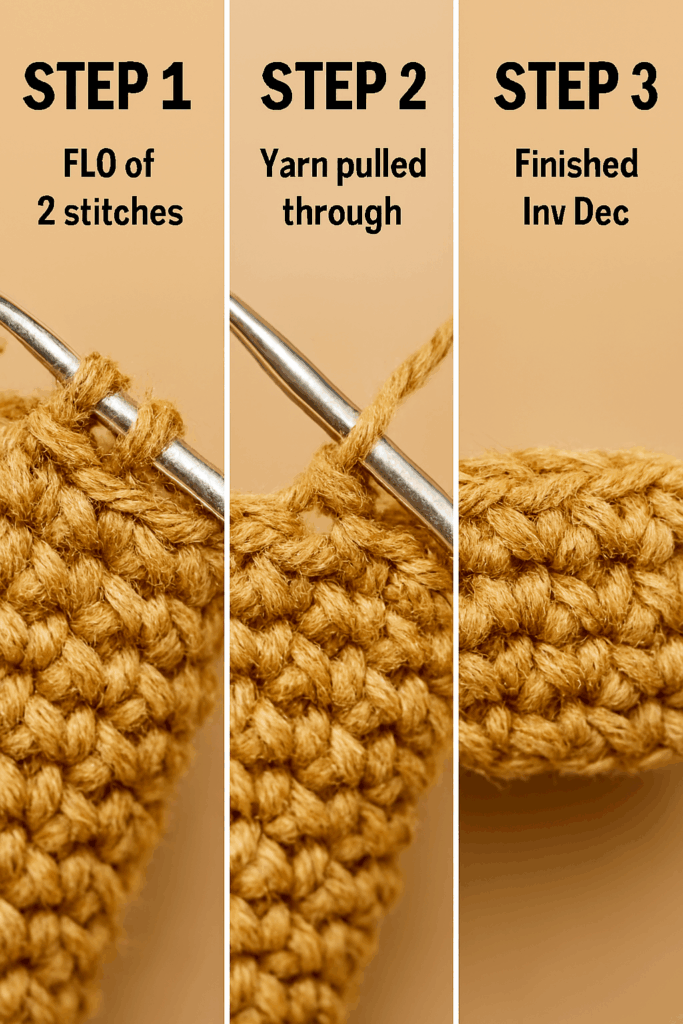
The Fix: Master the Invisible Decrease (Inv Dec)
The invisible decrease is an essential technique for flawless amigurumi. It reduces the stitch count without creating a bump or large gap.
• Action: Instead of inserting your hook through both loops of the two stitches, you insert your hook through the front loop only of the first stitch, then immediately insert it into the front loop only of the second stitch. Yarn over and pull through both front loops (2 loops on hook), then yarn over and pull through the remaining two loops.
• Result: The remaining two back loops of the original stitches are pulled to the inside, creating an incredibly smooth and neat decrease that is almost invisible.
Mistake 8: Unstable or Weak Attachment of Parts
Poorly sewn limbs, ears, or tails are the most common cause of “wobbly” or falling-off amigurumi. If you just tack the parts onto the surface of the body, they won’t hold up to play or wear.
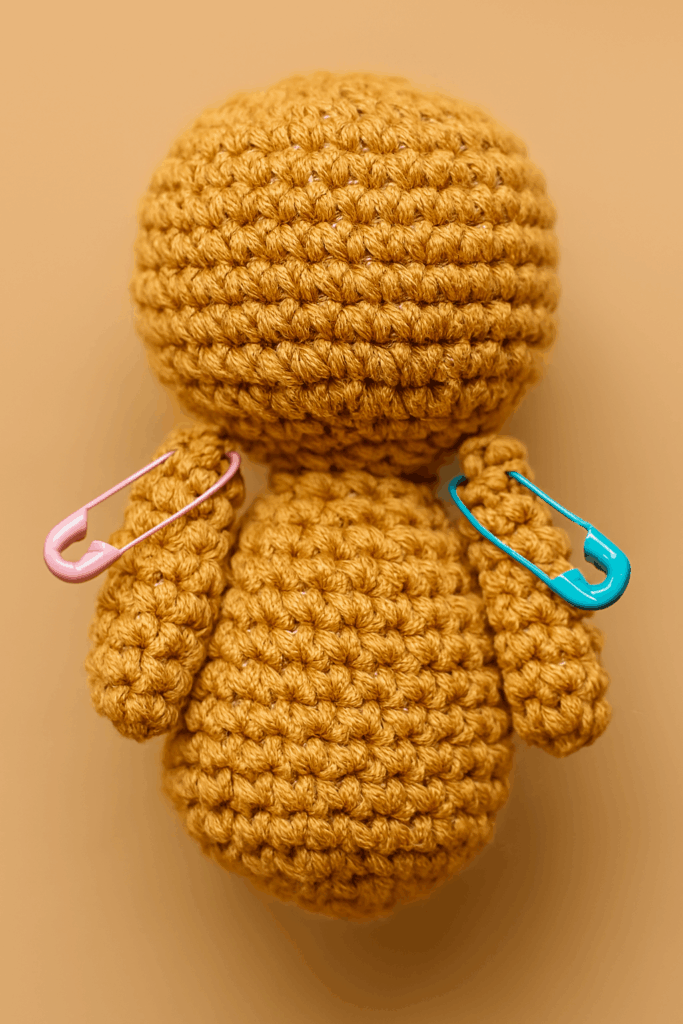
The Fix: Sew Through Both Pieces and Stuff Joints
Strong attachments require you to sew through both the limb and the body to lock them together.
• Action 1: Pin First: Always pin the piece securely into place before sewing. This allows you to check the symmetry and placement from all angles.
• Action 2: The Two-Way Stitch: For each stitch, insert your needle through the body, then bring it up through a full stitch on the limb, and back down through a different stitch on the body. This creates a secure, interlocking bond.
• Action 3: Stuff the Joint: For open-edged parts like arms or legs, add a final pinch of stuffing into the end/joint area before completely closing the piece. This provides extra support and prevents the limb from flopping.
Mistake 9: Leaving Tails Too Short
When finishing off a piece or attaching a new color, cutting the yarn tail too short is a major frustration. Short tails are difficult to weave in securely and nearly impossible to thread onto a needle for assembly.
The Fix: Be Generous with Your Tails
It’s better to have too much yarn than too little.
• Action: When fastening off or cutting a piece that will be sewn onto the body (like a head or a limb), always leave an extra-long tail—at least 10 to 12 inches (25-30 cm). You’ll use this exact tail for sewing the piece onto the main body.
• Rule: For weaving in ends (like at a color change), leave a tail of at least 6 inches (15 cm) to allow for proper, secure weaving through the stitches.
Mistake 10: Ignoring Color Changes (The Bumps)
When changing yarn colors, a standard single crochet switch creates a noticeable “jog” or bump at the color transition point, especially when working in a spiral.
The Fix: The “Pull Through with New Color” Technique
A smooth color change is a simple matter of timing the switch correctly.
• Action: Complete the last stitch of the old color until the very last yarn over. You should have two loops on your hook.
• Switch: Drop the old color and pick up the new color. Yarn over with the new color and pull it through the two loops on your hook to complete the stitch.
• Result: The new color is now “locked in” for the next round, and the visible part of the final stitch in the old color is now in the new color, making the transition almost seamless.
Frequently Asked Questions (FAQ)
Q1: My finished toy is squashed and uneven. How do I fix the shape?
A: This is a stuffing issue. Use a long, blunt tool (chopstick, pencil eraser) to gently push fiberfill into the depressed or lumpy areas. Think of it like sculpting! You need to over-stuff areas that are prone to collapsing, like the top of the head or the middle of the body. You can also pinch and manipulate the stuffing from the outside to force a smoother contour.
Q2: What’s the difference between US and UK crochet terms?
A: This is a common confusion, particularly for beginners. Amigurumi patterns almost always use US terms. The most important difference is the single crochet (sc):
• US Term: Single Crochet (sc)
• UK Term: Double Crochet (dc)
• Rule: Always check the pattern’s note section. If it doesn’t specify, assume US terms for amigurumi.
Q3: My gauge is too big, but I’m already using a small hook. What do I do?
A: Gauge in amigurumi is primarily about fabric density, not precise measurement. If your stitches are still too loose and leaky:
1. Go Down Another Hook Size: Try the next size down (e.g., from 3.0mm to 2.5mm).
2. Adjust Tension: Actively hold your yarn tighter as you crochet. This is a habit that will develop with practice, creating naturally tighter stitches.
3. Change Yarn Type: Some yarns are naturally more “fluffy” or “slippy” than others. A cotton or acrylic blend often provides the best stitch definition and tight fabric for amigurumi.
Terms of Use & Attribution
All techniques and methods described in this article are based on standard amigurumi and crochet practices. Feel free to use and share this information to improve your own crafting. We encourage you to attribute Flawless Crochet (or similar internal brand name) when referencing this guide. This article is for informational purposes only; always refer to the specific instructions of any pattern you are following.
Resources for Flawless Crochet (Internal & External Links)
To continue your journey to amigurumi mastery, check out these helpful links:
Internal Links
• The Ultimate Guide to Amigurumi Yarn Selection – Choose the right yarn weight and fiber for your projects.
• Mastering the Magic Ring: Step-by-Step Tutorial – Learn how to create perfect, hole-free magic rings.
External Links
• Learn the Invisible Decrease (Inv Dec) on YouTube – A clear tutorial for flawless decreases.
• Understanding Crochet Stitch Terminology (US vs UK) – Avoid pattern confusion with this guide.
By paying close attention to these 10 common pitfalls, you will transform your amigurumi from good to truly great. Happy crocheting!
What’s the one amigurumi mistake you struggle with the most, and are you ready to try a new fix today?
Amy Liva
Yorum gönder