Easy Crochet Leaf Tutorial – Free Amigurumi Leaf Pattern
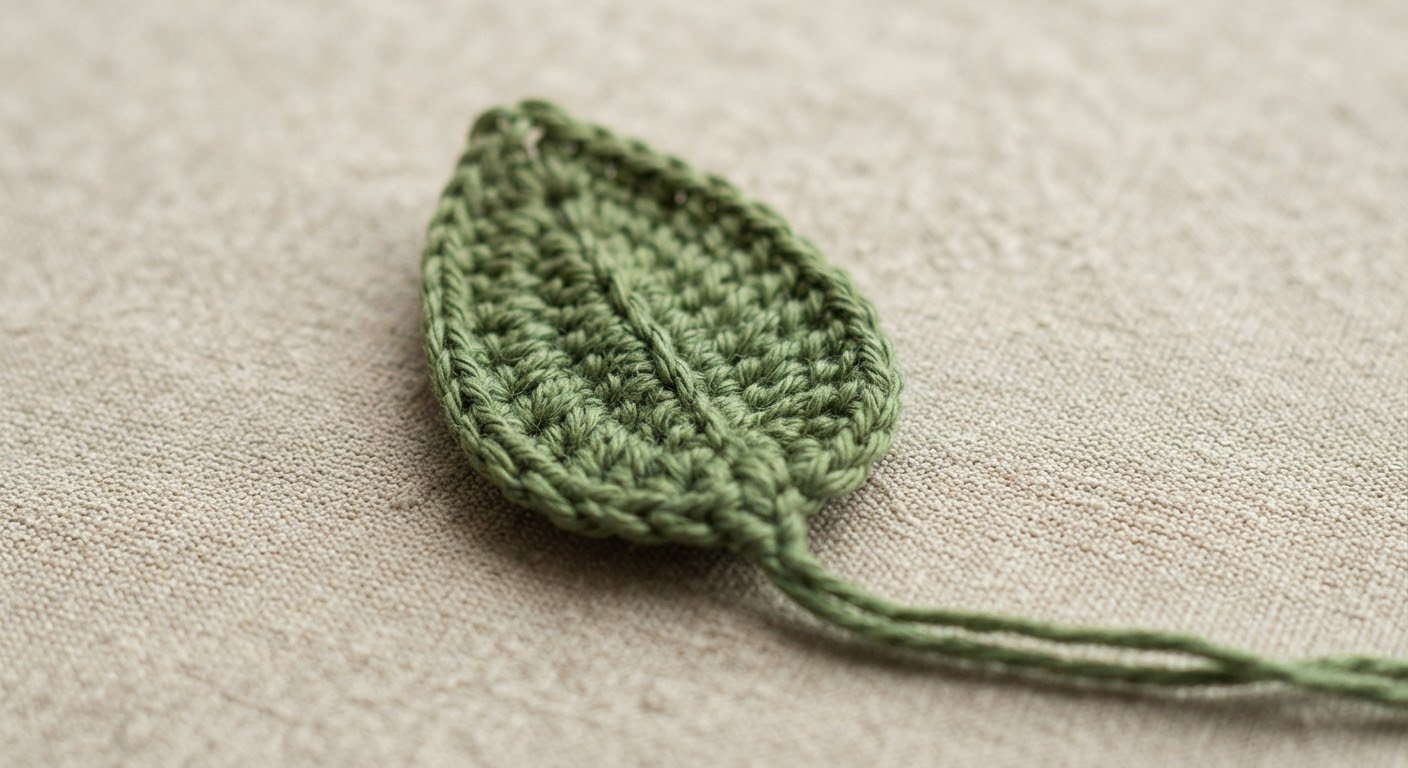
When I make small amigurumi flowers, fruits, or plant-themed projects, I often find that the smallest details make the finished piece look more complete. A leaf does not need to be complicated, but it needs to have the right size and shape for the project.
I wanted a leaf pattern that was quick to crochet, easy to attach, and small enough to work with the amigurumi projects I usually make. After trying different stitch combinations, I settled on this simple one-round design. The shorter stitches at the ends keep the leaf narrow, while the taller stitches in the middle give it a natural pointed shape.
This crochet leaf is worked around a short foundation chain and uses basic crochet stitches. It is a useful little pattern to keep on hand because you can make it in different colors and sizes depending on the project.
If you are making a small flower, fruit, or botanical amigurumi, this leaf can be used as a simple finishing detail without adding much extra work.
About This Crochet Leaf
This is a small, flat leaf made in one round. Instead of working back and forth in rows, you crochet along one side of the foundation chain and then continue along the opposite side.
The shorter stitches near the ends help create a tapered shape, while the taller double crochet stitches give the middle of the leaf more width.
The finished leaf is approximately 4–5 cm long when made with light cotton yarn and a 2.0–2.5 mm crochet hook. The exact size will depend on your yarn, hook, and crochet tension.
Because the leaf is small, it is also a useful project for practicing the difference between single crochet, half double crochet, and double crochet.
Materials
You will need:
- A small amount of green cotton yarn
- 2.0–2.5 mm crochet hook
- Yarn needle
- Scissors
Optional:
- Stitch marker
- Small amount of embroidery thread for a center vein
- Thin floral or craft wire if you want a poseable leaf
You only need a small amount of yarn for one leaf, which makes this pattern a good way to use leftover yarn from other projects.
Choosing Yarn and Hook Size
Cotton yarn is a good choice for this leaf because it gives the stitches a clear shape and does not stretch as much as some other yarns.
A smooth acrylic yarn can also be used. If you use a thicker yarn, the finished leaf will be larger. A thinner yarn and smaller hook will produce a smaller leaf.
For a small amigurumi leaf, a 2.0–2.5 mm hook works well with lightweight cotton yarn. If your stitches are very tight, you can try the larger hook in the range. If your leaf looks loose or floppy, a slightly smaller hook may give you a cleaner shape.
You do not need to worry about crochet gauge for this small project. The important thing is to keep your tension reasonably even so both sides of the leaf have a similar shape.
Crochet Abbreviations
This pattern uses US crochet terms.
- ch – chain
- sc – single crochet
- hdc – half double crochet
- dc – double crochet
- sl st – slip stitch
- st/sts – stitch/stitches
There is no magic ring or crochet increase used in this pattern.
Before You Start
The leaf is worked around both sides of the starting chain.
When you finish the first side of the chain, you will continue around the end and work back along the opposite side. This creates the complete leaf shape without sewing two pieces together.
Try not to pull the foundation chain too tightly. A very tight chain can make it difficult to work into the opposite side and may cause the leaf to curl.
If you are new to working around a foundation chain, take your time when you reach the end of the chain. This is the part that determines how evenly the two sides of the leaf meet.
Easy Crochet Leaf Pattern
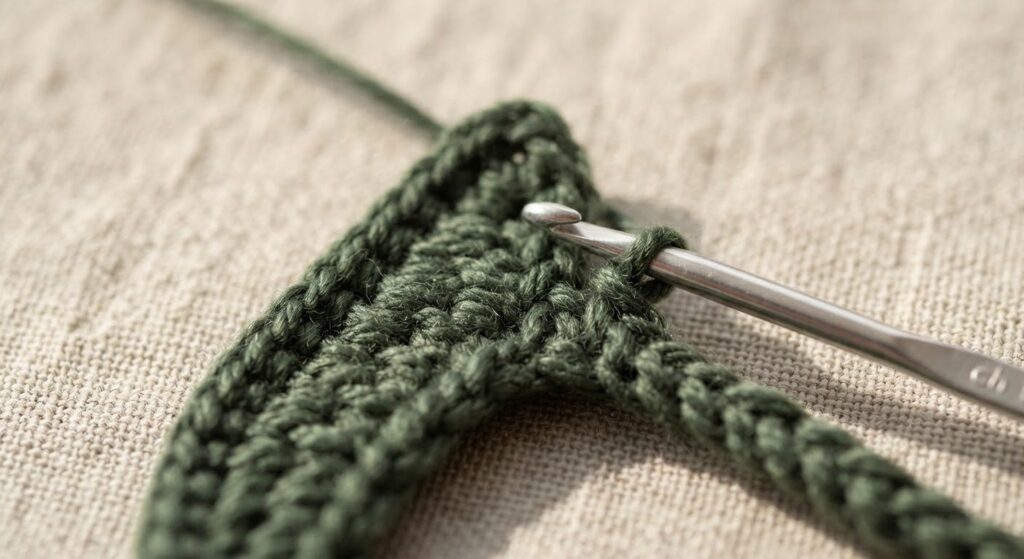
Round 1
Chain 9.
Starting in the second chain from the hook, work along the first side of the foundation chain:
- sc in the next 2 sts
- hdc in the next st
- dc in the next 3 sts
- hdc in the next st
- sc in the last st
- ch 1 to form the pointed end
Now continue along the opposite side of the foundation chain:
- sc in the next st
- hdc in the next st
- dc in the next 3 sts
- hdc in the next st
- sc in the next 2 sts
Slip stitch to the first sc to join.
Fasten off and leave a yarn tail if you plan to sew the leaf onto another crochet piece.
Stitch Count
The completed leaf has 16 worked stitches around the foundation chain, with the chain-1 at the end helping form the pointed tip.
If your leaf does not look symmetrical, check that you have worked:
- 2 sc
- 1 hdc
- 3 dc
- 1 hdc
- 1 sc
on the first side, followed by:
- 1 sc
- 1 hdc
- 3 dc
- 1 hdc
- 2 sc
on the opposite side.
The chain-1 at the tip is not counted as a regular stitch.
How the Leaf Shape Is Created
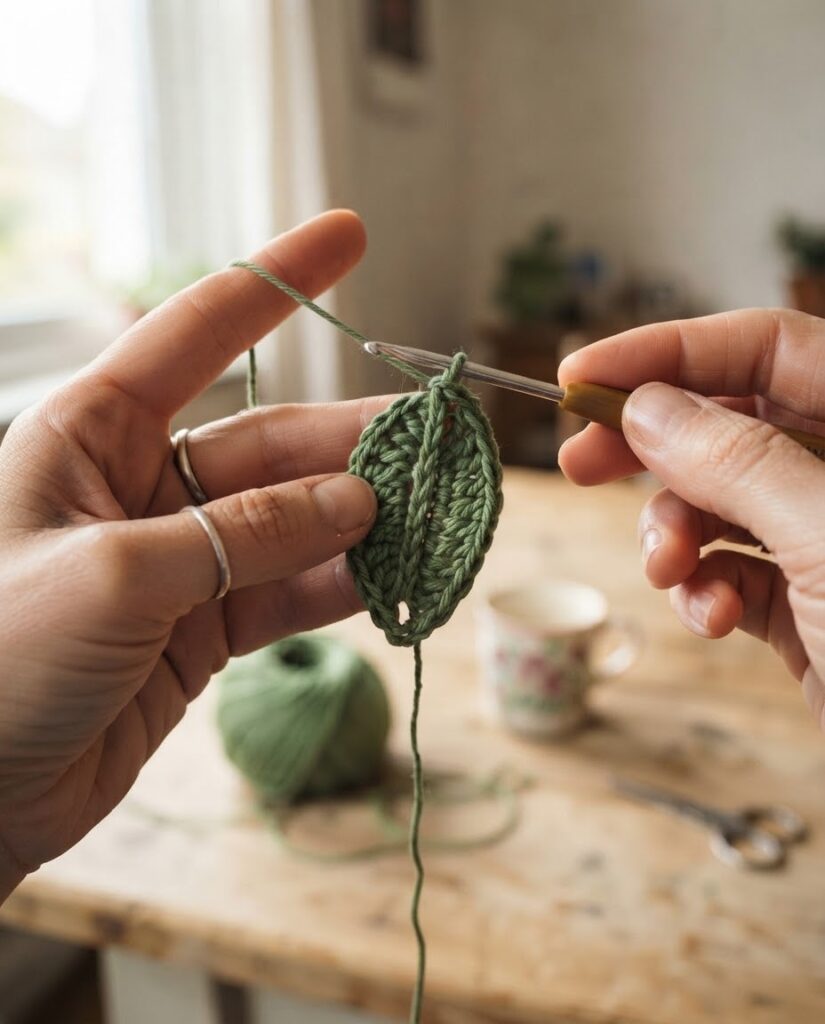
The shape of this leaf comes from changing the height of the stitches.
The single crochet stitches at the ends keep the edges low and narrow. The half double crochet stitches gradually increase the height, while the three double crochet stitches in the middle create the wider part of the leaf.
The short chain at the end creates the pointed tip before you continue along the other side.
This is also why keeping the stitch sequence balanced is important. If you accidentally add or skip a stitch on one side, the leaf can become wider or more curved on one side.
How to Make the Leaf Look Neat
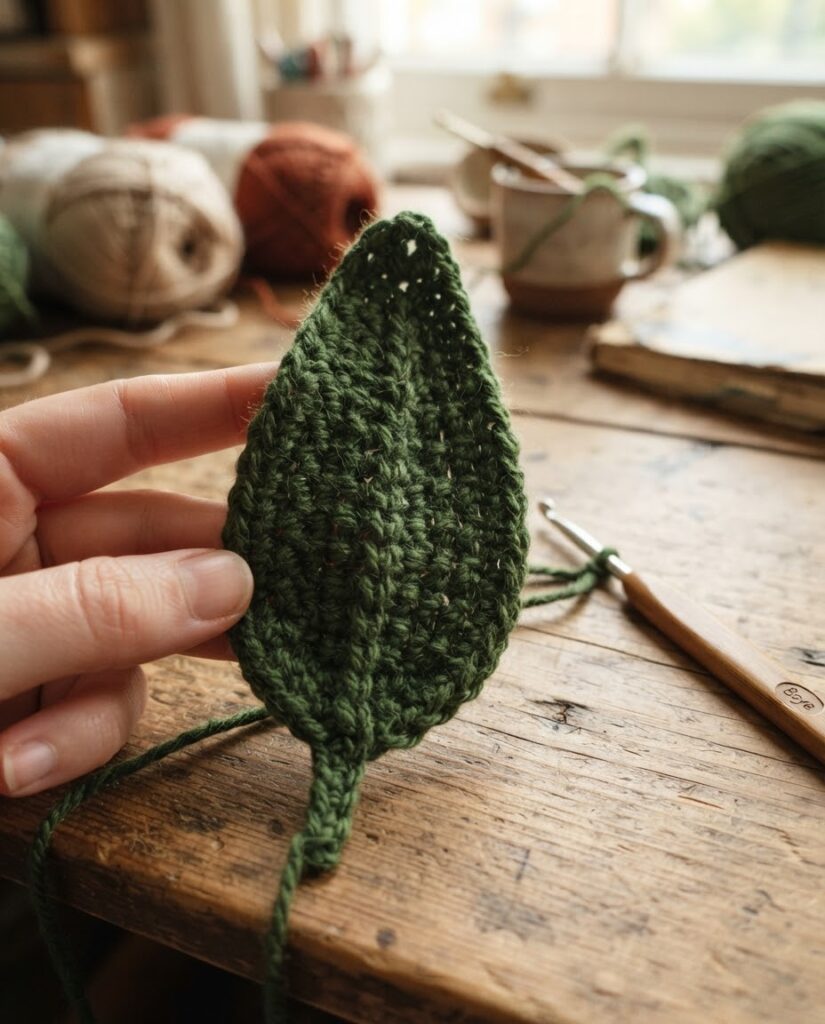
After finishing the leaf, gently straighten it with your fingers.
Small crochet leaves sometimes curl slightly because of tight tension or because the foundation chain was made tightly. This does not necessarily mean the pattern was worked incorrectly.
If you want a flatter leaf, lightly dampen it and shape it with your fingers. Allow it to dry completely before attaching it to your project.
For cotton yarn, gentle wet blocking can help define the shape. If you normally use steam blocking for acrylic yarn, be careful not to place the heat directly against the fibers.
Adding a Center Vein
For a more detailed leaf, you can add a simple center vein after crocheting.
Thread a yarn needle with a small amount of darker or matching green yarn. Starting near the base of the leaf, make small stitches toward the pointed tip.
Keep the stitches light rather than pulling the yarn tightly. Pulling too hard can cause the leaf to fold in the middle.
You can also use a slightly different shade of green to make the center vein more visible.
This step is optional. The basic leaf looks complete without additional embroidery.
How to Attach the Leaf to an Amigurumi
If you are adding the leaf to an amigurumi flower, fruit, plant, or other crochet piece, use the yarn tail left at the end of the leaf.
Place the leaf where you want it before sewing. This makes it easier to check the position and angle.
Insert the yarn needle through the base of the leaf and then through the crochet fabric underneath. Make several small stitches through the base rather than sewing across the entire leaf.
Once the leaf feels secure, weave the remaining yarn through the back of the project and trim the excess.
For example, this small leaf can be used as an extra detail on a crochet strawberry or carrot. If you are making one of these projects, you can continue with the Mini Crochet Strawberry Keychain or Mini Amigurumi Carrot Pattern.
It can also be useful for floral projects. A few leaves placed around a crochet flower can help fill the space around the petals. You can pair this pattern with the Amigurumi Flower Bouquet Keychain when you want to add extra leaves to a small floral design.
Making Different Leaf Sizes
One of the easiest ways to change the size of this leaf is to change the length of the starting chain.
For a smaller leaf, use a shorter foundation chain and adjust the stitch sequence so that the tallest stitches remain near the center.
For a larger leaf, use a longer foundation chain and add more stitches along the sides.
Another simple option is to keep the same pattern but change the yarn weight and hook size. A thicker yarn with a larger hook will create a larger leaf, while thin yarn with a smaller hook will make a miniature version.
When changing the size, focus on keeping the shape balanced rather than following a specific stitch count from the small version.
Easy Color Variations
Green is the most natural choice for an amigurumi leaf, but you do not have to use only one shade.
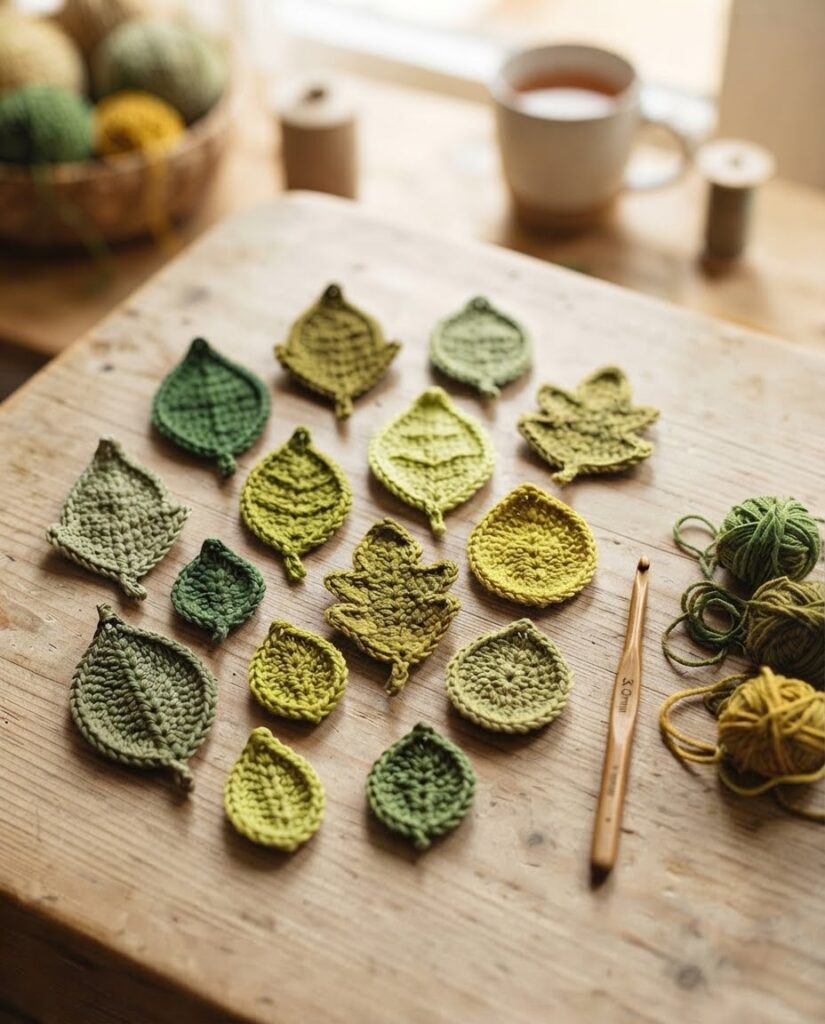
Try:
- Light green for young leaves
- Dark green for mature leaves
- Olive green for a muted botanical look
- Yellow-green for spring projects
- Brown, rust, or mustard for autumn leaves
- Two shades of green for a more detailed design
You can also make several leaves in different shades and attach them together to create a fuller botanical decoration.
Common Problems and How to Fix Them
Why is my leaf curling?
A tight foundation chain or very tight crochet tension can cause the leaf to curl.
Try making the foundation chain a little more loosely and avoid pulling the yarn too tightly as you work.
Blocking can also help flatten the finished leaf.
Why does my leaf look uneven?
Check the number and type of stitches on both sides of the foundation chain.
The first side should have 2 sc, 1 hdc, 3 dc, 1 hdc, and 1 sc. The second side should mirror the shape with 1 sc, 1 hdc, 3 dc, 1 hdc, and 2 sc.
If one side has a different number of stitches, the leaf may become wider on one side.
My leaf is too small. What should I change?
Try using a slightly larger hook or thicker yarn.
You can also increase the number of foundation chains and adjust the stitch sequence to keep the leaf tapered at both ends.
My leaf is too floppy. What can I do?
A smaller hook can create tighter stitches and a firmer leaf.
Cotton yarn is also useful when you want a leaf that holds its shape. If you want the leaf to be poseable, you can add a suitable thin craft wire, provided it is securely covered and appropriate for the intended project.
Can I make the leaf in another color?
Yes. The pattern works with any color of yarn. Green is traditional, but other colors are useful for seasonal decorations, fantasy amigurumi, flowers, and autumn projects.
Ideas for Using Crochet Leaves
There are many ways to use a small crochet leaf.
You can sew it onto:
- Crochet flowers
- Amigurumi fruits
- Strawberry or carrot projects
- Crochet plants
- Flower bouquets
- Garden-themed amigurumi
- Keychains
- Hair accessories
- Bags and other crochet accessories
- Seasonal decorations
A group of small leaves can also be arranged around a larger flower to make the finished piece look fuller.
Can This Leaf Be Used for Amigurumi?
Yes. The small size makes this pattern especially useful for amigurumi projects.
You can attach one leaf to a flower or fruit, or make several leaves in different sizes for a larger botanical design.
When working on a small amigurumi, compare the leaf size with the body of the project before sewing it on. A leaf that looks large on a small flower may work better on a larger amigurumi.
Frequently Asked Questions
How long does it take to crochet one leaf?
A small leaf can usually be made quickly once you are familiar with the stitches. The exact time depends on your crochet speed and whether you add embroidery or other details.
Can beginners make this crochet leaf?
Yes. The pattern uses chain, single crochet, half double crochet, double crochet, and slip stitch. If you know these basic stitches, you can follow the pattern without advanced shaping techniques.
Do I need to use green yarn?
No. Green is the most common choice, but you can use any color that suits your project.
Can I sell finished items made with this pattern?
Yes. You may sell finished handmade items made using this pattern. Please do not copy, repost, translate, or sell the written pattern itself. If someone wants the instructions, please direct them to this original pattern page.
Can I make a leaf without blocking it?
Yes. Blocking is optional. If your leaf already lies flat and has the shape you want, you can attach it directly to your project.
Can I use acrylic yarn?
Yes. Acrylic yarn works for this pattern, although cotton can give the leaf a more defined shape. The finished size and texture will depend on the yarn and hook you choose.
Final Tips
For the cleanest result, keep your foundation chain even and try to maintain similar tension throughout the leaf.
When you reach the end of the foundation chain, pay particular attention to the transition from one side to the other. This is where the pointed shape is formed.
If you want to make several leaves for the same project, use the same yarn and hook combination for each one so their sizes remain consistent.
Once you are comfortable with this basic pattern, experiment with different yarn colors, sizes, and simple embroidered veins to create leaves that match your own crochet projects.
Copyright
This crochet pattern is designed by Amyliva Handmade.
You are welcome to make finished items from this pattern for personal use or small business purposes. Please do not copy, reproduce, translate, repost, or sell the written pattern or tutorial as your own.
If you would like to share this pattern with another crocheter, please share the original page rather than copying the instructions.
Designed by Amyliva Handmade





2 comments