Cute Sea Turtle Keychain – Free Amigurumi Crochet Pattern
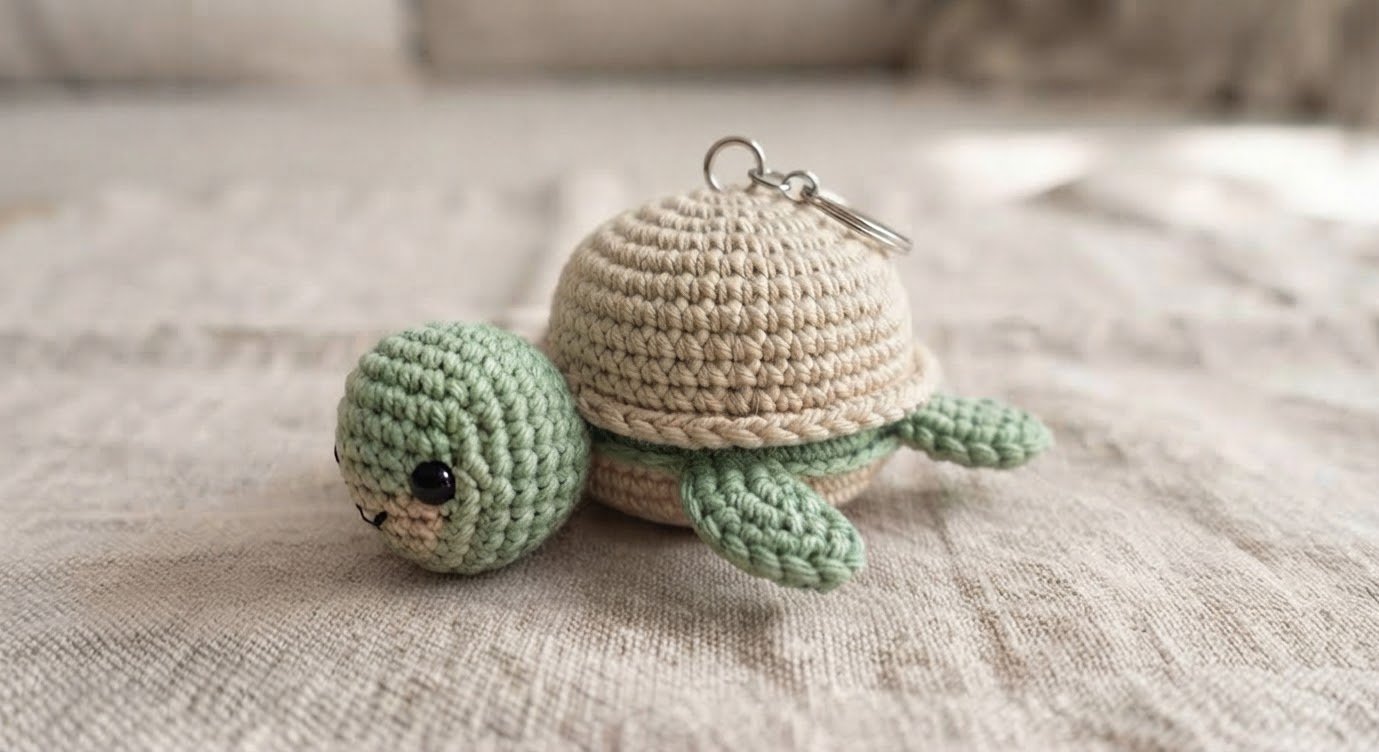
Today I’m sharing a small sea turtle crochet pattern that you can turn into a keychain or bag charm. It is made from a few simple pieces, with a separate shell that gives the turtle its rounded shape. The pattern is worked with basic amigurumi stitches, so it is a nice project to try when you want to make something small without committing to a large crochet project.
I used green for the turtle and a contrasting color for the shell, but there is plenty of room to change the colors and make the design your own. Below, you’ll find the complete pattern, assembly instructions, and a few practical notes that will help while putting the pieces together.
Pattern Details
- Skill level: Beginner to intermediate
- Finished size: approximately 5–7 cm, depending on yarn and tension
- Crochet terms: US terminology
- Main technique: continuous rounds
- Construction: separate shell, belly, head, flippers, and tail
Materials
- Green cotton yarn for the head and flippers
- Brown, beige, purple, or another contrasting color for the shell
- Small amount of black yarn for embroidered eyes
- Small amount of black or pink yarn for the mouth
- 2.0 mm crochet hook
- Small amount of fiberfill
- Yarn needle
- Scissors
- Stitch marker
- Small keychain ring
- Small jump ring
A smooth cotton yarn works particularly well for this project because the small stitches remain easy to see. You can use another yarn, but the finished size will change.
Abbreviations
- MR – magic ring
- sc – single crochet
- inc – increase
- dec – decrease
- ch – chain
- sl st – slip stitch
- st – stitch
The shell and belly are worked in continuous rounds. Use a stitch marker to mark the first stitch of each round.
Shell
Use your chosen shell color.
Round 1: MR, 6 sc [6]
Round 2: inc around [12]
Round 3: (1 sc, inc) × 6 [18]
Round 4: (2 sc, inc) × 6 [24]
Round 5: (3 sc, inc) × 6 [30]
Round 6: (4 sc, inc) × 6 [36]
Rounds 7–8: sc around [36]
Fasten off and leave a long yarn tail for joining.
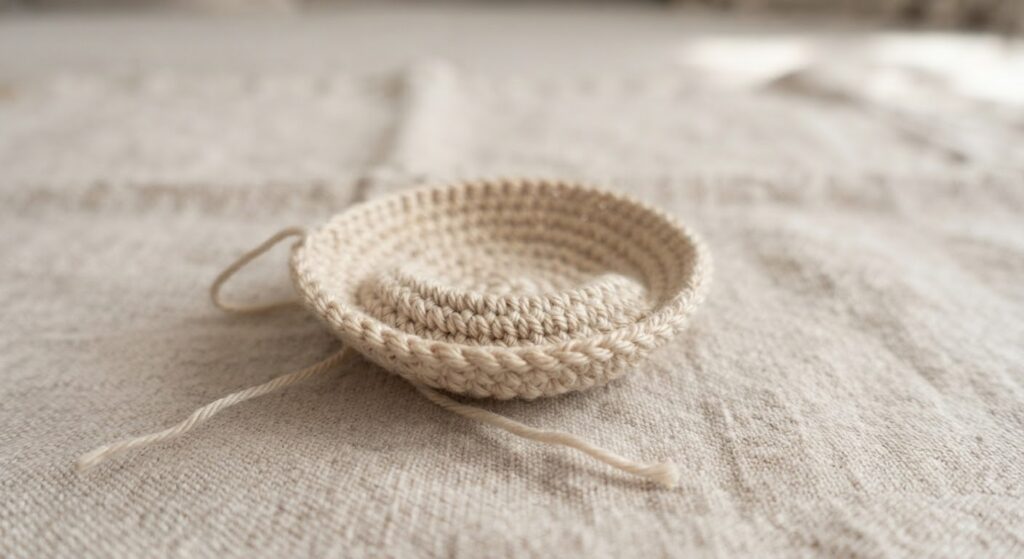
At this point, the shell should be a shallow rounded piece rather than a tight ball. If yours is very flat, gently shape it with your fingers before joining it to the belly.
Belly
Use green yarn.
Round 1: MR, 6 sc [6]
Round 2: inc around [12]
Round 3: (1 sc, inc) × 6 [18]
Round 4: (2 sc, inc) × 6 [24]
Round 5: (3 sc, inc) × 6 [30]
Fasten off and leave a long tail for sewing.
The belly is intentionally a little smaller than the shell. This helps the shell sit slightly above the underside instead of making the turtle completely flat.
Head
Use green yarn.
Round 1: MR, 6 sc [6]
Round 2: inc around [12]
Round 3: (1 sc, inc) × 6 [18]
Rounds 4–5: sc around [18]
Round 6: (1 sc, dec) × 6 [12]
Add a small amount of fiberfill. The head should be firm enough to hold its shape but not tightly packed.
Round 7: dec around [6]
Fasten off and close the opening. Leave a yarn tail for attaching the head to the shell.
Eyes
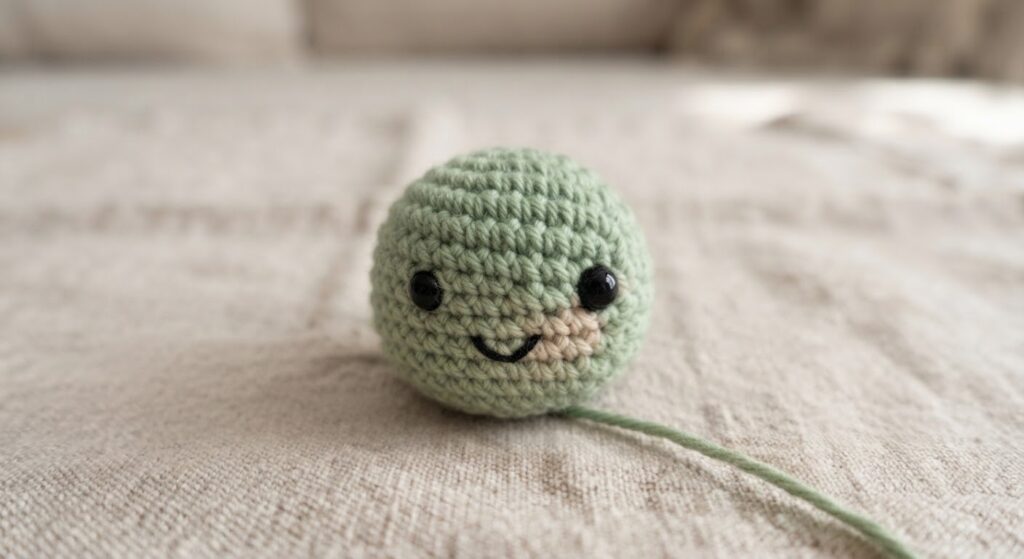
Embroider two small black eyes after the head has been stuffed and closed.
Place them on the front of the head with a small amount of space between them. Because the head is small, check the position before making several stitches.
You can use small safety eyes instead, but remember that safety eyes are small parts and are not suitable for young children who may put objects in their mouths.
Front Flippers – Make 2
Use green yarn.
For each flipper:
Chain 7.
Starting in the second chain from the hook:
Row 1: 1 sc, 1 hdc, 2 dc, 1 hdc, 1 sc [6]
Fasten off and leave a yarn tail.
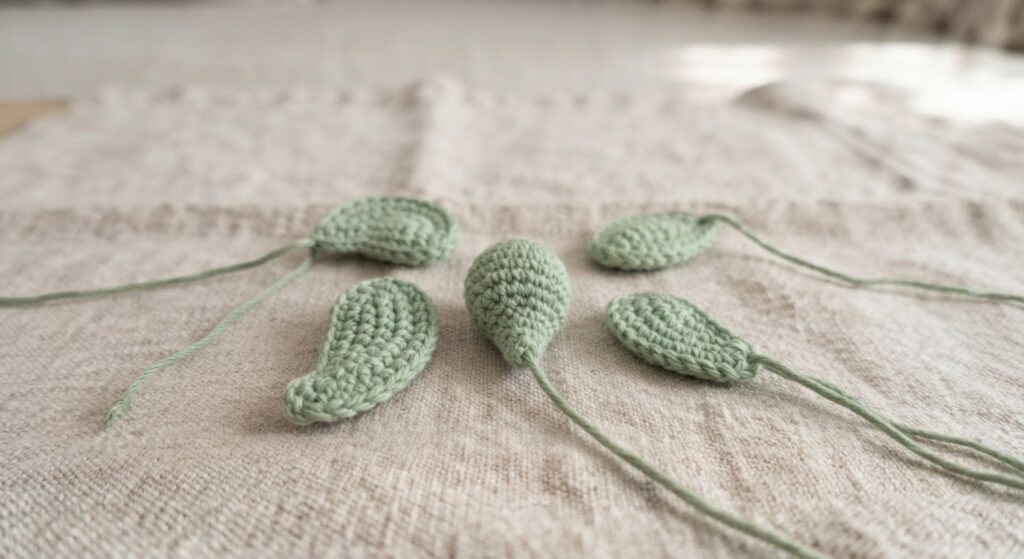
Gently flatten the flipper with your fingers. The slightly wider middle section gives it a simple paddle shape.
Back Flippers – Make 2
Use green yarn.
Chain 5.
Starting in the second chain from the hook:
Row 1: 1 sc, 1 hdc, 1 hdc, 1 sc [4]
Fasten off and leave a yarn tail.
The back flippers are smaller than the front ones so that the finished turtle does not become too bulky.
Tail
Use green yarn.
Chain 5.
Starting in the second chain from the hook, work 4 sc.
Fasten off and leave a yarn tail.
Flatten the tail slightly between your fingers. It can be sewn to the back of the turtle with the point facing outward.
Joining the Shell and Belly
Place the belly underneath the shell, making sure the edges line up as evenly as possible.
Before sewing, place the head, four flippers, and tail around the shell to check their positions.
Start joining the shell and belly around the edge with the yarn tail from the shell.
As you sew:
- Join a few stitches of the shell and belly together.
- Add a small amount of fiberfill between the two pieces.
- Continue joining around the edge.
- Stop occasionally to check the shape and add more stuffing if needed.
- Finish the seam securely.
Do not overstuff the turtle. Too much fiberfill can make the shell bulge and make the flippers harder to position.
Attaching the Head, Flippers, and Tail
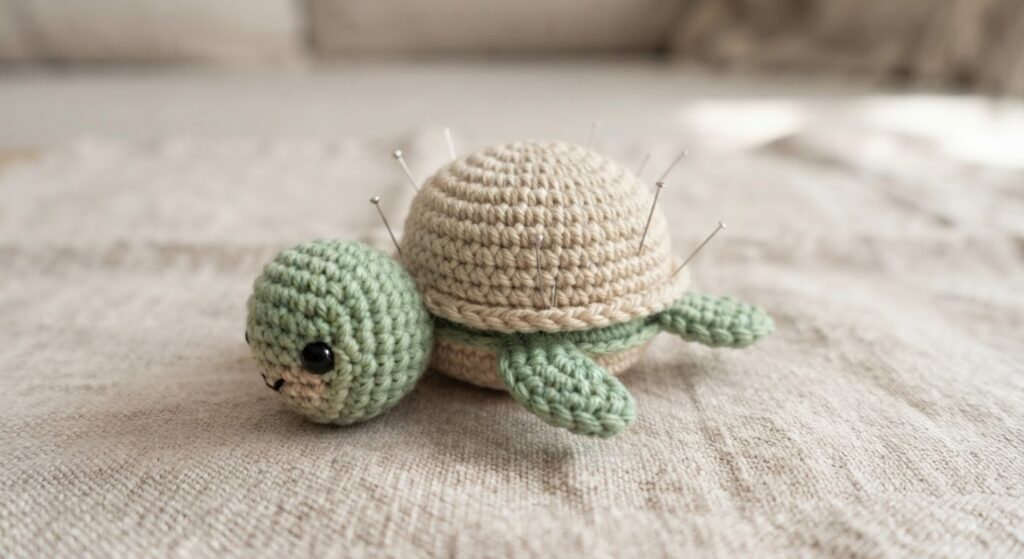
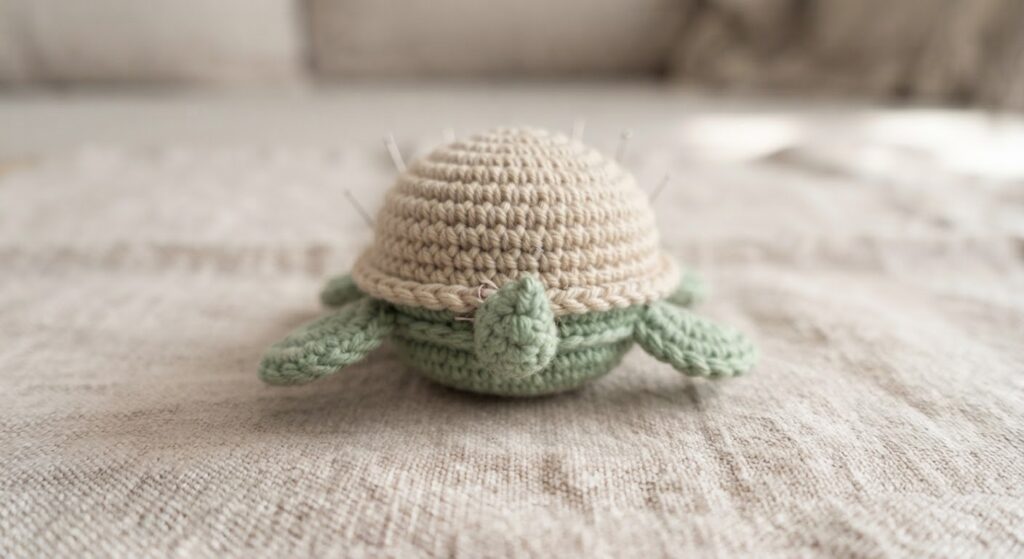
Sew the head to the front edge of the shell.
For the flippers, place the larger front flippers toward the front half of the shell and the smaller back flippers closer to the tail.
Before sewing each piece permanently, pin it or hold it in place and look at the turtle from above. This makes it much easier to keep both sides symmetrical.
Sew the tail to the back of the shell.
Weave all yarn ends into the body and trim the excess.
Face
Add a tiny embroidered mouth below the eyes if you want a smiling expression.
For a very small turtle, only a few embroidery stitches are needed. Keep the mouth simple so it does not overwhelm the face.
Adding the Keychain
The easiest place for the keychain attachment is at the top center of the shell.
Use a small jump ring and pass it through a sturdy group of stitches near the upper edge of the shell. Reinforce the area with several passes of yarn if the stitches feel loose.
Attach the keychain ring to the jump ring.
If you plan to use the turtle as a bag charm, check the attachment by gently pulling the ring before using it. The connection should feel secure and should not pull the crochet stitches apart.
Before You Finish
Take a quick look at the turtle from the front and from above.
The head should sit in the center, the two front flippers should be at roughly the same height, and the back flippers should be positioned evenly on both sides of the tail.
Small differences are normal in handmade pieces. If one flipper is noticeably higher than the other, it is easier to fix it before the yarn ends are woven in.
Changing the Colors
The shell does not have to be brown or beige. A contrasting shell color can make the small turtle easier to see, especially when the body is made with green yarn.
You can also use one color for the entire turtle and add a second color only for the shell.
For a more natural sea-turtle look, muted greens, browns, and sandy colors work well. Brighter colors are also useful if you want a playful keychain.
Frequently Asked Questions
Can I use a different yarn?
Yes. Cotton is a good choice for a small amigurumi because it gives the stitches a defined shape. Acrylic or another smooth yarn can also be used.
Because the pattern is small, even a small change in yarn thickness can noticeably change the finished size.
Why does my turtle look flatter or larger than the example?
The finished size depends on the yarn, hook, and your crochet tension. The shell is designed to be slightly domed rather than completely flat, but it should not form a round ball.
If your shell is too flat, check your tension and make sure you are not accidentally skipping stitches.
Can I make it without a keychain?
Yes. Simply leave off the jump ring and keychain hardware. The finished turtle can be used as a small decorative amigurumi.
Can I use embroidered eyes instead of safety eyes?
Yes. Embroidered eyes work particularly well for such a small project and avoid adding plastic parts.
Safety Note
This project uses small parts if you add safety eyes or keychain hardware. These parts can be a choking hazard. Use appropriate caution around young children, and do not treat a keychain as a children’s toy.
Pattern Usage & Copyright
This pattern and the photographs published with it are the property of AmyLiva Handmade.
You may make finished turtles for yourself, as gifts, or for small-scale sale. If you sell a finished item made from this pattern, please credit AmyLiva Handmade as the designer.
The written pattern and photographs may not be copied, reposted, translated, redistributed, or sold as your own. Please do not publish the pattern on another website or include the instructions in another pattern collection without permission.


Yorum gönder